First Build

Rat Rod Bikes Bicycle Forum

Help Support Rat Rod Bikes Bicycle Forum:

This site may earn a commission from merchant affiliate links, including eBay, Amazon, and others.

BTM

Joined
Dec 30, 2012
Messages
5
Reaction score
0
Rating - 0%
0   0   0
Greetings RodRodders!

As I said in my introductory post, I got my first bike in 10 years last month and I have been having a blast on it. I stumbled onto this site shortly after and thought to myself- Wouldn’t it be fun to build a bike! You guys create some amazing bikes and every thread is an inspiration.

I’ve always liked working with my hands and it’s nice to use something you build. I used to shape surfboards in college but not much point doing that in Tampa. The boards I have barely see the water anymore…

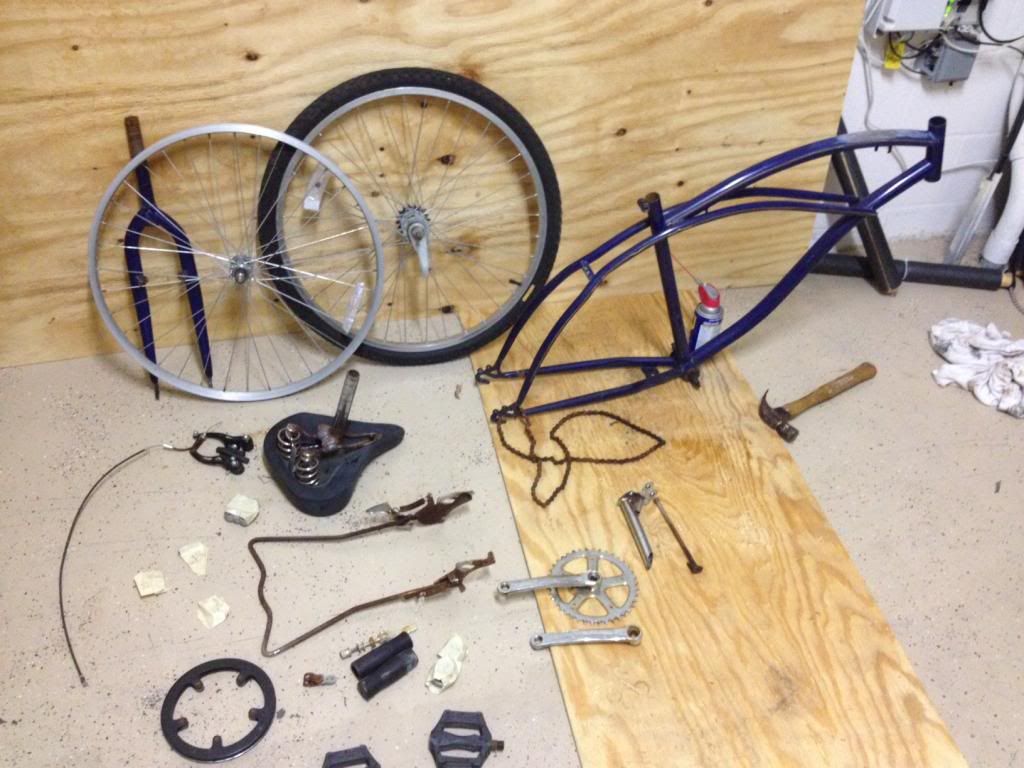
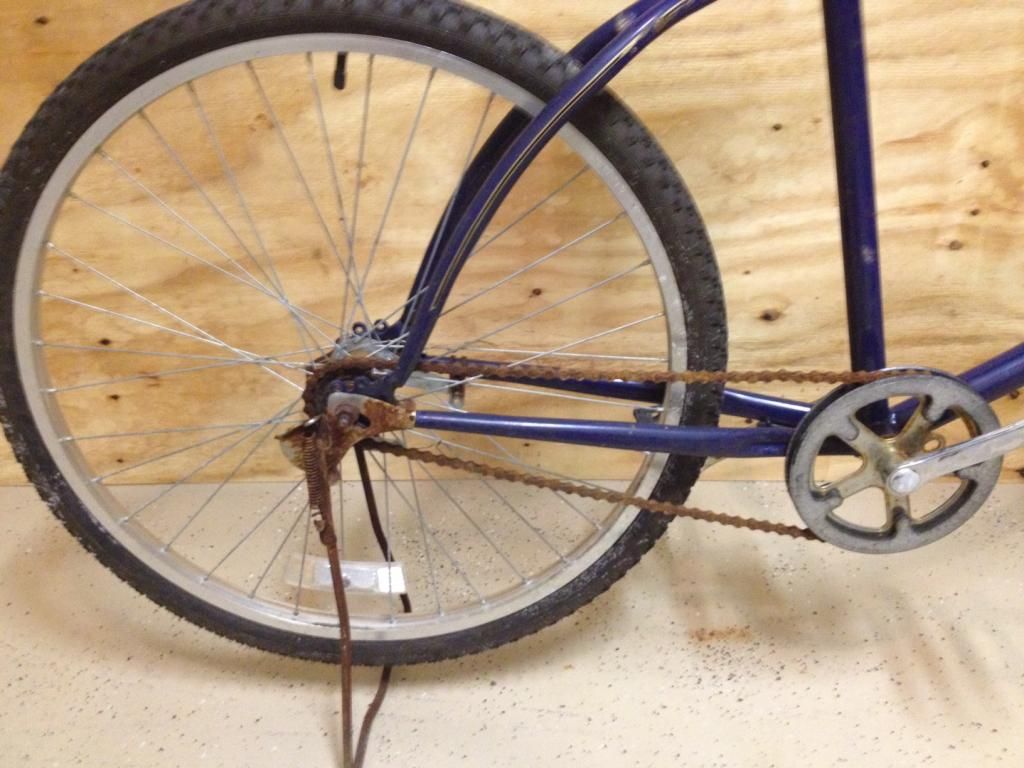
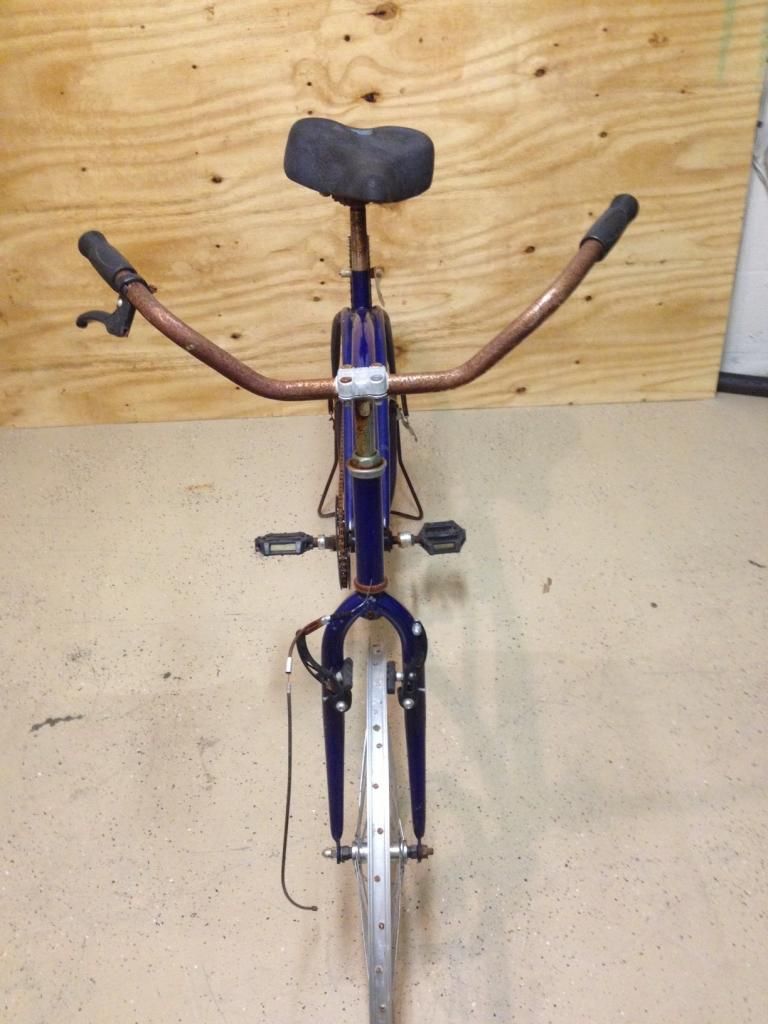
But back to the point. I picked up this bike from a junk shop this weekend. I paid $35 for it which is probably more than it’s worth. The only markings on it are a serial number (8212006) on the frame bottom bracket. The components (peddles, front brakes) are all Chinese and I couldn’t trace them to any specific manufacturer. Wheels are aluminum 26x1.75. Anybody have any idea what kind of bike it is?

0-BeforeProfile_zpscc029623.jpeg

0-BeforeRear_zps72b5884f.jpeg

0-BeforeFront_zps160b07ac.jpeg


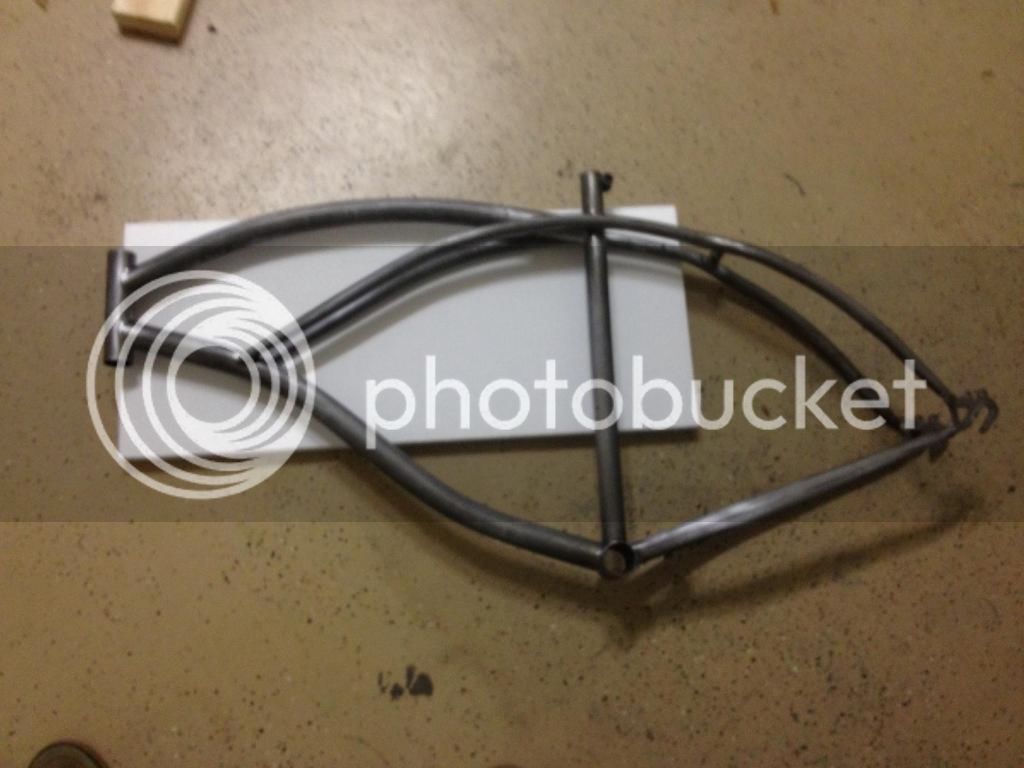
More to come shortly....
 
See, I said more to come shortly. Very shortly…

I guess I’ll start with the build concept. I plan on going with a battleship color scheme- battleship gray on the frame and wheels, white tires and on the other accessories, and black accents. I don’t know now to weld so I plan on building a tank out of XPS foam (Blue Dow from Lowes), wrap it in fiberglass, paint it white, and put in in the frame. The huge opening between the top tube and… whatever those other two little bars are called… looks so empty. It needs something there.

The disassemble went pretty well-

1-Deconstructed_zps0316e12f.jpg


Actually it went a whole lot better than I expected. Then again taking things apart is usually the easy part. Putting them back to together… not so much. Everything came apart pretty easy. None of the nuts were rusted on and I was pretty pleased that I remembered how to take apart the head set after watching a few YouTube videos.

A few issues:

- The chain is in pretty bad shape. I tried popping a link apart using a hammer, cut off nail, and a 2x4 with a hole drilled underneath (YouTube suggestion). After a few healthy whacks all I managed to accomplish was splitting my thumb open. I read that there is a special tool for popping out the links? Guess I’ll have to visit the bike shop.

- I didn’t get to the bottom bracket today. It’s pretty loose so I’ll have to do some more reading on how to fix that.

- Rust. Lots of it on the chrome plated parts such as the crank arm, quill, and handle bars. I plan on painting everything so I’ll need a nice fresh surface and I’m not sure what to do about that. Sand off the rust, leave the good chrome, and paint over everything? Sand everything to metal and paint? Again, I’ll do some more reading but suggestions are always welcome.

Although, if I want to keep my ‘battleship’ bike true to navy tradition, I guess I leave a healthy amount of rust on it…

I’ll be back at it again on Friday. Stay tuned.
 
Sounds like a cool concept -- I'm looking forward to seeing the build on that tank idea.

You can get a cheap chain tool for less than $10 at Walmart. I had one that lasted seven years or so -- I finally wore it out this fall.

Tampa? I'll have to look at your intro thread!
 
Ok, got some work done this week.

One side of the bottom bracket came off pretty easy but the other was stuck on hard. I took it to a local bike shop and they popped it off quick with a very expensive looking tool. The bearings were shot (cages completely disintegrated) and the cups had some bad pitting. It was cheaper to just buy a new bottom bracket than to replace the bearings.

I used some chemical paint stripper to take the frame down to bare metal. Even with ventilation the harsh fumes were getting to me. I’ll have to look into something a bit milder next time. It burned the heck out of my elbow when I bumped it too.

I found some decent EPS foam at a craft store and traced my tank onto it. The density is lighter then I would like but the bead adhesion seems fine. I forgot to get glue, so the shaping will have to wait till later. I like the look so far. I’ve also got to find some light weight fiberglass. All I can find is heavy stuff that will be a nightmare to wrap around tight corners.

2-TankFit_zps435b5283.jpeg


2-Tank_zps166241fa.jpeg


Next I built a super ghetto spray booth in my garage. After I set it up I realized that I couldn't open my garage door with it on so I had to make a few adjustments so I could get some ventilation. I gave it 3 light coats with a self-etching primer and then grey enamel primer over it. I couldn’t find quality grey spray paint but the woman at the auto store said the primer ‘should’ be ok without anything over it. What do y’all think- do I need to put a clear enamel coat over it or will the primer alone be hard enough to resist chipping?

2-PaintBox_zpsff1d0ba0.jpeg


3-FramePainted_zpsa8e7b60b.jpeg


More to come, and any advice on the primer issue would be appreciated.
 
like Luke said, primer is porous. Sucks up moisture, and rusts. Surely you have seen brand new fenders on cars, that werent painted. A year later they are a rusty mess. ya gotta seal it with something...clear, color, or, well, even wax.
 
Hey BTM, I'm looking forward to seeing your finished build, especially what you do with the tank. Please, lots of pics and lots of detailed instruction on the tank building process. I have a decent sized chunk of old Clark foam I got from a local shaper that I plan on making a tank out of but have never done it before. I've fixed a few dings here and there but I've never really tackled any real glass work. Your info would be very beneficial.
2-Tank_zps166241fa.jpeg
 
Thanks for the reply gents! Just as I feared- another trip to the hardware store for more paint. By the end of this build I could have bought a brand new bike for the same price!

It seems most you are interested in the tank so I will post some detailed pictures and description on what I do. In the meantime... here is a quick primer on foam, fabric, and resin! I haven’t worked on boards in 3 years so correct me if my memory is foggy.

There are lots of different types of foams. PVC, EPS, XPS, Polyurethane, and probably more that I’m not familiar with. I will keep the differences specific to our (bike building/ tank shaping) purposes. EPS and XPS are the two that I know the most about so I will start with them.

EPS (expanded cell polystyrene) is the type of foam you find in disposable coolers and those big 4’x8’ white sheets of insulation foam at lowes/home depot. Its distinguishing characteristic is the presence of foam beads packed closely together. It comes in several different densities. The kind you find at home improvement stores is a very light density (.9LBS/ft3) and is very difficult to shape due to poor bead adhesion. If you try to shape it with a blade (such as a block planer), saw, or surform it will break apart in irregular lines. A coarse grit sand paper on a block is your best bet but you might still get some beads ripped out. After shaping you can ‘seal’ the shape with some spackle. **I used EPS for this tank and cut it out with a very sharp filet knife. As you can see I cut WAY outside of the line because I know it will rip some beads** I’ve actually made a surfboard out of large block of foam used to package lab equipment (super low density, poor quantity) so even the foam you have in your new TV box packaging be used to make a tank.

XPS (extruded cell polystyrene) has the same chemical base as EPS but is blown differently so its cell structure is closed. The blue or pink Dow Foam you see in home improvement stores is the most common example of this. You can cut it nicely with a VERY sharp blade or shape it with coarse grit sand paper on a block. Resin does not adhere to smoothly sanded XPS well. Surfboard builders often ‘punch’ it to get better resin penetration or sand it with super rough grit paper.

Polyurethane is the type of foam ‘conventionally’ used in surf boards. **Pudge- your foam is most likely polyester.** It has a closed cell and is very easy to shape with a blade, surform, or sandpaper on a block. It is denser then XPS and EPS (heavier) but has a rigid structure and it’s a dream to work with.

PVC foam, such and divinycell, is a rigid foam in generally high density. I haven’t used it much, but I know it is easy to shape. It’s also very expensive so I doubt any of you will use it (better choices for a better price).

Fiberglass- It’s just a fabric. Fabric is fabric is fabric. It doesn’t matter whether its carbon fiber or linen. It’s still just fabric. A medium for your resin. DIY board builders made surfcraft back in the day out of picnic table cloths. With that being said… not all fabric is created equally. Fiberglass is the most common. You can buy it at any automotive, boat, or home improvement store. Heck, you can even get it at Wal-Mart. The heavier weight fiberglass you use the harder it is to wrap around tight curves. The ‘bondo’ brand fiberglass is relatively heavy and hard to wrap on tight curves.

In the place of fiberglass you can use other ‘fabrics’ such as Kevlar or carbon fiber. They have unique characteristics but more expensive. CF is great for frames when formed under vacuum to get the perfect resin to weight ratio… but a bit over kill for a simple aesthetic tank build.

Ok, on to resin. Two major types- Epoxy and polyester. Either can be used to wet out any of the fabrics. Epoxy can be used on any of the above fabrics or foams. Polyester can used with any fabric but can ONLY be used with polyurethane foam. If you use polyester resin with EPS or XPS foam the resin with DISOVLE the foam! Lots of other particularities between epoxy and poly, but I wanted to keep it simple.

When in doubt, do a test panel. Outside of experience, it is the best way to know if your resin, fabric, and foam are compatible.

Like I said, my fabric/foam/resin info may be outdated because I haven’t been in the industry for a while. But, to the best of my knowledge, the above info is correct. If I’m wrong… please let me know.
 
Sounds to me like you know what you are doing...

As regarding buying a new bike for the same price, or less, I'm pretty sure that could be said for most builds on here, but that is not really the point is it? I know I don't want to have the same bike as someone else in the park, or down the street, I want a bike I can be proud of and others will like too... :D

The satisfaction of doing it yourself is easily worth any added cost... :wink:

Luke.
 

Latest posts

Back
Top