I thought I'd post pics of this hub I took apart recently. As I've posted elsewhere I thought/hoped it was a F&S Duomatic. When I took it apart I realised it wasn't. But it's a lovely piece of engineering.
When I picked this hub up it felt really stiff. I decided I'd take it apart and have a look to see if it needed a clean. When I did get it open I found the brake shoe cracked, so I'm happy I took the time to strip it.
Take off the retaining spring clip that holds the sprocket on.
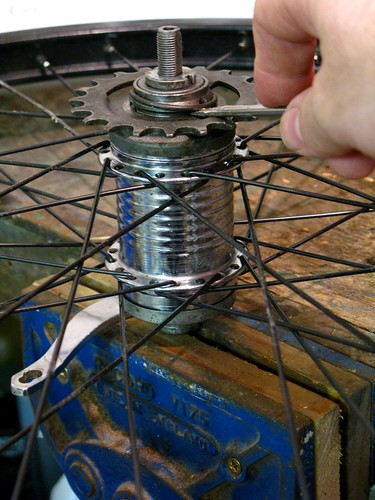
Once the sprocket is off you can remove the spacer and dust cover. The bearing race in this picture is the wrong way up. Bearings should be inside!
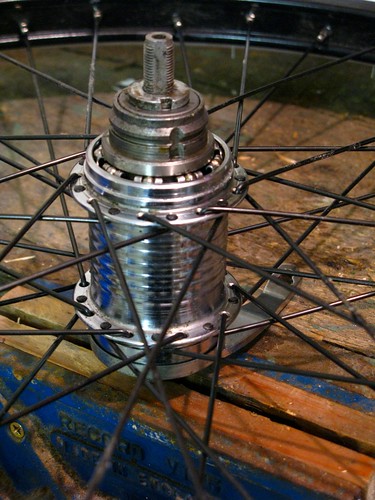
I recommend you get at least one F&S hub tool. Once the two nuts are separated. The brake arm and cover will lift off.
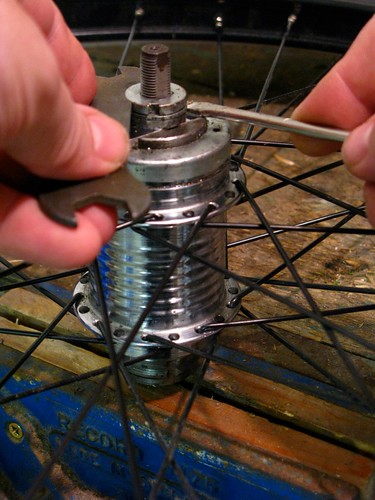
As I cleaned the hub before taking these photos, the bearing race and brake shoe are still in place. However, you'll probably find that these lift off with the brake arm and dust cover. Again, bearing race is the wrong way up.
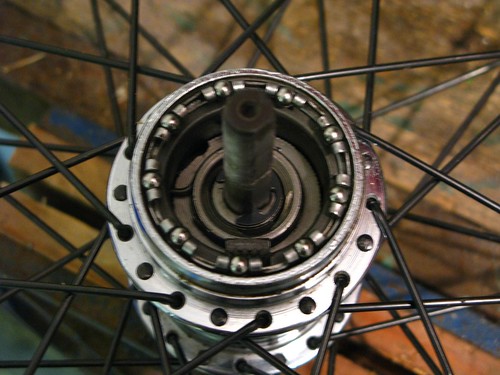
If the brake shoe wasn't lifted out with the dust cover. Then hook it out with your fingers. Once this is removed you can take the hub shell off the internal assembly.
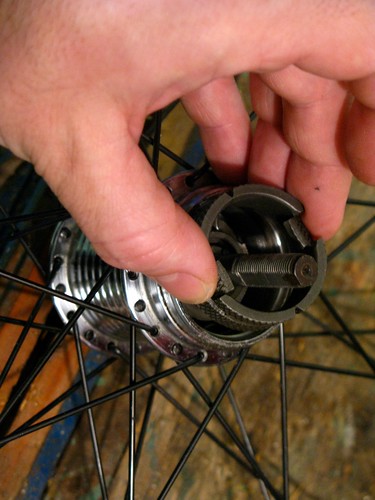
The brake actuator is the first piece to come off. It just untwists clockwise and then lift it off the axle.
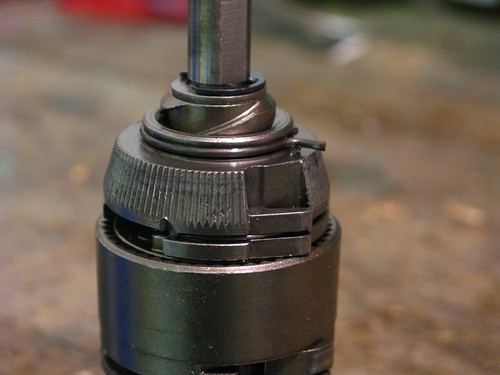
On re-assembly, the split in the brake shoe needs to locate on the pin that sticks out of the brake actuator.
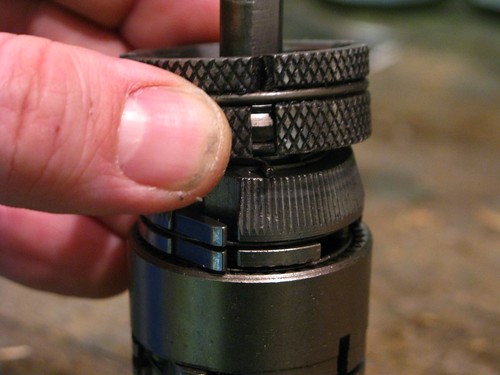
Removing the cir-clip at the top of this picture allows the removal of the planetary gears off of the axle. The spring clip at the bottom of the helix releases the spindle that the planet gears spin on.
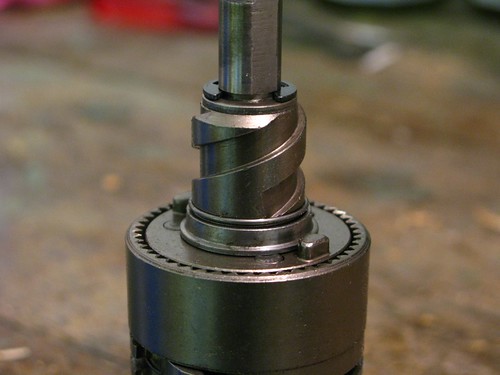
Watch out for the washer held in place by the planetary gears.
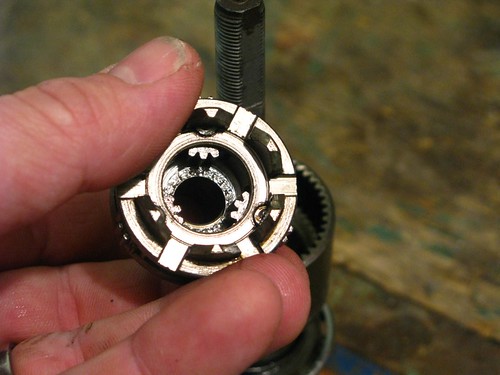
What's still to be stripped. To get the rest of it off you need to turn the axle over again.
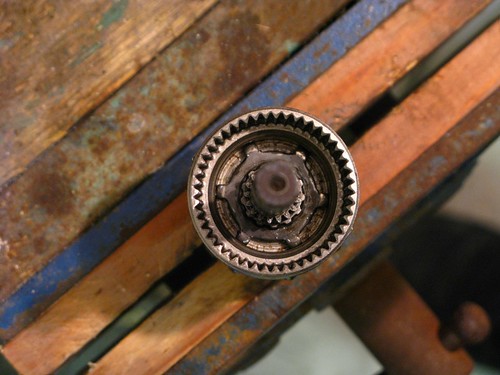
The driving mechanism pulled back to show the cone and smaller spring. The outside of the nut was 19mm from the end of the axle on my hub. Once the nut and cone are loosened be careful not to loose the cap on the end of the spring. The drive assembly just lifts off the end of the axle after the nut and cone are removed. Again the bearing race should be the other way up.
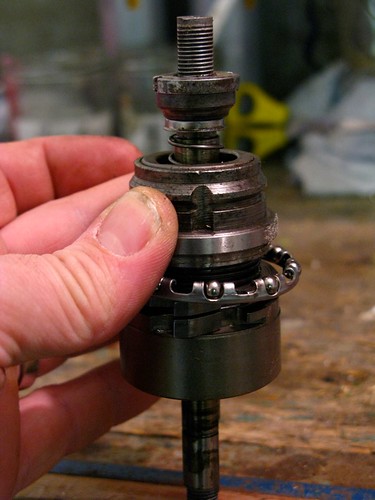
Last bit, line the holes on either side of the cog up with the slot in the axle and push the small anchoring pin out through the larger hole. When it comes to putting it all back together, this has to go far enough in so the cog spins freely around it. Happy hub stripping.
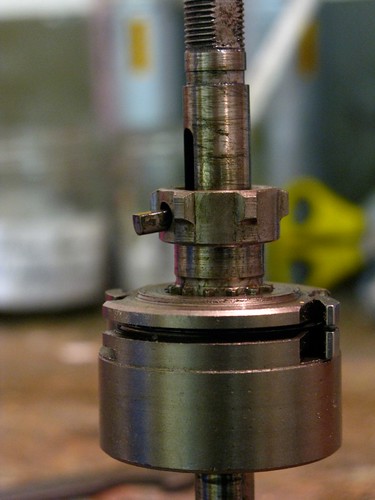
As this is my first disassembly I'd welcome any feedback. I'll maybe update the pics with the bearings the right way up to avoid any confusion.
When I picked this hub up it felt really stiff. I decided I'd take it apart and have a look to see if it needed a clean. When I did get it open I found the brake shoe cracked, so I'm happy I took the time to strip it.
Take off the retaining spring clip that holds the sprocket on.

Once the sprocket is off you can remove the spacer and dust cover. The bearing race in this picture is the wrong way up. Bearings should be inside!

I recommend you get at least one F&S hub tool. Once the two nuts are separated. The brake arm and cover will lift off.

As I cleaned the hub before taking these photos, the bearing race and brake shoe are still in place. However, you'll probably find that these lift off with the brake arm and dust cover. Again, bearing race is the wrong way up.

If the brake shoe wasn't lifted out with the dust cover. Then hook it out with your fingers. Once this is removed you can take the hub shell off the internal assembly.

The brake actuator is the first piece to come off. It just untwists clockwise and then lift it off the axle.

On re-assembly, the split in the brake shoe needs to locate on the pin that sticks out of the brake actuator.

Removing the cir-clip at the top of this picture allows the removal of the planetary gears off of the axle. The spring clip at the bottom of the helix releases the spindle that the planet gears spin on.

Watch out for the washer held in place by the planetary gears.

What's still to be stripped. To get the rest of it off you need to turn the axle over again.

The driving mechanism pulled back to show the cone and smaller spring. The outside of the nut was 19mm from the end of the axle on my hub. Once the nut and cone are loosened be careful not to loose the cap on the end of the spring. The drive assembly just lifts off the end of the axle after the nut and cone are removed. Again the bearing race should be the other way up.

Last bit, line the holes on either side of the cog up with the slot in the axle and push the small anchoring pin out through the larger hole. When it comes to putting it all back together, this has to go far enough in so the cog spins freely around it. Happy hub stripping.

As this is my first disassembly I'd welcome any feedback. I'll maybe update the pics with the bearings the right way up to avoid any confusion.


