I took yesterday and the day before that off from building the 18 and played a little with stencils and spraypaint! 
I've been curious to see what could be done with rattlecans, for a while, and searched the web to see what other's have done. Seen some clips on youtube of guys painting mostly space images, and found some of their techniques interesting although I do think most of them use them in somewhat limited ways and their paintings are too symmetrical and often just feel like copies of what they've already done, or what someone else's done. Oh, I almost got sidetracked there! Anyway, I also searched the web for images made with spraypaint and stencils. Most pictures I found are graffiti using only one or two stencils, but some use that technique to make paintings too, and this is when I couldn't resist giving it a try myself! I decided that my first try would be a fish, because I figured that would give a good opportunity to see how I could make different layers interact (shades, scales, highlights etc.)
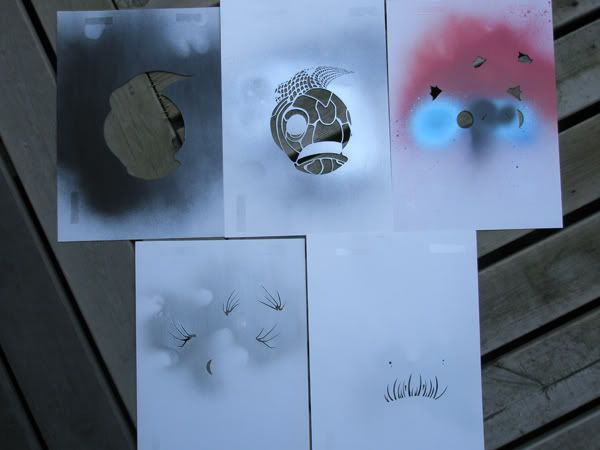
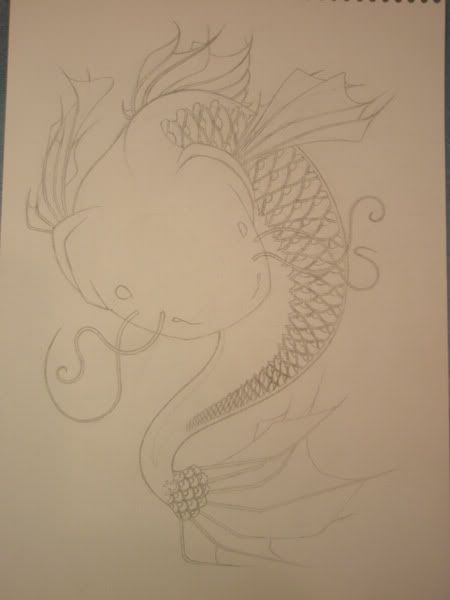
So I drew a sketch of a fish, scanned it and printed out 9 copies, cut the stencils and got going!
The sketch:
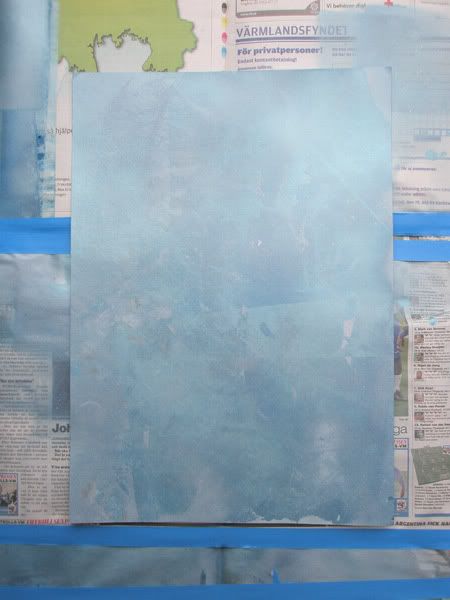
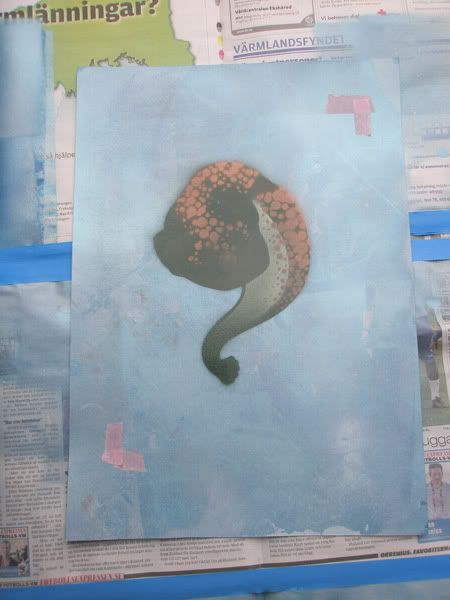
I made the backround using a techniqe I saw on youtube, spraying different colours on top of each other without letting each layer dry and while the paint was still wet I used a page from a magazine to lift the paint.
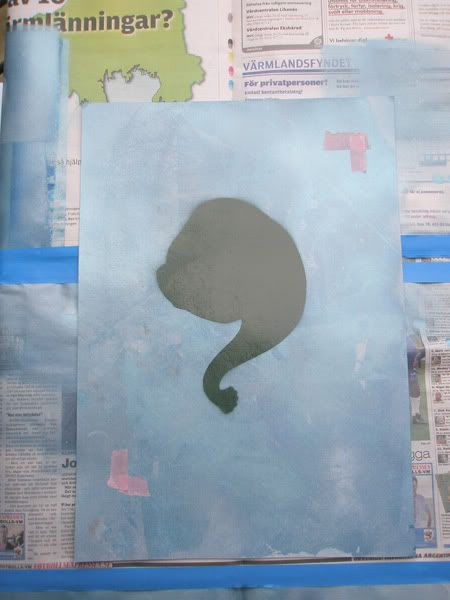
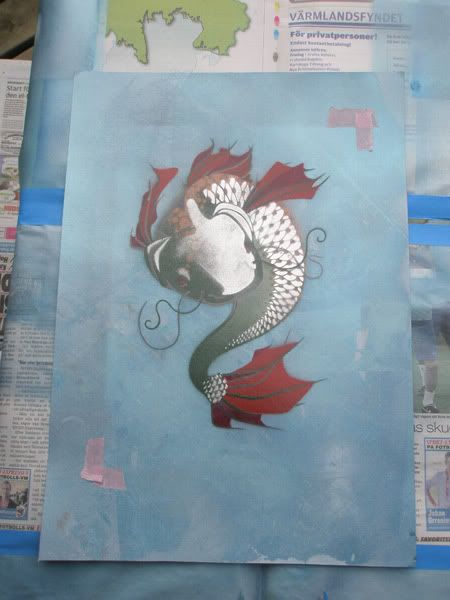
Then it was stencil time!
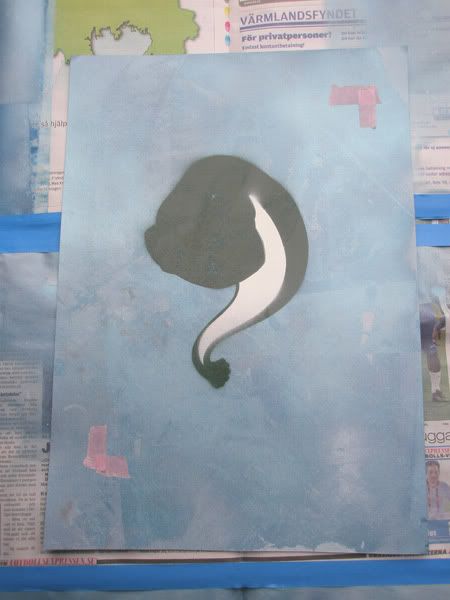
Went back to tone down the white a little...
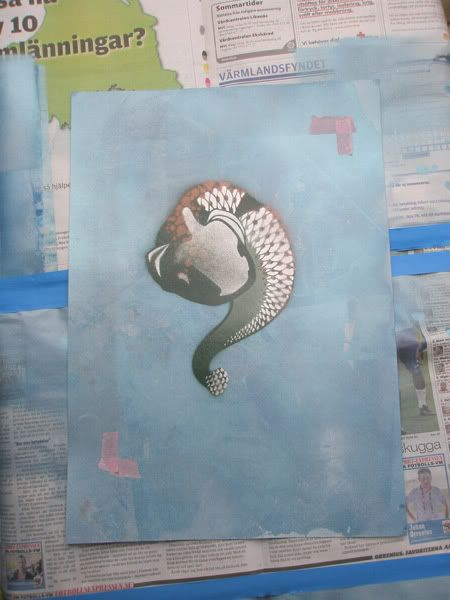

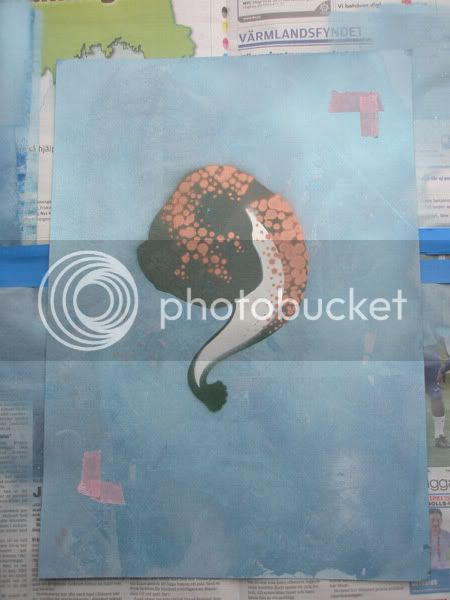
I learned that when using regular copying paper for the stencils, I had to work quickly when spraying and removing the stencil because the solvents in the paint would go through the paper and mess up the underlying layer. That happened on a few of the layers and I had to go back and do some touching up on some of them. The silver layer (the scales) for example is therefore a little thicker than I wanted it to be. Oh well, I've learned until next time.
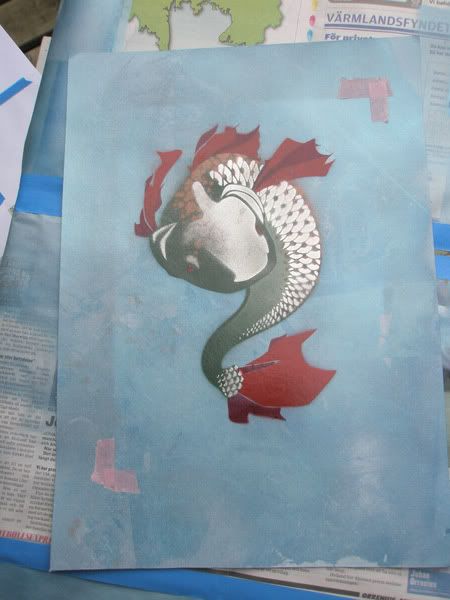
Used a brush to paint black outlines. Strangely enough I haven't seen any stencil paintings on the web with brushpainted outlines but I wanted to do that on this one anyway. My picture, my rules! :mrgreen:
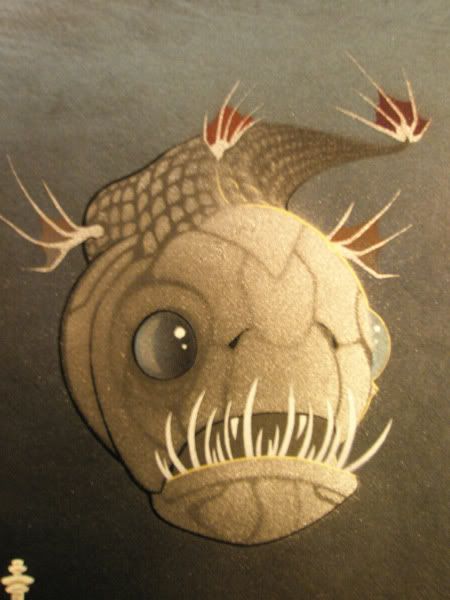
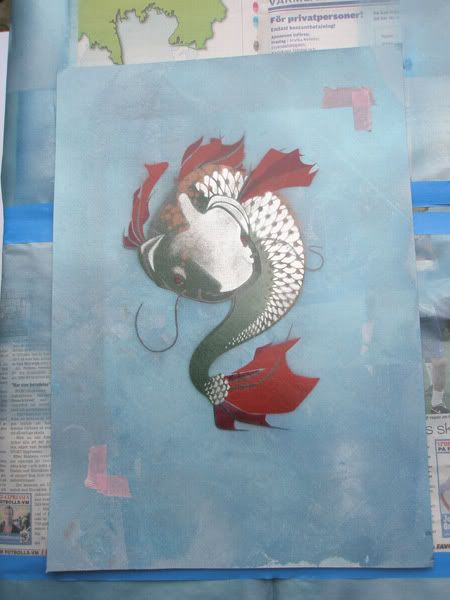
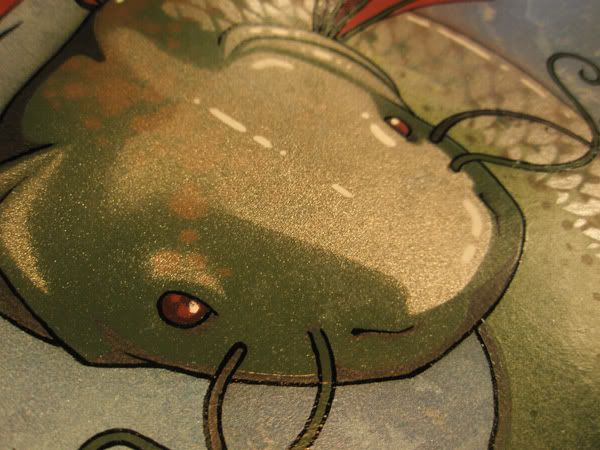
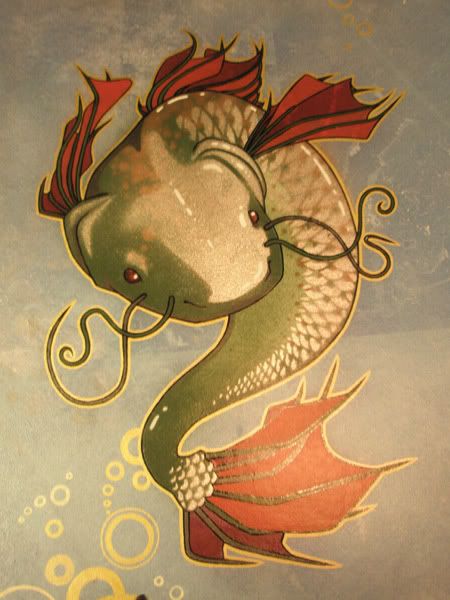
Close-up. Oops forgot the end of the whisker!
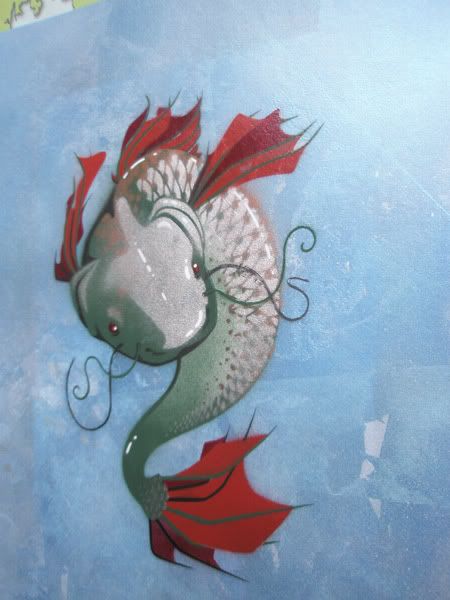
Added some gold...
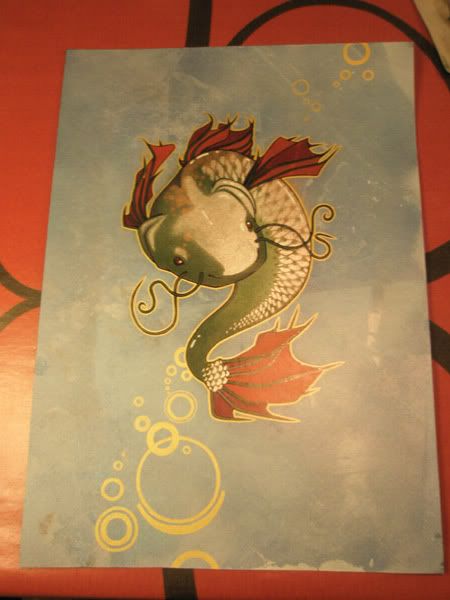
...and some white.
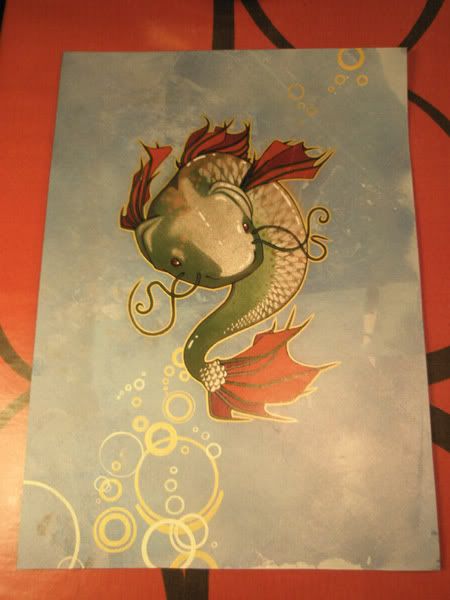
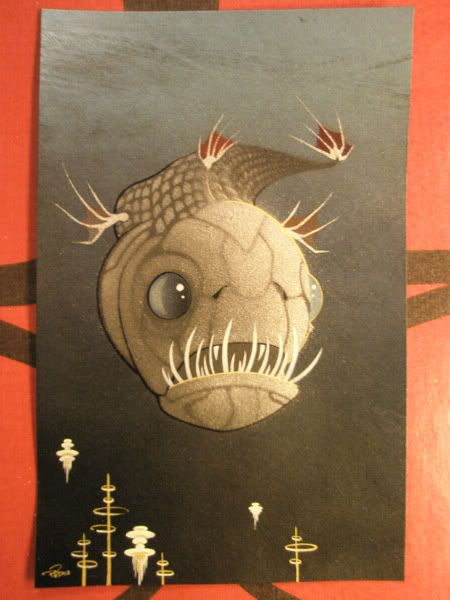
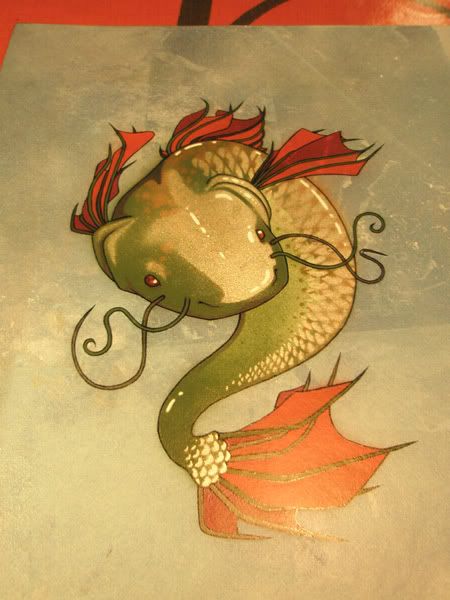
Close-up of the finished fish!
Hope this could spark some inspiration for you! I'm sure using stencils could work on a chainguard, for example, otherwise the technique could easily be adapted to use with masking tape. Happy painting everybody!
I've been curious to see what could be done with rattlecans, for a while, and searched the web to see what other's have done. Seen some clips on youtube of guys painting mostly space images, and found some of their techniques interesting although I do think most of them use them in somewhat limited ways and their paintings are too symmetrical and often just feel like copies of what they've already done, or what someone else's done. Oh, I almost got sidetracked there! Anyway, I also searched the web for images made with spraypaint and stencils. Most pictures I found are graffiti using only one or two stencils, but some use that technique to make paintings too, and this is when I couldn't resist giving it a try myself!
I decided that my first try would be a fish, because I figured that would give a good opportunity to see how I could make different layers interact (shades, scales, highlights etc.) So I drew a sketch of a fish, scanned it and printed out 9 copies, cut the stencils and got going!
The sketch:
I made the backround using a techniqe I saw on youtube, spraying different colours on top of each other without letting each layer dry and while the paint was still wet I used a page from a magazine to lift the paint.
Then it was stencil time!
Went back to tone down the white a little...
I learned that when using regular copying paper for the stencils, I had to work quickly when spraying and removing the stencil because the solvents in the paint would go through the paper and mess up the underlying layer. That happened on a few of the layers and I had to go back and do some touching up on some of them. The silver layer (the scales) for example is therefore a little thicker than I wanted it to be. Oh well, I've learned until next time.
Used a brush to paint black outlines. Strangely enough I haven't seen any stencil paintings on the web with brushpainted outlines but I wanted to do that on this one anyway. My picture, my rules! :mrgreen:
Close-up. Oops forgot the end of the whisker!
Added some gold...
...and some white.
Close-up of the finished fish!
Hope this could spark some inspiration for you! I'm sure using stencils could work on a chainguard, for example, otherwise the technique could easily be adapted to use with masking tape. Happy painting everybody!