How to build a low-buck Fixie:
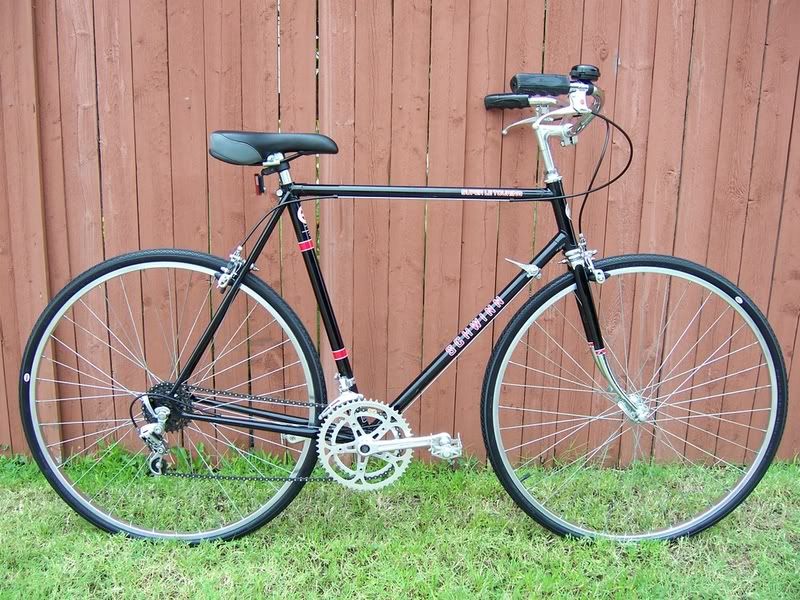
1 - First get yourself a garage sale road bike* like this one:

Most important of all is to find a frame with horizontal dropouts. Vertical dropouts make adjusting chain tension difficult to say the least. There are solutions for that, but going the low buck route, we'll keep it simple and stay horizontal. A chro-mo frame with high quality components is ideal.

* A mountain bike frame will also work.
2 - Take off all the stuff you won't be needing any more:

Freewheel, derailleurs, shifters, extra chainrings, brakes if you're hardcore...
This is a good time to clean the frame, re-lube the headset, bottom bracket, wheel bearings etc.
3 - The heart of the matter: the rear wheel. You will need a track cog. Fortunately, track cogs share the same thread as freewheels. Cogs are available to fit 1/8 or 3/32 size chains. 3/32 is what you will find on most older road bikes.
Remove the existing freewheel. Toss.
Spin your new cog onto the hub. Tighten it well. Track cogs are asymmetrical. The flat side goes outboard so you can:
Spin a bottom bracket lock ring onto the hub. Tighten it well.


4 - Chainline. This may take some adjusting (depends on the frame). Chainline is VERY important on a fixie. With my frame, I was able to use the inner chainring and everything lined up properly. On the first try too! If you find things don't line up, you may have to add spacers to the front cog. If things are really bad, respacing and re-dishing the rear wheel is the solution. Hopefully this won't be the case. Some bottom brackets allow for side to side adjustment.

5 - You should end up with something that looks like this:

This bike was built for less than $50CDN. The most expensive part was the track cog. It set me back $30.
For much more indepth tech, Sheldon Brown is the man:
http://www.sheldonbrown.com/fixed-conversion.html
Fixed Gear Gallery has plenty of goodness too (lots of eye candy)
http://www.fixedgeargallery.com/
-Mp
1 - First get yourself a garage sale road bike* like this one:
Most important of all is to find a frame with horizontal dropouts. Vertical dropouts make adjusting chain tension difficult to say the least. There are solutions for that, but going the low buck route, we'll keep it simple and stay horizontal. A chro-mo frame with high quality components is ideal.
* A mountain bike frame will also work.
2 - Take off all the stuff you won't be needing any more:
Freewheel, derailleurs, shifters, extra chainrings, brakes if you're hardcore...
This is a good time to clean the frame, re-lube the headset, bottom bracket, wheel bearings etc.
3 - The heart of the matter: the rear wheel. You will need a track cog. Fortunately, track cogs share the same thread as freewheels. Cogs are available to fit 1/8 or 3/32 size chains. 3/32 is what you will find on most older road bikes.
Remove the existing freewheel. Toss.
Spin your new cog onto the hub. Tighten it well. Track cogs are asymmetrical. The flat side goes outboard so you can:
Spin a bottom bracket lock ring onto the hub. Tighten it well.
4 - Chainline. This may take some adjusting (depends on the frame). Chainline is VERY important on a fixie. With my frame, I was able to use the inner chainring and everything lined up properly. On the first try too! If you find things don't line up, you may have to add spacers to the front cog. If things are really bad, respacing and re-dishing the rear wheel is the solution. Hopefully this won't be the case. Some bottom brackets allow for side to side adjustment.
5 - You should end up with something that looks like this:
This bike was built for less than $50CDN. The most expensive part was the track cog. It set me back $30.
For much more indepth tech, Sheldon Brown is the man:
http://www.sheldonbrown.com/fixed-conversion.html
Fixed Gear Gallery has plenty of goodness too (lots of eye candy)
http://www.fixedgeargallery.com/
-Mp