LITTLE TOAD! RRBBO#14 Class 2. I'm out. :(

Rat Rod Bikes Bicycle Forum

Help Support Rat Rod Bikes Bicycle Forum:

This site may earn a commission from merchant affiliate links, including eBay, Amazon, and others.
Awesome work on that whole wheel assembly! I really like the open hole look, very stealth and gives it a 'light weight' look as well. Well, as light as a steel 11" wide wheel can look anyway! :21:

And those welds.....:41: !
Thank you Sir!
Great fab work! :thumbsup:
Appreciate it! :blush:
thats looks verrry good ! :41::rockout:
Thanks 1HP!


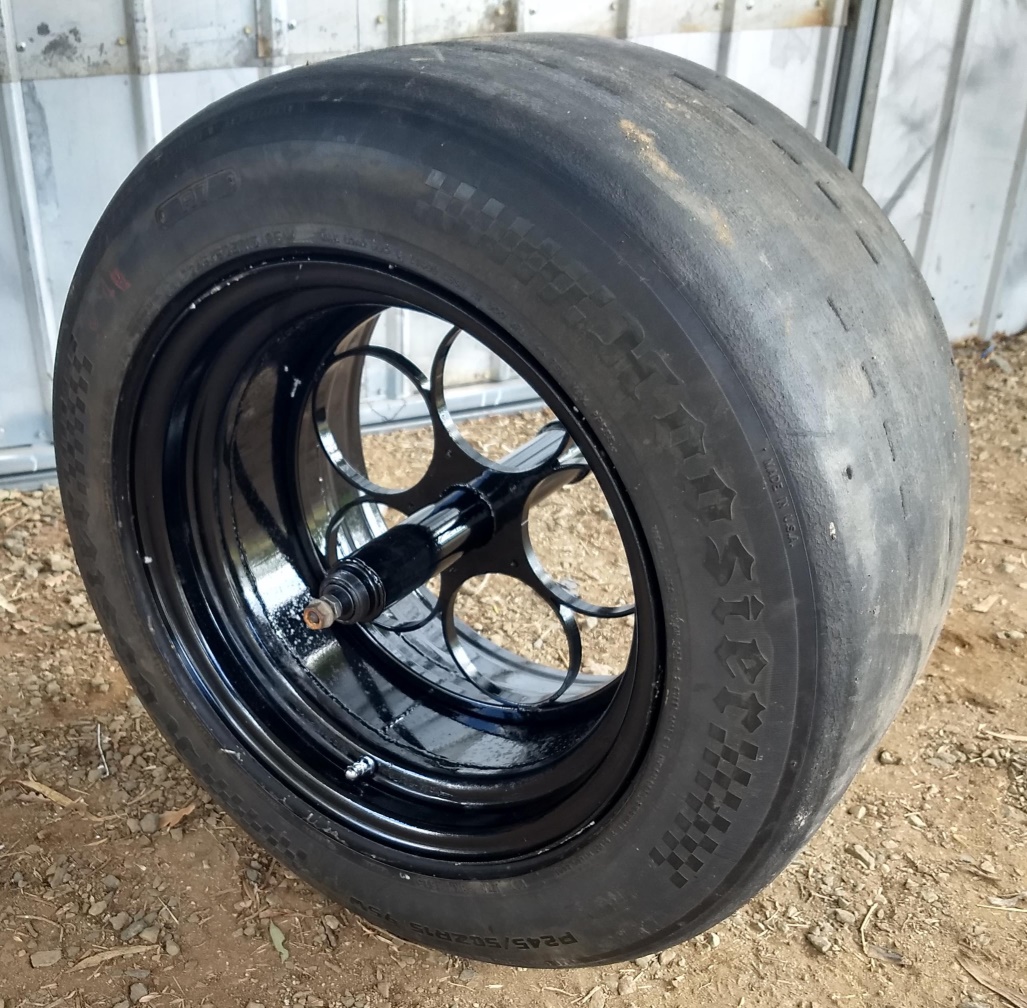
I took a trip into town today...

Got a tire fitted...

:nerd:


IMG_20190515_135311785_HDR.jpg
 
:21:

I have been tossing up the way the frame will be built, I know it will mainly be 7/8" tubing, but my original idea was to brace in between with more short pieces of the same tubing, that is why I built a little notching jig a while back:

IMG_20190424_170700627.jpg
IMG_20190424_165309374.jpg
IMG_20190424_174554624.jpg

Of course there is that other thing I have been wanting to do but couldn't justify the purchase price of the tooling, I have considered making my own tooling to do it, and that was part of the reason I upgraded the little lathe motor, but now I am having trouble keeping belts on it, too much torque on too narrow a belt... :doh:

Bigger pulleys and belts in the future will fix that...

I had pretty much given up on the idea until I was bored tonight and went searching the internet for how to ways of doing what I wanted...

Found 2 videos, I will probably combine the methods used and see what I can come up with!


Hoosier daddy!!! Too cool.
Thanks everyone! It is crazy for sure!
Tell me this bad boy is tubeless...

It looks bad (well you know what is suppose be here)...
index.php
And serious Kudos on welding up an air tight rim!
It is indeed tubeless! The rim is welded from both sides, so much easier to get a full seal, even so, I was glad the gas bottle ring worked out!
What does the tyre shop say when you rock up with a rim like that?
Well considering the guy that fits my tires also owns one of my first builds, they usually just ask me to bring it by when it is done so they can see what the build looks like! :21:

This is "Big Joe" from my local tire place with the "50 years" bike from MBBO#01:

DSC00305.jpg


You have a sketch of what the general layout is going to look like? :nerd:
Nope, kinda rough idea in my head...

Somewhere between this:

athos1.jpg


and this:

Speed zombie trike.jpg


with a dash of this:

Long John cargo.jpg


and these:

ghetto.JPG
luggage.JPG

100_0422.jpg


Not sure if I can pull all that off, but that is where my head is at... :21:
 
Thought I was starting to smell what's cooking until I got to the boombox and luggage..:21:...kinda get the idea though...non-bent Little Toad.

That quad cycle is wicked!..:43:
Yep non bent tadpole cargo trike thing...

That quad was the short lived Athos quad, they also made fat tire 26" versions. It had crazy awesome custom differentials and everything, but I think they just priced themselves out of the market for what was basically a toy.
In reality a good two wheeled machine could probably beat it in every way in the real world.
I believe the whole company is bust now, as all the web pages are gone...

Shame, some cool engineering there...
 
That's a common thing when a company makes crazy, overly complicated contraptions, that might look cool, be nice to ride, but are over engineered. I think that's the reason that most of the 7speed bikes that come to my shop, are on a Nexus hub, instead of the Sram Spectro
 
That's a common thing when a company makes crazy, overly complicated contraptions, that might look cool, be nice to ride, but are over engineered. I think that's the reason that most of the 7speed bikes that come to my shop, are on a Nexus hub, instead of the Sram Spectro
Totally agree!
 
So, I combined those ideas in the videos posted earlier about doing dimple dies, and built my own method:


Basically a fork lower bearing cone with a spacer welded inside to center it on the bolt, an outer tube a bit bigger, in this case a Datsun clutch throw out bearing, some thick washers and an impact wrench...

Just after the video was shot the nut stripped completely, thankfully I had a spare nut, so reassembled the whole thing using it and used some high pressure molybdenum grease on the threads instead, that got me to the end of that strip before the new nut bound up and stripped the bolt.

Managed to dig up another bolt and nut out of the stash, and going a bit slower and with plenty of grease got the second strip done, but by the last hole the new nut was starting to bind as well.

Hopefully two strips is plenty, but can easily get some better quality grade 8 bolts and nuts next time I am in town either way, those cheap bolts just can't handle the torque required to do 16 gauge (1.6mm) drawn steel, thinner steel or annealed sheet would be fine, I was just using what was handy...

It might be time to get a sheet of 18 gauge Zincanneal, (1.2mm) need some for the Datsun anyway...

IMG_20190517_173850457.jpg
IMG_20190517_173856758.jpg
 

Latest posts

Back
Top