You are using an out of date browser. It may not display this or other websites correctly.
You should upgrade or use an alternative browser.
You should upgrade or use an alternative browser.
(MBBO#05 Class 1) Bike of opportunity Build! My3rd entry is on the road"
- Thread starter QUEASY RIDER
- Start date

Help Support Rat Rod Bikes Bicycle Forum:
This site may earn a commission from merchant affiliate
links, including eBay, Amazon, and others.
Had some time today. I put the headbadge on after I worked out wrinkles and dents the best I could.

Also got the bottom bracket all back together and put the chainguard on.

Had time to install the fork too and check how the front wheel lined up.

For now I am using a coaster wheel to check fender and brake mounting. I need to work out the front fender and brakes also. Still need to build a rear 3 speed wheel for it. I'm getting closer but I know the deadline is on the horizon.
Sent from my iPhone using Tapatalk

Also got the bottom bracket all back together and put the chainguard on.

Had time to install the fork too and check how the front wheel lined up.

For now I am using a coaster wheel to check fender and brake mounting. I need to work out the front fender and brakes also. Still need to build a rear 3 speed wheel for it. I'm getting closer but I know the deadline is on the horizon.
Sent from my iPhone using Tapatalk
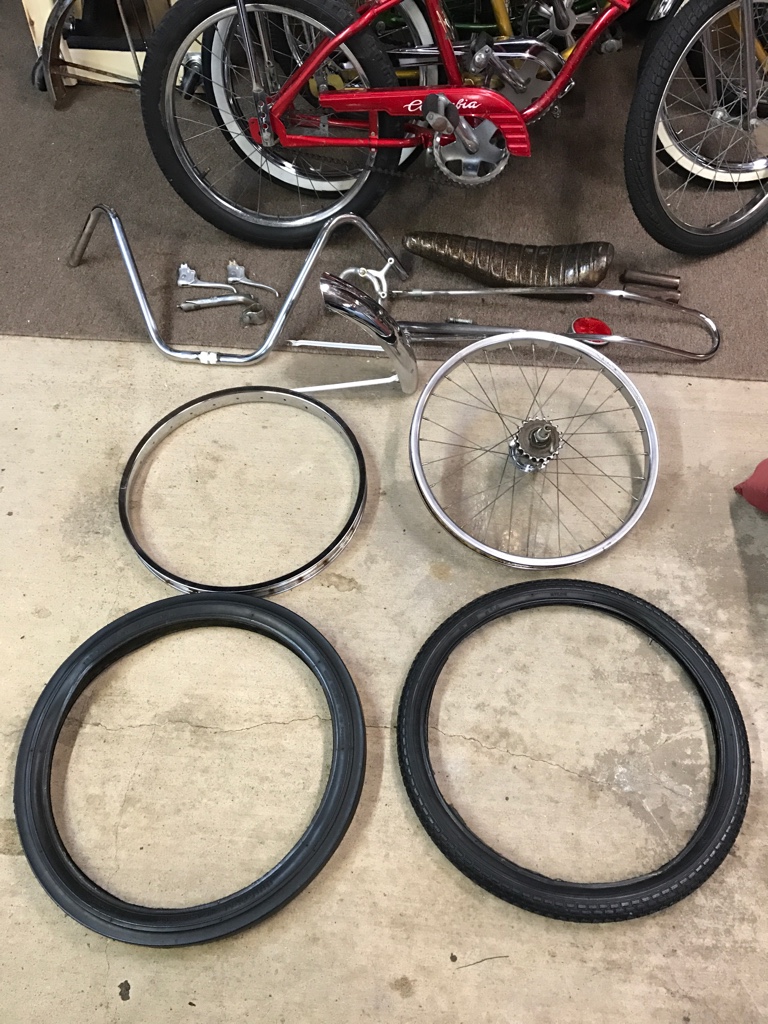
When this group of parts is gone, the bike will be finished.
Sent from my iPhone using Tapatalk

Sent from my iPhone using Tapatalk
Another awesome job in progress. Love the brown on this one.
Looking good!
Agree with Chad too, that brown is super nice!
Luke.
Agree with Chad too, that brown is super nice!
Luke.
Looking good,


$19.99
Electra Glide Wall Decal 2ft Long Sport Harley Davidson Bike Motorcylce Sticker Man Cave Garage Boys Room Decor
FatCat Wall Graphics

$19.99
Top Brass Bicycle/Motorcycle Chain Picture Frame 5" X 7" Photo - Faux Bike Chain
Old River Outdoors (USA Merchant)

$19.95 ($31.17 / oz)
$21.28 ($33.25 / oz)
Hayes Semi-Metallic Disc Brake Pads Dyno/Ryde T122
Bell's Bike Shop

$29.95
Crossroads Home Décor A Biker's Prayer, Gift for Motorcycle Riders, Inspirational Bike Picture Frame, 6451BW
Crossroads_Home_Decor

$19.99
Old River Outdoors Bicycle/Motorcycle Chain Picture Frame 4" X 6" Photo - Faux Bike Chain
Old River Outdoors (USA Merchant)
Tonight I was getting the shifter cable worked out. The bike had everything removed pertaining to the 3 speed and hand brakes. I had an extra cable anchor that attaches to the frame and the bottom of the cable housing. When these cable sets were originally made, they came in different lengths. I went through my 3 speed cable sets and didn't have a correct one. So it was time to make one. The next photo shows an original size cable clamp that fits inside the adjusting barrel on the left side. In the middle is the 10 speed style cable end. On the right is the piece that attaches to the spokes when an odometer is used on the front axle.

I grind down the ten speed cable end to the same diameter as the 3 speed cable end.

The adjusting barrel then can slide freely over the cable end.

The cable then runs through the housing and up to the shifter. At this point I grind down the odometer piece to fit in the cable anchor in the shifter. The cable runs through the slot that was used to anchor it to the spoke. Tighten the screw down and that's it.
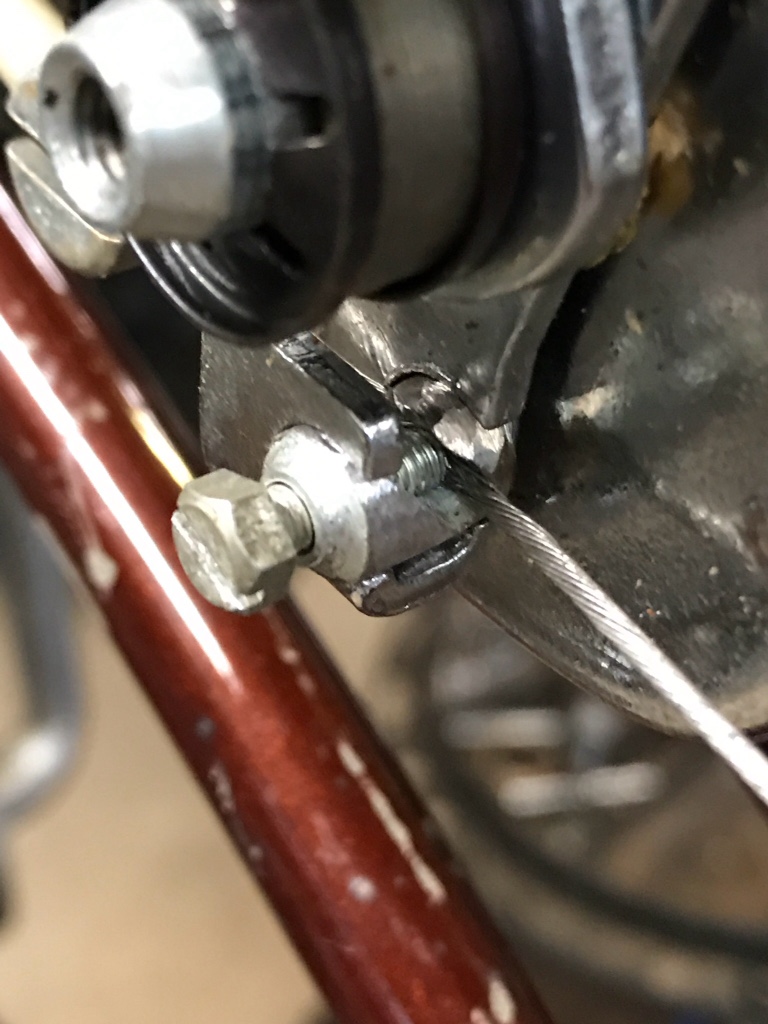
I don't cut the cable until I set the gears in the hub to the sequencing on the shifter. Everything fits under the shifter housing and know body knows it was home made. I've done this many times before and it works great!
Sent from my iPad using Tapatalk

I grind down the ten speed cable end to the same diameter as the 3 speed cable end.

The adjusting barrel then can slide freely over the cable end.

The cable then runs through the housing and up to the shifter. At this point I grind down the odometer piece to fit in the cable anchor in the shifter. The cable runs through the slot that was used to anchor it to the spoke. Tighten the screw down and that's it.

I don't cut the cable until I set the gears in the hub to the sequencing on the shifter. Everything fits under the shifter housing and know body knows it was home made. I've done this many times before and it works great!
Sent from my iPad using Tapatalk


BTW : everyone, that's reads your, post....
Will know it was home made.

Great work.


Love that cable trick!
Great tip on that cable idea!
Luke.
Luke.
Yesterday I mounted the seat, sissybar, stem, bars, grips and hand brake levers.


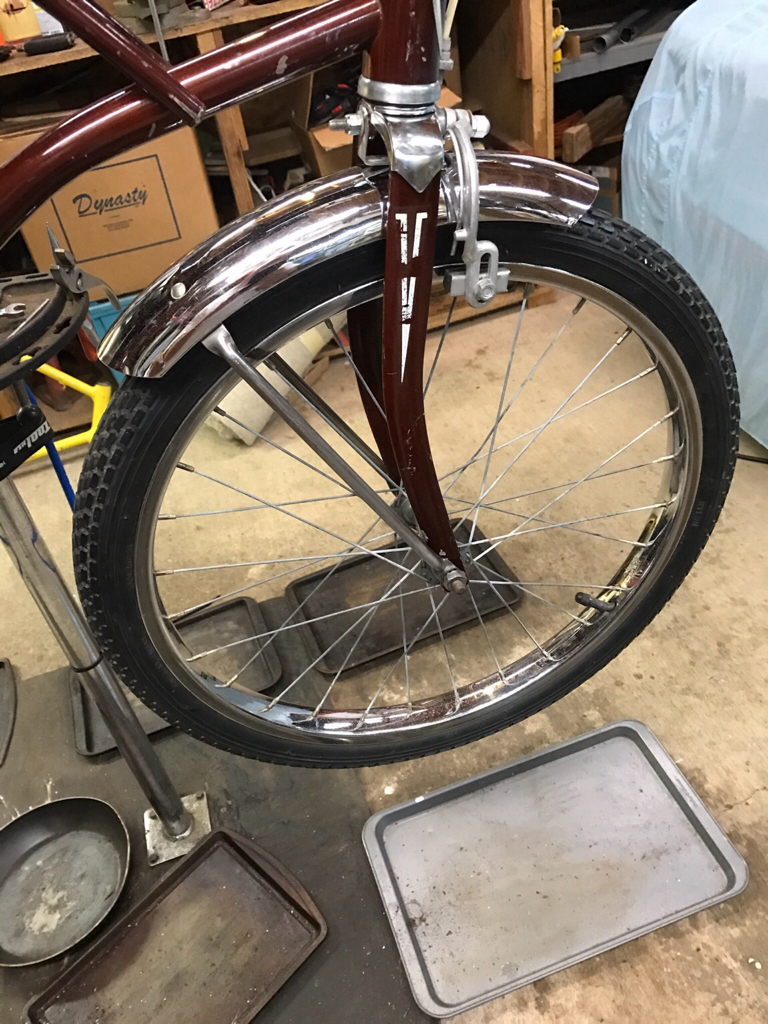
Tonight I was able to get the front fender fork mount made up and in place along with the front caliper brake. Polished the front wheel and mounted the tire. I mounted a 3 spd hub to get the shifter adjusted and to make sure the hub worked properly before I lace a rim to it. Then I put the S7 coaster wheel back in place so I could run the cables and adjust front and rear calipers. Tomorrow, I should be able to get the rear wheel finished and clean a few more pieces on the bike. Getting real close with this one.


Sent from my iPad using Tapatalk


Tonight I was able to get the front fender fork mount made up and in place along with the front caliper brake. Polished the front wheel and mounted the tire. I mounted a 3 spd hub to get the shifter adjusted and to make sure the hub worked properly before I lace a rim to it. Then I put the S7 coaster wheel back in place so I could run the cables and adjust front and rear calipers. Tomorrow, I should be able to get the rear wheel finished and clean a few more pieces on the bike. Getting real close with this one.


Sent from my iPad using Tapatalk
Starting to look like a 300,,
Again. good work.
Again. good work.

I finished the rear wheel and made some final adjustments. I went on the test ride and it works great. The ride is nice and has no rattles. Enjoyed the ride.
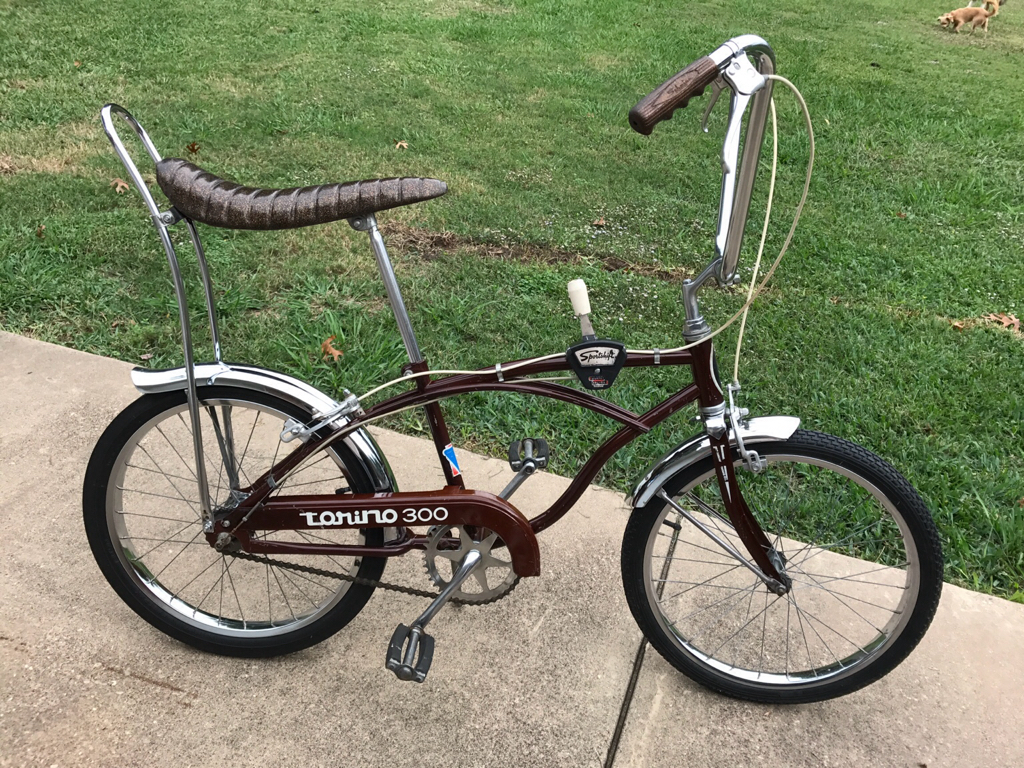

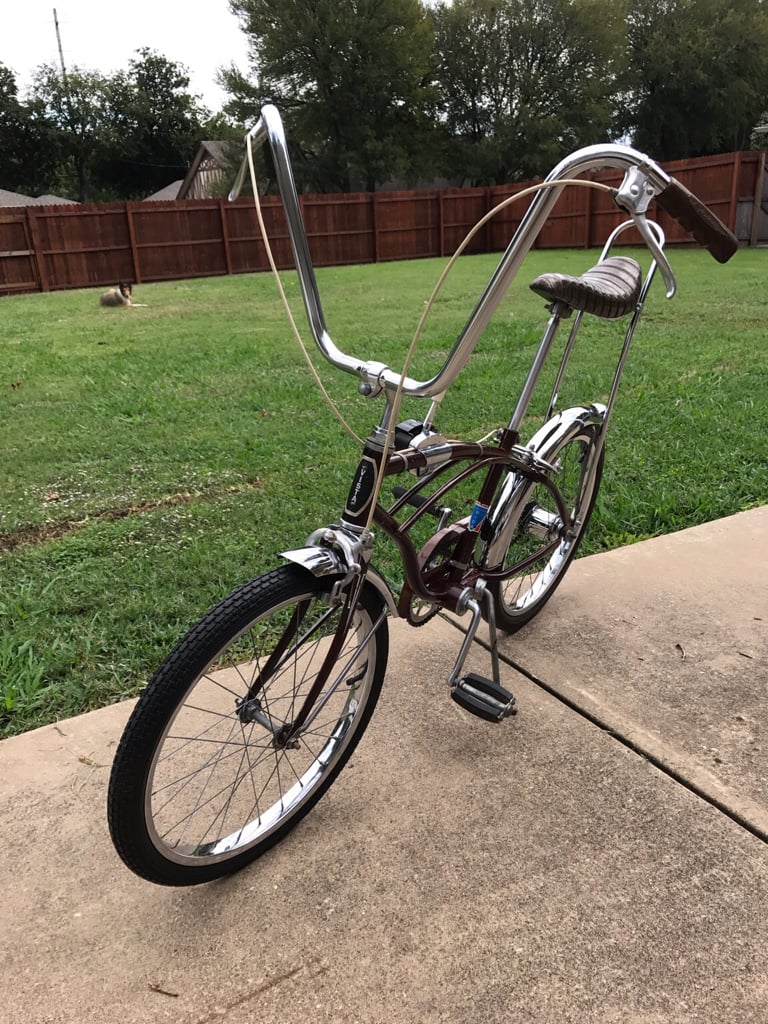
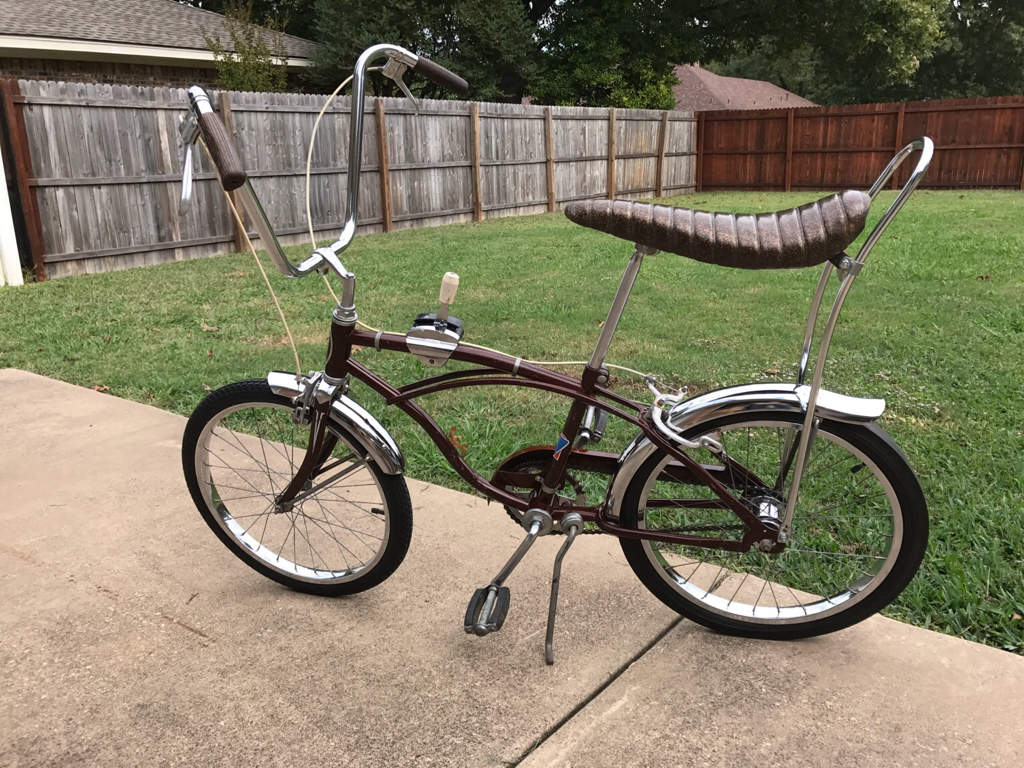
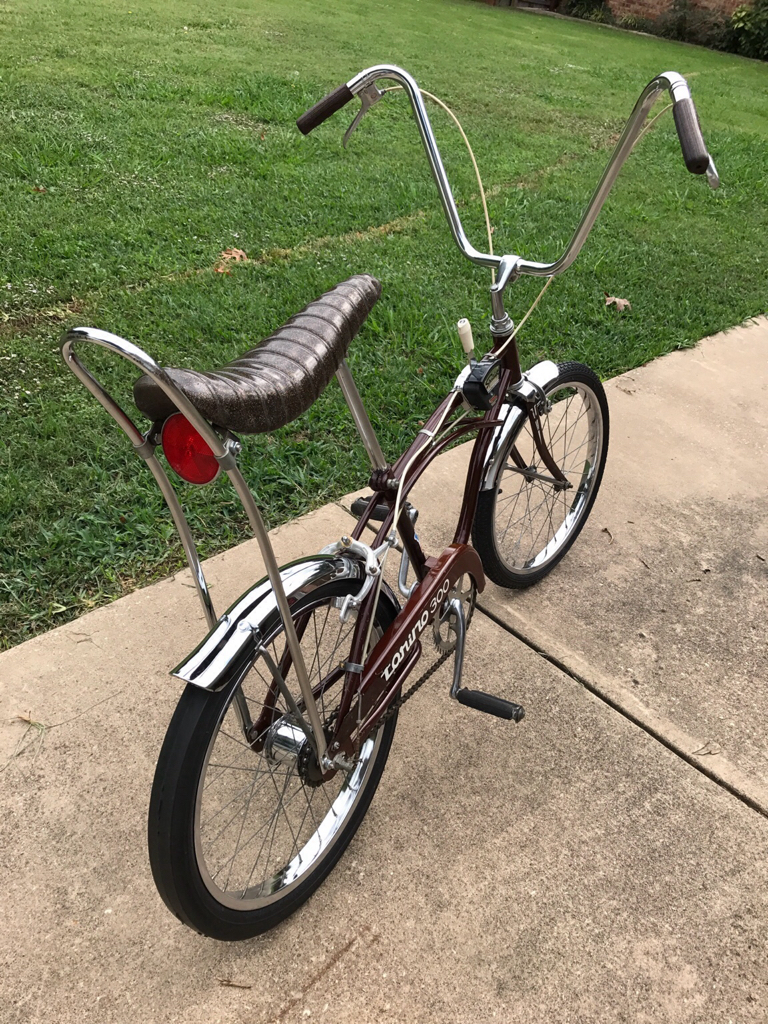

I'm very pleased with the outcome and really love the color.
Sent from my iPad using Tapatalk


I'm very pleased with the outcome and really love the color.
Sent from my iPad using Tapatalk


O.k. :now,, you ,can take it apart,,,
Then, ship back to Ohio.

Fv2
Don't know what I'm doing, gonna do it anyway.
Good point, I'll give you my address.
O.k. :now,, you ,can take it apart,,,
Then, ship back to Ohio.

Love it!
Luke.
Luke.


