Edit:
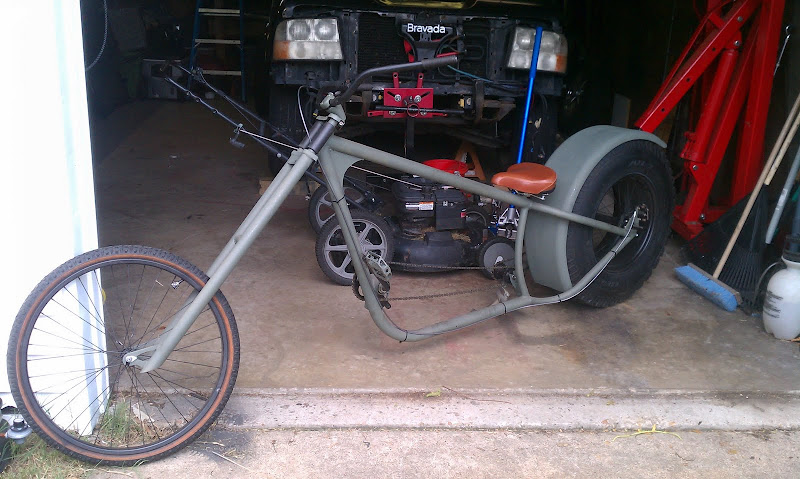
Here is my Chopper Bicycle as it sits today.
And this is how it got here...
So here it is the start of my crazy chopper bike project. The frame is being completely built from scratch with a lot if inspiration taken from the Atomic Zombie Overkill chopper. I am trying to go for a cross between a mountain bike and a chopper with a old school jeep/military vehicle theme. When it's done it will be olive drab flat green with white markings. There are still a ton of design and functional elements of this bike that are up in the air right now and I am just kind of figuring everything out as I go. So far all I know for a fact is that it is going to have a 26" MTB wheel/tire up front and a 15"x8" rim wrapped in a 30" AT tire which will be spoked to a widened out bike bmx hub with a disc brake in the back.
The project began with my dad giving me a pile of steel tubing and the plans to the Overkill chopper for Christmas. I had seen the Overkill bike before and though it was awesome but I never expected to actually be building it. Well once I read through the plans I really liked the idea but I knew I had to do something different with it.
Well obviously the first step of the build was to find the right rear wheel/rubber combo since it is going to be the main focal point and "Wow" factor of this build. Then Lo and behold I remembered a set of old Cragars that I had given to a friend that came off of my old Baja Bug. He was originally going to clean them up and use them on his 68 Camaro but after a little conversing with him and re-examining of their condition we both agreed that they were too rough to salvage for his car but would make a perfect candidate for this project. Then the more I got to thinking about it (and pricing out wide street rubber) the more I thought why not stick with the knobby tires that are already on them and do something really unique. Then just a couple of days later the idea to do a military vehicle theme popped in my head, and stuck. I already knew that I wanted to go a direction with it that I have never seen another bike taken and the idea for a ruggedized mountain chopper seemed really awesome. Now don't get me wrong this bike will probably never see any more off road action than my front yard but it is definitely being built to be ridden... Slowly...lol.


Now that I had the rear wheel I set to building a frame around it. The tubing that we are using is 1" and 1.5" electrical conduit. So far no measurements have been taken and I have just been flying by the seat of my pants, kind of just putting together what looked right. What I came up with is quite a bit longer and lower than the Overkill. And right now my main concern is if that downtube in the front is going to be too far away to be a good location for the BB.


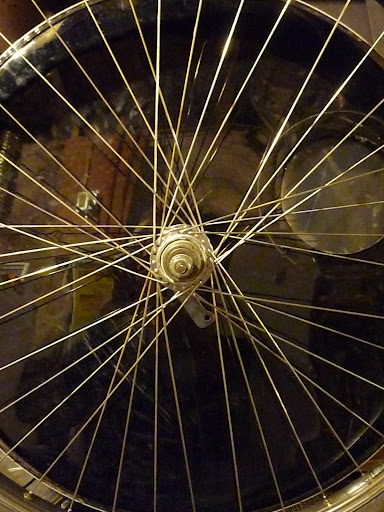
Also I have been making progress with the rear wheel. Pulled the tire, got the center cut out and I just finished drilling all of the holes for the spokes. Which by the way turned out to be an adventure in it's self, with a lot of finger crossing, guesstimating and many many broken drill bits along the way. Hopefully though it will be right. The rear hub is also complete, cut and extended the axle and hub by about 8". I had to be very careful since I was not able to remove the free wheel which also meant I could not remove the spokes, and believe me I tried. Unfortunately budgetary and time constraints forced me to work with what I have, plus I really wanted to use a disc brake hub out back. Luckily the spokes seem to have survived the hub welding process intact and are still in good shape. But just the thought of lacing them up is making be crazy, I'm sure I am going to need advice when it comes time for that.


So, right now that is where I am at and I'll keep posting updates as stuff gets done. Please feel free to post any ideas, suggestions or comments about the project. I know it is a bit unusual, but that's kind of what I am going for here. I'll be perfectly honest I have never built a bike at this level before and there is a lot about bike building that I do not know (and a lot of tools that I don't have). Also I know for a lot of parts and other things it might seem like I am being cheap, or using crappy parts, but honestly I really don't have a budget at all for this bike right now, so I just have to use what I can get for free or really cheap. Ultimately my main focus for now is just to make the frame strong and durable, because I know I can always upgrade the little parts and pieces later down the road if I need to. Right now my total investment in this project is only about $60 and by the time I'm done probably won't be over $150.
Here is my Chopper Bicycle as it sits today.
And this is how it got here...
So here it is the start of my crazy chopper bike project. The frame is being completely built from scratch with a lot if inspiration taken from the Atomic Zombie Overkill chopper. I am trying to go for a cross between a mountain bike and a chopper with a old school jeep/military vehicle theme. When it's done it will be olive drab flat green with white markings. There are still a ton of design and functional elements of this bike that are up in the air right now and I am just kind of figuring everything out as I go. So far all I know for a fact is that it is going to have a 26" MTB wheel/tire up front and a 15"x8" rim wrapped in a 30" AT tire which will be spoked to a widened out bike bmx hub with a disc brake in the back.
The project began with my dad giving me a pile of steel tubing and the plans to the Overkill chopper for Christmas. I had seen the Overkill bike before and though it was awesome but I never expected to actually be building it. Well once I read through the plans I really liked the idea but I knew I had to do something different with it.
Well obviously the first step of the build was to find the right rear wheel/rubber combo since it is going to be the main focal point and "Wow" factor of this build. Then Lo and behold I remembered a set of old Cragars that I had given to a friend that came off of my old Baja Bug. He was originally going to clean them up and use them on his 68 Camaro but after a little conversing with him and re-examining of their condition we both agreed that they were too rough to salvage for his car but would make a perfect candidate for this project. Then the more I got to thinking about it (and pricing out wide street rubber) the more I thought why not stick with the knobby tires that are already on them and do something really unique. Then just a couple of days later the idea to do a military vehicle theme popped in my head, and stuck. I already knew that I wanted to go a direction with it that I have never seen another bike taken and the idea for a ruggedized mountain chopper seemed really awesome. Now don't get me wrong this bike will probably never see any more off road action than my front yard but it is definitely being built to be ridden... Slowly...lol.
Now that I had the rear wheel I set to building a frame around it. The tubing that we are using is 1" and 1.5" electrical conduit. So far no measurements have been taken and I have just been flying by the seat of my pants, kind of just putting together what looked right. What I came up with is quite a bit longer and lower than the Overkill. And right now my main concern is if that downtube in the front is going to be too far away to be a good location for the BB.
Also I have been making progress with the rear wheel. Pulled the tire, got the center cut out and I just finished drilling all of the holes for the spokes. Which by the way turned out to be an adventure in it's self, with a lot of finger crossing, guesstimating and many many broken drill bits along the way. Hopefully though it will be right. The rear hub is also complete, cut and extended the axle and hub by about 8". I had to be very careful since I was not able to remove the free wheel which also meant I could not remove the spokes, and believe me I tried. Unfortunately budgetary and time constraints forced me to work with what I have, plus I really wanted to use a disc brake hub out back. Luckily the spokes seem to have survived the hub welding process intact and are still in good shape. But just the thought of lacing them up is making be crazy, I'm sure I am going to need advice when it comes time for that.
So, right now that is where I am at and I'll keep posting updates as stuff gets done. Please feel free to post any ideas, suggestions or comments about the project. I know it is a bit unusual, but that's kind of what I am going for here. I'll be perfectly honest I have never built a bike at this level before and there is a lot about bike building that I do not know (and a lot of tools that I don't have). Also I know for a lot of parts and other things it might seem like I am being cheap, or using crappy parts, but honestly I really don't have a budget at all for this bike right now, so I just have to use what I can get for free or really cheap. Ultimately my main focus for now is just to make the frame strong and durable, because I know I can always upgrade the little parts and pieces later down the road if I need to. Right now my total investment in this project is only about $60 and by the time I'm done probably won't be over $150.