Typhoon Too

Rat Rod Bikes Bicycle Forum

Help Support Rat Rod Bikes Bicycle Forum:

This site may earn a commission from merchant affiliate links, including eBay, Amazon, and others.
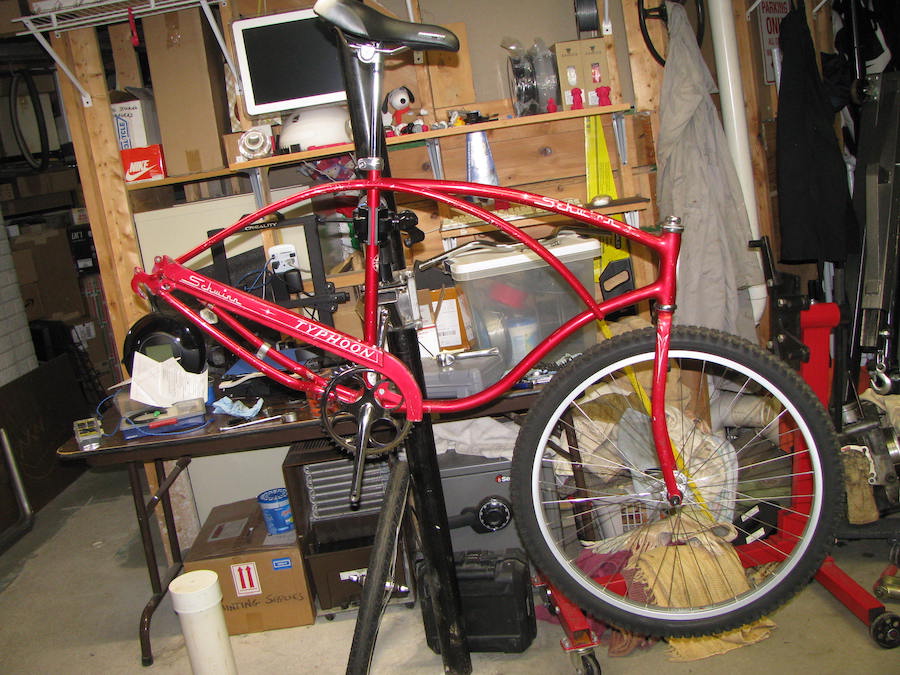
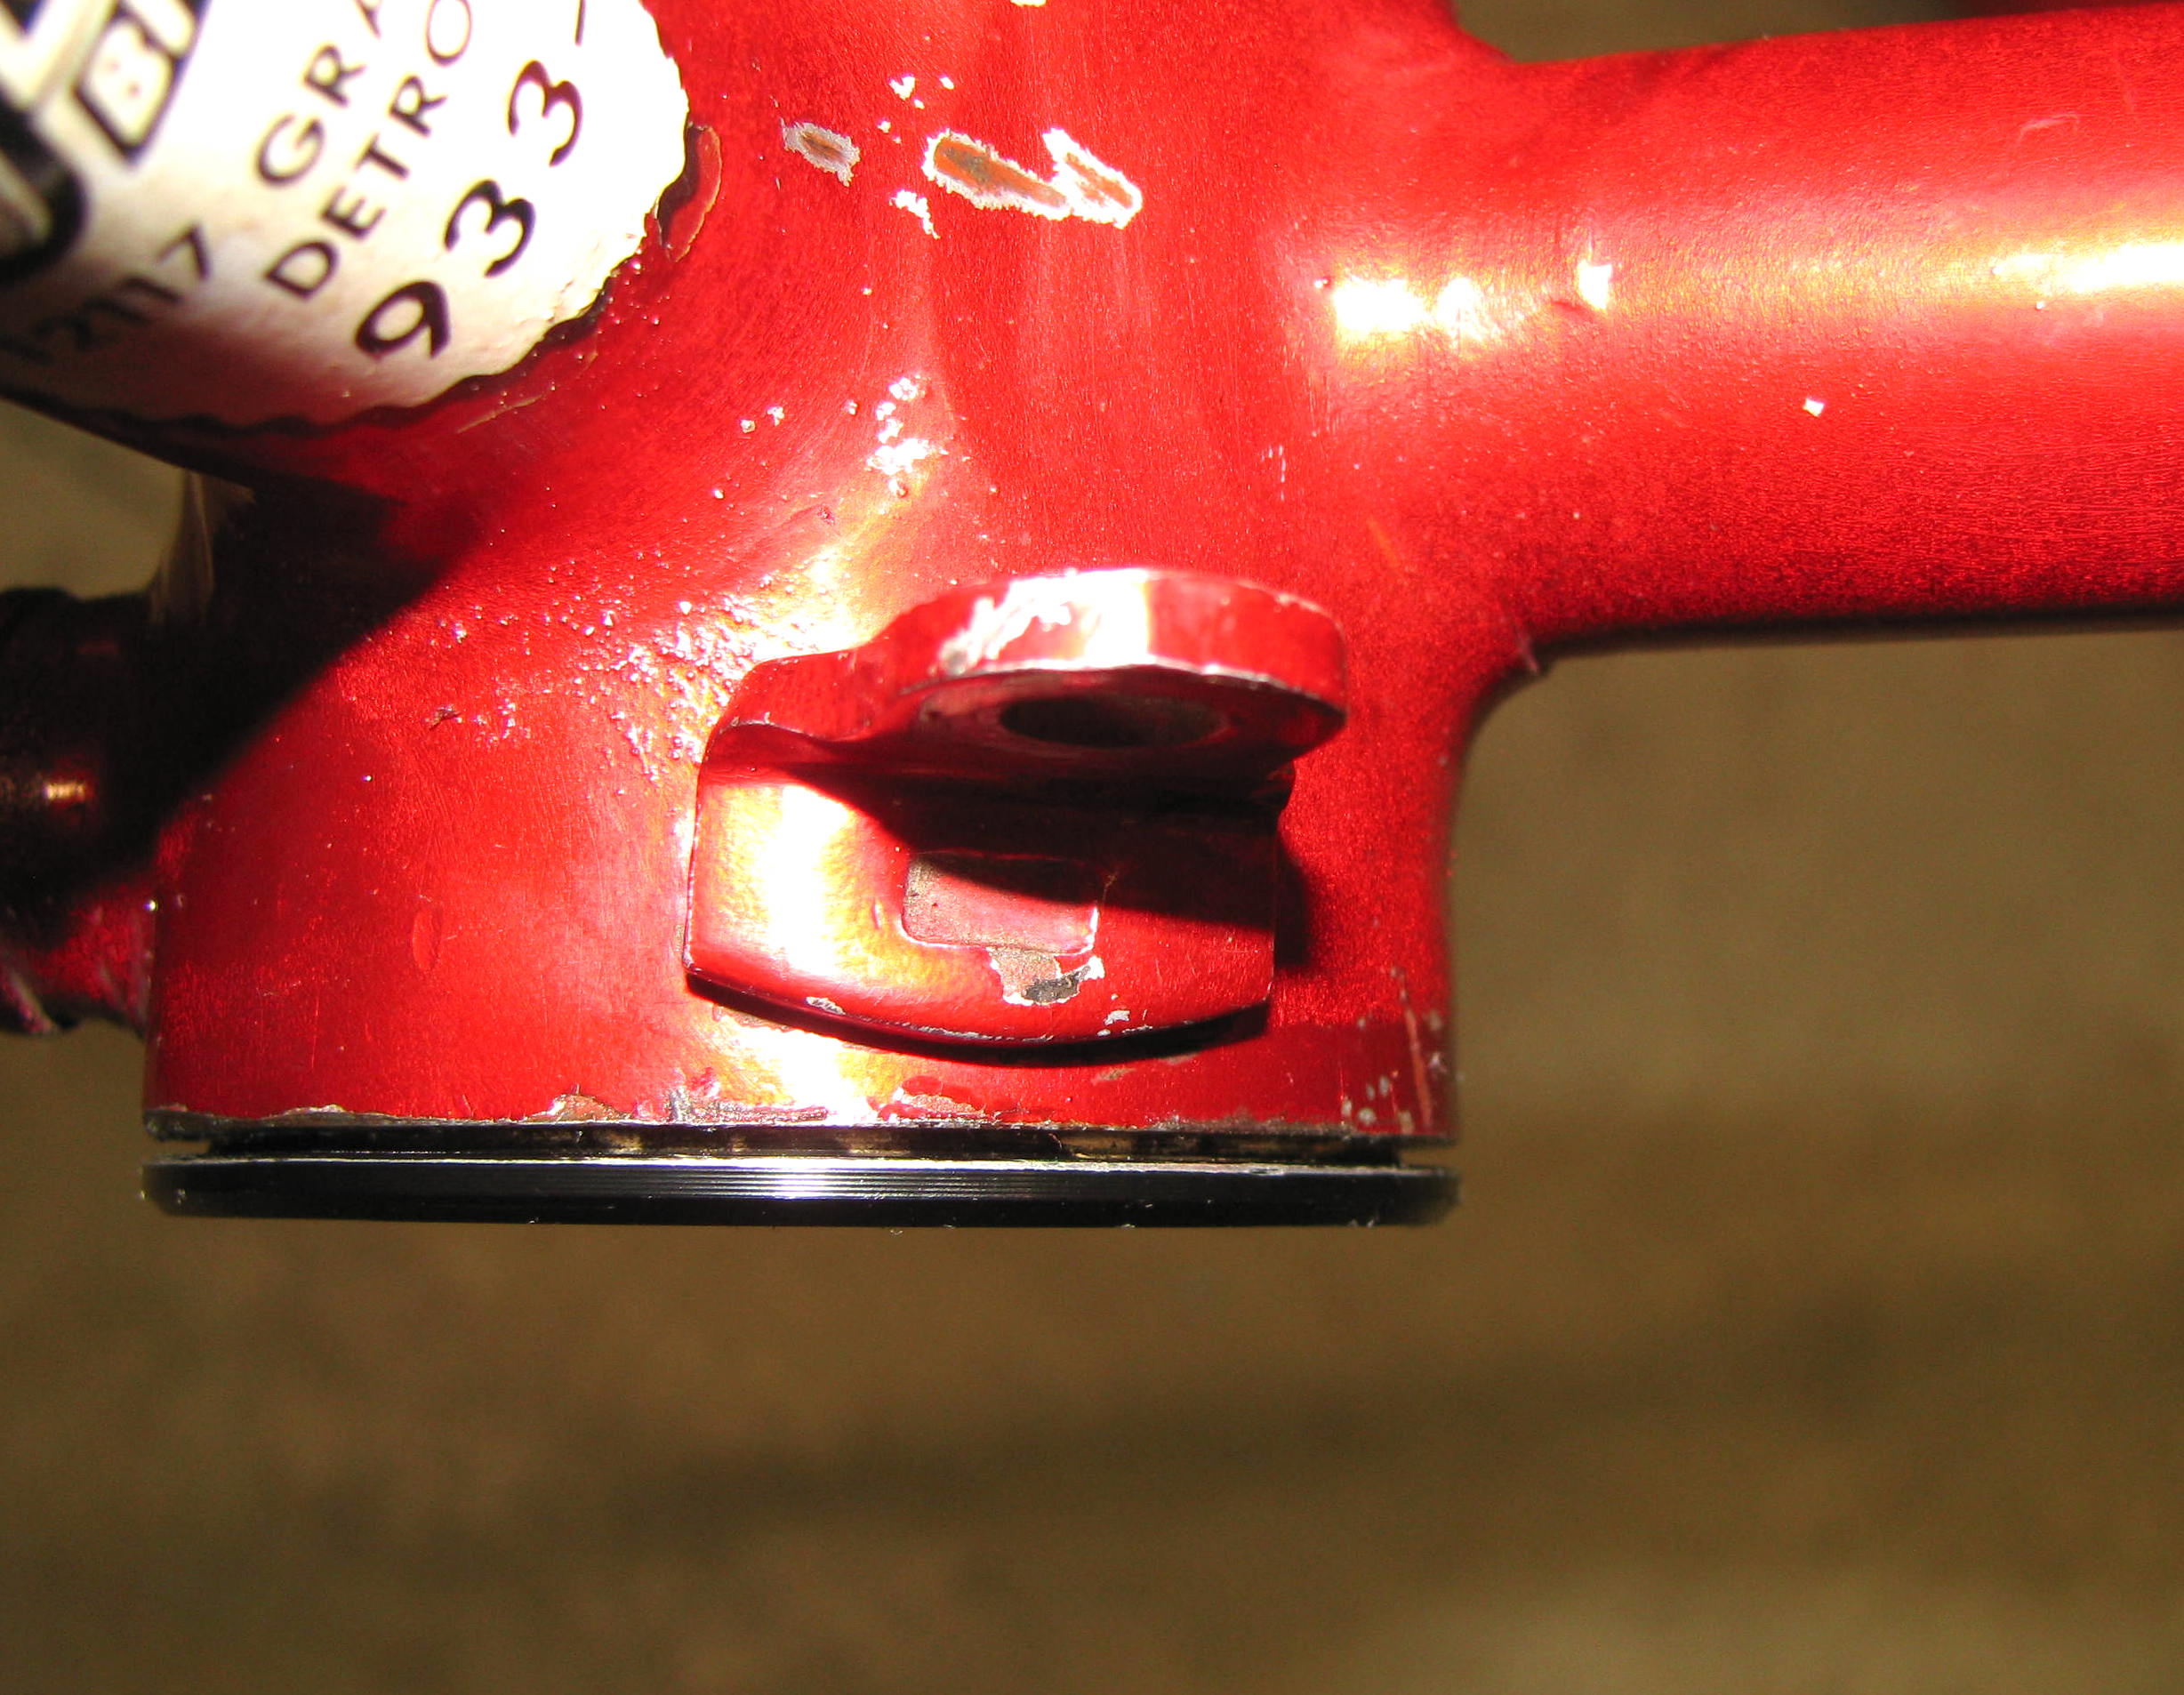
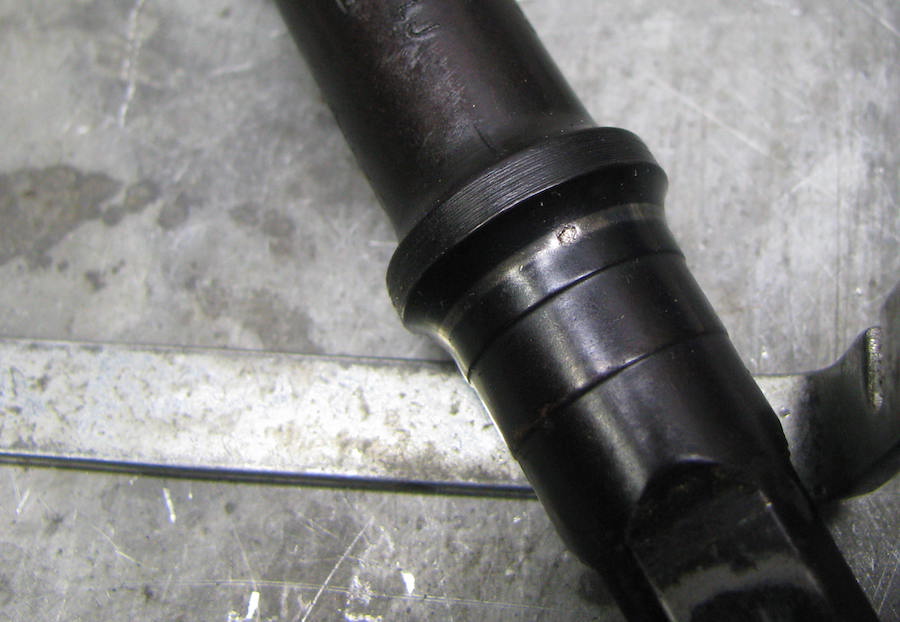
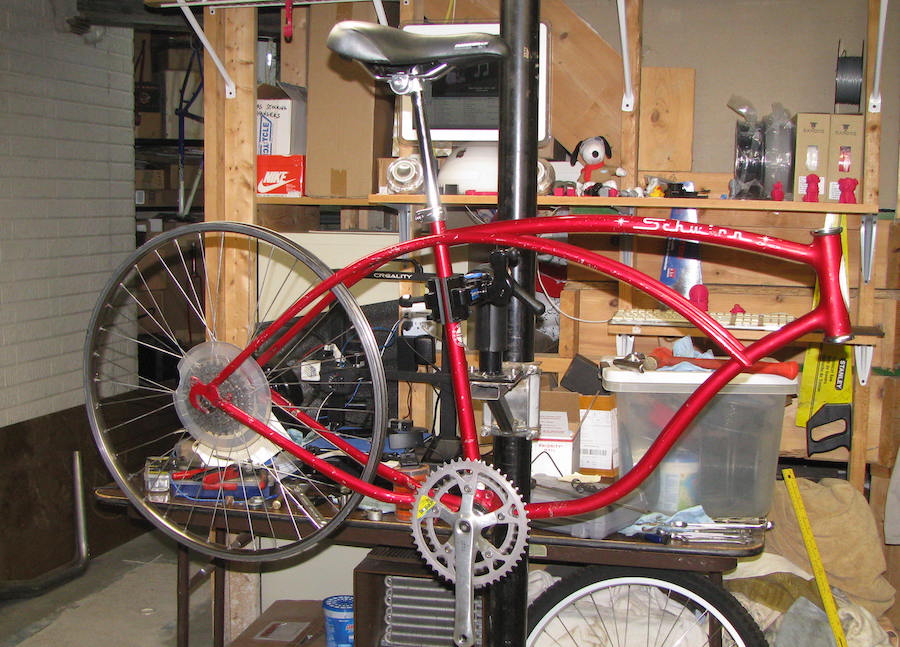
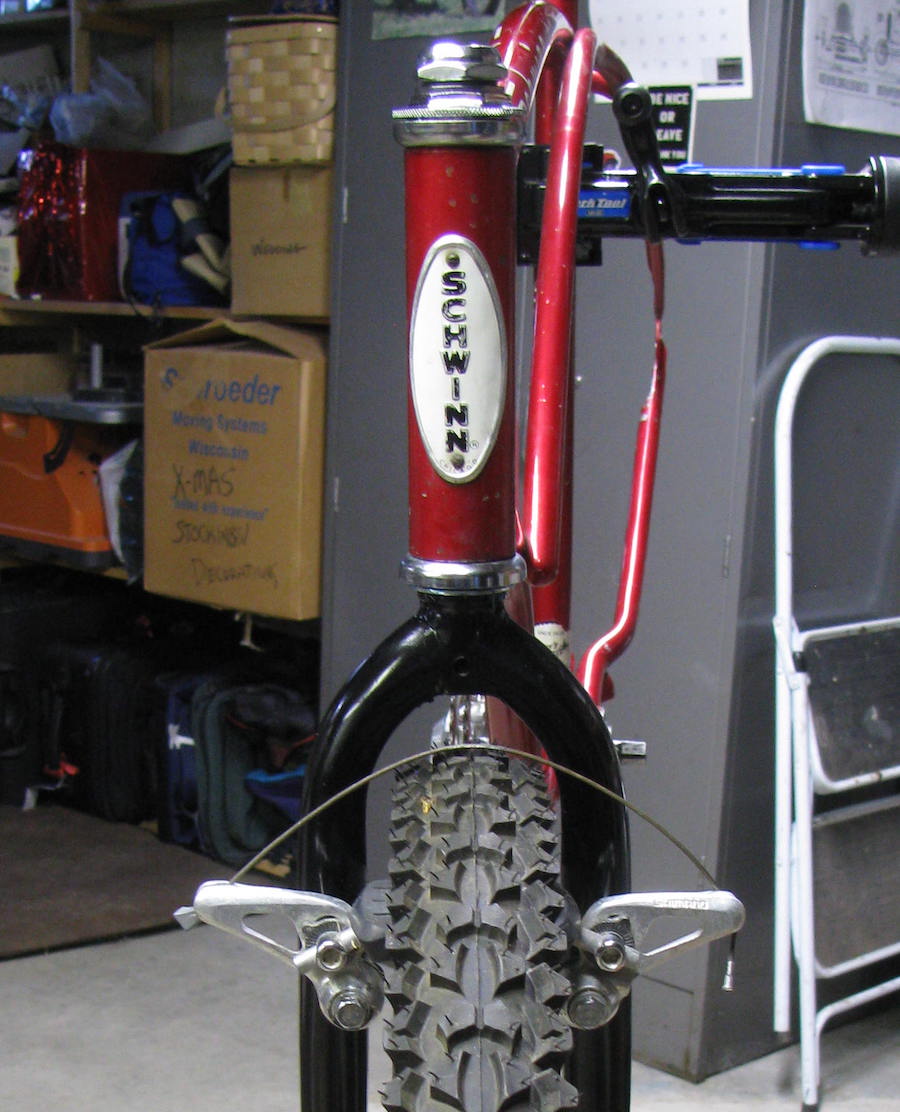
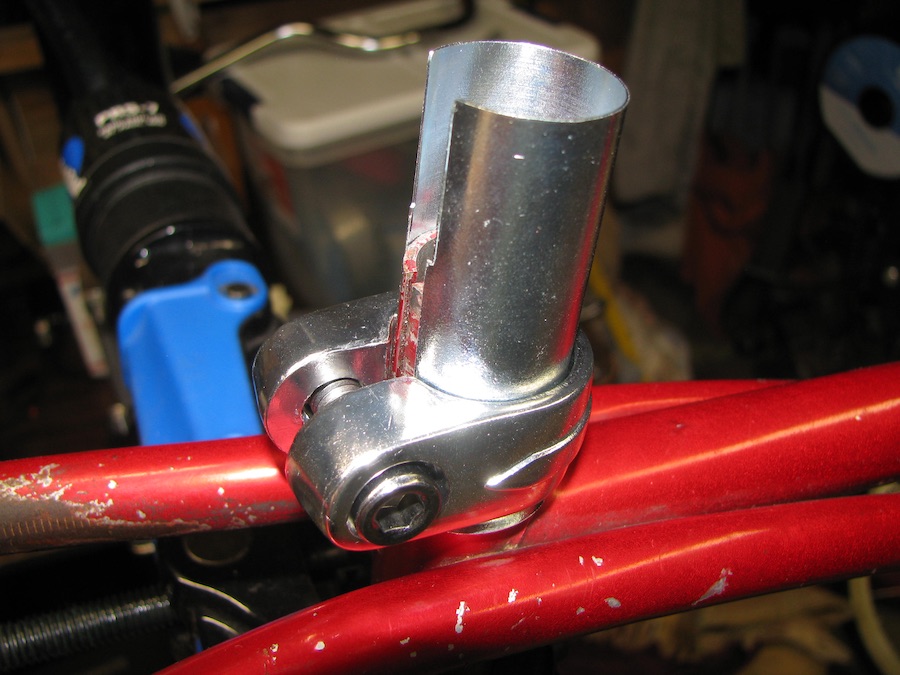
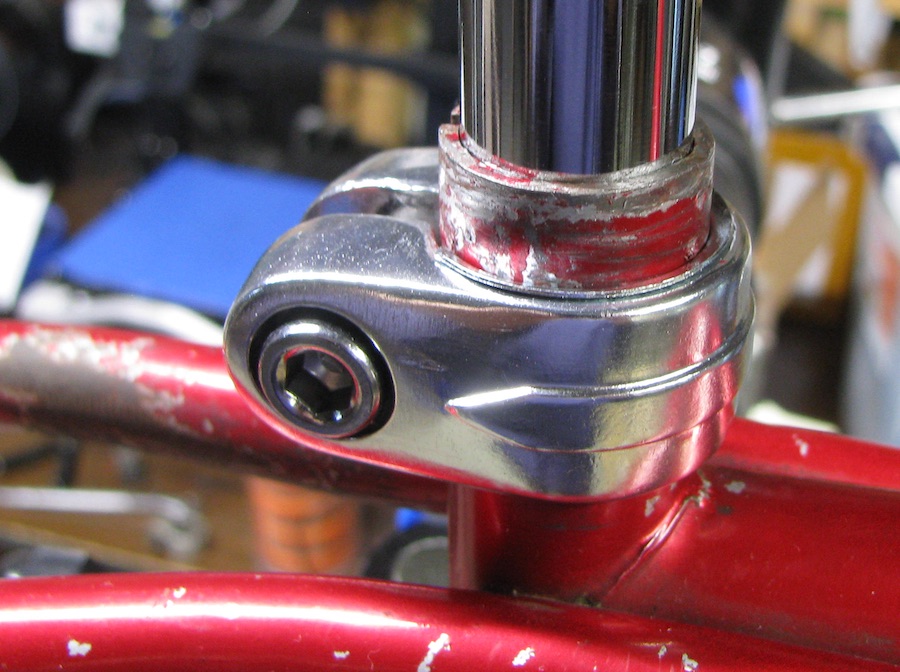
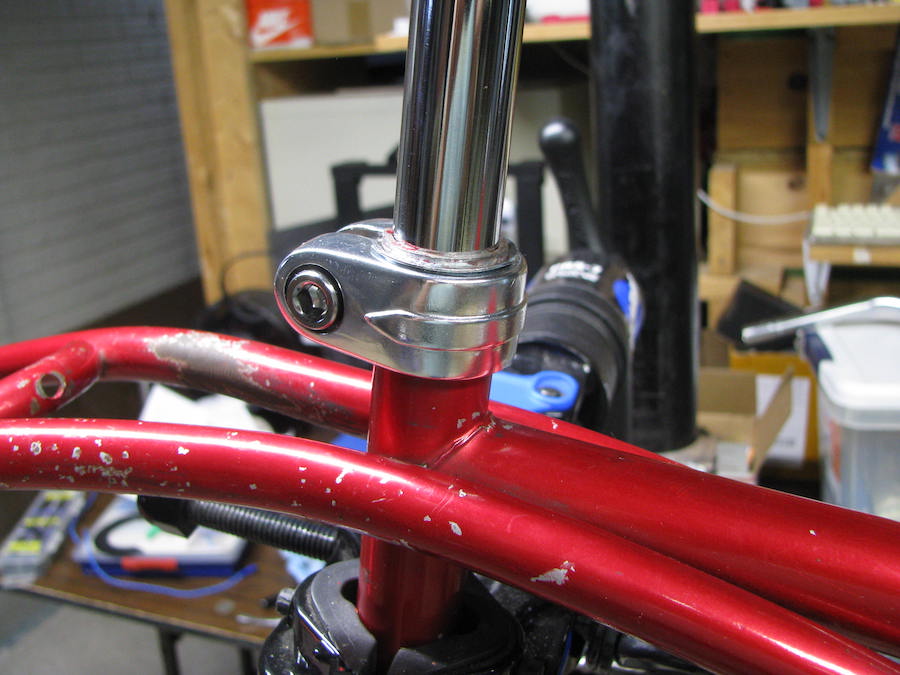
Looking good there mate. Nice work on that seat clamp. The earlier forged steel clamps Schwinn used work much better than the later pressed steel ones. I would lift that clamp to the top of the seat mast. It will look a lot nicer.

Yeah I wasn't in love with the clamp position either. Luckily most everything is finger tight right now because it's all going to move/come off multiple times before it's done.
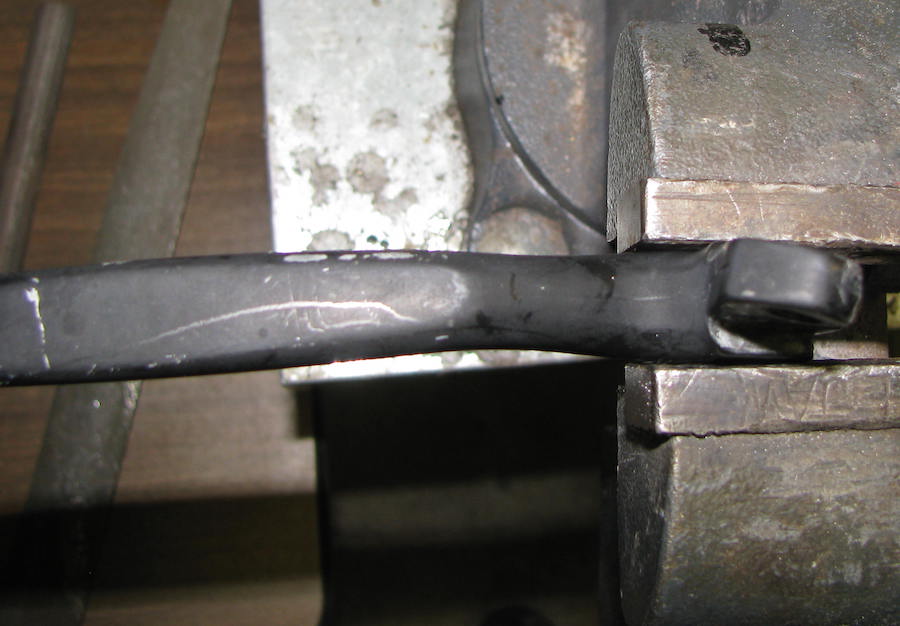
Much more better?
SeatpostClamp_6332.JPG


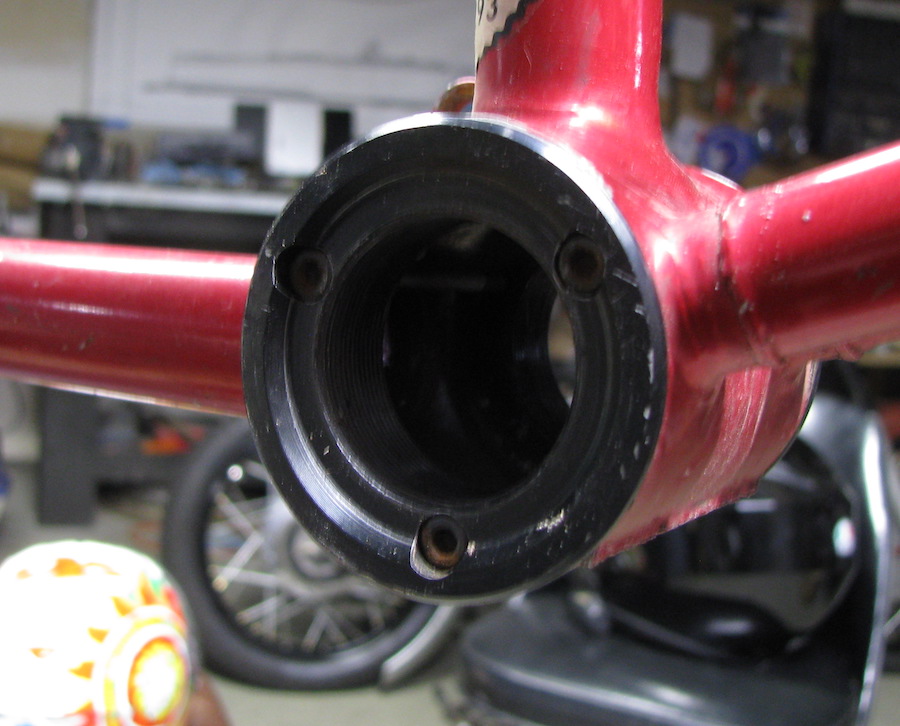
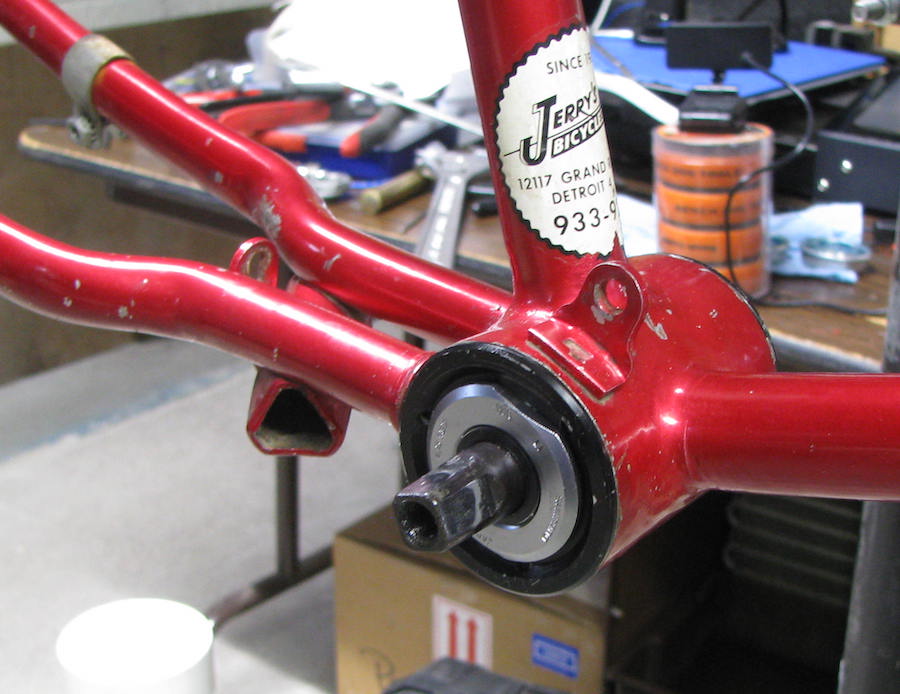
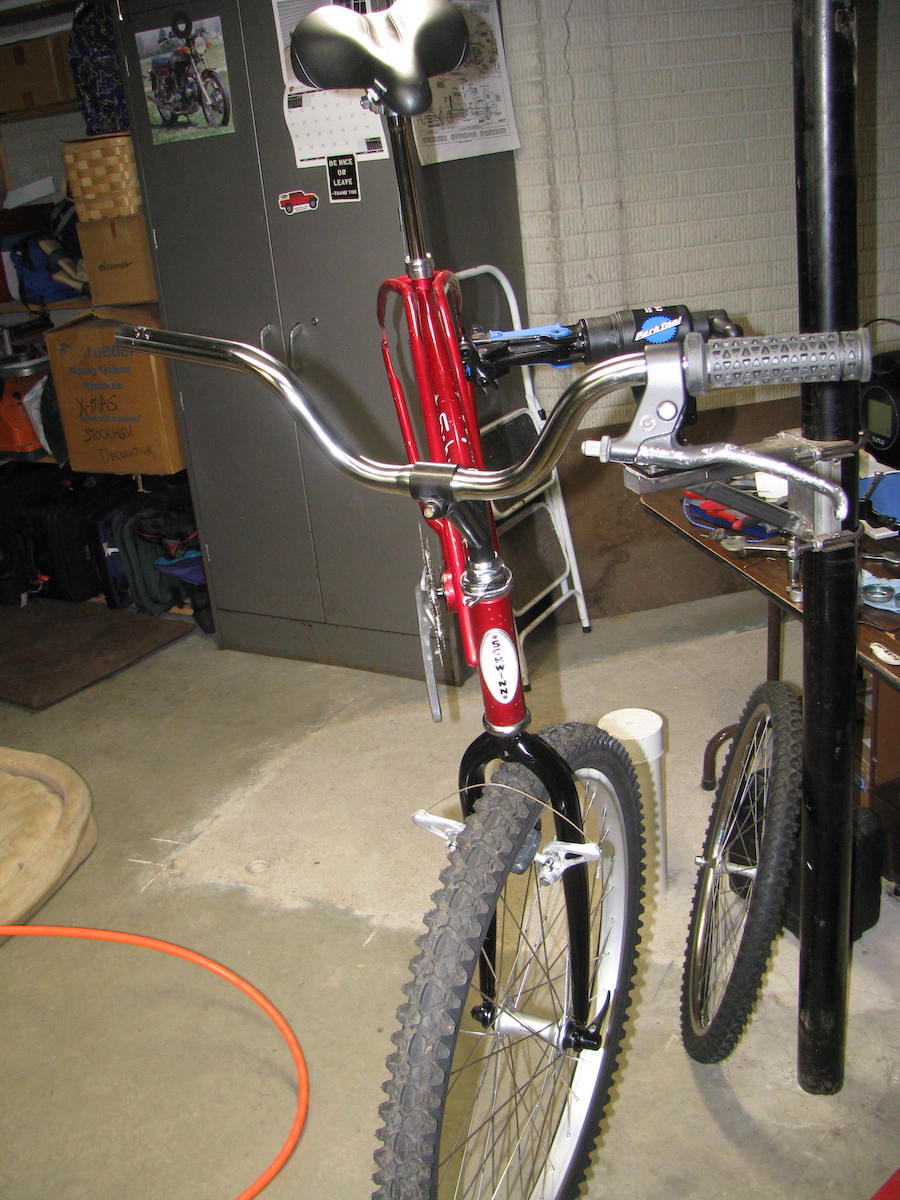
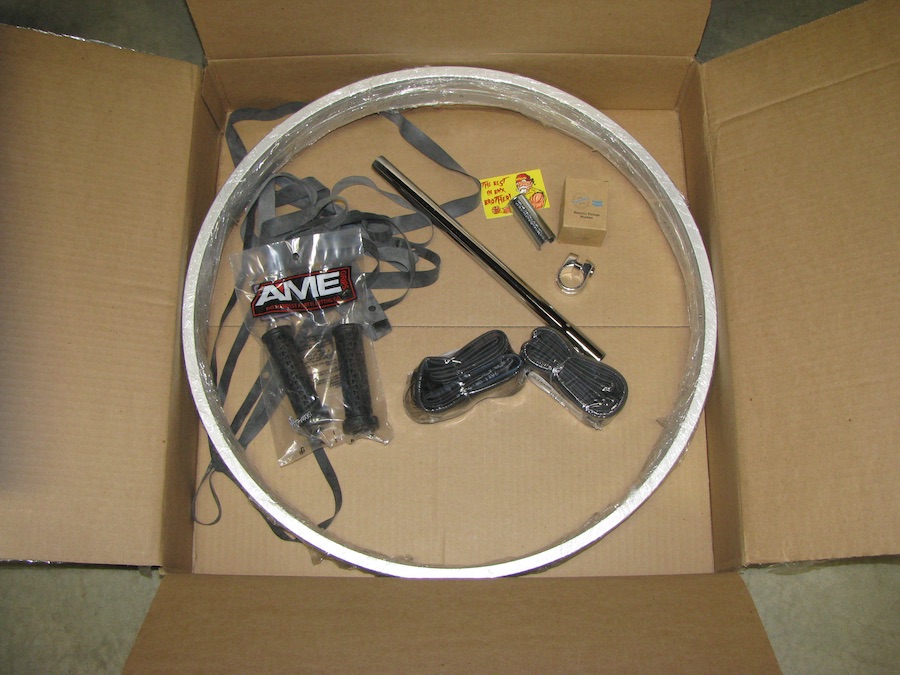
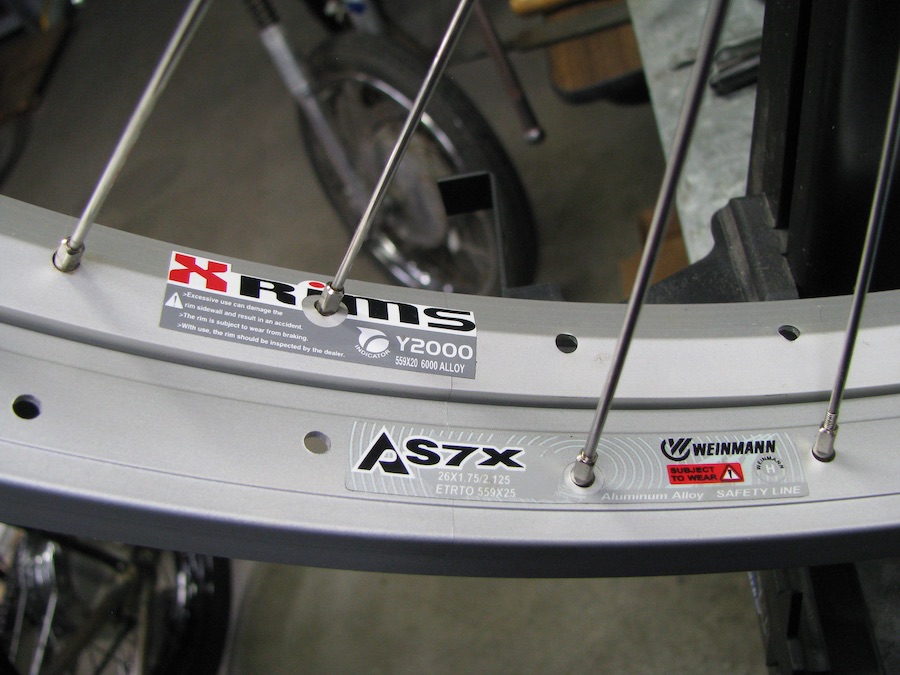
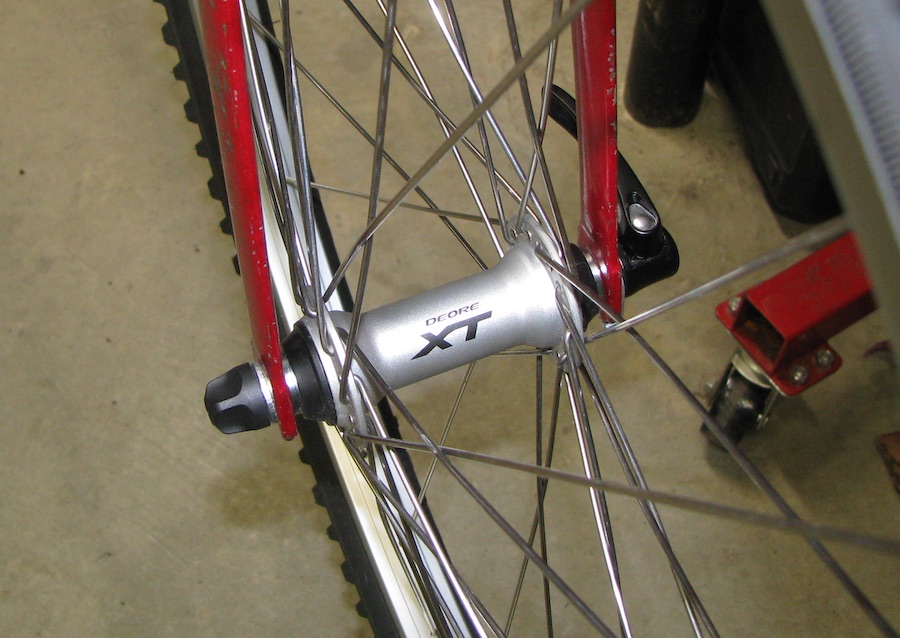
Today's update is pretty trivial. I got more parts but nothing fun. The front hub isn't going on this bike anymore so that led to multiple distractions as I rationalized what else I could use it on. At one point it was going to get put on a bike I don't even own yet... but I came back to putting it on the Sanctuary 7 cruiser, just like I planned on yesterday, using the original spokes off the cruiser.

That plan lasted right up until I was ordering the spokes for the rear wheel on this and I added spokes for that too.

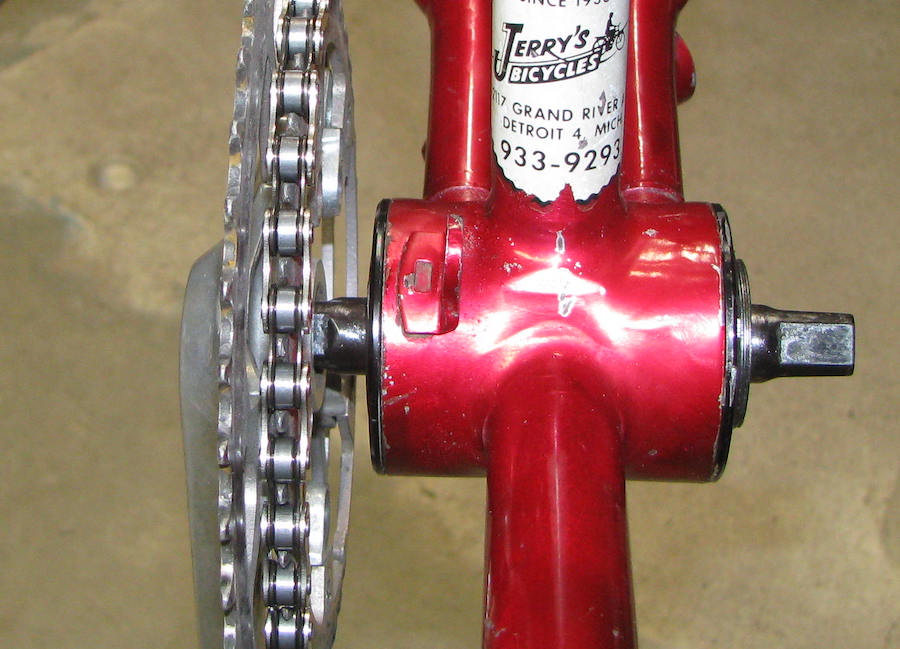
I looked at gearing today. The stock chainring on the Breeze looks pretty big to me. I did the math, compared it to the gearing on my cruiser, and have convinced myself I need something around a 36t front chainring. On the crusier I was typically in 2nd or 3rd around town. On the Typhoon a 36 front would put it right between 2 and 3 on the cruiser, with low a touch lower than 1st. Sounds about right to me.

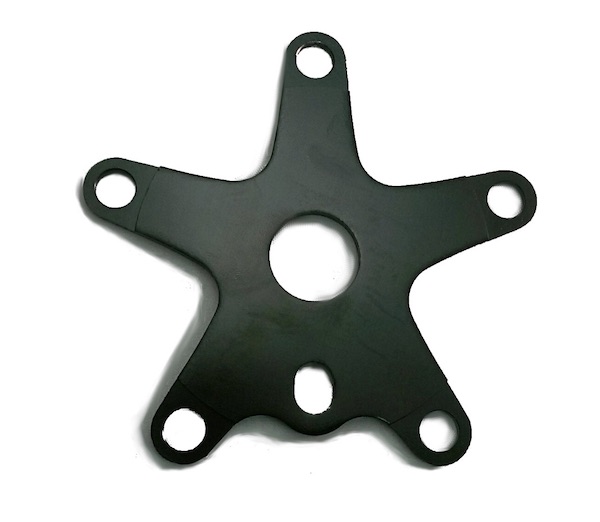
I'll probably end up getting something cheap but I'm also looking into spyders with seperate chain rings for easier changes in the future. I'm keeping my options open, I have a couple ideas that could take some time to work out, but it's still early in the game... this thing won't be winning any awards but there may be a few touches added before it's over.

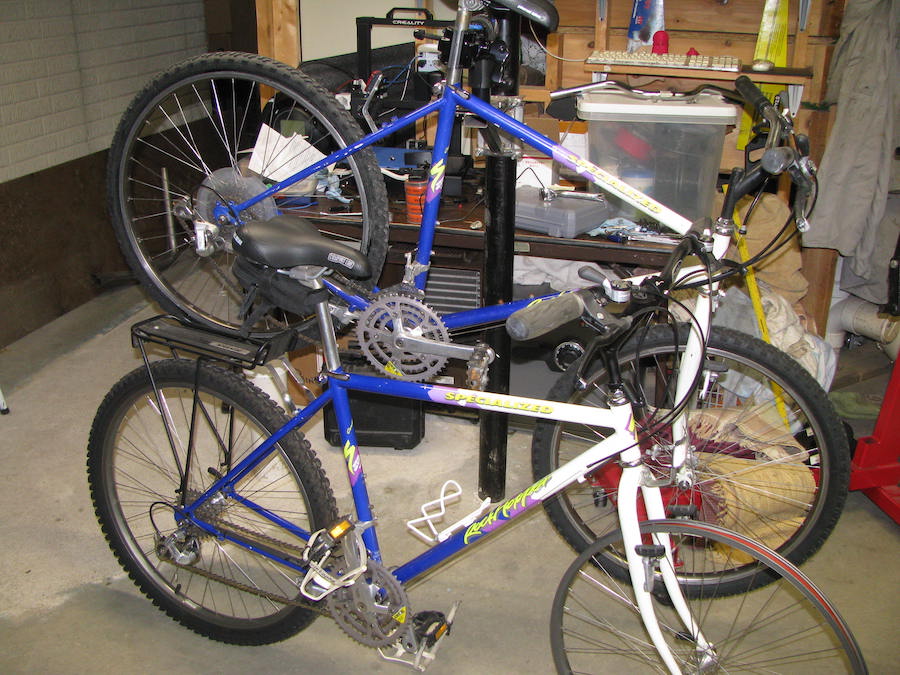
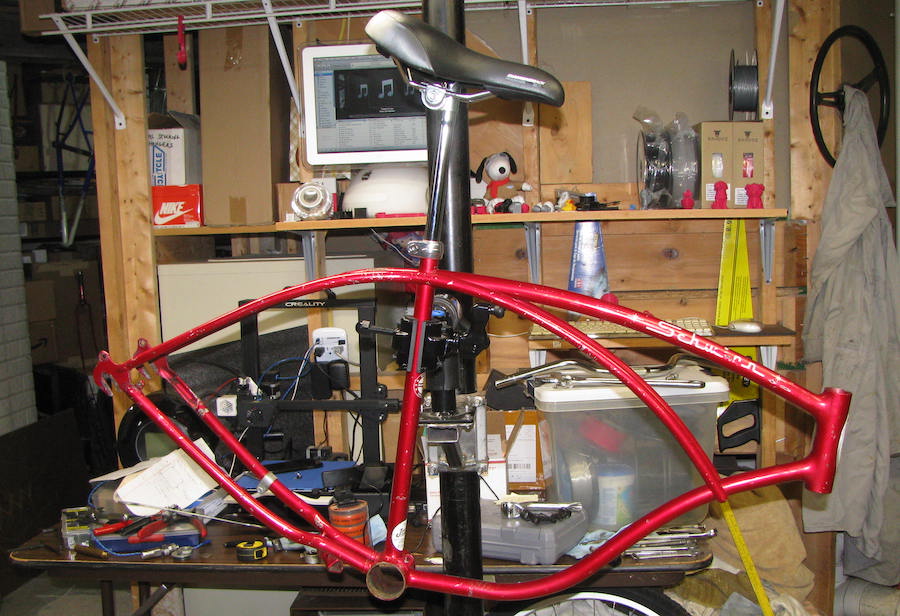
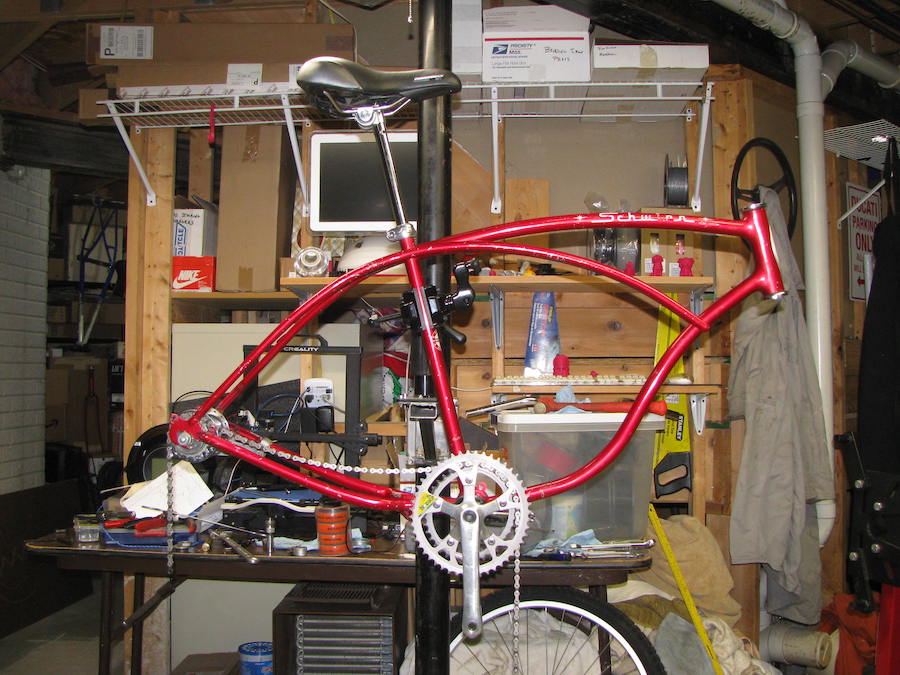
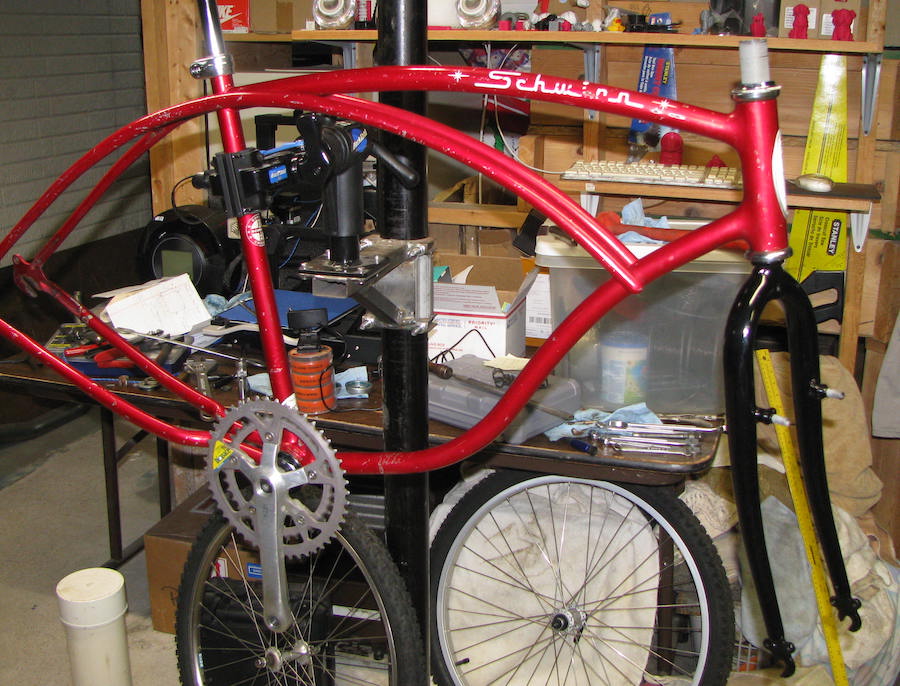
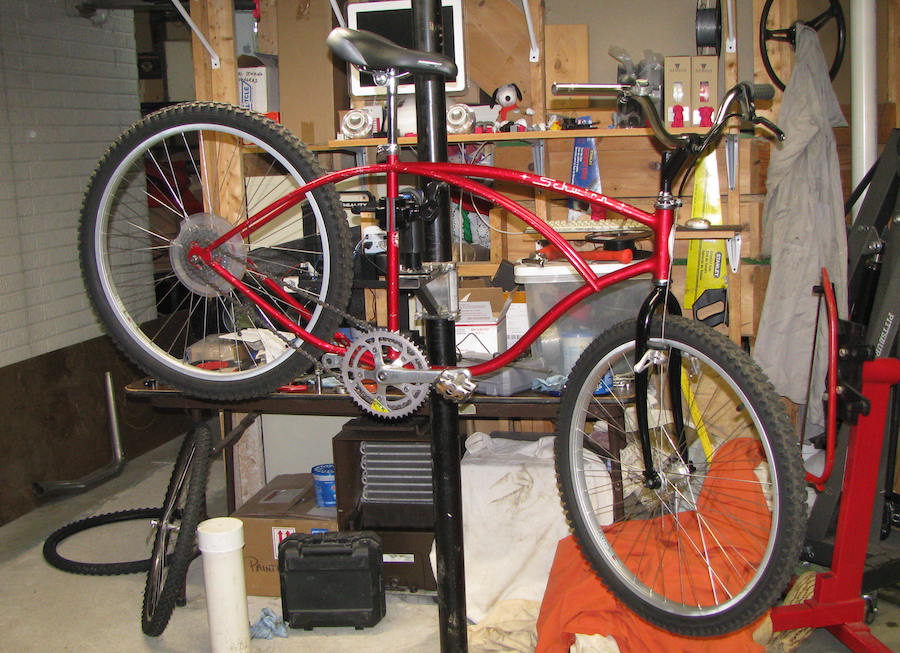
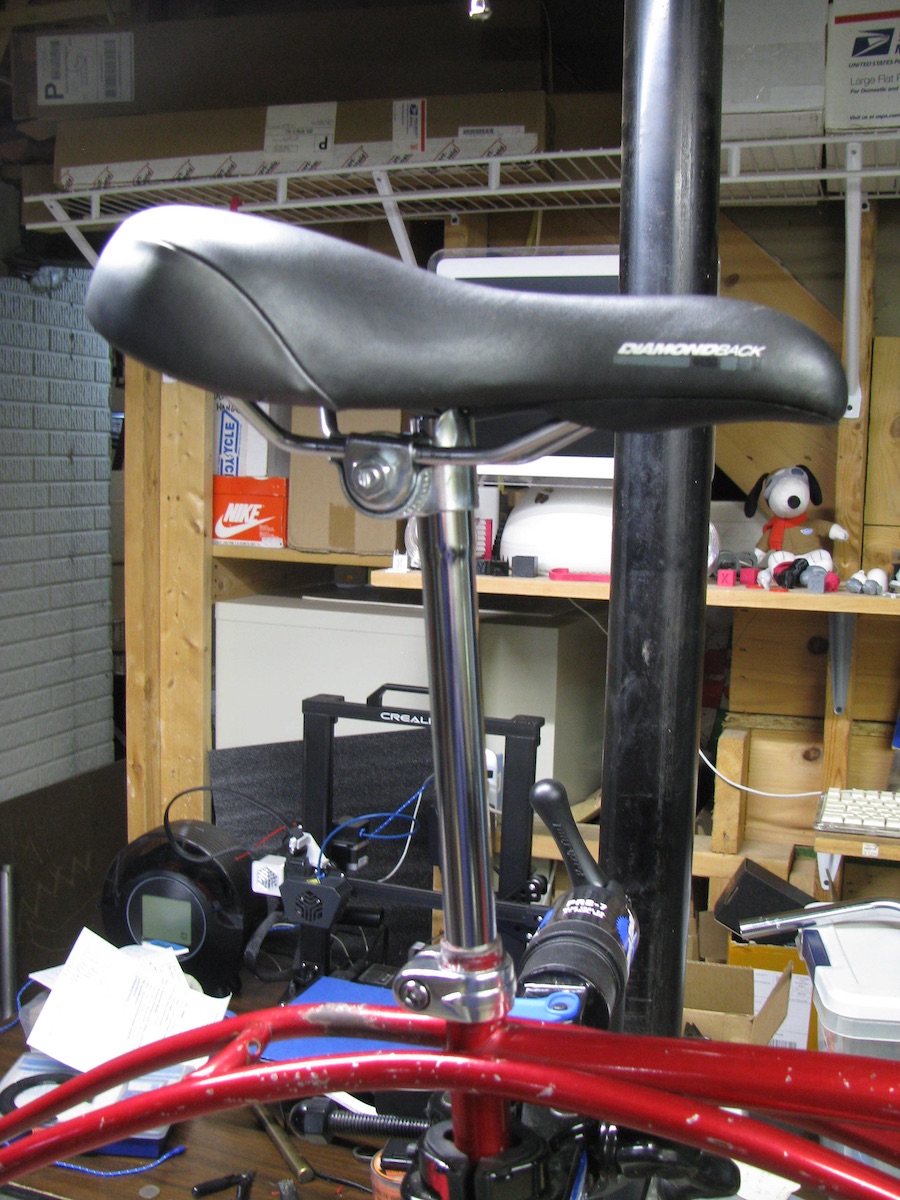
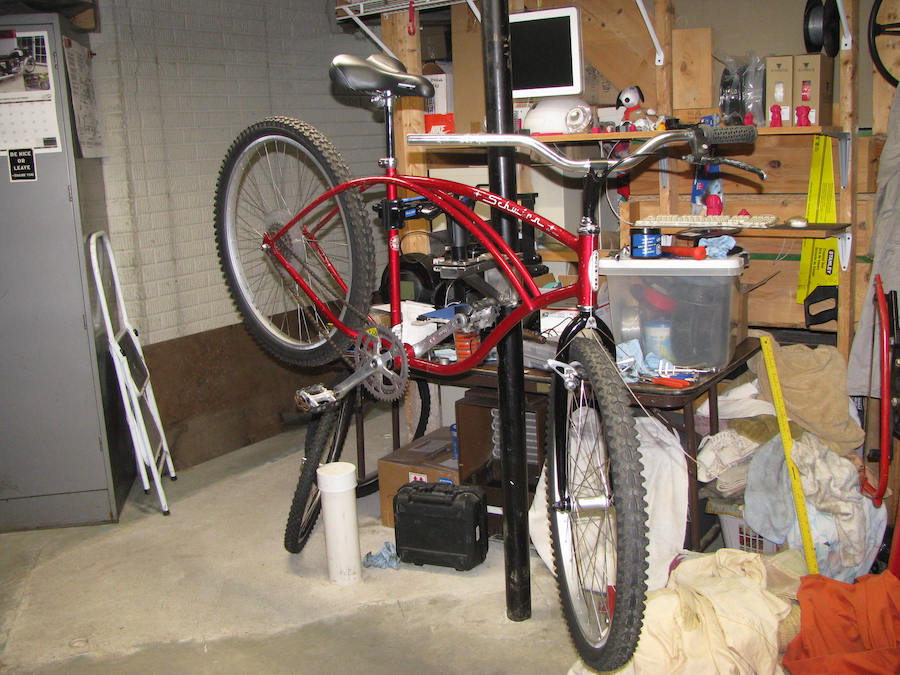
And the obligatory "here's how it looks at the moment" shot.
MockUp_6337.JPG
 
@DesmoDog , I may have a 34-36 t range one piece crank ring I can send you. Then you can use yout original crank and bottom bracket. If you want to swap to a spyder / 3 piece crank, you'll need a bottom bracket conversion kit as well. Def more options for cranks and rings, but more costly too.
 
@DesmoDog , I may have a 34-36 t range one piece crank ring I can send you. Then you can use yout original crank and bottom bracket. If you want to swap to a spyder / 3 piece crank, you'll need a bottom bracket conversion kit as well. Def more options for cranks and rings, but more costly too.

I'd be very interested in a chainring, I'll contact you. Thanks!

As for the spider, I was talking about something that would work with a one piece crank, like this
Spider.jpg


The thing is, I've got some aluminum here and friends with cnc mills, so if I got ambitious...

I also considered a 3 piece crank. When I picked up the frame it had this installed:
BottomBracket_6028.JPG
 
I get great results with evapo-rust. I used to let parts soak overnight. But I recently bought a ultrasonic cleaner with a heater. Heated evapo-rust in the ultrasonic is amazing. You can watch the rust dissolve. Most light rust is gone in a 5 minute cycle. If the rust is really bad, it does help to rinse with water between cycles.
 
I get great results with evapo-rust. I used to let parts soak overnight. But I recently bought a ultrasonic cleaner with a heater. Heated evapo-rust in the ultrasonic is amazing. You can watch the rust dissolve. Most light rust is gone in a 5 minute cycle. If the rust is really bad, it does help to rinse with water between cycles.
I thought about trying that. I've seen guys put containers in an ultrasonic that has the cleaner of their chocie in it, then water filles the ultrasonic tub. Keeps you from having to fill the tub with Evaporust. I thikn the label mentiones that temperatures can affect how well it works so just being hot would probably help.

It worked out eventualy so no worries.
 
Alrighty. Today's update will be brief too, because I didn't work on the Typhoon today. What I DID do, was spend too much money on another bike.

RHCII_6352.JPG


No, you aren't seeing double. In one of my searches for donor bikes I came across a 1988 Rock Hopper Comp in the same colors as the 1988 Rock Hopper Comp that I have. But mine is too small for me. This one is the next size larger. Do ya see where I'm going with this?

Long story short, I made an offer below his "lowest I'll go" number and he took it. I still thought it was too much, but I could look for a long time trying to find another one. It's the exact 34 year old bike I wanted, that's got to be worth something. In the big picture we still weren't talking all that much money so what the heck. I drove the 45 minutes to see it... and it was in even worse shape than I thought.

Whatever, I mainly wanted the frame/fork, and that looked straight. So I bought it.

Got it home. Tore it down. A lot of the components are trashed but I've got the frame I wanted. Plus a few things that may or may not work on a Typhoon frame, hence me posting about it here.

The fork should be here tomorrow. That's when the fun should start.
 
I put the crank on today. Then the chainguard. Spun the crank. Hit the chainguard. Scratched it. D'oh!

It was already dinged up so not the end of the world but what a rookie move. I got everything to clear but I doubt I'll use it anyway. I didn't take pictures. Imagine a Typhoon frame with a shiny-ish one piece crank.

I also put the front wheel from my '88 Rockhopper Comp on just for yucks. I'm stealing the tires for this bike because the RH is a bit small for me and I rarely ride it anyway. No reason to let a set of tires dry rot on it.

When I had the RockHopper sitting next to the Typhoon it occured to me I could have pulled most of the parts off of it instead of ordering new stuff. But then I wouldn't have it to rarely ride anymore.

Tonight I was searching bikes on marketplace and came across the twin of my Rock Hopper, except the next size larger. Same year, same graphics, larger frame. A few changes but nothing major. He wants too much for it, it needs work... but... between that bike and mine, I could make a Rock Hopper that's not too small and have most of what I'd need to make a pretty sweet klunker... but I already ordered what I need for that.

I suppose the logical solution is to turn up the search for a '62 Schwinn frame. So I can do this all over again.

This madness all started when I got a free Typhoon frame. Repeat after me - there is nothing more expensive than a free bike... I've heard versions of that for ages and it never registers.

He's already cut the price in half once, and it's still too much. Forget it? Wait it out? Lowball offer? Hmm.... I really don't need more projects!
There is nothing more expensive than a free bike. lol.
 
I started the day prepping the bike for a few things I wanted to try. One step up, two steps back leads to this. No BB cups. No headset cups. But the seatpost is staying!
Mockup_6390.JPG


First thing I tried was installing the cups from a new Haro headset to prep for the new fork. Oops. Too small. I forget the numbers now (they're written down somewhere) but the Haro cups were 0.2mm smaller than the Schwinn cups so they aren't a press fit in the frame. Re-install the Schwinn cups.

Move on to the bottom bracket. I've got the crank from the Rock Hopper now so I can try the adapter the frame came with. I found that they bottomed out on a ridge in the BB before seating.
BB_6395.JPG


Not a big surprise, I saw this mentioned in a video about installing them. A little work to trim the edges and they fit.
BB_6402.JPG


When I cleaned up the Rock Hopper's parts I found out they're bad. The fixed cup is damaged but the adjustable one is ok.
BB_6406.JPG


The spindle is messed up too.
BB_6413.JPG


I was ready to go back to the one piece crank, but decided to press on just to find out if the spindle was the right length, or figure out what I'd need anyway.
BB_6417.JPG


Right about here I decided to just go with it. The BB is still functional. The bad parts will get worse but so what? They won't ruin anything that isn't already bad so .... the torpedoes, full speed ahead. May as well completely trash it before it's replaced.
Mockup_6418.JPG


I tried to figure out what size spindle I'd need to move the outer sprocket inline with the sprocket on the hub. The small chainring is already removed here. You can't see it here but I found out the chain has a twist in it. Whataya expect for $10 I guess?
BB_6420.JPG


The middle ring seems about right, so I measured from the outside of the big ring to the outside of the middle ring. About 7.5mm. So a spindle 7.5mm shorter should work? But... the spindle is overall length so I'd really have to go 15mm shorter... it's marked 122.5 now so I'm thinking a 107ish should work? And getting it with a new BB set would replace all the bad parts.

And as I sat there staring at it planning my next move, that stupid little voice in my head said "Gee, the small chainring would fit no problem. And that two speed hub seems to have a lot of drag. And the Rock Hopper rear hub has a big spacer on the left side. I wonder if it would fit the frame with that spacer removed?"

Hmmm....
MockUp_6422.JPG


Yep. I had to spring the frame a little but I did it by hand.

Crap. NOW what rabbit hole am I going down??? If I got an old school derailleur hanger that went under the axle nut it would take up some of the space of the missing spacer and I could probably even get away with using the stock axle and QR skewer.


Ch-ch-ch-ch-changes
Turn and face the strange
Ch-ch-changes
Don't want to be a richer man...

All it would take is a few more bucks and this could be an 18 speed Typhoon. I mean, I know when I started out I didn't want ANY cables or levers, and now I'd need shift cables and brake cables and two derailleurs, and all the assorted clamps, etc...

I'll sleep on that one. But as I was shutting down for the day another box showed up.
MockUp_6424.JPG


The fork is here! Maybe I'll put some more time into this today after all.
 
I went back downstairs to install the fork. Everything went ok, and then I tried to insert the stem. Wouldn't fit! What the heck? I was sure I already had it in the fork?

Ah... must be the nut. Sure enough, took that off and the stem slid into the fork itself. Well that's an easy fix. I screwed it on to the section of the fork I had cut off, stuck that in the lathe, and did a little shaving down. I thought I took an action shot but must not have. Oh well, here's one of a test fit.
Stem_6425.JPG


Next I had to decide which brake to use. I have a new lever that will work with these but they look too modern and I've never been a fan of how they work, though to be fair I've only ever used the cheap versions.
Brake_6433.JPG


I'd rather use these from the Rock Hopper
Brake_6434.JPG


But the levers on the Rock Hopper are trashed. Everything is supposed to be in a straight line on this
Lever_6440.JPG


I wasn't so sure I'd be able to straighten it all back up, but it was worthless bent and would only be slightly more worthless if I broke it. Out came the propane torch and the big Crescent wrench. It was succesful but you'll just have to take my word for it, no action shots.

MockUp_6443.JPG


I had messed around with this enough for one day so that's where I stopped. My shop is a disaster area so tomorrow will be a clean up day with no work done. I have to make room for my motorycles down there, I think my riding season is over and it's time to start parking my car in the garage.
 
I def like the cantilever brakes on there better than the V-brakes; much more vintage and fits the build. Your 122.5 spindle BB should be fine for chain rings and chain line. That's a pretty common length for mtb BB. The next hurdle will be finding a front derailleur that will have a clamp diameter to fit that Schwinn seat tube. And, you don't have any cable stops on that bike so you will have to fab some for all your cables / housing for brakes / shifting cables.

I like the look of it so far! My first 'big bike' was a 1965 Schwinn Typhoon. Got it for my birthday that year. It was red just like yours. I had it until the late '90s when I sold it to a friend who was getting into restoring and selling old bikes. Little did I know, I'd be into the vintage bike hobby so much myself back then!
 
I agree on the brake, now that I got the lever straightened out the canti is the one.

If I do go with the cassette hub I think I'll leave the front derailleur off. I've never been fond of front derailleurs anyway. But the plan was to shim the Rock Hopper part rahter than find a differnt one - I've got to stop spending money on this!

I checked on cable clamps and they seem expensive. I thought I might try zip ties... seriously. One of the things I still need to do is figure out if I have cables around that would work. I would need a rear brake caliper though.

The current plan is to try to lace the 2 speed hub to the Rock Hopper rim using the stock spokes. That rim has a couple zigs and zags in it that I wasn't able to get out. They would be noticable with a rim brake, but with a big tire and a coaster brake it might work. Then use the front wheel from the Rock Hopper untouched. That would leave the new front tire and rear rim for the cassette hub set up.

It's a theory anyway. I'm sure it'll change as I start working on it again.

My brother had a Typhoon when I was a kid. It was BEAT. When he got a new bike my dad asked if I wanted it. It was too big so I said no. We left it next to a donation box and on the way home I had major second thoughts. When we went back it was already gone. I've wanted a Typhoon ever since!
 
I made a mistake in my last post - the plan was to lace the two speed to the rockhopper rim with the NEW spokes, and the new rim to the Rock Hopper hub with the old spokes.

I did that this afternoon and the Rock Hopper spokes are a couple mm too short for the new rims. They physically go together, but won't be as strong as they could be...

Here's where I ended up today.
MockUp_6468.JPG


The seat height is where it needs to be. The bars are too narrow. I'll be putting the Rock Hopper bars on it tomorrow. They are not as high but are wider, and alloy vs the steel ones on there now.

I really need to decide which way I'm going with this, two speed or six speed... when the spokes show up I'll lace the two speed hub onto the other rim. the spokes will be too long but the way the rim is made it should still work. Proof of concept anyway.

I'm not a big fan of the BB adapter, the way it's made it blocks access to the locknut. One more detail I've learned so when I put the next one together it'll be better. I'm looking for a 1962 frame to apply all my new knowledge to. ;-)

If I build this with the 6 speed hub I will have used nothing from the Breeze I bought as a donor. That means I can build a skinny tire bike too! Or sell the hub for more than I bought the Breeze for and cover some of my over spending on this thing!
 
The big brown truck stopped by today!
Parts_6291.jpg


Yeah, doesn't look like much, because it really isn't. The fork won't arrive until later in the week and that's what I'm really waiting for.

But there were a couple things I could play with. When I was ordering this I saw seat post clamps on sale. I needed a 24.5 clamp I think, and the smallest they had was 25.4. But they also sold a shim to bring a 21.1 stem up to 22.2. That's the wrong diameter but (almost) the right thickness, so what the heck. I'm not a fan of the stock clamp, that shim should open up enough to fit, and it doesn't go around the entire tube so maybe being a touch thick wouldn't be an issue.

Proof of concept looked good
SeatpostClamp_6293.jpg


So I cut it down and slipped it all in place with a new post.
SeatpostClamp_6302.jpg


The nice thing about the new post is, it's larger on top so common seat hardware fits and it can't fall down into the frame. I had a clamp and seat on the shelf so I slapped those on too.
Seat_6298.jpg


At some point it occurred to me that I was planning to put a road hub on the front of what was now intended to be an off road bike... while my Sanctuary 7 cruisier had a Deore XT hub on it... That's silly. If you're going to build two wheels you may as well build three, right?

I did the time honored tape the new rim on the old one switcheroo to get teh Deore hub on the Typhoon.
Rims_6316.jpg


Sanctuary 7 on top (not a stock rim) and Typhoon on bottom. I know what you're thinking - I didn't buy the rims I said I was going to! No, I did not. Because I changed my mind.

Are you seeing a pattern here???

I bought these instead for a few reasons. They aren't polished. They are a name brand. They cost $5 less per rim. And the ERD was .25mm off what I have written down for the Sanctuary 7 rims. That means I could use the same spokes with the Deore hub.

When I put the two rims side by side I had my doubts though. It looked like the one had a dropped center and the other didn't. The good news is the spokes were a touch on the long side for the old rims, so they worked out great for the new ones. I meant to put a picture here showing the spokes in the new rim, but I managed to delete all my photos from today before I intended to, so here's one that got saved before the delete, showing the rim contours, old on left, new on right.
Rims_6315.jpg


I was pretty happy with how this rim trued up. I was going to wait to put the tire on but once the wheel was done I had to see how it looked. That picture got deleted so here's one of the hub in place in the wrong fork instead.
Hub_6327.jpg


Tomorrow the new front hub I'm not using on this, pedals I will probably use, and a new chain that it turns out I don't need are supposed to show up. The next step will probably be ordering spokes for the next two wheels. Then maybe harvest more parts off the RockHopper while I wait for the fork.

Then I'll be waiting for spokes to lace up the rear wheel. And then... it will be done?

Nope.

I won't call it done because I have a tendancy to change my mind. All bets are off until much closer to the deadline.
I like what you are doing to this Schwinn product. Those Wald shims are very useful for shimming the seat clamp to an upside down stock Schwinn steel seatpost. Most of the seat clamps for cruiser bikes use a seat clamp made for a 7/8" seatpost. Schwinn's are 13/16". Slip on the Wald shim over an upside down Schwinn seatpost and now you have a 7/8" diameter post that will fit your seatpost clamp very well. The stock Schwinn seatpost clamp fits the stock Schwinn seatpost that necks down to 5/8" , I think, and I consider them way too weak for a person my size. I'm getting set to rebuild a Schwinn Varsity with all after market fittings. The seatpost clamp is a problem and your solution is elegant. They also make retro BMX clamps that have a hinge and these will clamp the post tube well. I have used the slightly bigger size clamp and shaved a bit off the inside of the aluminum clamp right where the clamp bolt goes through. This allows the clamp to be clamped even tighter which will fit a Schwinn seatpost tube. I haven't had any problem with the clamp I modified that way.
 
I have GOT to stop late night parts buying.

Last night (this morning? Around 2am) I ordered almost everything I need to do this up as a 6 speed. I will be one derailleur hanger short of what I need.

Which is kind of ok I suppose.

But I also added parts for a different build, which would be based on a bike I don't even own.

But it gets better. In my head I was building this bike up using the two-speed kick back hub I won't use if I build the Typhoon as a six speed. The better part? I forgot that little detail during my parts buying spree.

The parts I ordered for the bike i don't have?

Brake levers.

I ordered brake levers for a bike I don't have that wasn't going to use hand brakes anyway.

But they're cool levers! And they were on sale!
 
I put a little more time into the bike today, but I'm mostly waiting for the spokes to show up. I thought about other projects as I was working on this, and I've made the decison. Final answer - it will be built up as a two speed kickback. For now anyway. I'm going to pull this rim off the cassette hub and put it on the kickback hub when the spokes show.

I put the wider bars on it and hooked up the front brake. The carrier cable (straddle cable? I've forgotten what it's called) is too short but I found a new one in the tool box with all my bike tools.
MockUp_6475.JPG


You'll notice the right hand grip hasn't been installed. Because I'd have to remove it again to put a brake lever on if the two speed hub doesn't work out... ya gotta keep your options open.
 
The spokes still haven't shown up to build the two speed wheel, but I needed to pull the rim so I'd be ready when they do.

While I was at it, I thought I'd try fixing the Rock Hopper rim I had written off for hub brake use only. An idea popped into my head this morning while I was pretending to be asleep so my dog didn't bother me (Spoiler alert: It didn't work) and I figured why not? It might completely trash the rim but it might not.

The first thing I had to do was figure out where the rim was bent. I put it up against a rim I knew was good and messed around with it until I thought I had it figured out. I located where I thought the actual bend was, and the spots where it started to deviate from straight. Marked those and labeled the spot with the most offest as the place to pull from.
RimFix_6487.JPG


To the left of that spot is where I think the actual bend was. To the right is the gradual return to straightness. I'm basing that on how sharply the bad rim pulls away from the good one.

Then I set it up in my super special rim straightener fixture. It's got a two ton weight limit in this configuration, I was hoping that would be enough to move the aluminum...
RimFix_6490.JPG


I used steel to hold the rim down to start with, but before yanking on it decided to go with a little more giving set up to avoid crushing the rim. And once it was all in place, I started the yanking procedure.
RimFix_6493.JPG


Yankage had not yet been started in that shot but you get the idea. I did have a set up to measure how far I pulled on it since I wasn't sure how much springback I'd get. I'm not showing that though, patent applied for and all that.

Anyway, I did the initial yankage and pulled the rim back out. Set the bad rim on the good one, and discovered I WAY over estimated springback on the aluminum. I had pulled it too far. Oops. Ok, re-mark, re-clamp, re-yank. Repeat as needed.

You can see one of my clamp location marks here and how the rim starts to pull away to the left of it. At this point I had switched from painter's tape (remember when it was called masking tape?) to much more fancy paper clips. Eco friendlier. Organic. Much more better.
RimFix_6500.JPG


I went through the process I think five times before I was happy with it. The clamping marks kept moving closer together so I knew I was making progess. As the clamp marks got closer together the springback would change so it was really just a guess each time and my patent applied for measuring method was basically worthless... The pull mark moved a few times and changed direction twice when I over did things, when I got here I decided I would probably be chasing my tail trying to go further.

RimFix_6498.JPG


I think there is roughly a bajillion ways for this all to go wrong but so far it looked ok? Proof is in the pudding though, time to lace it up and see what I've got. If it was a new rim I'd be bummed at how it turned out but considering it was a bent rim that has road rash from being ridden/rolled on a flat tire, I'm good with it!


I have no idea if anything other than a grey arrow is showing up there^^^? If you see an arrow, click on it. I've never tried attaching a video before. Anyway, I should have taken a before video too but you'll just have to take my word for it. It seems to have worked. It's not perfect but it's good enough for who it's for!

And no, I'm not going to take a video of it in the truing stand. The flaws are WAY more noticable in the stand! :giggle:
 
Last edited:
The spokes showed up! SO I spent sometime this evening lacing up the two speed hub. No process pics, I just wasn't into it tonight. But I did weigh the wheel when I was done.
Wheel_6515.JPG


So now I'm here. I could finish it up with the Biopace chainring but a round one is supposed to show up on Wednesday so I'll wait for it.
MockUp_6520.JPG
 

Latest posts

Back
Top