This bike is a byproduct of our semi-annual pilgrimage to the swap meet at Raceway Park in Englishtown, NJ. A couple of friends and I would take a “mental health day” from work on the Friday of each swap meet and cruise around looking for projects. Ill-advised, peer-pressure-driven, and occasionally alcohol-fueled decisions were made as to what each year’s projects were going to be. After the first year, and the lack of major projects being purchased, it was evident that riding around on standard BMX and mountain bikes just wasn’t going to be a cool enough tribute to the swap meet gods. So….. After a couple of days looking through Craigslist I came across a Jesse James WCC chopper.
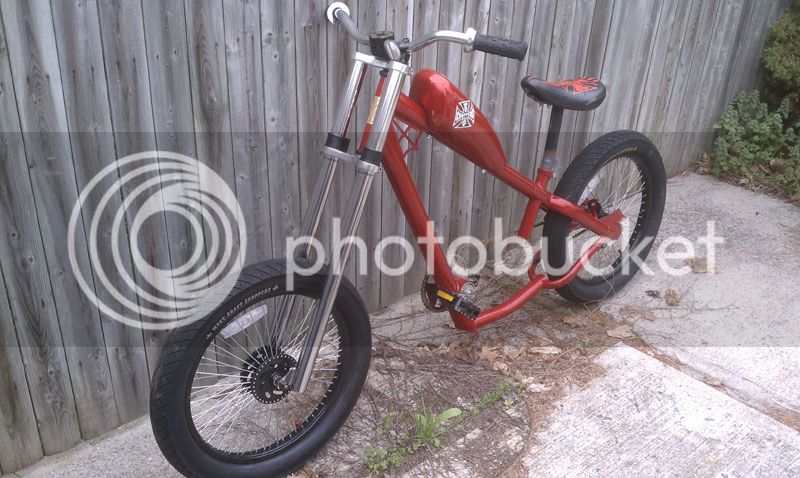
The first thing I noticed was that even though the previous owner modified the seat for a larger rider, I needed more room. So I borrowed a pair of apes and a leftover Walmart seat to see what kind of potential it had.
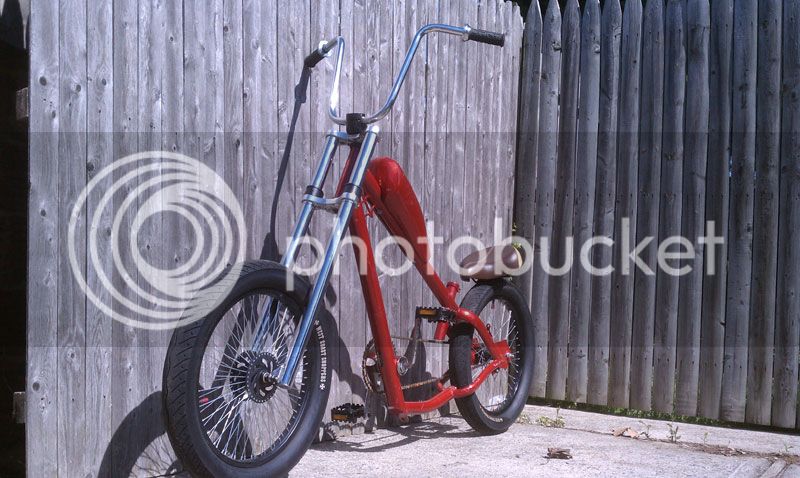
Not too shabby…. But the original red wasn’t what I wanted. I had already ordered some the metallic olive green used on Jeep Wranglers when I saw what the primer looked like on the bike.
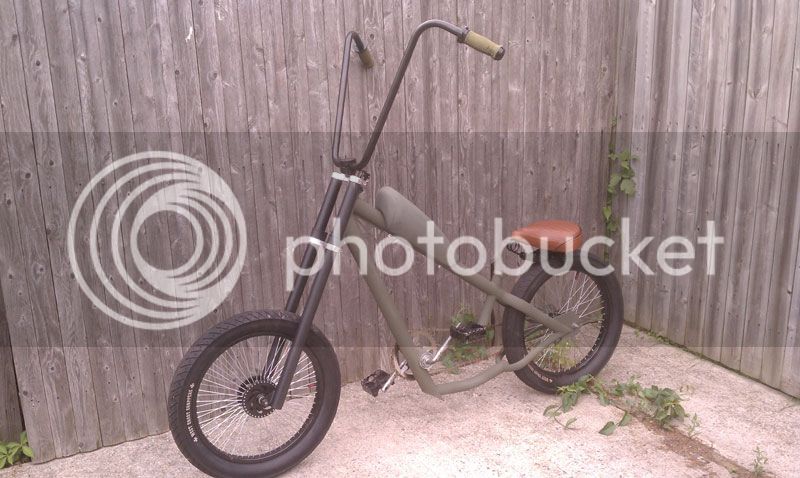
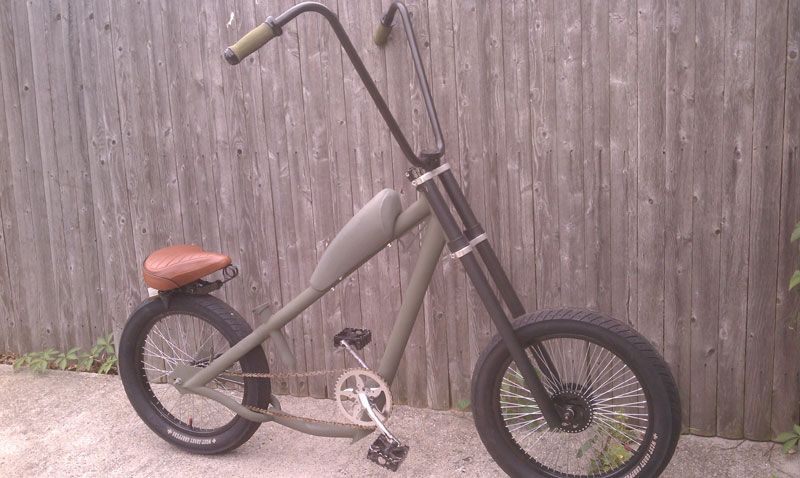
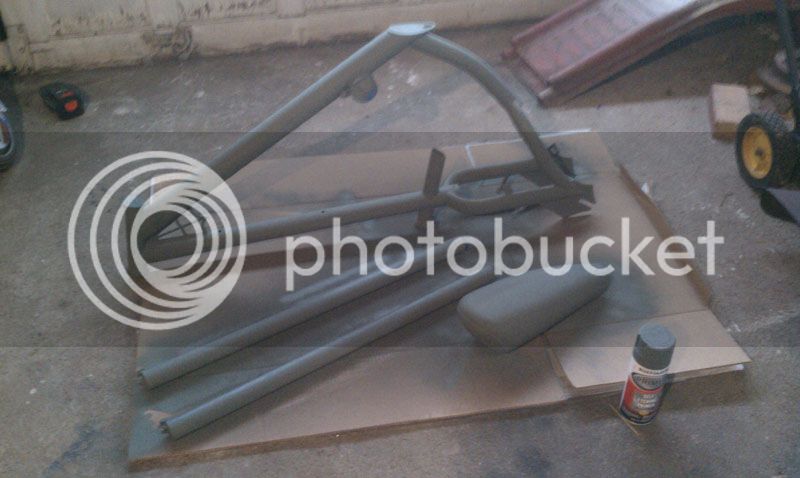 A set of 18” apes, Felt grips & seat, and a new sprocket started to round out the new flat paint.
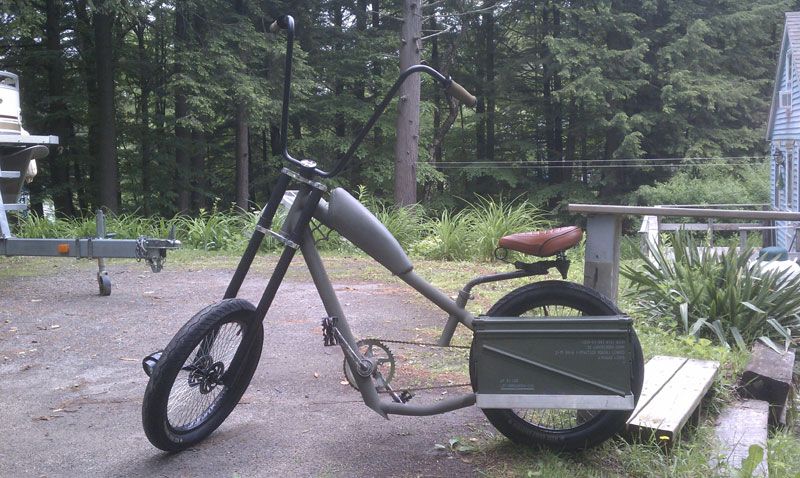
As a swap meet tribute, this bike needed some storage space. A military theme had started to grow, so I figured I’d help it along. A trip to the surplus store netted some ammo cans.
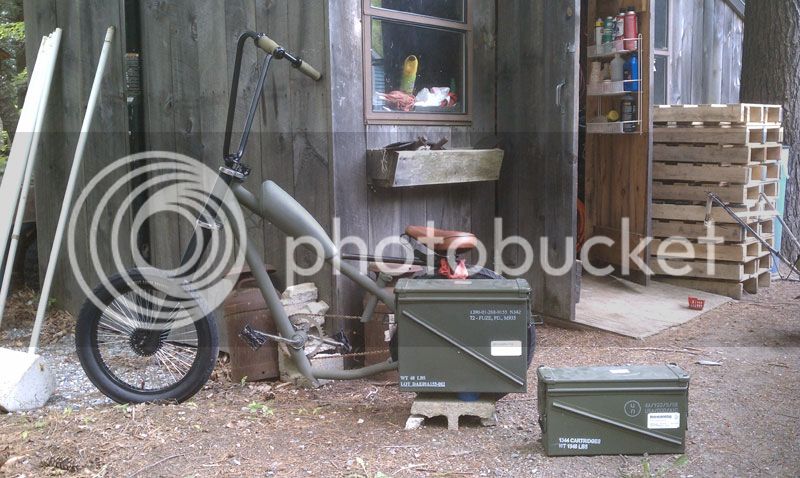
I wasn’t sure what size I wanted, but I knew I wanted to add tail lights, so I only got enough cans for one side. The large can was going to hit both the ground and my leg so I went with the “small” one.
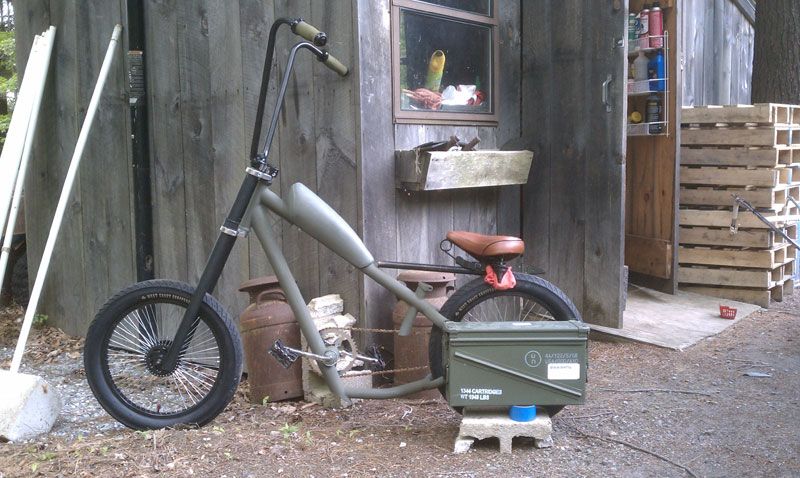
Between the weight of the can and whatever project parts I picked up I knew it was going to have to be solidly mounted.
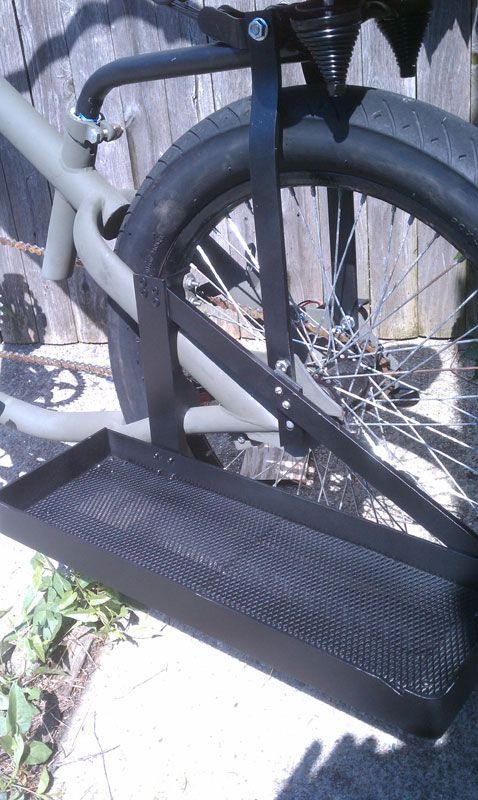
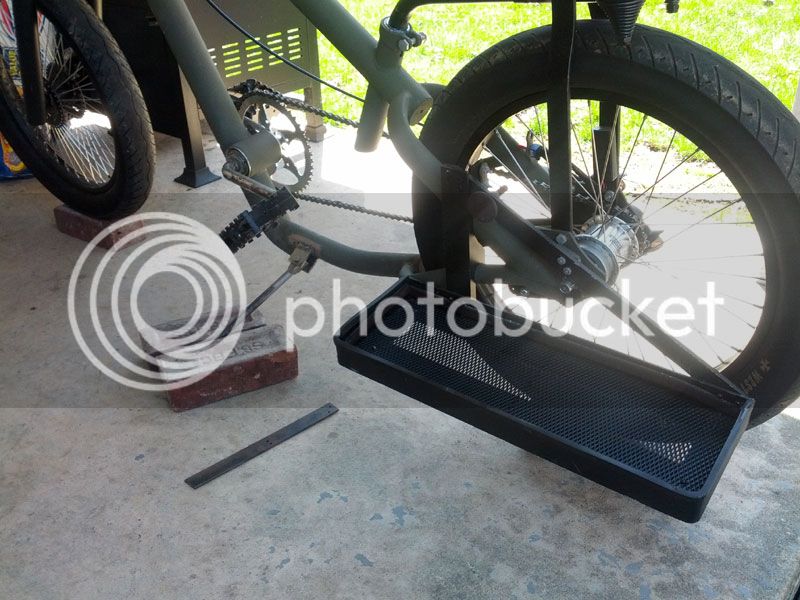
I took some aluminum angle stock and cut two notches that would hook over the frame. I made it so that it bolts to the original reflector mount. More angle stock was notched and bent to make the tray. Some flat stock and expanded mesh were added and the whole thing was riveted together. The center of the tray is supported on the axle nut.
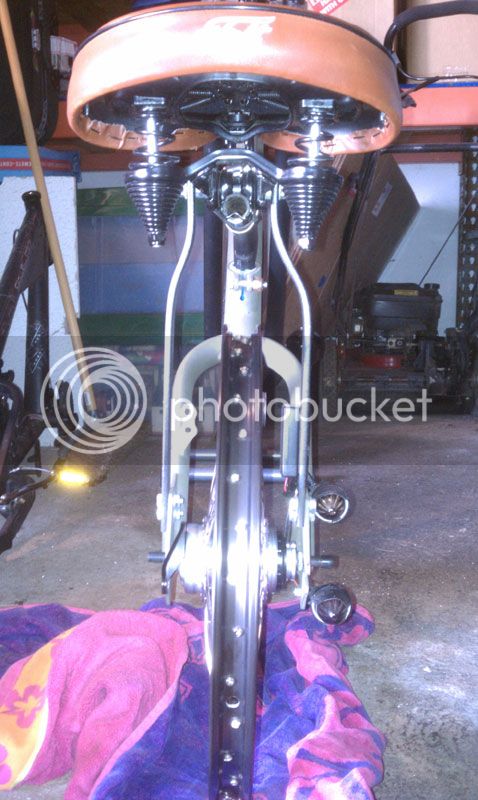
The storage was coming along great, but if I planned on actually riding this thing I was going to need a seat. Like I said before, I needed more room. The apes were going to give me enough leeway to put the seat pretty much wherever I wanted. Since that’s the case, let’s move it as far back as I can get away with. With a long seat post, a MAPP torch, and some elbow grease I got that seat way back. Unfortunately that long post was not going to be able to hold solidly without some support. I bent up two pieces of steel flat stock and bolted them to the dropouts. A piece of allthread holds the supports and the seat clamp all together.
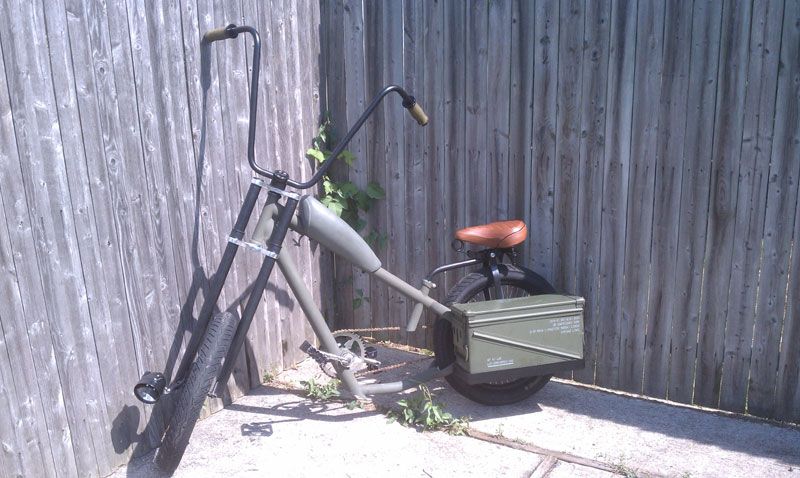
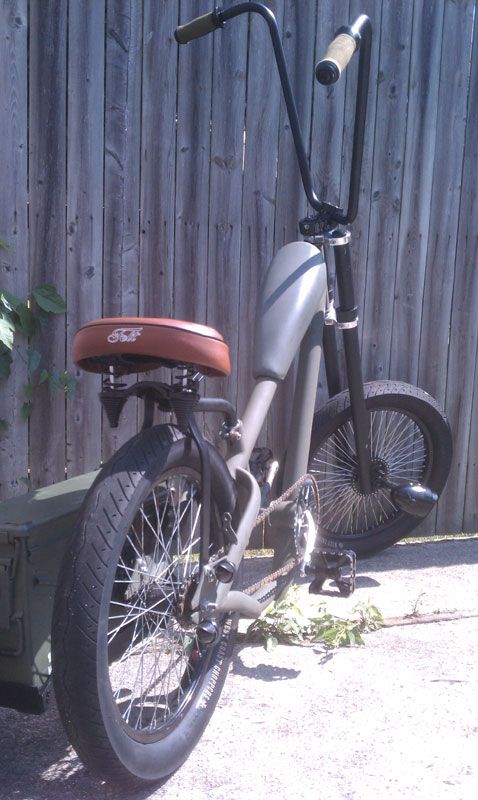
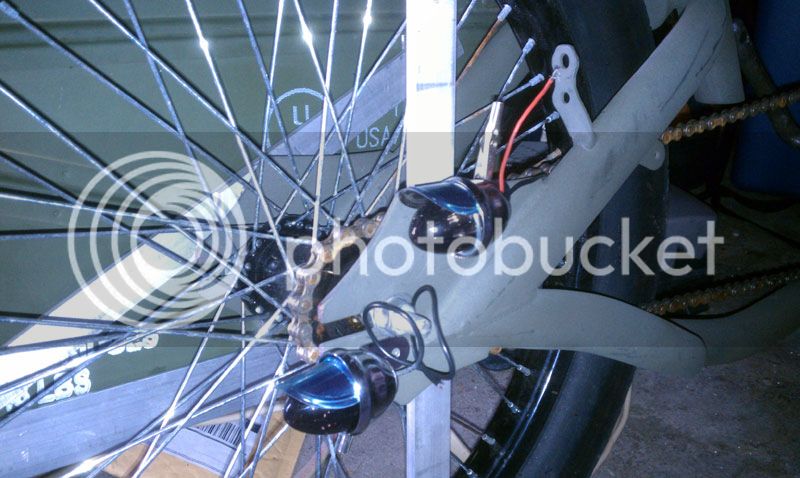
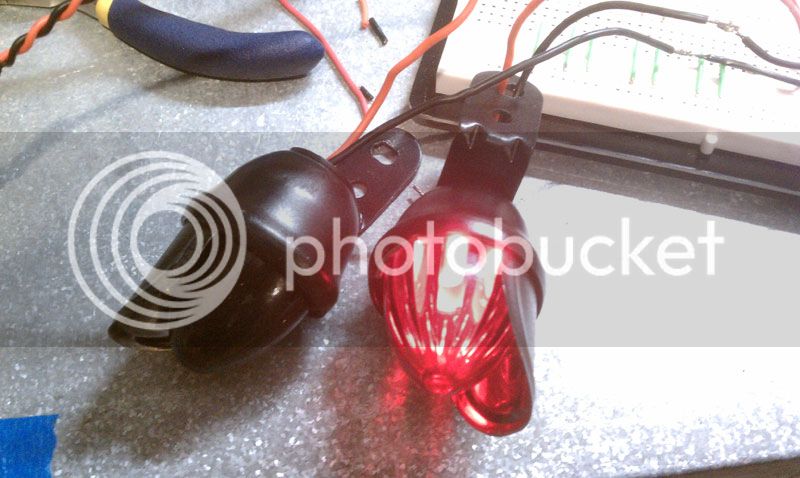
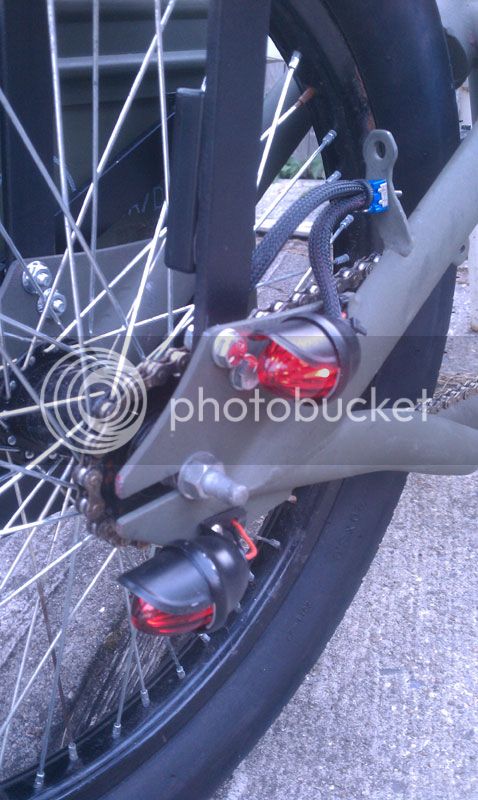
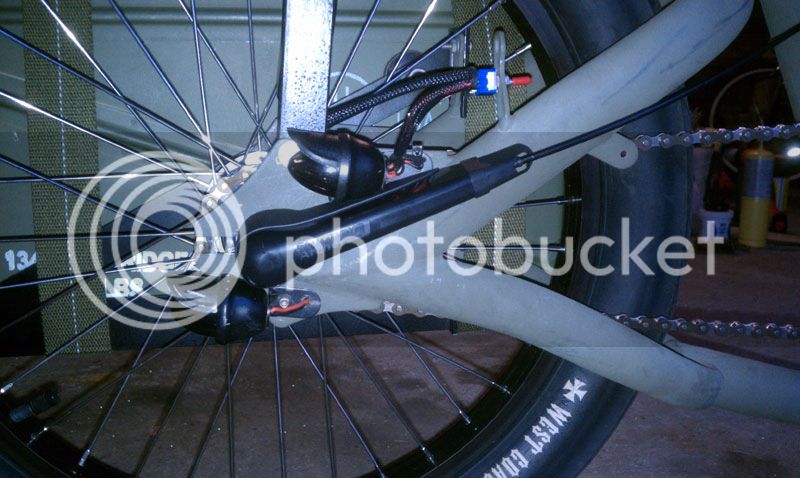
Okay, so now that I had a place to sit, it was time to get moving on those tail lights. A pair of baby bee lights with smoked lenses was a good place to start. A quick coat of black covered the chrome. The two AAA’s are mounted inside the seat support and the switch is mounted in the other reflector mount.
With the seat this far back and the size/location of the apes, a standing riding position was a treacherous proposition. That and the weight pretty much relegated the bike to being ridden on flat ground. It needed gears. Plus, this bike was going to be much cooler with a suicide shifter. I picked up a Sturmey Archer internal three speed to keep that clean uncluttered look I was going for. And in order to add more to the cool factor I laced it with a crow’s foot pattern.
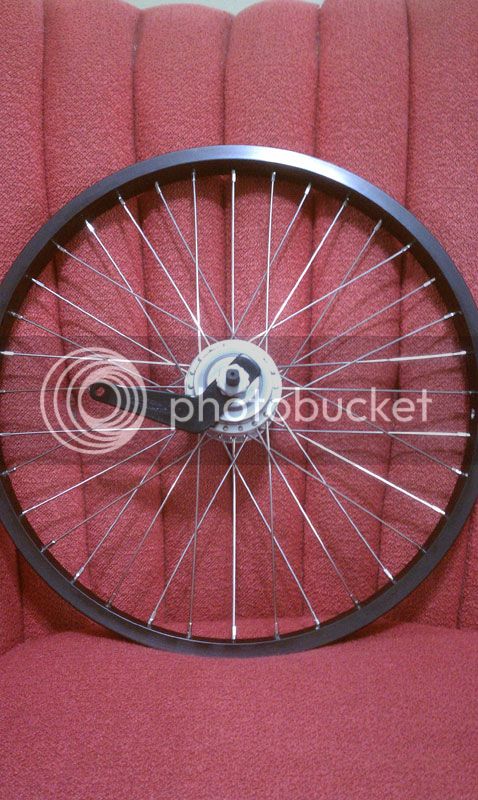
I knew what lengths I was going to need for the spokes, but didn’t think about dishing. I guess I got lucky on the first shot.
The cover fit along the frame and cleaned up the chain/cable/axle junction nicely.
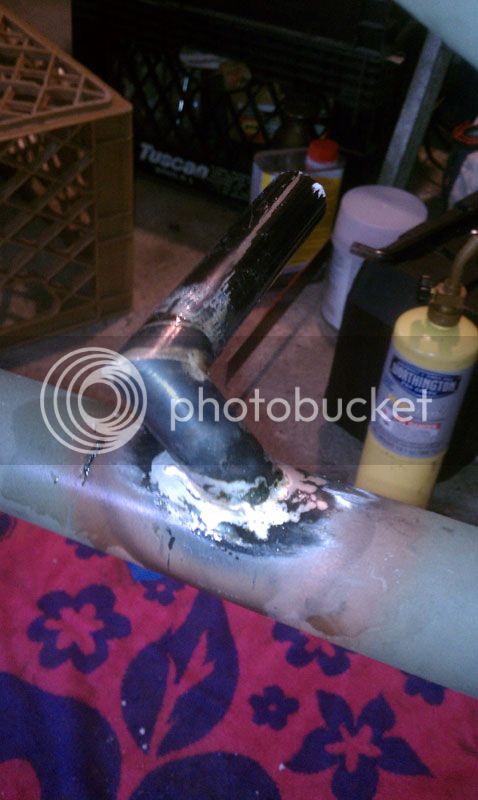
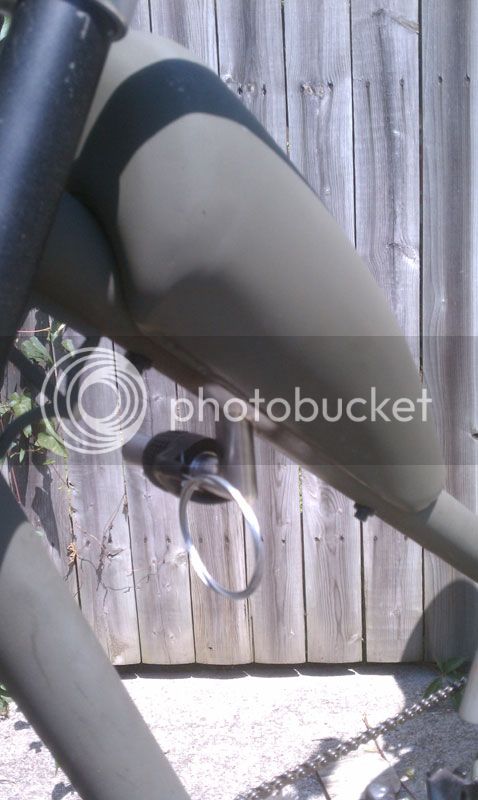
Now for the shifter…. The tail end of the bike was starting to get a little crowded so I decided that it need to be mounted up front somewhere. I brazed on a couple of pieces of sacrificed handle bar to the bottom of the top tube under the tank.
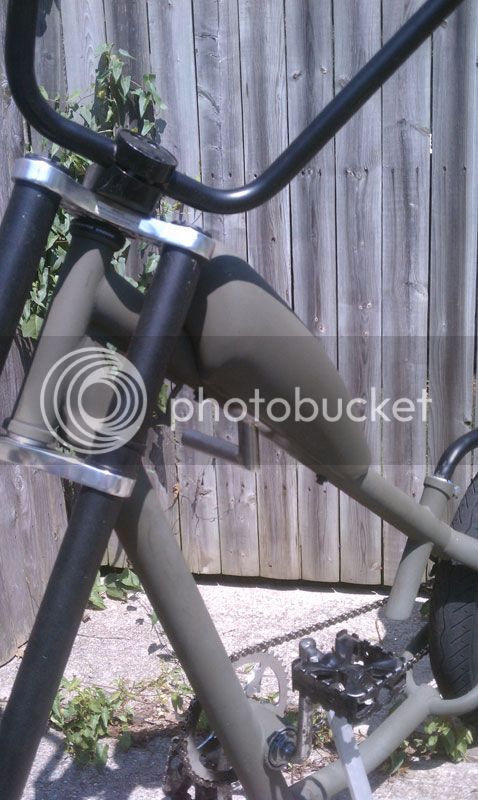
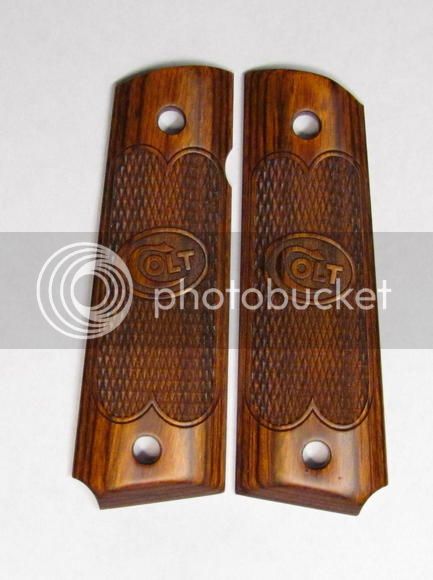
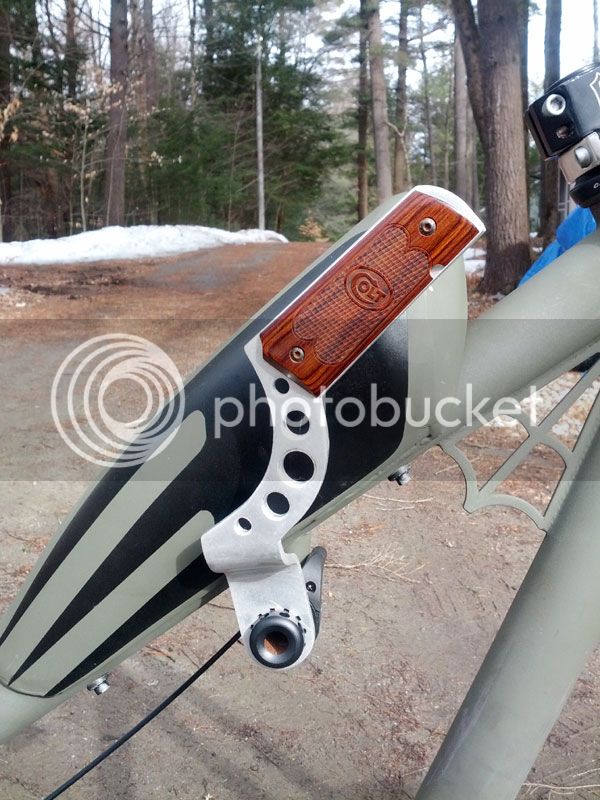
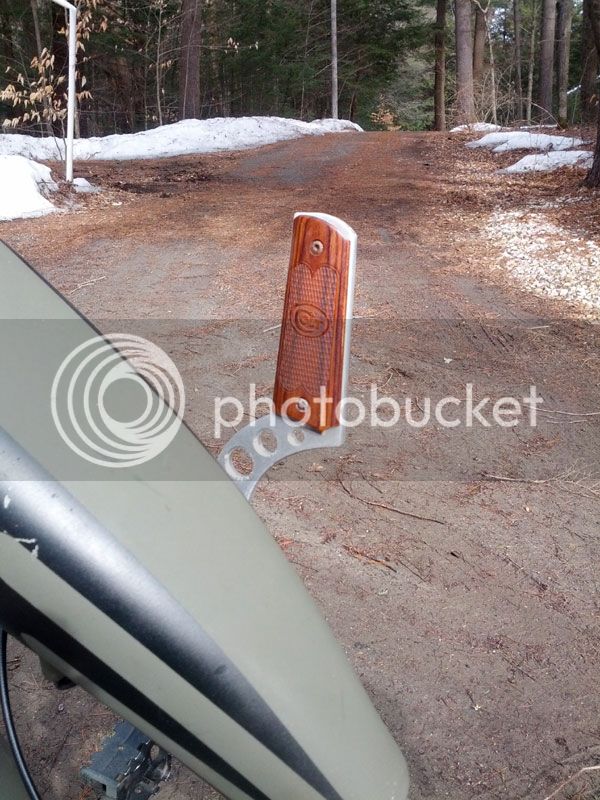
What kind of shifter would a surplus bike have? Well a pistol grip of course! So I picked up a pair of wooden 1911 grips.
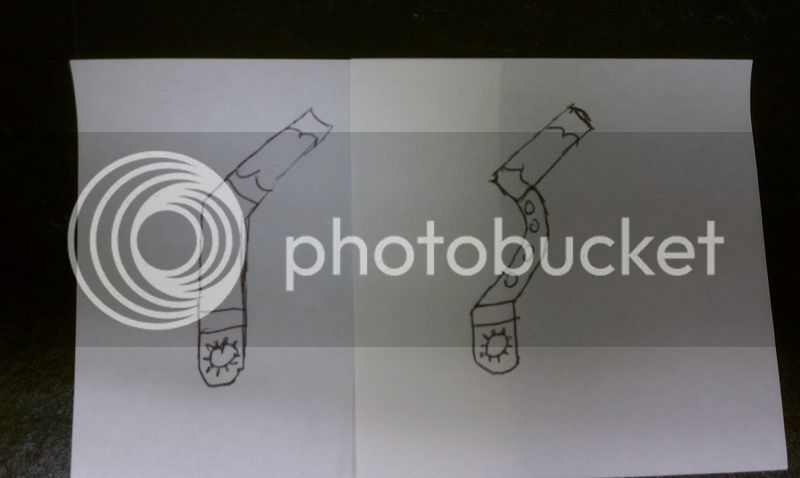
I bounced around a couple of ideas for the shape. I wanted the back of the grip to line up with top of the tank when it was all the way forward. The minimum requirements basic shifter wasn’t going to cut it. A more inspired design with speedholes was hatched.
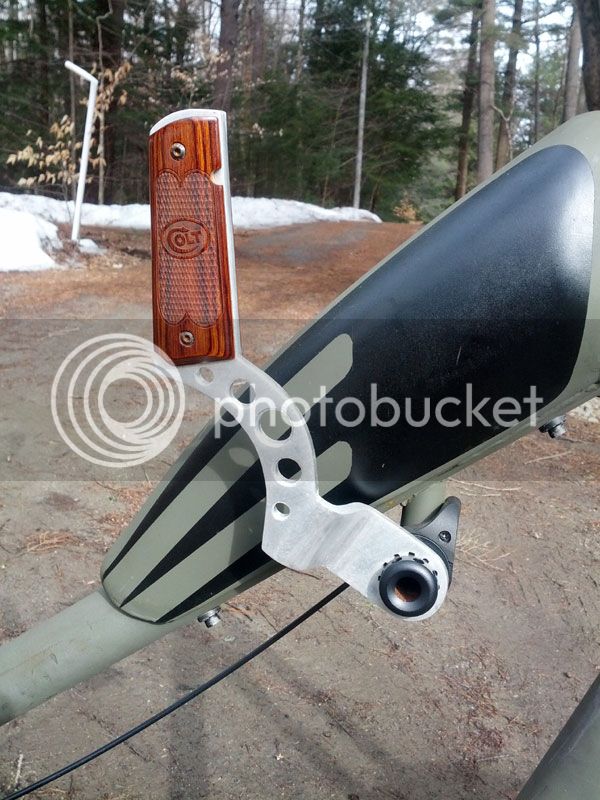
I cut out the initial shape from a piece of aluminum plate. I drilled several holes in a circle that matched the ribs on the shifter that index the rubber grip. I then drilled the larger center hole that fits over the shifter. I took a small square file and squared up the initial round holes so that they fit over the ribs. A bar end clamp cleans up the looks and makes sure it all stays on.
Up to this point I had used a notched piece of aluminum flat stock as a kickstand. I practically needed to have the planets come into alignment for it to work effectively. And it wasn’t cool.
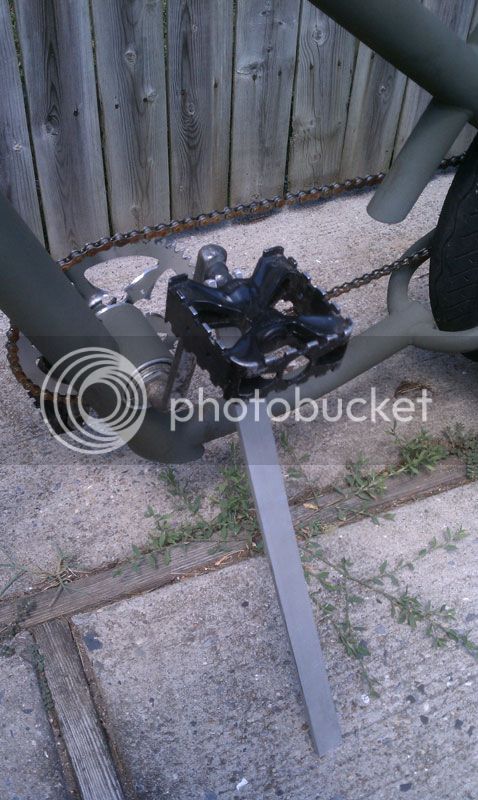
The original kickstand (which apparently disappeared before the initial Craigslist transaction) mounted to the rear axle. That wasn’t going to be an option with the ammo can there….. Hmm… What to do now…. It looks like a motorcycle…. Motorcycle kickstand. Duh. You would not believe how long it took me to come to that conclusion. We had just picked up a cheap MIG from a HF sidewalk sale. Time to melt stuff! Woah woah woah! Why don’t I take a couple of measurements first before turning the bike into a big puddle of molten slag?
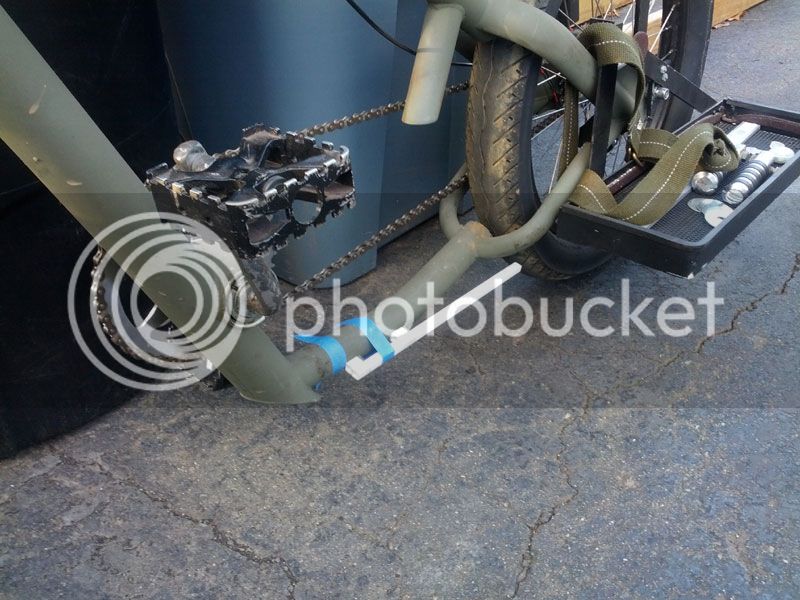
Actually, I like to take lots of measurements and go over all the possibilities if I’m doing something for the first time. For example: my proposed kickstand.
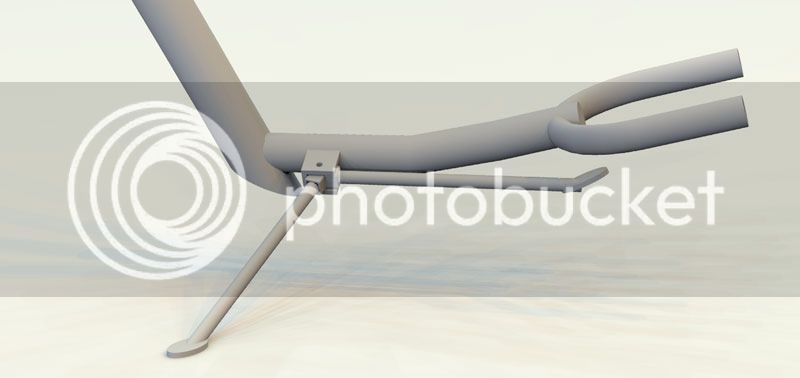
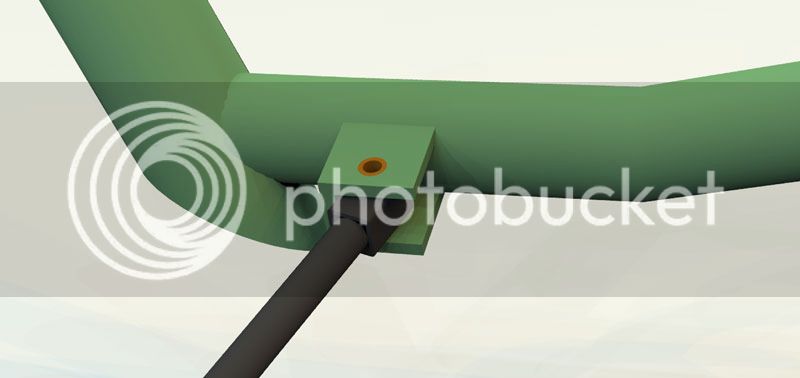
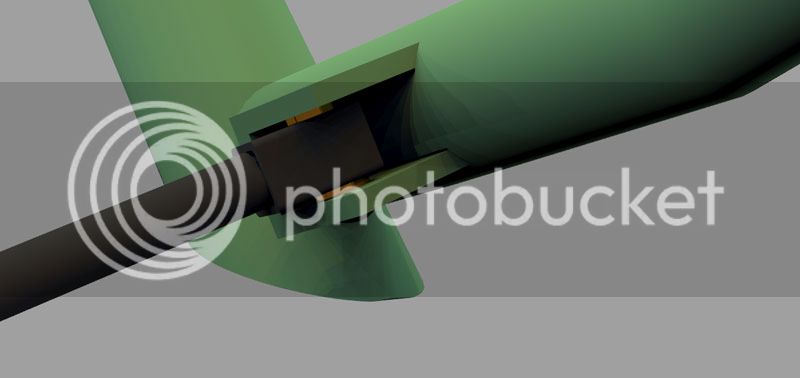
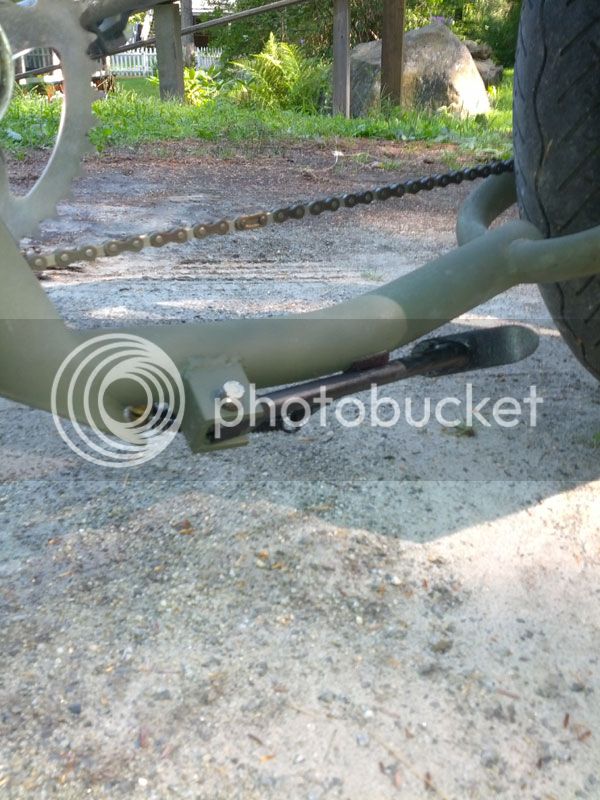
I took a length of round tube, sleeved the end in a piece of square tube to keep it aligned with the bushings, and bolted it to a couple of plates. At that point I did melt the daylights out of it. After some cleanup (okay, a whole ton of grinding and filing) I had a good start to a mount. It then got fishmouthed to fit to the frame.
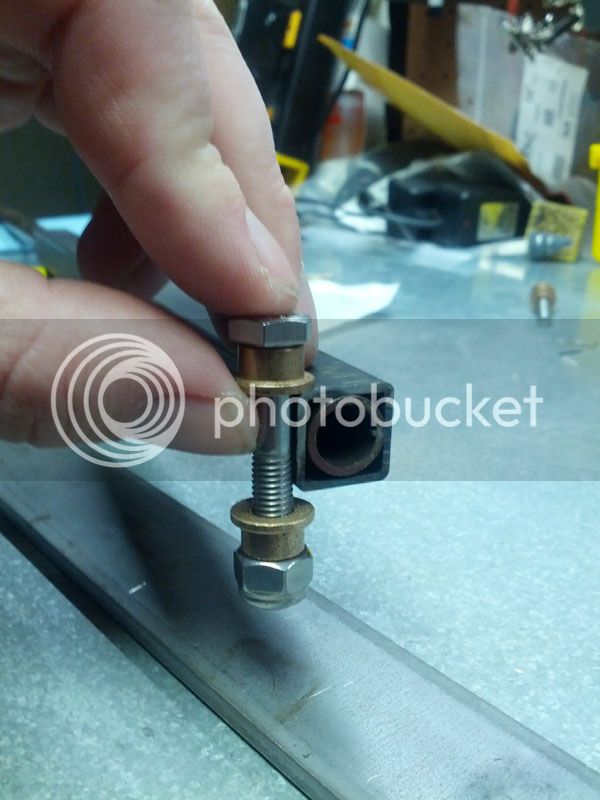
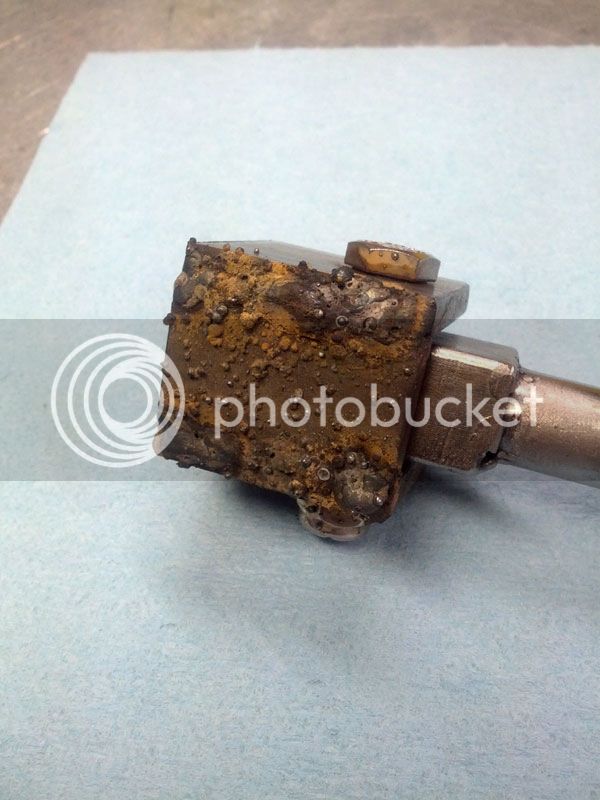
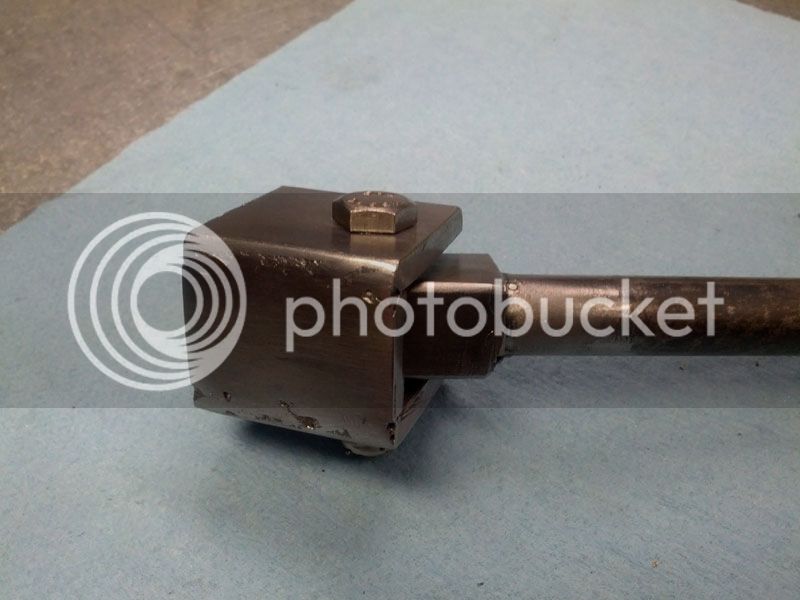
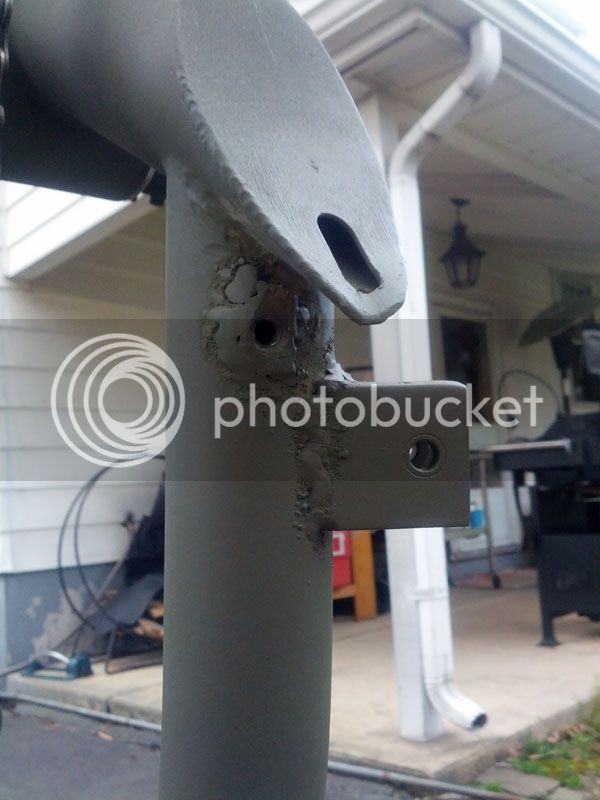
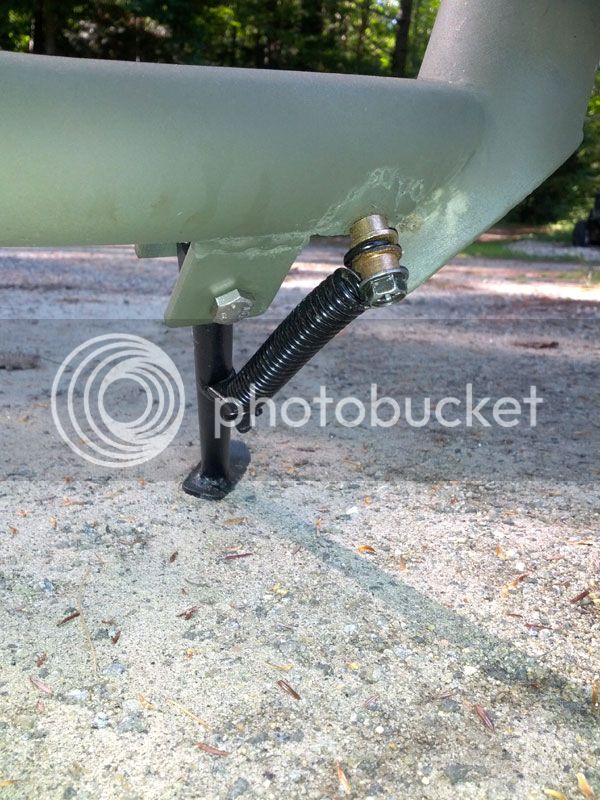
Now I needed a spring setup to keep everything in place. I’m not sure as to what it’s called but I welded this threaded insert into the bottom of the frame. A spring and the tab from an OCC kickstand rounded out the parts. (Insert more gnarly MIG welding.)
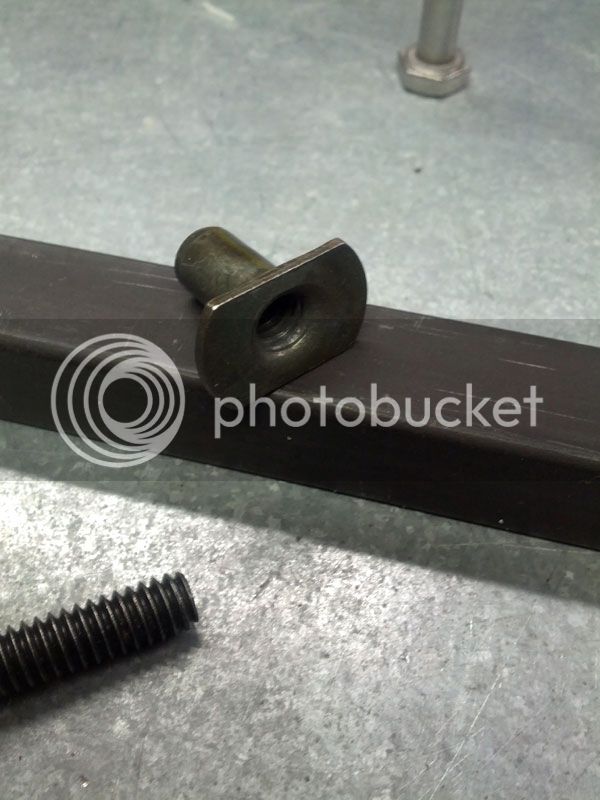
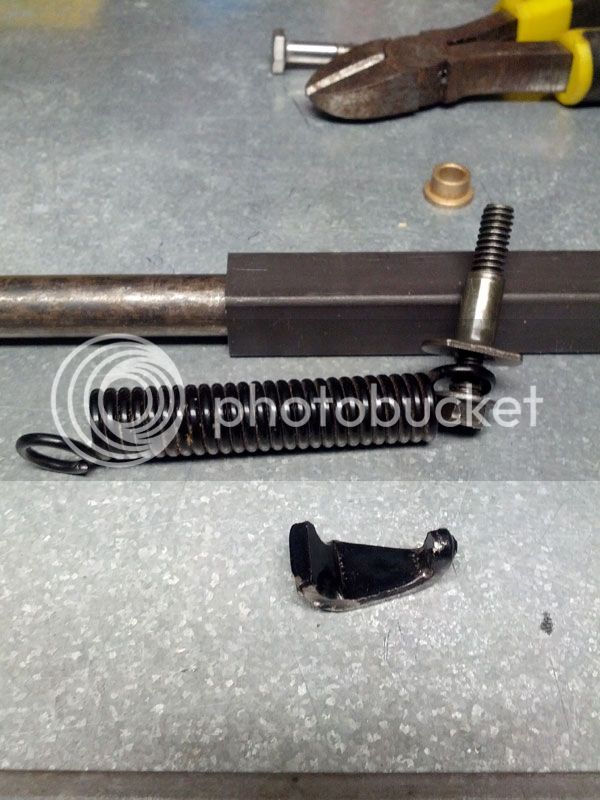
I had purposely not cut the kickstand tube to length. So now I needed to figure out how far over I wanted the bike to lean, cut to length, and then weld on the foot. I put the bike up on two bricks, set the kickstand down where I was happy with the stance, and then put two bricks around the kickstand to mark where the “ground” was. (This picture also shows how the ammo can tray sits on the frame. I added a threaded foot with a felt pad to the tray as well. The padded foot reduces vibration and rattling when the can is belted to the frame.)
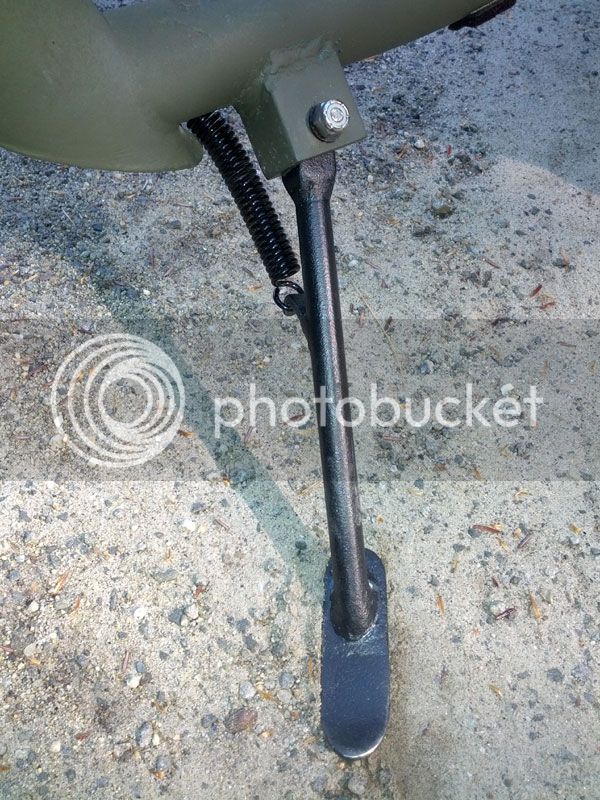
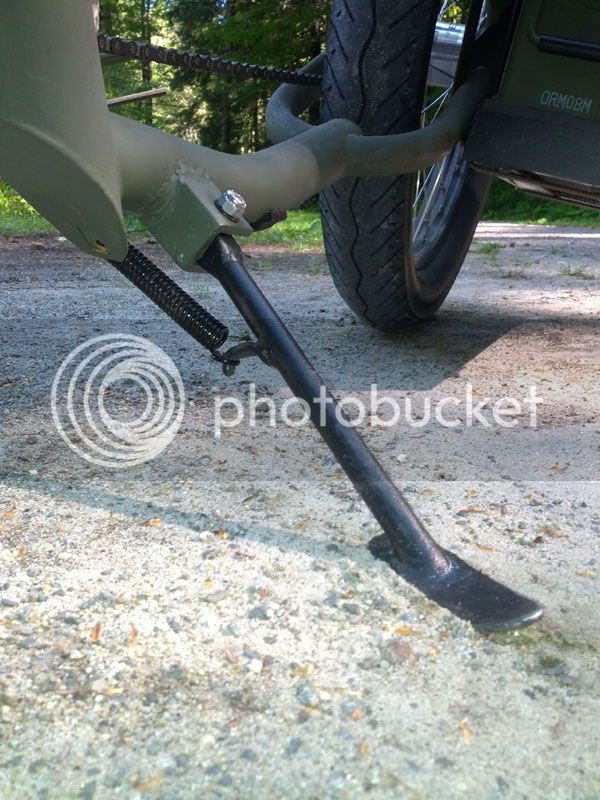
A little welding, some paint, and a piece of adhesive felt and it’s done.
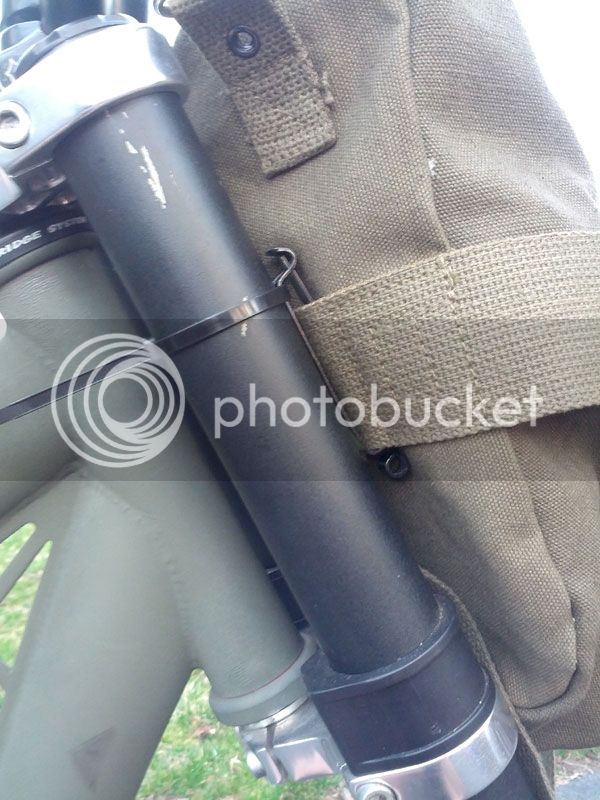
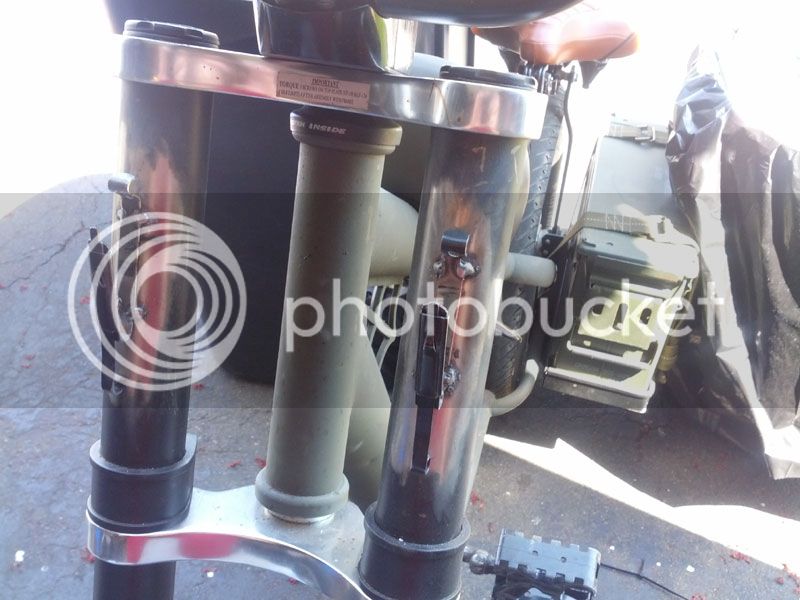
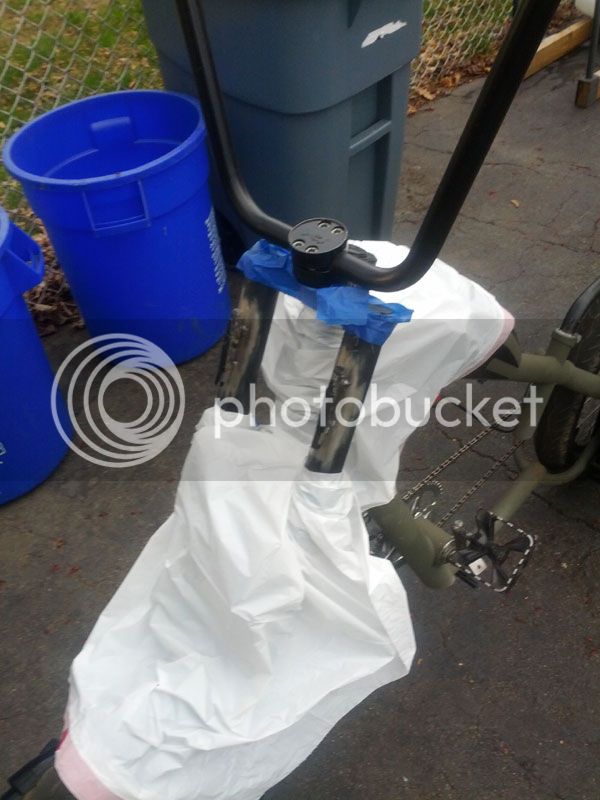
Since the headlight was down on the front axle, there was plenty of space on the triple trees for more storage. In this case it was a retro style hip pack. A couple of ALICE clips tacked on to the fork tubes and a soft sided lunchbox makes for an easily removable cooler. Unfortunately the fork tubes were not as easily removable after I tacked the clips on. Pshaw… I can repaint it right here.
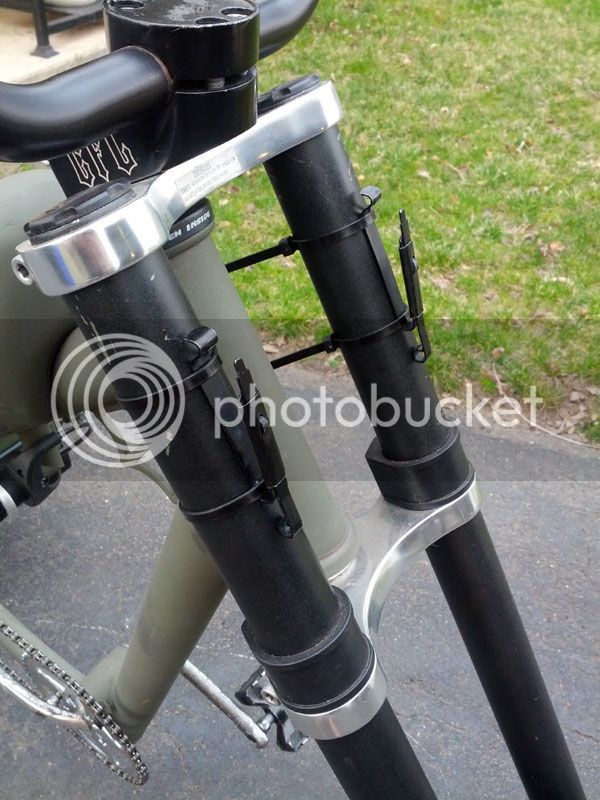
So after three years of continual growth and modification, here it is in its current form.
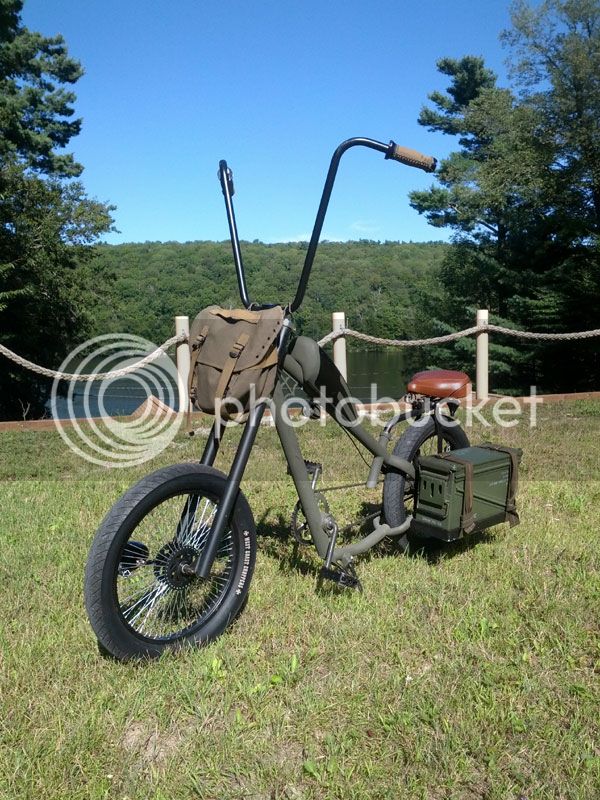

Noticed, I said “current form.” I have some ideas I would like to work on for front end suspension. I’ll have to see how it plays out.

The first thing I noticed was that even though the previous owner modified the seat for a larger rider, I needed more room. So I borrowed a pair of apes and a leftover Walmart seat to see what kind of potential it had.

Not too shabby…. But the original red wasn’t what I wanted. I had already ordered some the metallic olive green used on Jeep Wranglers when I saw what the primer looked like on the bike.
 A set of 18” apes, Felt grips & seat, and a new sprocket started to round out the new flat paint.

As a swap meet tribute, this bike needed some storage space. A military theme had started to grow, so I figured I’d help it along. A trip to the surplus store netted some ammo cans.

I wasn’t sure what size I wanted, but I knew I wanted to add tail lights, so I only got enough cans for one side. The large can was going to hit both the ground and my leg so I went with the “small” one.

Between the weight of the can and whatever project parts I picked up I knew it was going to have to be solidly mounted.

I took some aluminum angle stock and cut two notches that would hook over the frame. I made it so that it bolts to the original reflector mount. More angle stock was notched and bent to make the tray. Some flat stock and expanded mesh were added and the whole thing was riveted together. The center of the tray is supported on the axle nut.

The storage was coming along great, but if I planned on actually riding this thing I was going to need a seat. Like I said before, I needed more room. The apes were going to give me enough leeway to put the seat pretty much wherever I wanted. Since that’s the case, let’s move it as far back as I can get away with. With a long seat post, a MAPP torch, and some elbow grease I got that seat way back. Unfortunately that long post was not going to be able to hold solidly without some support. I bent up two pieces of steel flat stock and bolted them to the dropouts. A piece of allthread holds the supports and the seat clamp all together.


Okay, so now that I had a place to sit, it was time to get moving on those tail lights. A pair of baby bee lights with smoked lenses was a good place to start. A quick coat of black covered the chrome. The two AAA’s are mounted inside the seat support and the switch is mounted in the other reflector mount.


With the seat this far back and the size/location of the apes, a standing riding position was a treacherous proposition. That and the weight pretty much relegated the bike to being ridden on flat ground. It needed gears. Plus, this bike was going to be much cooler with a suicide shifter. I picked up a Sturmey Archer internal three speed to keep that clean uncluttered look I was going for.

I knew what lengths I was going to need for the spokes, but didn’t think about dishing. I guess I got lucky on the first shot.

The cover fit along the frame and cleaned up the chain/cable/axle junction nicely.

Now for the shifter…. The tail end of the bike was starting to get a little crowded so I decided that it need to be mounted up front somewhere. I brazed on a couple of pieces of sacrificed handle bar to the bottom of the top tube under the tank.


What kind of shifter would a surplus bike have? Well a pistol grip of course! So I picked up a pair of wooden 1911 grips.

I bounced around a couple of ideas for the shape. I wanted the back of the grip to line up with top of the tank when it was all the way forward. The minimum requirements basic shifter wasn’t going to cut it. A more inspired design with speedholes was hatched.

I cut out the initial shape from a piece of aluminum plate. I drilled several holes in a circle that matched the ribs on the shifter that index the rubber grip. I then drilled the larger center hole that fits over the shifter. I took a small square file and squared up the initial round holes so that they fit over the ribs. A bar end clamp cleans up the looks and makes sure it all stays on.


Up to this point I had used a notched piece of aluminum flat stock as a kickstand. I practically needed to have the planets come into alignment for it to work effectively. And it wasn’t cool.

The original kickstand (which apparently disappeared before the initial Craigslist transaction) mounted to the rear axle. That wasn’t going to be an option with the ammo can there….. Hmm… What to do now…. It looks like a motorcycle…. Motorcycle kickstand. Duh. You would not believe how long it took me to come to that conclusion. We had just picked up a cheap MIG from a HF sidewalk sale. Time to melt stuff! Woah woah woah! Why don’t I take a couple of measurements first before turning the bike into a big puddle of molten slag?

Actually, I like to take lots of measurements and go over all the possibilities if I’m doing something for the first time. For example: my proposed kickstand.


I took a length of round tube, sleeved the end in a piece of square tube to keep it aligned with the bushings, and bolted it to a couple of plates. At that point I did melt the daylights out of it. After some cleanup (okay, a whole ton of grinding and filing) I had a good start to a mount. It then got fishmouthed to fit to the frame.


Now I needed a spring setup to keep everything in place. I’m not sure as to what it’s called but I welded this threaded insert into the bottom of the frame. A spring and the tab from an OCC kickstand rounded out the parts. (Insert more gnarly MIG welding.)


I had purposely not cut the kickstand tube to length. So now I needed to figure out how far over I wanted the bike to lean, cut to length, and then weld on the foot. I put the bike up on two bricks, set the kickstand down where I was happy with the stance, and then put two bricks around the kickstand to mark where the “ground” was. (This picture also shows how the ammo can tray sits on the frame. I added a threaded foot with a felt pad to the tray as well. The padded foot reduces vibration and rattling when the can is belted to the frame.)

A little welding, some paint, and a piece of adhesive felt and it’s done.


Since the headlight was down on the front axle, there was plenty of space on the triple trees for more storage. In this case it was a retro style hip pack. A couple of ALICE clips tacked on to the fork tubes and a soft sided lunchbox makes for an easily removable cooler. Unfortunately the fork tubes were not as easily removable after I tacked the clips on. Pshaw… I can repaint it right here.


So after three years of continual growth and modification, here it is in its current form.


Noticed, I said “current form.” I have some ideas I would like to work on for front end suspension. I’ll have to see how it plays out.


