as always your outstanding in your paint work . Good job Buddy !!
You are using an out of date browser. It may not display this or other websites correctly.
You should upgrade or use an alternative browser.
You should upgrade or use an alternative browser.
(MBBO Class 1) "The Judge 5": Closing argument.
- Thread starter CRASH
- Start date


Help Support Rat Rod Bikes Bicycle Forum:
This site may earn a commission from merchant affiliate
links, including eBay, Amazon, and others.
Always love seeing the magic you do with paint!
That fade is freakin' sweet.
X2That fade is freakin' sweet.
It will be difficult to take this out. So pretty.

That's awesome..you get the seat yet? What about decals? Let's see them decals...;-)
I got the seat, but it's not what I wanted. What I wanted was a custom two-tone seat that will match the bike's colors. (I picked the colors based on the Naugahyde samples). So what I got was a used glitter red seat that matches the grips and sissy pad. The decals were set before the clear coat. The frame and fork are hiding under my bed to cure while I work on the other parts prepping them for install. For instance...
Who polishes a bottom bracket? Honestly, my OCD gets the better of me sometimes.
But on the flip side of that OCD, my shop is a complete mess. I had to stop for the night because after I polished the front fender, I went to grab the rear fender and it's not with my Rail parts. It's not with the Super Stock, or the Spyder, or the Fair Lady, or the Astro Flight or the girls Super Stock. (Yes... all these are either in a build state, or are going to be soon) So I'm panicking because I don't know where I put it, or would have put it other than with it's own parts. I'm slightly freaking out right now.
Hope you find it!
Luke.
Luke.
The frame and fork are hiding under my bed to cure while I work on the other parts prepping them for install.
Nice!
Who polishes a bottom bracket? Honestly, my OCD gets the better of me sometimes.
I've polished a few..that one looks amazing. Nice work.
Spent the morning tearing down my garage and putting it back together a little more neatly, all the while trying to find my missing rear fender. At the end, when I had tore into every where I could have put it, I was panicked. I started to think of ways to us different rear fender since there will be no hope of getting a proper one. So I took my garage trash can to the curb while thinking of ways. On the way back, I had the angle where I could see under my work bench. I saw a glint. And there it was. Now I have a neater garage, and a NOS rear Rail fender. By this time, it was time to get the kids in the car to go to our movie.
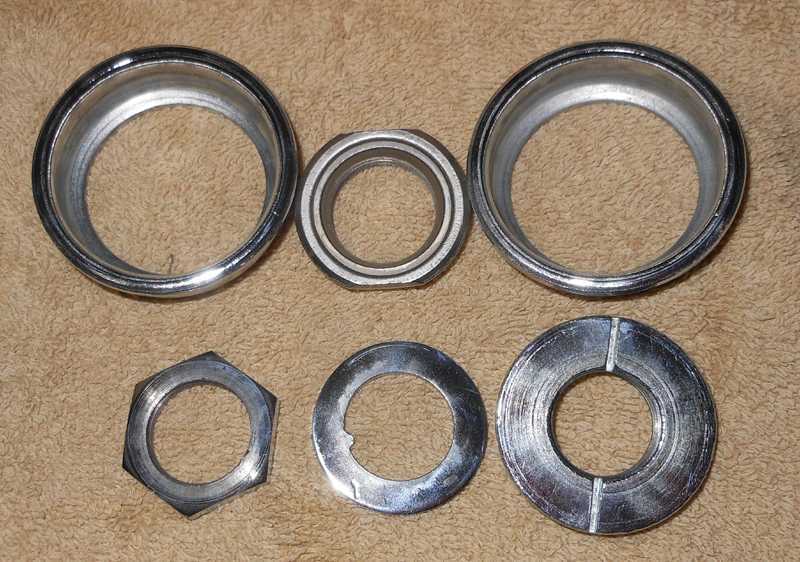
After the movie I got to work polishing. I cleaned up that rear fender, the front fender, the headset, the kick stand, a 48" Troxel sissy bar, and various pieces of hardware such as the fender bolts and the chain guard bolts. Speaking of headset...
Remember when I pulled the bearings out to clean the cages really good? Well, putting the cages back together didn't work out so well. They don't clear in the cups. Rather then fart around trying to make them work, I'm going to hunt down replacements at my LBS before Christmas.
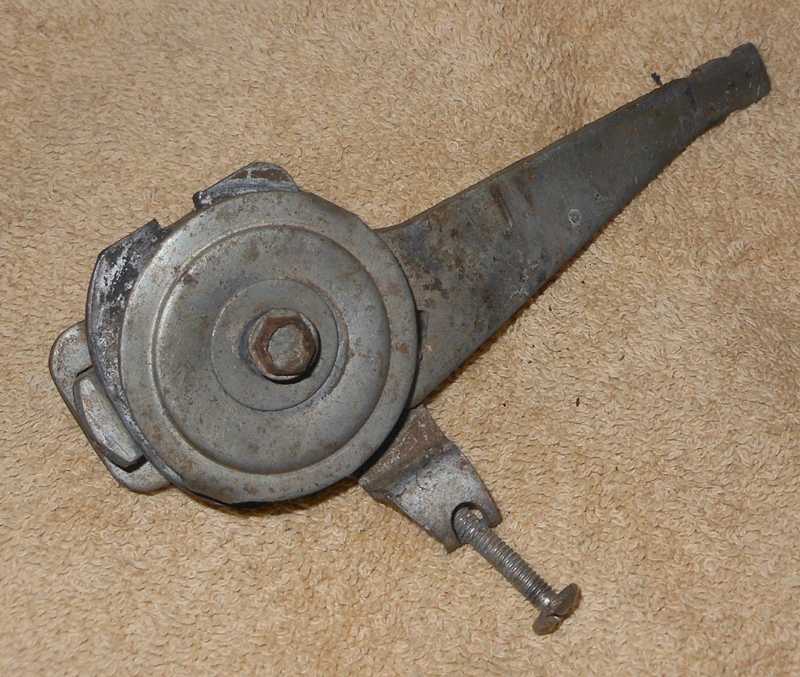
Speaking of LBS, I noticed tonight that I didn't have shift cable housing (in white). I thought I had got some, but I apparently didn't. So I ordered some. I'm also going to hope that my LBS has some (int white) They haven't to this point, which is why I'm always ordering it online. If the LBS doesn't have any, and what I ordered it doesn't get here in time, I'll have to make brake housing work. Why was I thinking of brake housing? Because another thing I polished was this.
Before...
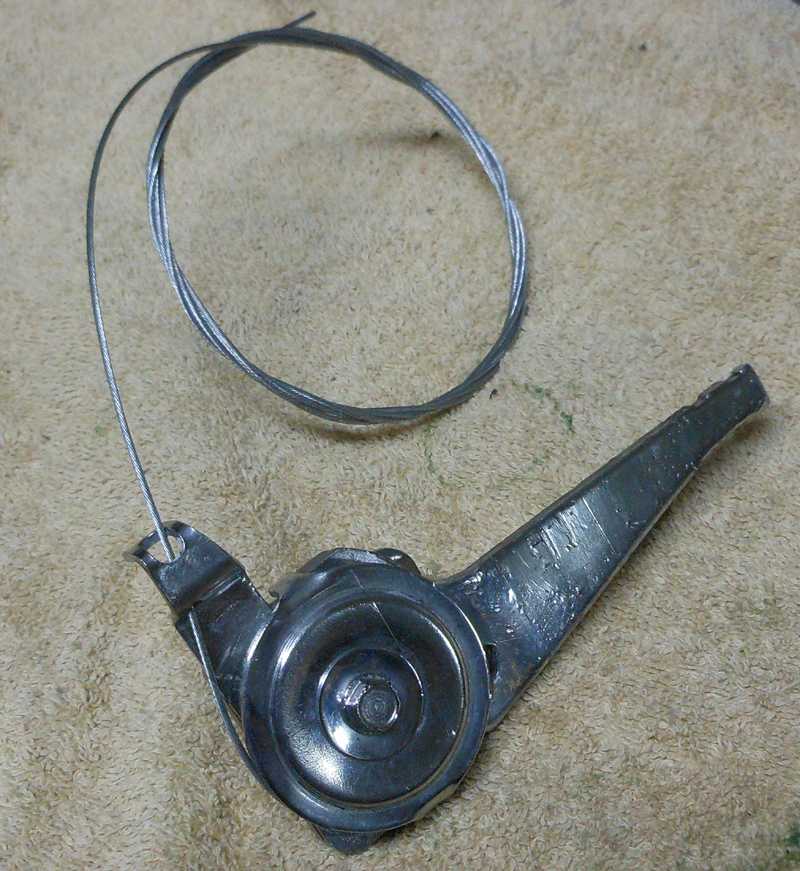
After...
After the movie I got to work polishing. I cleaned up that rear fender, the front fender, the headset, the kick stand, a 48" Troxel sissy bar, and various pieces of hardware such as the fender bolts and the chain guard bolts. Speaking of headset...
Remember when I pulled the bearings out to clean the cages really good? Well, putting the cages back together didn't work out so well. They don't clear in the cups. Rather then fart around trying to make them work, I'm going to hunt down replacements at my LBS before Christmas.
Speaking of LBS, I noticed tonight that I didn't have shift cable housing (in white). I thought I had got some, but I apparently didn't. So I ordered some. I'm also going to hope that my LBS has some (int white) They haven't to this point, which is why I'm always ordering it online. If the LBS doesn't have any, and what I ordered it doesn't get here in time, I'll have to make brake housing work. Why was I thinking of brake housing? Because another thing I polished was this.
Before...
After...
Oh the garage search! Been there. With me it's usually some tool I need. I've had the master link search go on for a long time too. Glad you found the fender.
I usually do the same procedure when I lose something. Start putting things away until it turns up.
Is that one of those hand parking brake/ line lock deals for a twin stick? Takes some rubbing to get cad plated parts that shiny. Nicely done. Can't wait to see this one.
I usually do the same procedure when I lose something. Start putting things away until it turns up.
Is that one of those hand parking brake/ line lock deals for a twin stick? Takes some rubbing to get cad plated parts that shiny. Nicely done. Can't wait to see this one.
Must have been hard to pay attention to that movie!
Big Hero 6. It was actually really good. Recommended if you have kids.
Who the heck is working on a bike on Christmas Eve day? Oh, that's right... ME!! I've got so much to do and so many other plans I have to utilize what time I can. So here's what I've done...
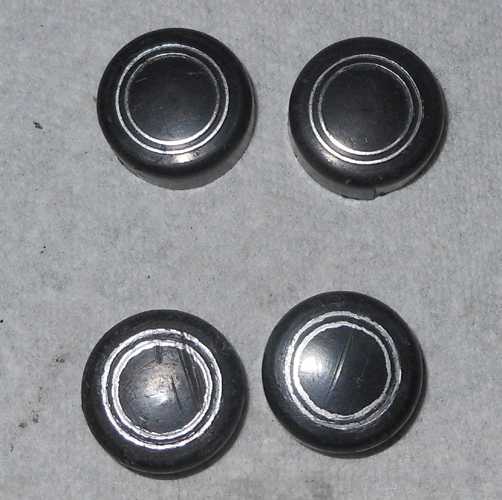
I've gone through a few of the Shimano Larks I have looking for one I can make look good. I had a few caps. One set had all the silver rubbed off...

...so I wanted to bring them back. I mounted each one on an 11mm socket and spun it around, making as smooth a line I could. Not perfect, but it's ok. Especially if you don't look too hard.
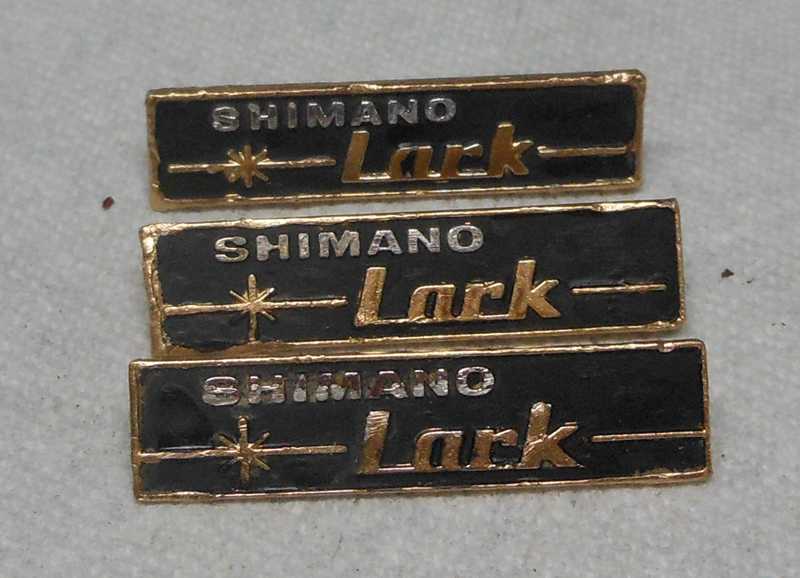
Another restoration piece for the Lark is the name plate. I wish I had taken a before photo, but they were pretty beat up. This is the "after" painting.
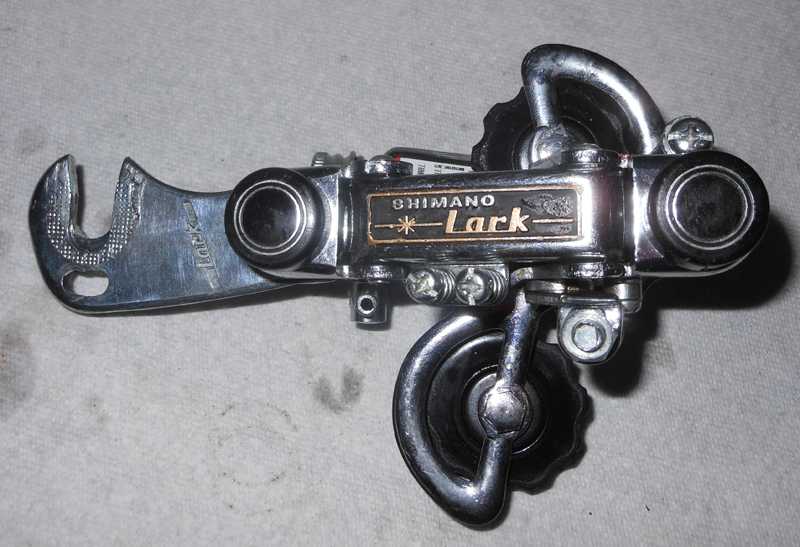
And here's my derailleur after a thorough cleaning, polishing, and lubing.
I've gone through a few of the Shimano Larks I have looking for one I can make look good. I had a few caps. One set had all the silver rubbed off...
...so I wanted to bring them back. I mounted each one on an 11mm socket and spun it around, making as smooth a line I could. Not perfect, but it's ok. Especially if you don't look too hard.
Another restoration piece for the Lark is the name plate. I wish I had taken a before photo, but they were pretty beat up. This is the "after" painting.
And here's my derailleur after a thorough cleaning, polishing, and lubing.
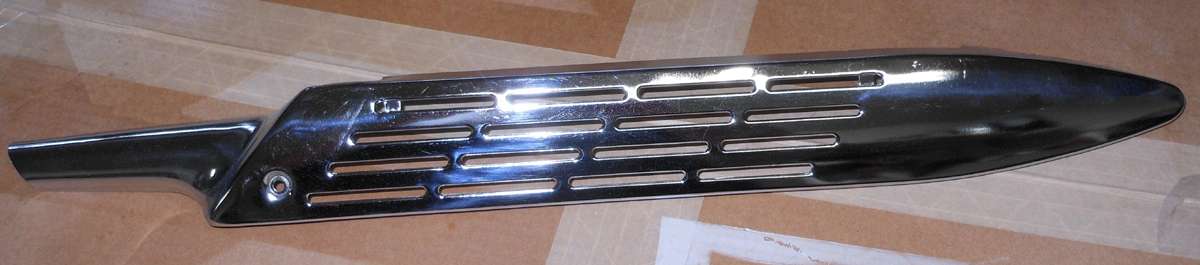
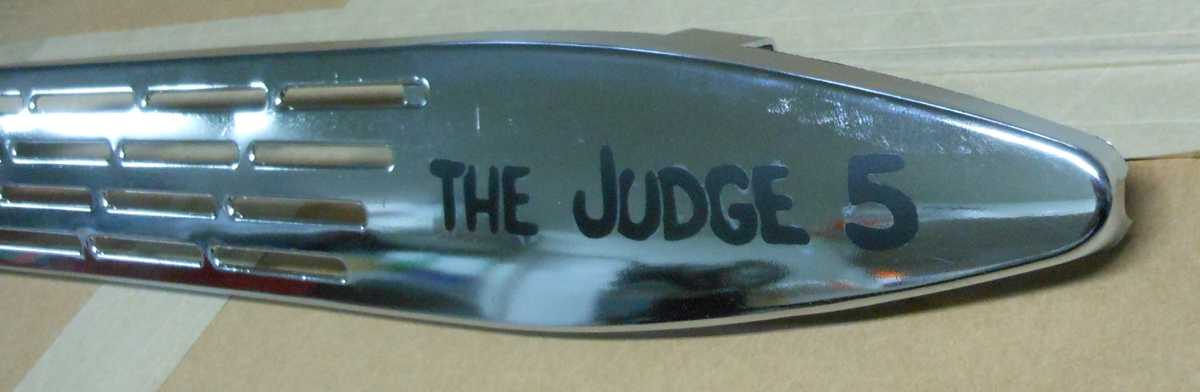
I labeled my Flaming Stack tonight.
I was very lucky to find a Flaming Stack in such good condition.
A friend drew the font letters based on a picture I found on the internet. I pulled a favor from another friend's work associate who digitied the drawing and cut a stencil for it. I placed the stencil... (the chrome looks black)
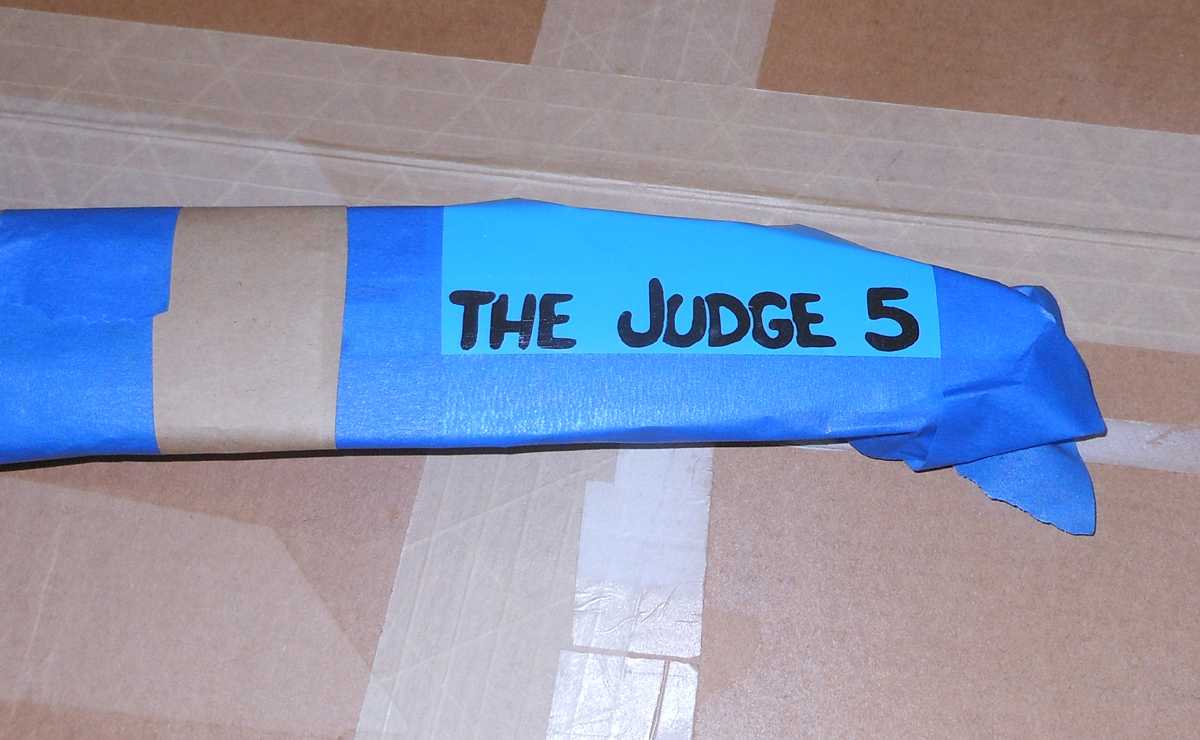
Shot it with some adhesion promoter than black primer...

Then pulled the stencil and hung it to dry for a few days.
I was very lucky to find a Flaming Stack in such good condition.
A friend drew the font letters based on a picture I found on the internet. I pulled a favor from another friend's work associate who digitied the drawing and cut a stencil for it. I placed the stencil... (the chrome looks black)
Shot it with some adhesion promoter than black primer...
Then pulled the stencil and hung it to dry for a few days.
Last edited:
Very cool work as always Crash!
Luke.
Luke.
That derailleur looks great!...love the flaming stack.
I was able to score an actual rear Cheater Slick that wasn't completely destroyed like the set that came with this bike. But it was not without it's issues. Mainly, there is a lot of weather cracking, and that cracking reveals a lot of white in the side wall. Seeing all this, I'm concerned about it being rideable for my son. I will probably find a new slick... maybe a Duro... and use the stencils I have to make a cheating Cheater Slick. But for now I'm going to use the real deal for this build.
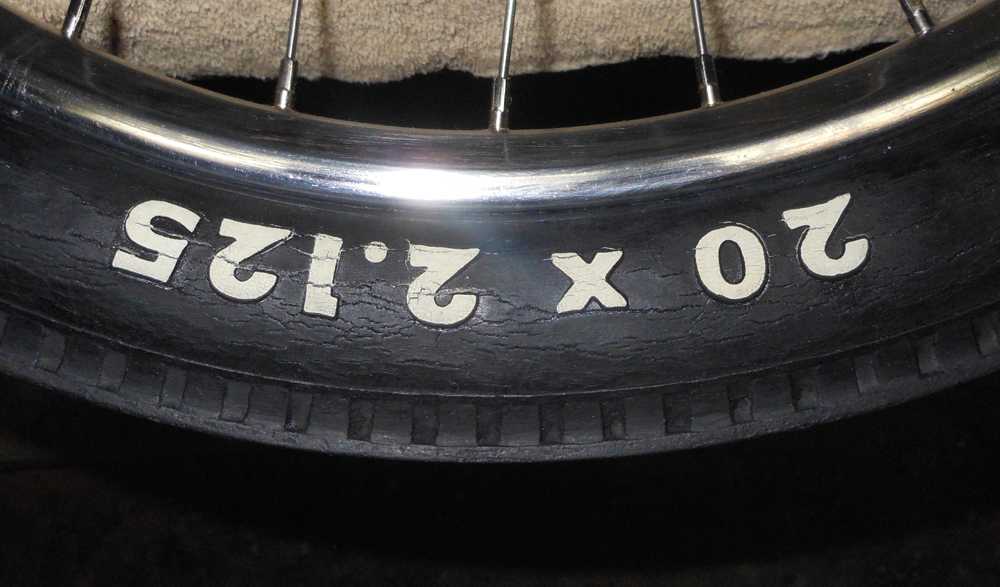
So the question was, what should I do to make the tire look black again. There were several suggestions, but ultimately since I'm am really worried about time, I decided to go with my gut and use shoe polish instead of trying some paint and having to spend a lot of time masking everything off.
So here is before. I cleaned the tire up real well with Wesley's Tire Bleach. It had a lot of dirt embedded in it. I also found a lot of broke off thorns in the tread after it was cleaned up.
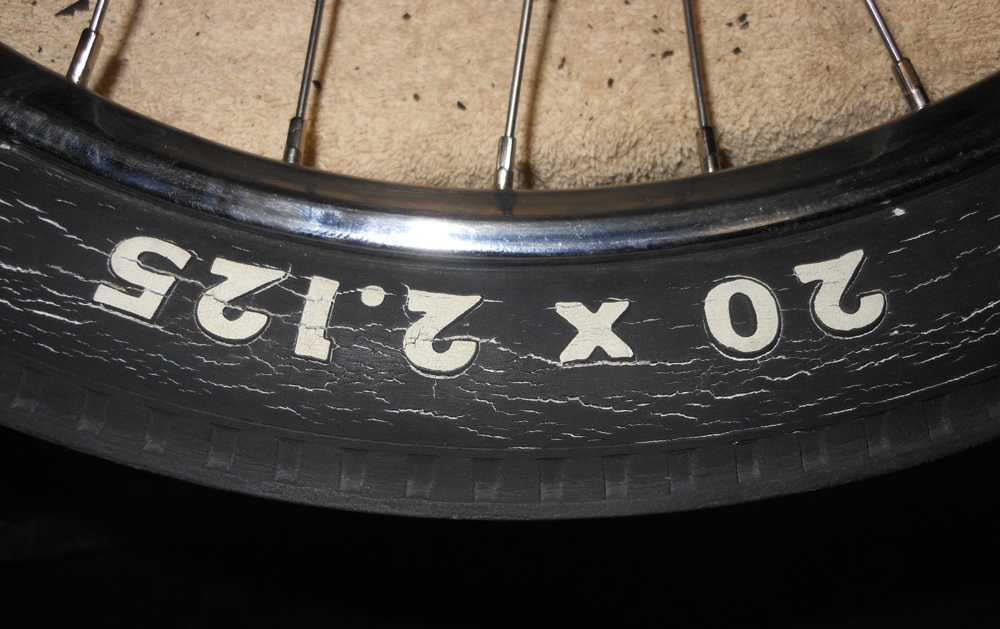
After I used a toothbrush to apply the polish and cleaned up the lettering.
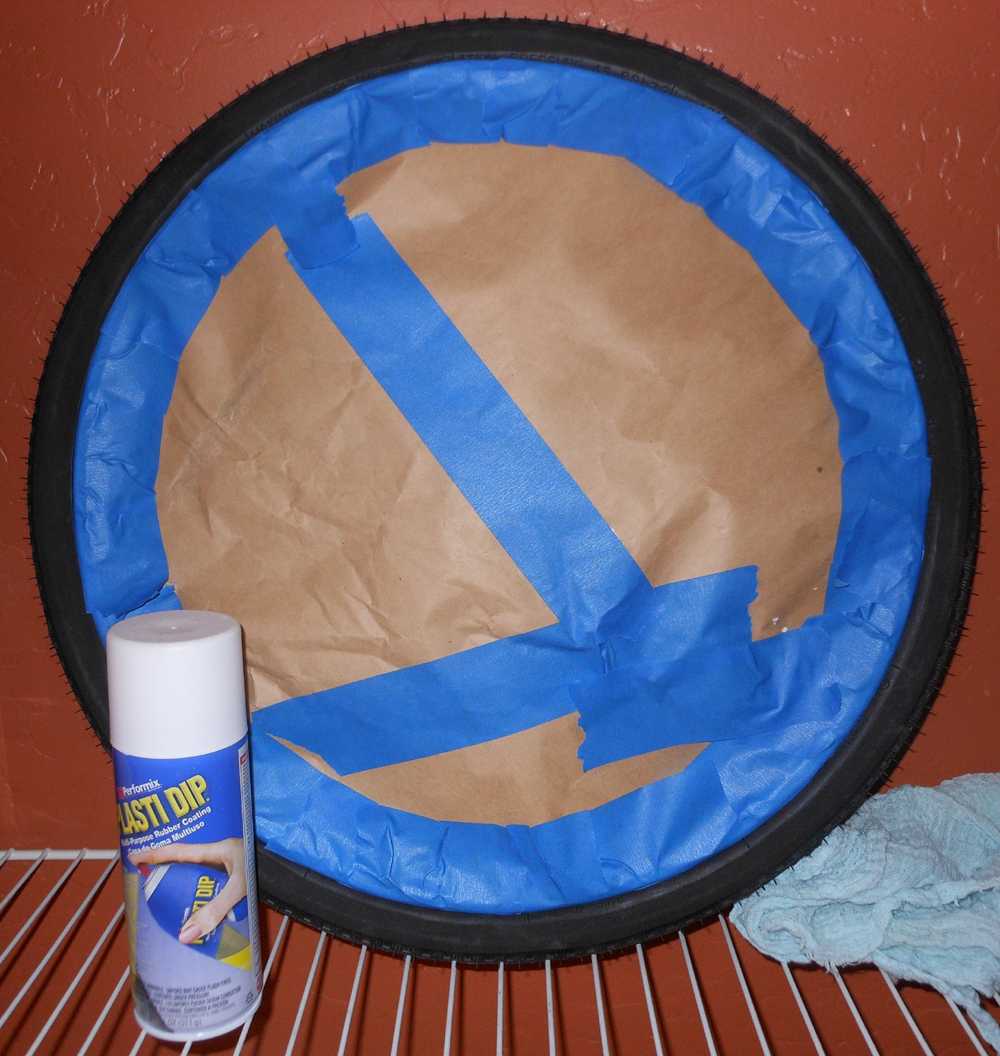
I was not so lucky finding a front tire to match, so I'm going to continue with making one. As you saw previously, I sanded down the texture off the tire. Here's the wheel masked. I'll start the pain-staking work of applying 3 single-letter stencils at a time, shooting 2 coats, letting it dry, then doing it again. But at least I think I can shoot both sides of the tire for each round and let them dry standing up. I think I'll start assembling the bike when I do this as well.
So the question was, what should I do to make the tire look black again. There were several suggestions, but ultimately since I'm am really worried about time, I decided to go with my gut and use shoe polish instead of trying some paint and having to spend a lot of time masking everything off.
So here is before. I cleaned the tire up real well with Wesley's Tire Bleach. It had a lot of dirt embedded in it. I also found a lot of broke off thorns in the tread after it was cleaned up.
After I used a toothbrush to apply the polish and cleaned up the lettering.
I was not so lucky finding a front tire to match, so I'm going to continue with making one. As you saw previously, I sanded down the texture off the tire. Here's the wheel masked. I'll start the pain-staking work of applying 3 single-letter stencils at a time, shooting 2 coats, letting it dry, then doing it again. But at least I think I can shoot both sides of the tire for each round and let them dry standing up. I think I'll start assembling the bike when I do this as well.
Ha! I was going to say shoe polish. Put it on cracked tires all the time when I was a kid.
Can't wait to see that front tire!
Can't wait to see that front tire!