- COMPETITIONS
- THE COMPETITION ARCHIVES
- RRBBO OFFICIAL COMPETITIONS
- BUILD OFF 18 (2023)
- Build off 18 - CLASS 1
- BUILD OFF 18 - Class 1 Build Journals
You are using an out of date browser. It may not display this or other websites correctly.
You should upgrade or use an alternative browser.
You should upgrade or use an alternative browser.
▀▄▀▄▀▄ 𝘚𝘗𝘌𝘌𝘋𝘍𝘐𝘚𝘏 𝘚𝘗𝘌𝘊𝘐𝘈𝘓 ▄▀▄▀▄▀ ( or... How To Turn Your Cycle Truck Into A Supercharged Cycle Car Racer Using Two Kiddie Cars)
- Thread starter kingfish254
- Start date


Help Support Rat Rod Bikes Bicycle Forum:
This site may earn a commission from merchant affiliate
links, including eBay, Amazon, and others.


Last edited:
Nice finishing on the frame rail end.
Traced the rear car body curves to do some slicing and dicing and curving of the rear end of the speed rails


Wow, did you know that you can use this foil tape as ACTUAL tape!!

My side by side flat and needlenose plier method came out easier than i thought. It matches the template pretty well and has a relatively good curve


$246.60
$289.67
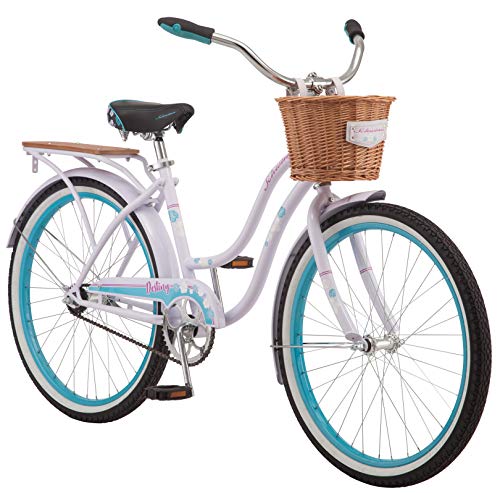
Kulana Lakona Tide Adult Beach Cruiser Bike, 26-Inch Wheels, 7-Speed, Silver
Amazon.com


$19.99
Electra Glide Wall Decal 2ft Long Sport Harley Davidson Bike Motorcylce Sticker Man Cave Garage Boys Room Decor
FatCat Wall Graphics


$18.99
Old River Outdoors Bicycle/Motorcycle Chain Picture Frame 4" X 6" Photo - Faux Bike Chain
Old River Outdoors (USA Merchant)


$115.00
$229.99
Huffy Stone Mountain Women's Mountain Bike, Gray, 26 Inch Wheels/17 Inch Frame
Amazon.com


$99.99
$108.99
Schwinn Toggle Quick Build Kids Bike, 12-Inch Wheels, Smart Start Steel Frame, Easy Tool-Free Assembly, Blue
easiness
Using a little FFAFT engineering to figgerout the transition to the seatstay.
(File Folder And Foul Tape)


(File Folder And Foul Tape)
So far, so good.

I'll still do a little tweaking. Cut it a little short, but I'm happy with the transition result.


Good day of progress. Glad to finally have the front and back of the speed rail with a more finished look.
Still have to do the rear end of the drive side speed rail.
Looking forward to making the speed bumper too.


Still have to do the rear end of the drive side speed rail.
Looking forward to making the speed bumper too.
Last edited:
- Joined
- Dec 9, 2010
- Messages
- 1,086
- Reaction score
- 1,339
That's a lot of practical cargo space within your fuselage!!!???
The body's profile is reminiscent of an old school slap faced Beetle or Ford pick up glove compartment door.
A.similat side hatch idea is golf club doors behind the drivers seat of luxury roadsters of the '30s.
A compartment such as this hold essential items such as your racing gloves, mirrored driving glasses, cold bee...uh beverages of choice..., sun screen... awards etc, etc, etc.
Those headlights are really cool and I think they work well on this build. The bumper works too. It reminds me of a spreader bar on an old hot rod.
Thanks. Hoping to get to work on the speedhole bumper instead today. Hoping to have time to mount up the lights in a few days.
Bracket on the seat post and hang it out the back.
I actually tested the mouse ear spoiler that way (and other places) a week or so ago, and it just didn't feel right.
Love the details..The devil is always in the details
to make it solid. Great work on cleaning it up while solidifying it up.

Yeah, this part is fun. Making the mockups into reality and removing allllllllllll of the foil tape.
 . I was very pleased with how solid and secure this is turning out to be with all of this extra metal pieces. Finishing off the ends of the speed rails is a big step with the fit and finish.
Nice finishing on the frame rail end.
Thanks, it feels good to not having those poking out the front and back anymore.
That's a lot of practical cargo space within your fuselage!!!???
The body's profile is reminiscent of an old school slap faced Beetle or Ford pick up glove compartment door.
A.similat side hatch idea is golf club doors behind the drivers seat of luxury roadsters of the '30s.
A compartment such as this hold essential items such as your racing gloves, mirrored driving glasses, cold bee...uh beverages of choice..., sun screen... awards etc, etc, etc.
It is a ton of space inside of the car body. Hadn't even thought of any sort of access to it. Time constraints will prevent me from exploring that option though.
My first though was a tube cross member like a duce, use the spring perch for a headlight mount? Just a though.............Curt
Yeah, I've toyed with that as well. Even thought about some of the curved erector set pieces to mimic that. I'm still pretty certain the bumper is gonna be a curved pieced of the speed hole material that I made the speed rails with.
I love this idea!I'm still pretty certain the bumper is gonna be a curved pieced of the speed hole material that I made the speed rails with.
Found out that the crew we had doing work on our house can finally come back as early as Monday. I need to squeeze as much build time in as I can now.l so after dinner I wrapped up the rear end of the drive side speed rail and got it attached.


Even got a little design session in after dark.
File folder mockup of speed bumper.
First option - keeping the speed bumper flush with the sheet metal for the nose just like I did for the speed rails and the car body.


Second Option - use the 90 degree ledge of the speed rail and have the speed bumper protrude out slightly and bend the egdes back so that they taper to the sides of the nose.


I am leaning towards the flush option. I just think it will be a cleaner cohesive look. We'll see in daylight mockups.
I guess another option would be to to have the speed bumper protrude out a little like option 2, but don't try to have any ledge on top.
That brings up something else that I'll have to test. If I flip the speed bumper rail upside down as in option 2, then the holes in the bumper would be lower than the holes in the side rails since the the holes are spaced farther away from the angled edge that they are from the flush edge.
File folder mockup of speed bumper.
First option - keeping the speed bumper flush with the sheet metal for the nose just like I did for the speed rails and the car body.
Second Option - use the 90 degree ledge of the speed rail and have the speed bumper protrude out slightly and bend the egdes back so that they taper to the sides of the nose.
I am leaning towards the flush option. I just think it will be a cleaner cohesive look. We'll see in daylight mockups.
I guess another option would be to to have the speed bumper protrude out a little like option 2, but don't try to have any ledge on top.
That brings up something else that I'll have to test. If I flip the speed bumper rail upside down as in option 2, then the holes in the bumper would be lower than the holes in the side rails since the the holes are spaced farther away from the angled edge that they are from the flush edge.
Last edited:
Flush mount option


Last edited:
I kind of like option 2, but they both work and option 1 seems like it would be quicker to build.