Wow, that's looking good 
You are using an out of date browser. It may not display this or other websites correctly.
You should upgrade or use an alternative browser.
You should upgrade or use an alternative browser.
'59 Schwinn Jaguar Restoration
- Thread starter Buster1
- Start date

Help Support Rat Rod Bikes Bicycle Forum:
This site may earn a commission from merchant affiliate
links, including eBay, Amazon, and others.
Thanks to everyone so far, and thanks to the few family members who have contributed posts on this great forum, or in some other way. It's good to hear from you all, and I hope you'll surf around the forum as well. Thank you! 
Okay, so the bad news. :?
Al from Bike World called me at work today. (He has over 100 vintage bikes, and a few Jaguars and Phantoms as well, all the Krates...all in pristine condition). The rear hub looks great...except for 3 broken planet gears. I went over and looked at them and they looked no-so-great. A few of the 'sprockets' of the gears have broken off. Here's a pic from the internet on what we're dealing with on these complicated things. All I can say is that Al is worth his weight in gold for being able to fix something like this scientific and engineering marvel.
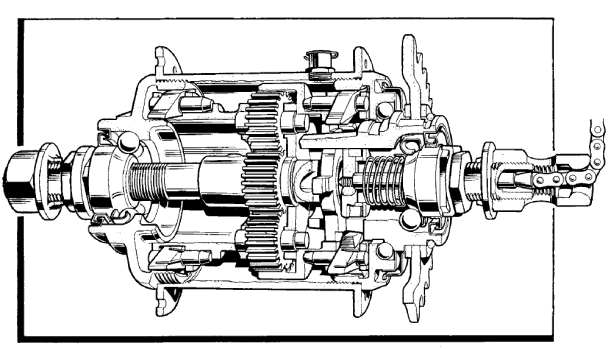
You can see the smaller...well...planet gears, in this schematic. Their little fingers or sprockets as I call them were toast. Now I'm on the hunt for planet gears, or an old 3-speed hub that is cheap that I can cannibalize.
He also examined my frame and recommended a full repaint or powder coat. I just don't have the $$ or time for that...now. Maybe later...but it would be cool. I think I'll polish it up and see where that takes me.
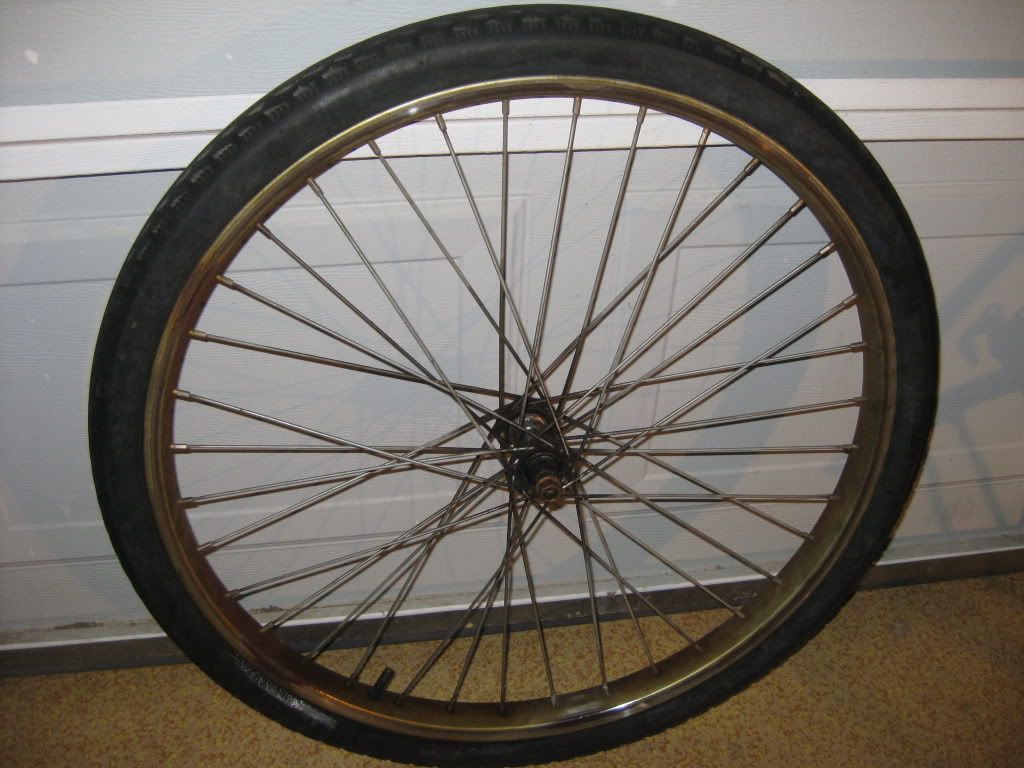
He also looked at the front wheel and determined that it's a basic $24 'everyday' wheel, nothing special. I knew it! Oh well. Anyone what to buy and old WalMart wheel?
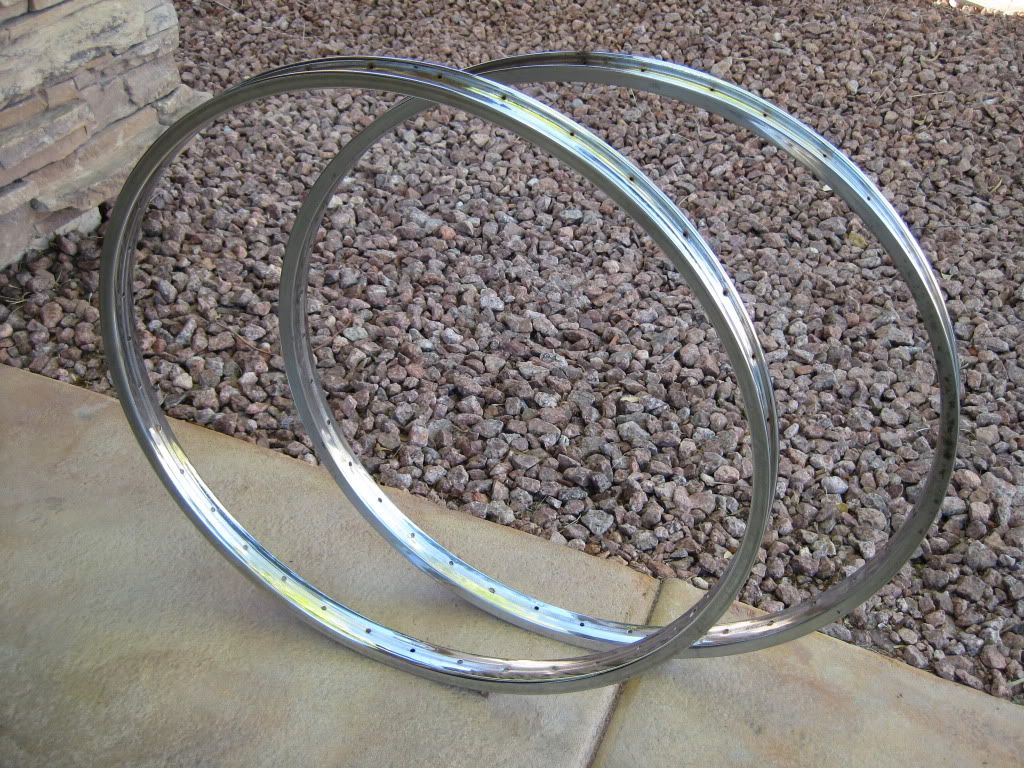
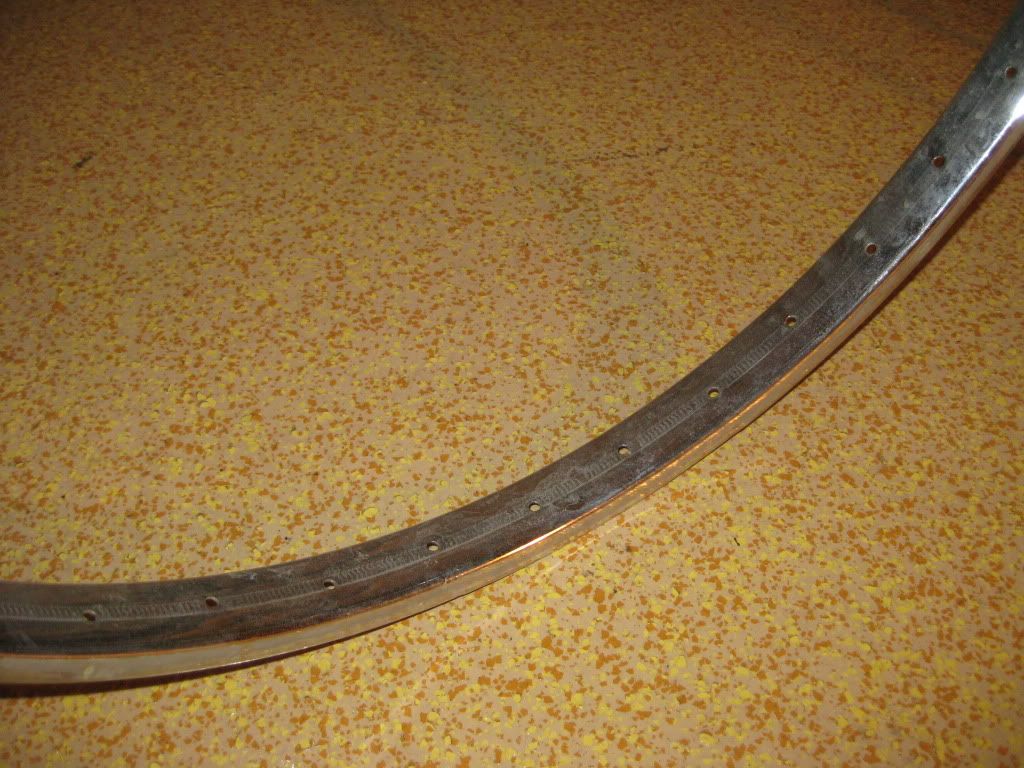
Lastly, I pulled my one good S7 rim out of the acid bath and found it to be looking pretty good. I may just use it. It needs some polish, and the chrome is worn off in areas. But overall it's looking pretty sharp. The seller from Madison Wisco on this forum is sending his S7s to me ASAP...I just need to PayPal him.
More Air Force work than bike resto today...but we're coming along. Also not pictured are the fenders and fender braces that came out of the baths too. They look okay, but the braces are just plain gray steel. Not shiney. I did some researching last night and found a technique to restore old cruddy braces to almost-new status. More on that later, but I think I'll be removing them and fixing them up with this technique. Nothing too secret, but you'll have to wait and see what happens there! :mrgreen:
Okay, so the bad news. :?
Al from Bike World called me at work today. (He has over 100 vintage bikes, and a few Jaguars and Phantoms as well, all the Krates...all in pristine condition). The rear hub looks great...except for 3 broken planet gears. I went over and looked at them and they looked no-so-great. A few of the 'sprockets' of the gears have broken off. Here's a pic from the internet on what we're dealing with on these complicated things. All I can say is that Al is worth his weight in gold for being able to fix something like this scientific and engineering marvel.

You can see the smaller...well...planet gears, in this schematic. Their little fingers or sprockets as I call them were toast. Now I'm on the hunt for planet gears, or an old 3-speed hub that is cheap that I can cannibalize.
He also examined my frame and recommended a full repaint or powder coat. I just don't have the $$ or time for that...now. Maybe later...but it would be cool. I think I'll polish it up and see where that takes me.
He also looked at the front wheel and determined that it's a basic $24 'everyday' wheel, nothing special. I knew it! Oh well. Anyone what to buy and old WalMart wheel?

Lastly, I pulled my one good S7 rim out of the acid bath and found it to be looking pretty good. I may just use it. It needs some polish, and the chrome is worn off in areas. But overall it's looking pretty sharp. The seller from Madison Wisco on this forum is sending his S7s to me ASAP...I just need to PayPal him.

More Air Force work than bike resto today...but we're coming along. Also not pictured are the fenders and fender braces that came out of the baths too. They look okay, but the braces are just plain gray steel. Not shiney. I did some researching last night and found a technique to restore old cruddy braces to almost-new status. More on that later, but I think I'll be removing them and fixing them up with this technique. Nothing too secret, but you'll have to wait and see what happens there! :mrgreen:
Well I got a few things done today with another day off from work (man, having days off really speeds up the resto project!)
Anyway, I was able to shine up the S7 rim with some Blue Magic and it's looking pretty sweet. The chrome is thin in spots, and worn off around where the brake pads hit, but it looks well enough for me, and for 52 years of former use.
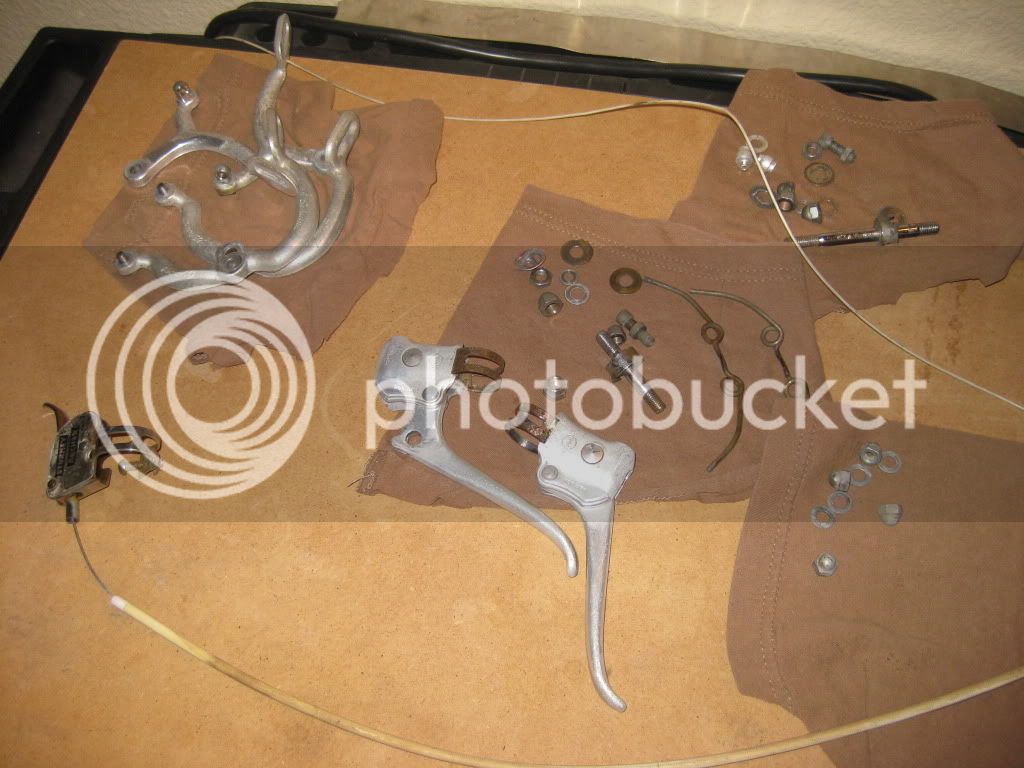
Second was brake caliper disassembly. I also took copious pictures and even made a schematic of the brake calipers. Here's a before shot.
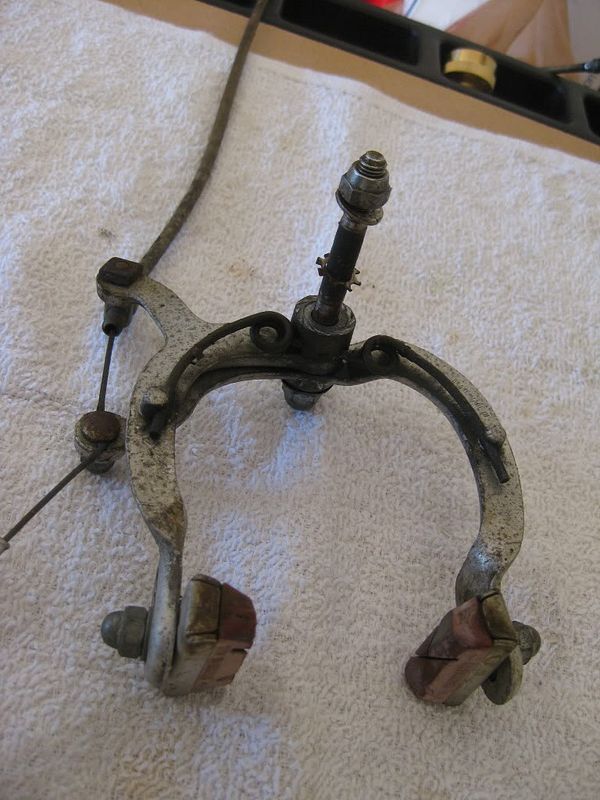
Here's the after shot...yikes! :shock: Hope I can remember where it all goes in a few months.
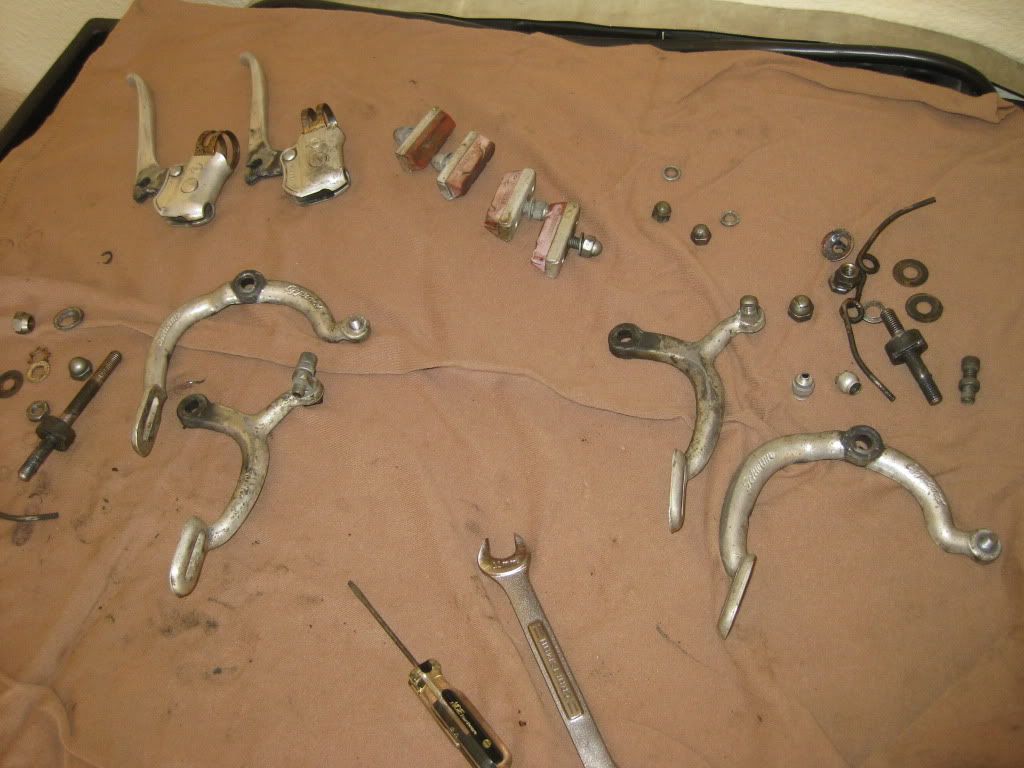
I have the 'hard metal' parts soaking seperately in some kerosene, and the aluminum hand brakes and calipers soaking in Simple Green. I also decided to take the brake pad 'housings' and shine them up with the dremel tool and Blue Magic. I love the look of shiny aluminum!
BEFORE:
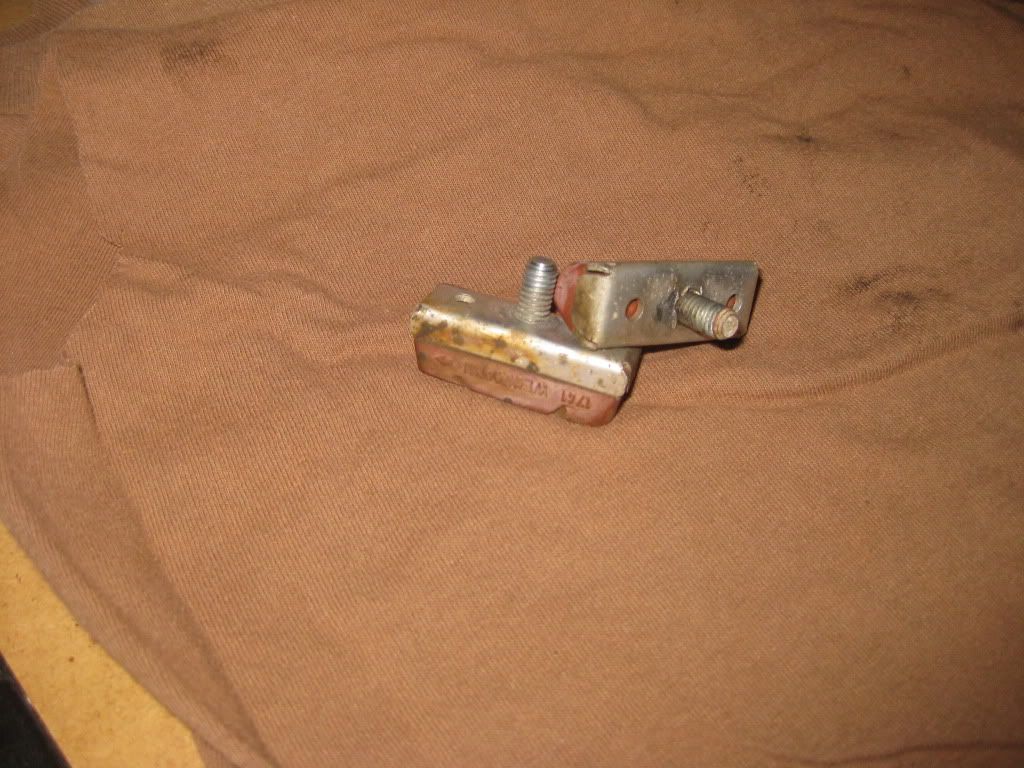
AFTER:
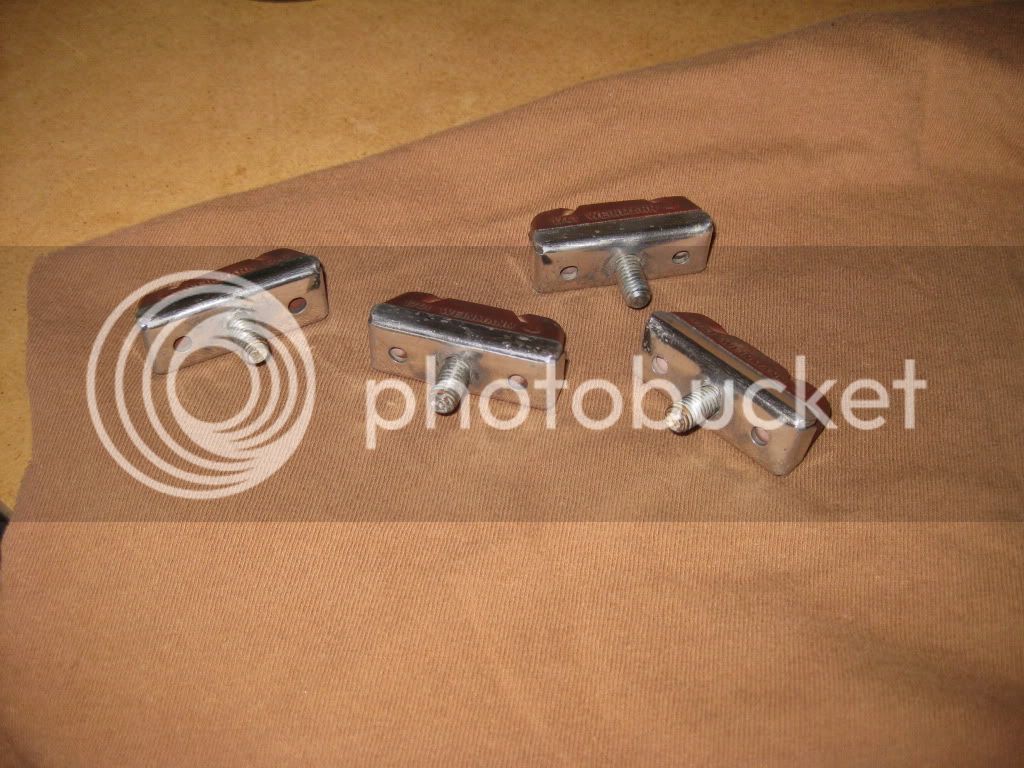
I can't wait to get all the aluminun parts buffed up and cooking! It's gonna look good! 8)
After that I decided to remove the fender braces. Something I should have done a long time ago for ease of cleaning and such. I followed the advice of some dudes on this forum and just drilled out the back of the rivets...and out they came. I'm now committed to replacing the rivets later with the 'bolt type' that look like rivets from the outside, but actually have a screw and nut on the underside. I was able to hammer out some of the dents in the fenders as well with the braces gone...but they need more work. Later I'll clean up the braces and attempt the 'special technique' I read about to make them purr!
Anyway, I was able to shine up the S7 rim with some Blue Magic and it's looking pretty sweet. The chrome is thin in spots, and worn off around where the brake pads hit, but it looks well enough for me, and for 52 years of former use.
Second was brake caliper disassembly. I also took copious pictures and even made a schematic of the brake calipers. Here's a before shot.

Here's the after shot...yikes! :shock: Hope I can remember where it all goes in a few months.

I have the 'hard metal' parts soaking seperately in some kerosene, and the aluminum hand brakes and calipers soaking in Simple Green. I also decided to take the brake pad 'housings' and shine them up with the dremel tool and Blue Magic. I love the look of shiny aluminum!
BEFORE:

AFTER:

I can't wait to get all the aluminun parts buffed up and cooking! It's gonna look good! 8)
After that I decided to remove the fender braces. Something I should have done a long time ago for ease of cleaning and such. I followed the advice of some dudes on this forum and just drilled out the back of the rivets...and out they came. I'm now committed to replacing the rivets later with the 'bolt type' that look like rivets from the outside, but actually have a screw and nut on the underside. I was able to hammer out some of the dents in the fenders as well with the braces gone...but they need more work. Later I'll clean up the braces and attempt the 'special technique' I read about to make them purr!

Good work... also, it's pretty easy to put actual rivets back in. I just used a rivet gun to put the head badge on my build. Check it out. It's really easy. About as difficult as a stapler!
Evening Update:
Great news! Cameron from Udall Kansas, and a great member of this forum, was able to locate some planet gears in his parts bin. He's sending them out tomorrow! Thanks Cameron!
This forum is great! In just one day I found something I really need very quickly thanks to the help of fellow bike enthusiasts!
Here is what they look like.
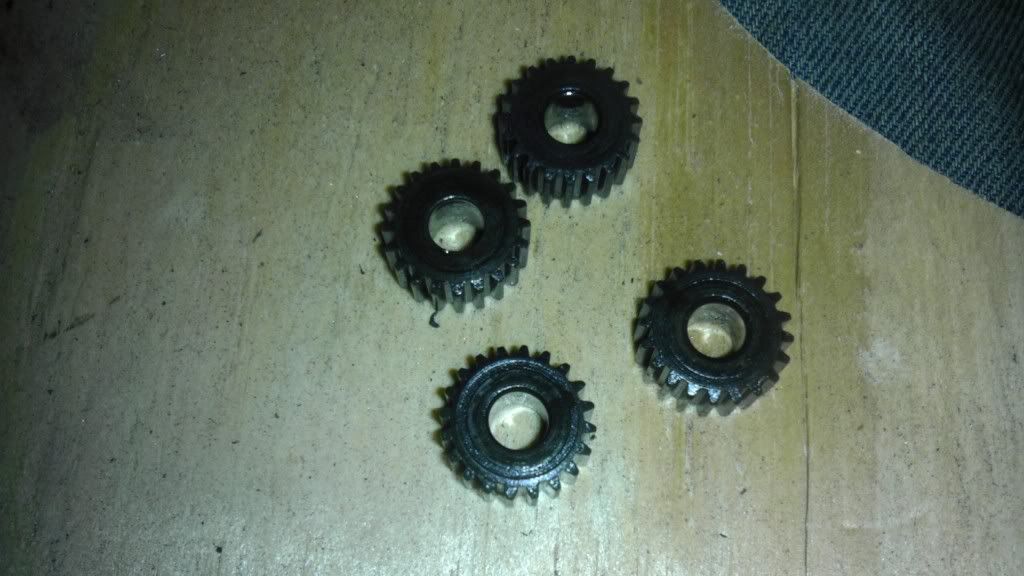
Great news! Cameron from Udall Kansas, and a great member of this forum, was able to locate some planet gears in his parts bin. He's sending them out tomorrow!
This forum is great! In just one day I found something I really need very quickly thanks to the help of fellow bike enthusiasts!
Here is what they look like.

Today was a pretty good day on the bike, although I had to spend just about all of it doing stuff over at Nellis AFB for my deployment, I still made it home before dinner and had a little time to do a few things.
First I pulled all the brake and shifter parts out of their respective baths, and dried them up and put them asied for later. They look...okay. :?
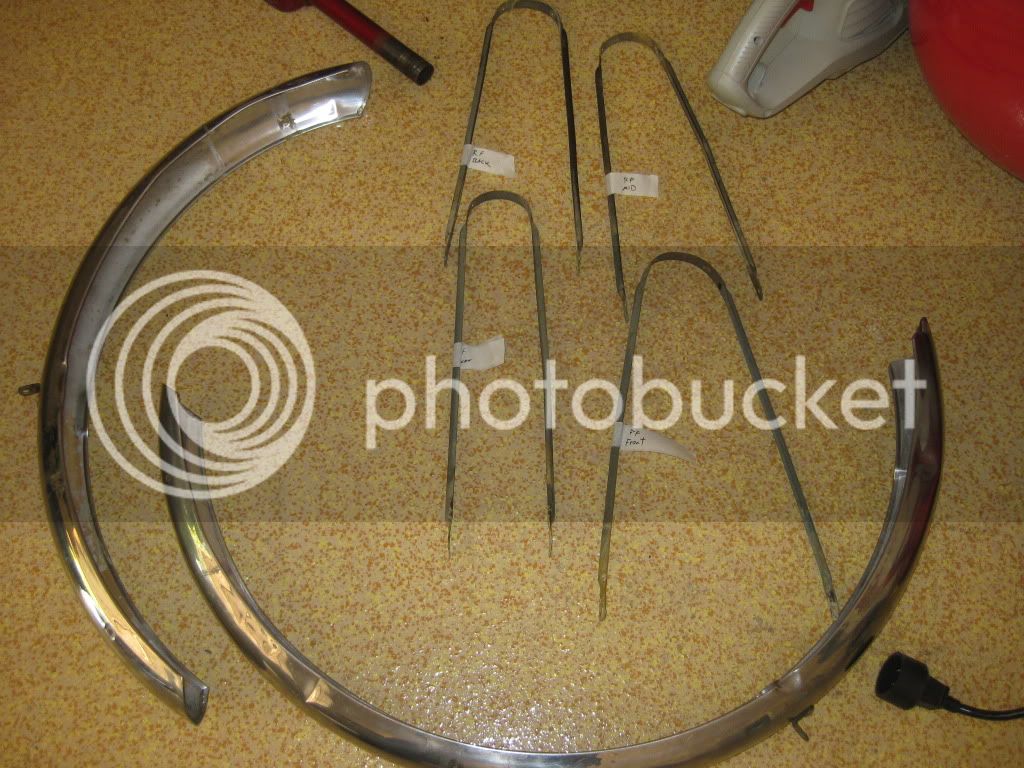
Next I began to work a little on the braces with the technique suggested to me by Gary here on the forum. Gary also sold me my crutch tip rack at a fair price, and it's in excellent condition. I started off with his recommendation of filing each brace with a metal file. My son even helped out and before you knew it, we were seeing raw steel...nice and clean and shiny! 8) I think it may take a while to get them all filed, but I don't think we're going to go that far...just get them as smooth as possible before the next phase...chrome paint! Here you can see the improvement. They were black before. While still pitted looking in some areas, they really smoothed out and I think will take to the chrome paint quite well.
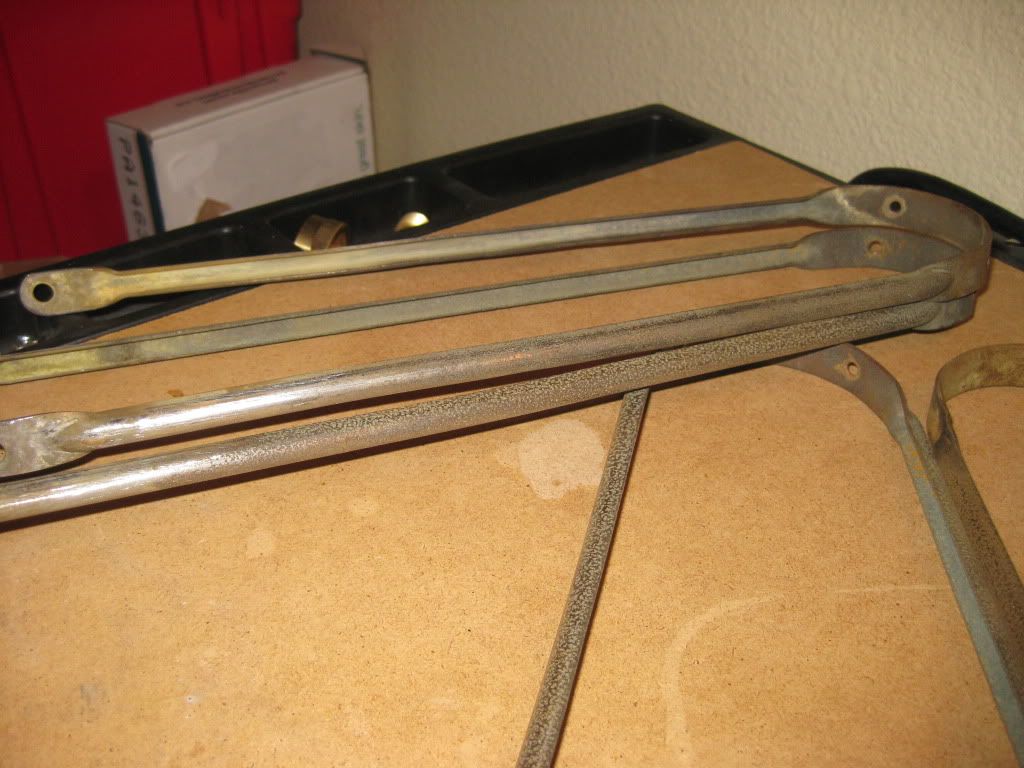
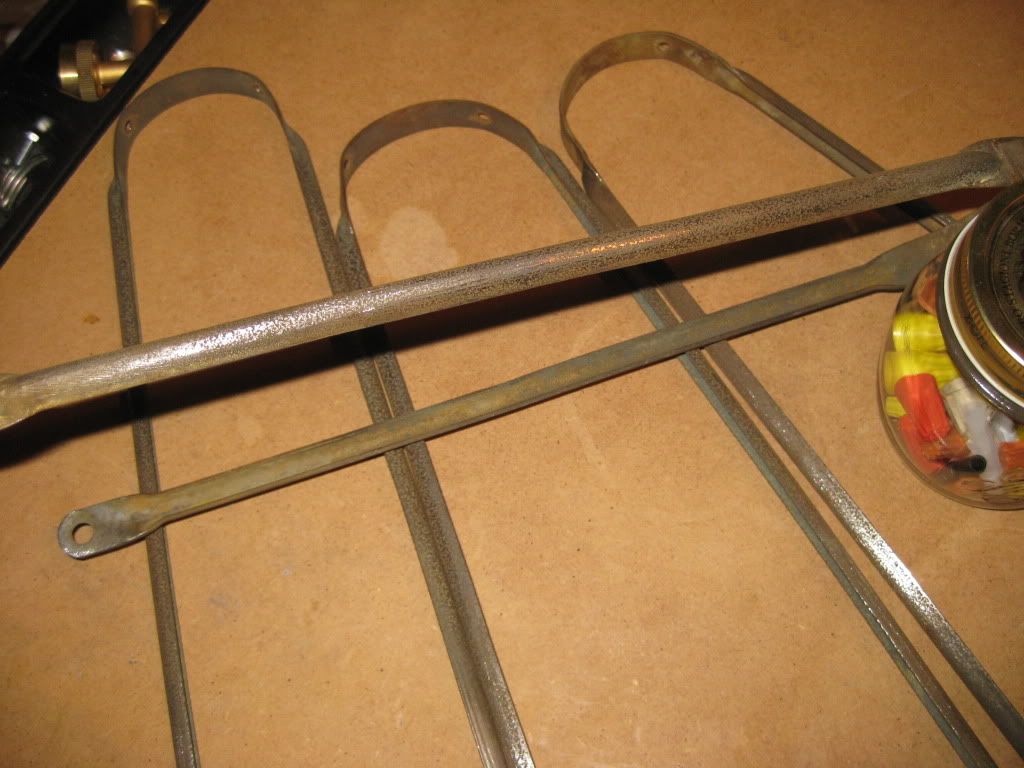
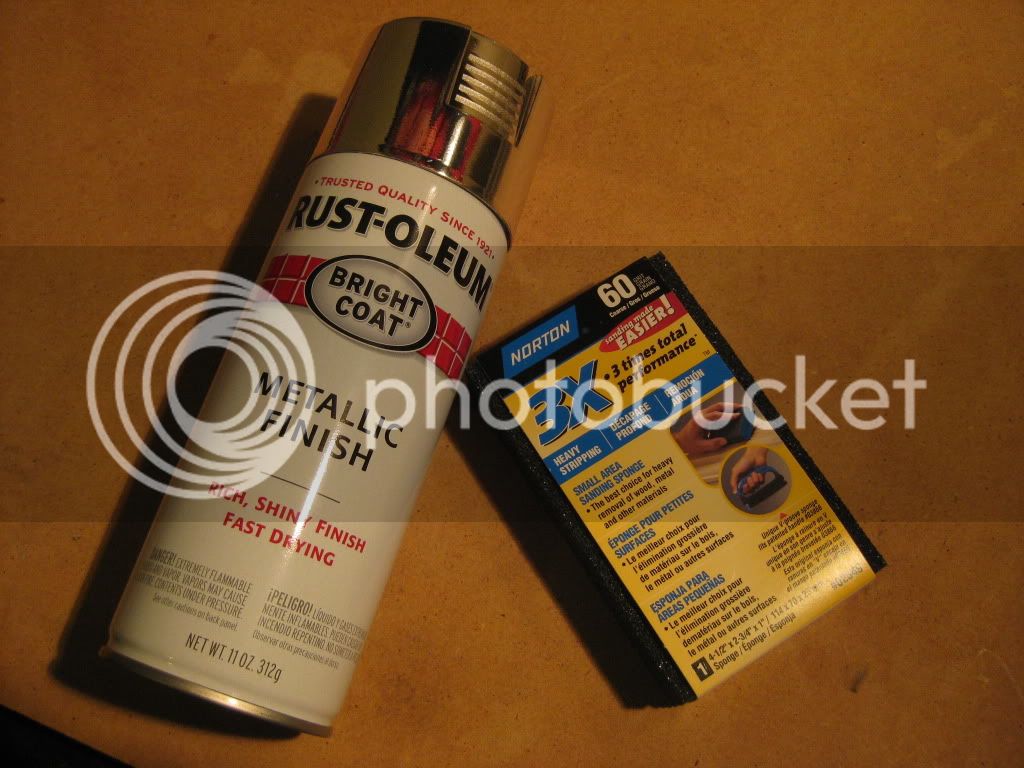
Following my final approval of filing, I'll hit 'em with this coarse sander block...then the paint. Everyone seems to think that it will make the braces look 'almost' as good as new. They were never chrome, but they were bright steel...and this paint should do the trick! I also spent the time to straighten each one back out. I think I got them all pretty true. Had some nice damage on a few before today.
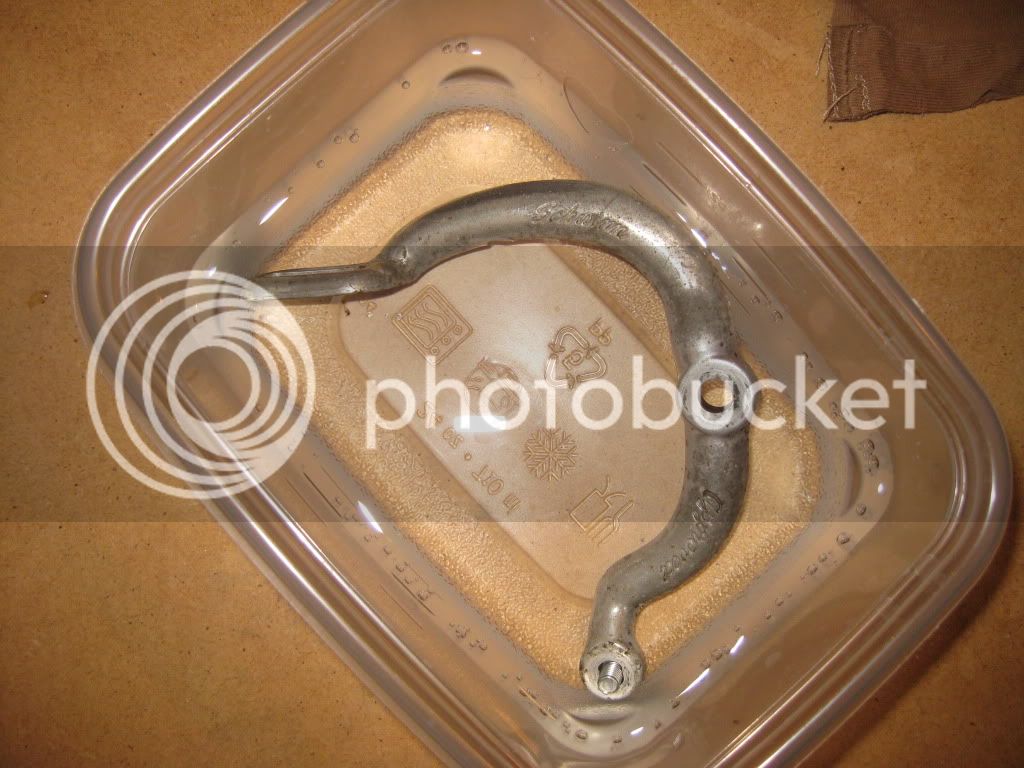
I also did a little reading about aluminum cleaning on the internet this evening. My calipers are looking nice now, but they are stained with years of gunk. I decided to drop one in a mild solution of household white vinegar and water. The internet says it works, so it must be right! :shock: We'll see tomorrow if this natural solution gives any sheen and shine. After this, my last resort is the dremel again and some Blue Magic. That will work, but it will be dirty and painstaking. Here's the test caliper going for its swim.
Okay, now for the really exciting news (at least for me.) I gave part of the frame a good rubdown with the turtlewax mild polishing compound. I could hardly believe what I was seeing! I know it will never be as good as new, but the sparkling red was coming back to life! It is true what they say about these old Schwinn paintjobs...they really did put a lot of work into them. I even heard from Al (the Schwinn fanatic at Bike World) that they used an undercoat of silver or gold paint on most of these old '50s and 60s bikes.
You know, you just don't find craftsmanship like this anymore. I am amazed every day while working on this bike at how WELL it's made. Every part and piece is quality! Made in AMERICA people! When did we drop quality for cost? Too bad really. Anyway, that's enough of my soapbox for now. The paint is looking good, and while tough to see in the pics (sorry 'bout the out of focus one) it really has a chance of being salvaged.
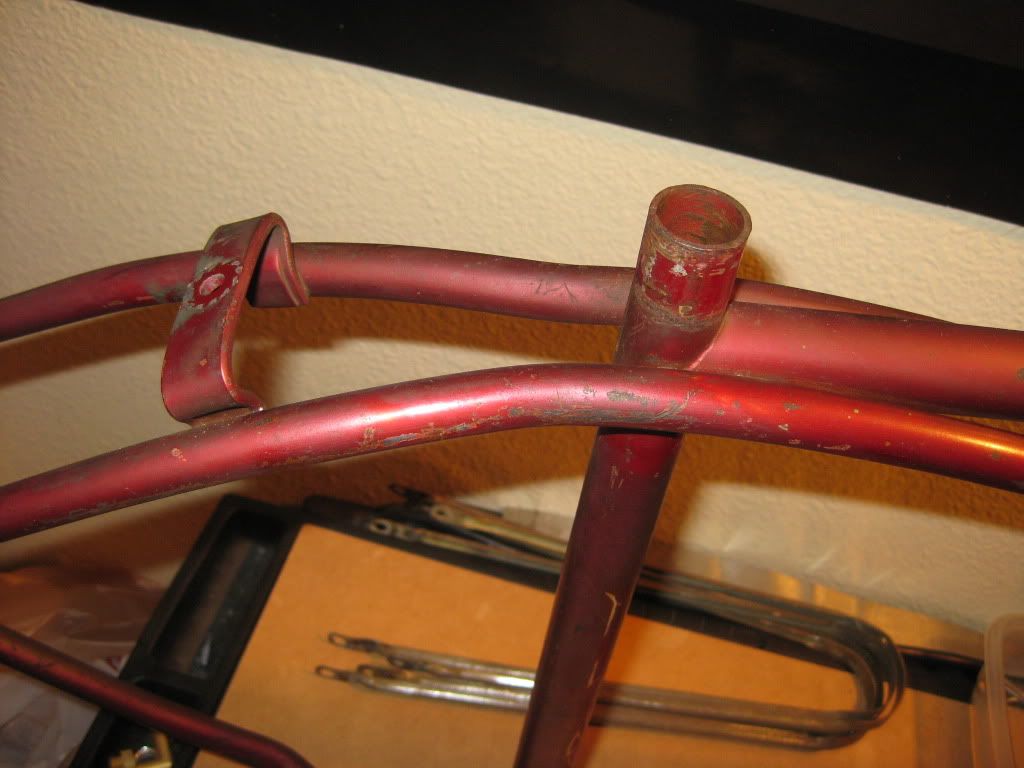
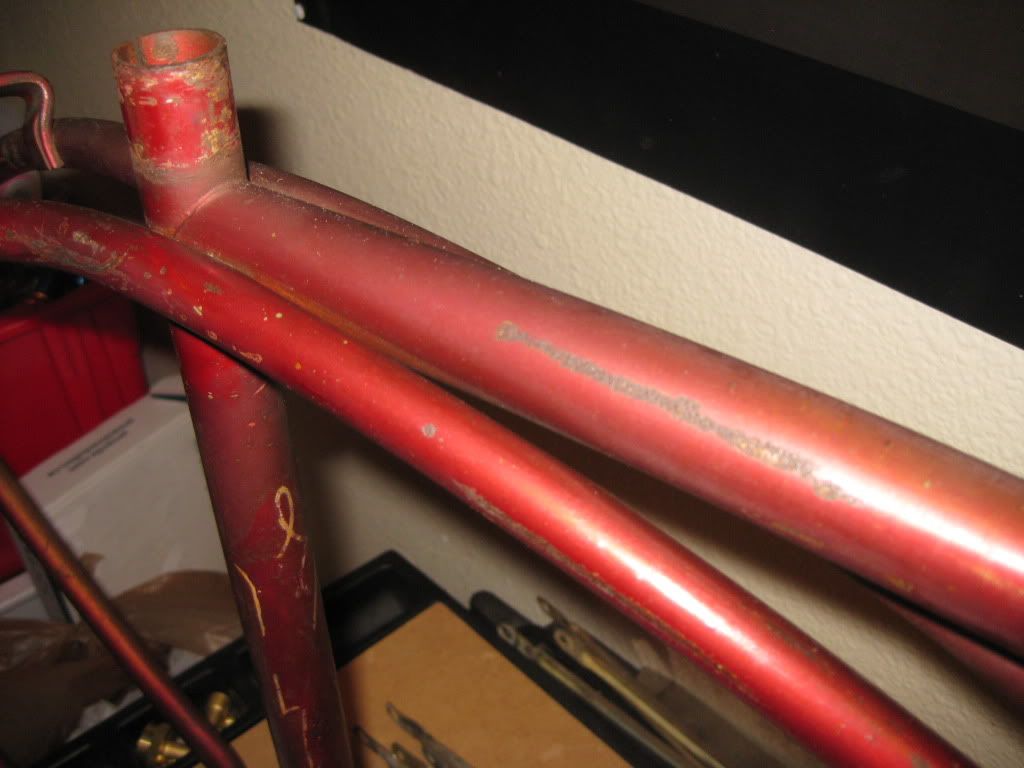
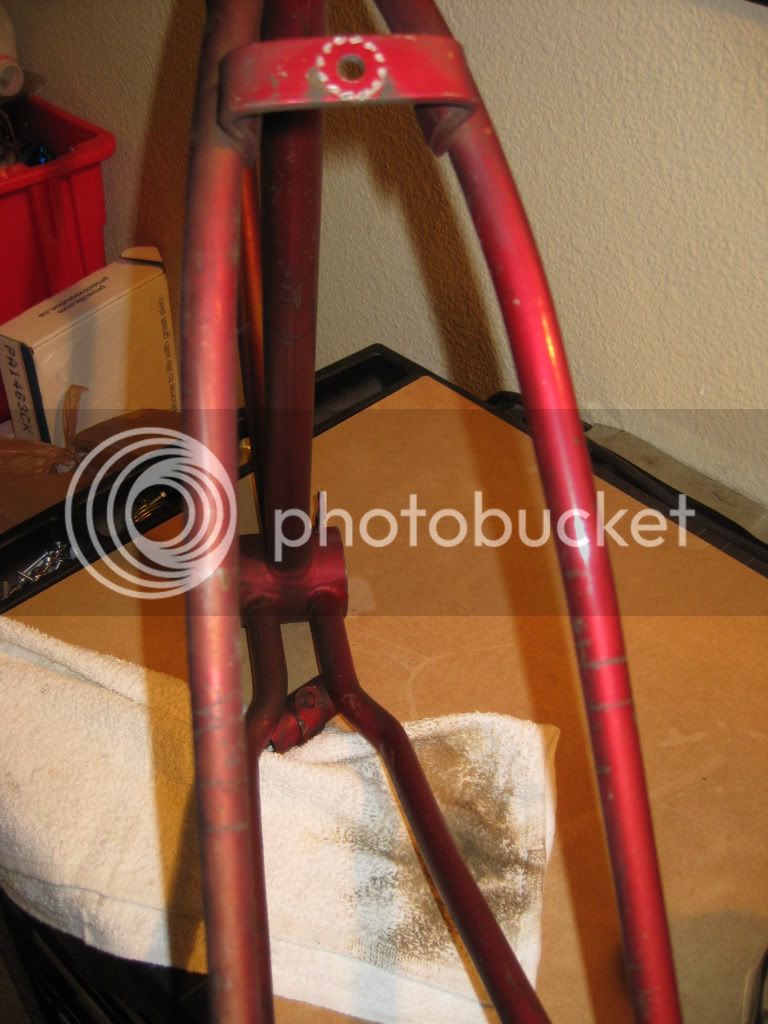
Thanks for checking in. And oh yeah, my new (old) planet gears are being shipped today, and the S7 rims tomorrow! Sweet! :mrgreen:
First I pulled all the brake and shifter parts out of their respective baths, and dried them up and put them asied for later. They look...okay. :?

Next I began to work a little on the braces with the technique suggested to me by Gary here on the forum. Gary also sold me my crutch tip rack at a fair price, and it's in excellent condition. I started off with his recommendation of filing each brace with a metal file. My son even helped out and before you knew it, we were seeing raw steel...nice and clean and shiny! 8) I think it may take a while to get them all filed, but I don't think we're going to go that far...just get them as smooth as possible before the next phase...chrome paint! Here you can see the improvement. They were black before. While still pitted looking in some areas, they really smoothed out and I think will take to the chrome paint quite well.


Following my final approval of filing, I'll hit 'em with this coarse sander block...then the paint. Everyone seems to think that it will make the braces look 'almost' as good as new. They were never chrome, but they were bright steel...and this paint should do the trick! I also spent the time to straighten each one back out. I think I got them all pretty true. Had some nice damage on a few before today.

I also did a little reading about aluminum cleaning on the internet this evening. My calipers are looking nice now, but they are stained with years of gunk. I decided to drop one in a mild solution of household white vinegar and water. The internet says it works, so it must be right! :shock: We'll see tomorrow if this natural solution gives any sheen and shine. After this, my last resort is the dremel again and some Blue Magic. That will work, but it will be dirty and painstaking. Here's the test caliper going for its swim.

Okay, now for the really exciting news (at least for me.) I gave part of the frame a good rubdown with the turtlewax mild polishing compound. I could hardly believe what I was seeing! I know it will never be as good as new, but the sparkling red was coming back to life!
You know, you just don't find craftsmanship like this anymore. I am amazed every day while working on this bike at how WELL it's made. Every part and piece is quality! Made in AMERICA people! When did we drop quality for cost? Too bad really. Anyway, that's enough of my soapbox for now. The paint is looking good, and while tough to see in the pics (sorry 'bout the out of focus one) it really has a chance of being salvaged.


Thanks for checking in. And oh yeah, my new (old) planet gears are being shipped today, and the S7 rims tomorrow! Sweet! :mrgreen:

$19.99
Electra Glide Wall Decal 2ft Long Sport Harley Davidson Bike Motorcylce Sticker Man Cave Garage Boys Room Decor
FatCat Wall Graphics
Okay, so here's the update for today. A lot to discuss.
First off, yesterday after work I looked into the vinegar bath and caliper that was soaking. I was hoping to see astounding results. Much to my dismay, the thing looked just like it did when I dropped it in there. Real nice. :roll: Now for plan B on those things.
I also worked on the frame some more and the forks too. No pics as it's really slow going. I am seeing improvements, but it's tough work as this bike has sooo much grime and years of dirt imbedded into it.
I also decided to strip off the old paint from the chain guard and just go with it. Kinda a leap of faith here, but the old stuff was looking pretty ratty. Now I can repaint it and add the decals for a sweet looking new chain guard. The old one cleaned up rather nicely with some WD40 and 0000 steel wool.
I also filed all the fender braces...again.
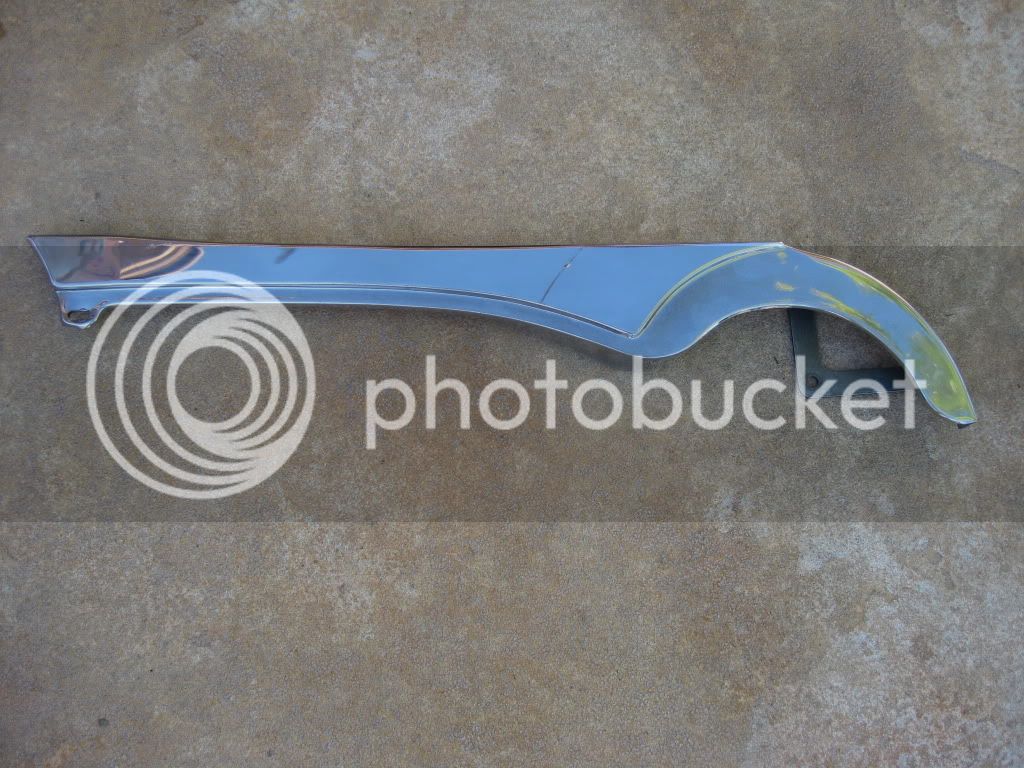
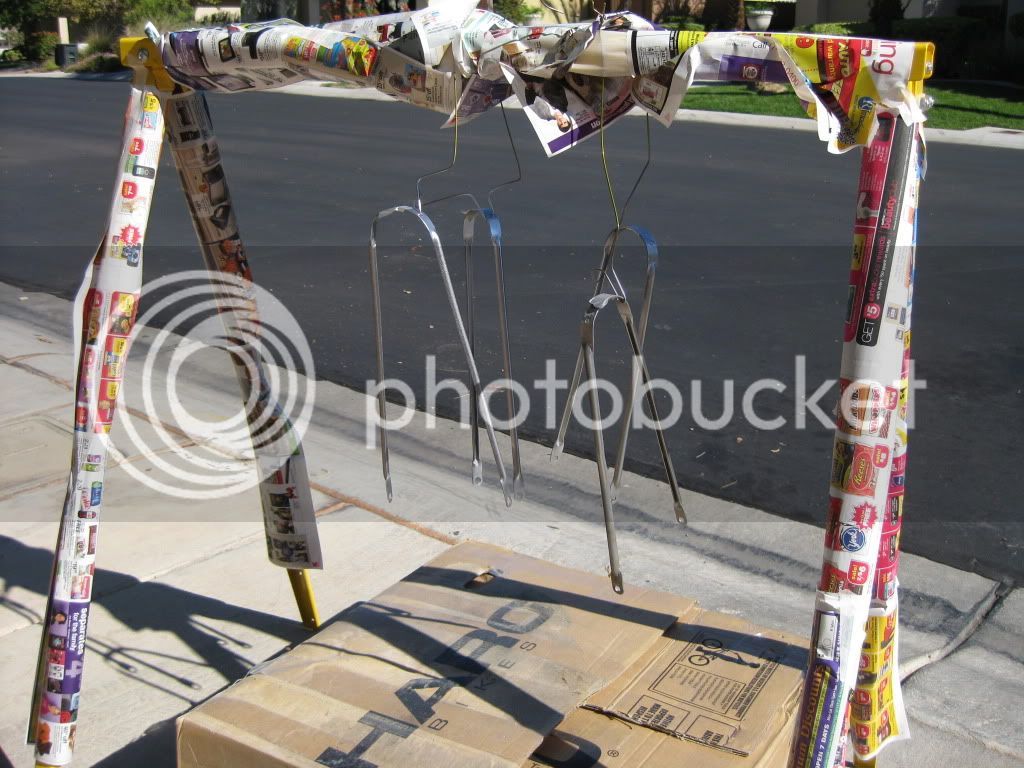
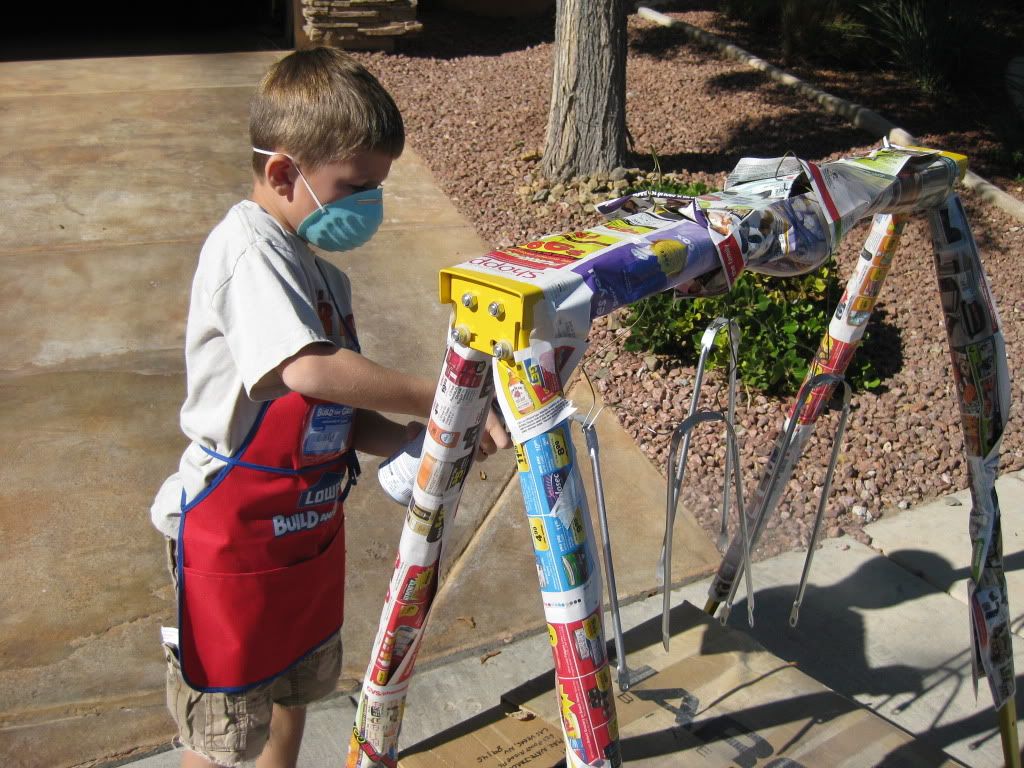
So today was pretty productive. I started the morning by setting up one of my sawhorses on it's highest setting, covering it with newspaper and hanging the fender braces. Once they were hung, I cleaned them (for like 20 minutes) with mineral spirits to remove any grime, fingerprints, or gunk. This was a great technique from Gary (B607, I think, here on the forum).
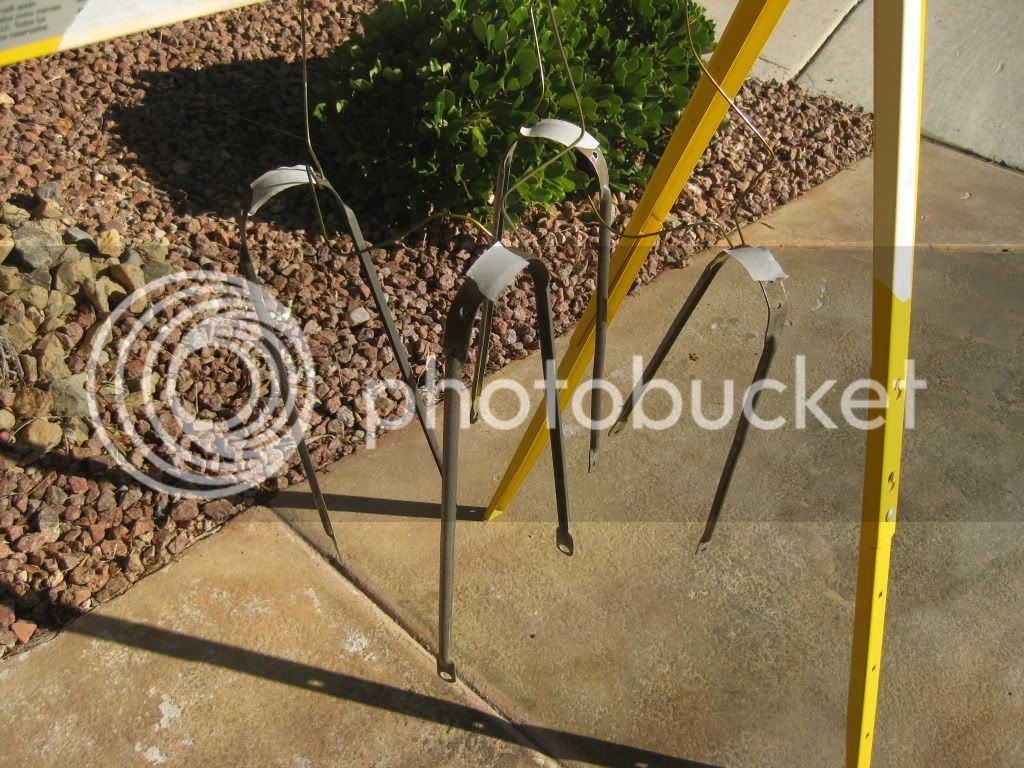
After that, my son and I "hit 'em" with Rustoleum Chrome paint in three seperate light coat applications. We put them aside to dry.
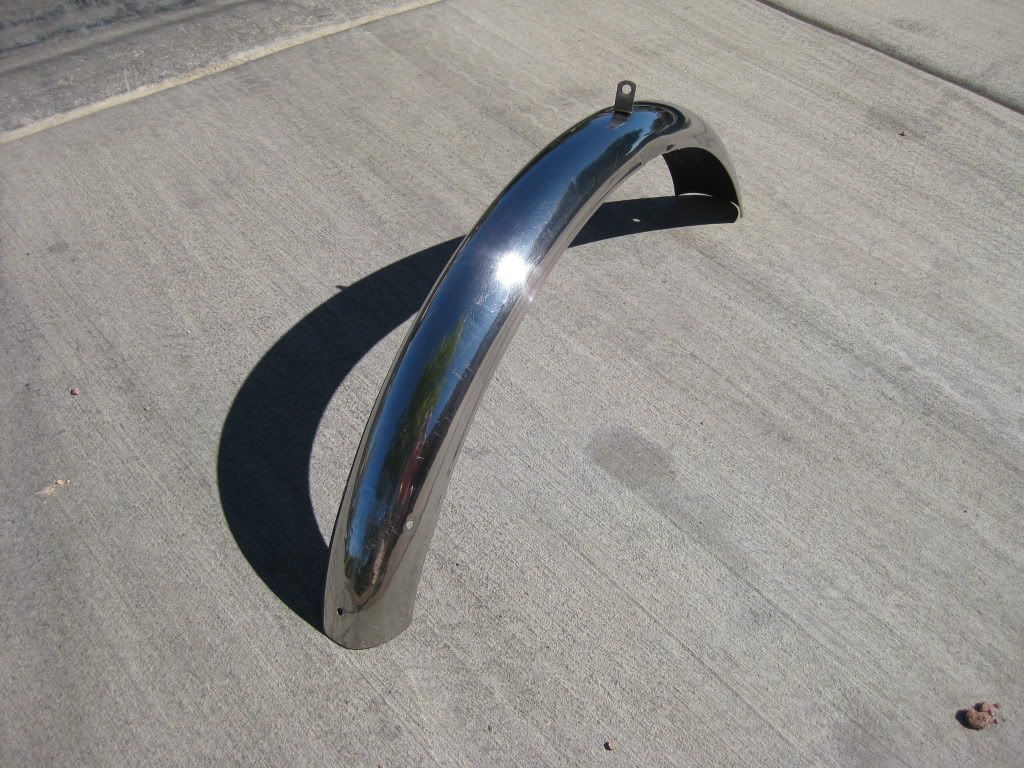
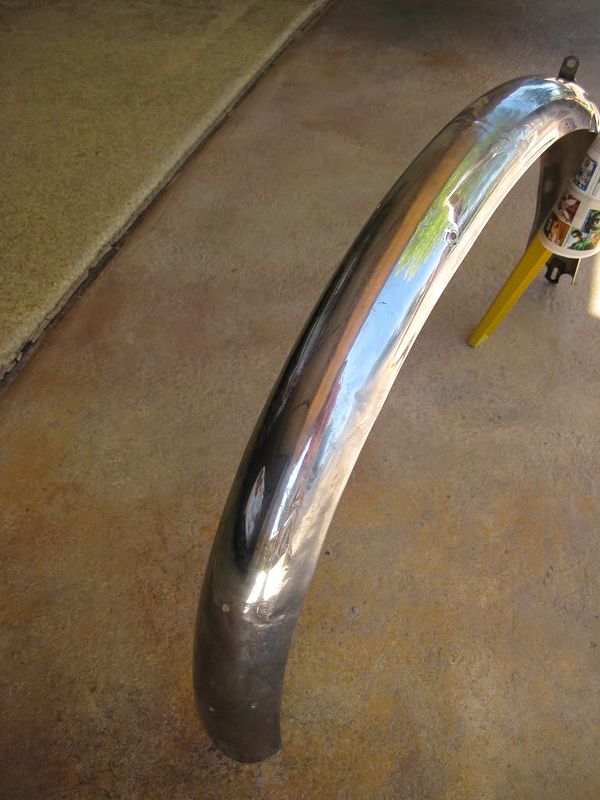
Next were the fenders. Man, I feel like I spent an eternity on these things today and got no where. Both were moderately dented and scraped, and I've been spending a little time every day banging out the dents from the back side of the fenders with a hammer and screwdriver butt. Today I even tried a golfball as well. Seriously, like 2 hours later, I maybe saw some light improvements. The front one was less damaged so I spent the last part of 'fender time' working on it. Lots of WD and steel wool later, it was looking okay by my eye. I then hit it with some Blue Magic metal polish and I now think we have a completed fender!
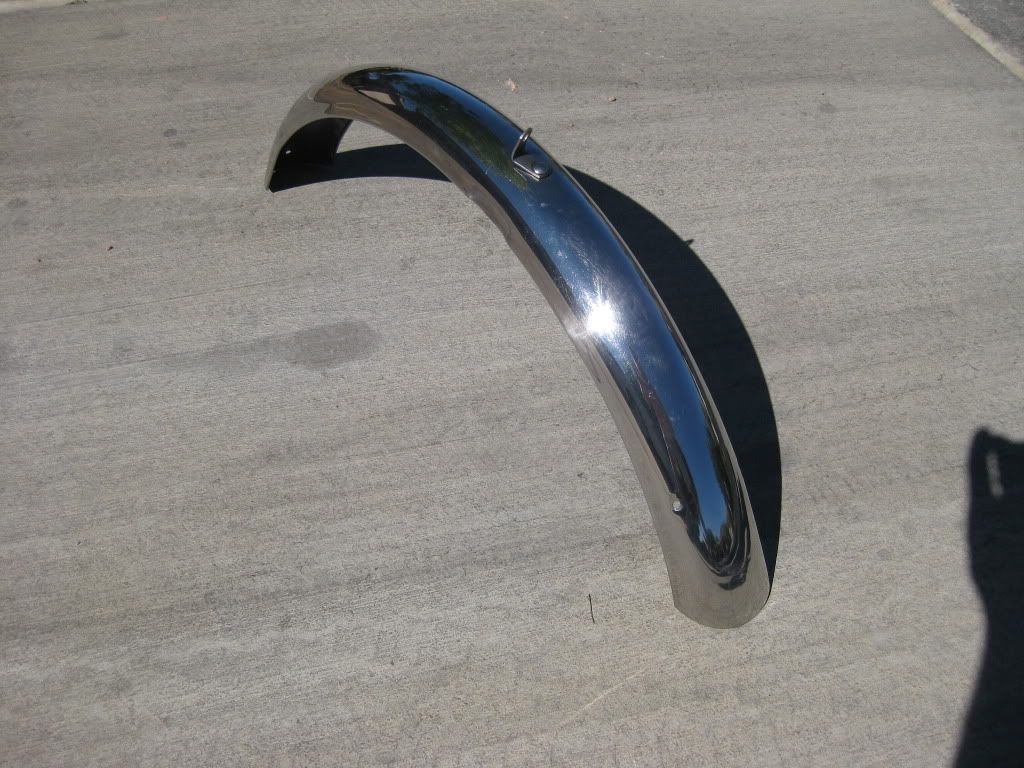
Here's what the rear fender looks like now too. A long way to go to get to looking like the front one huh?
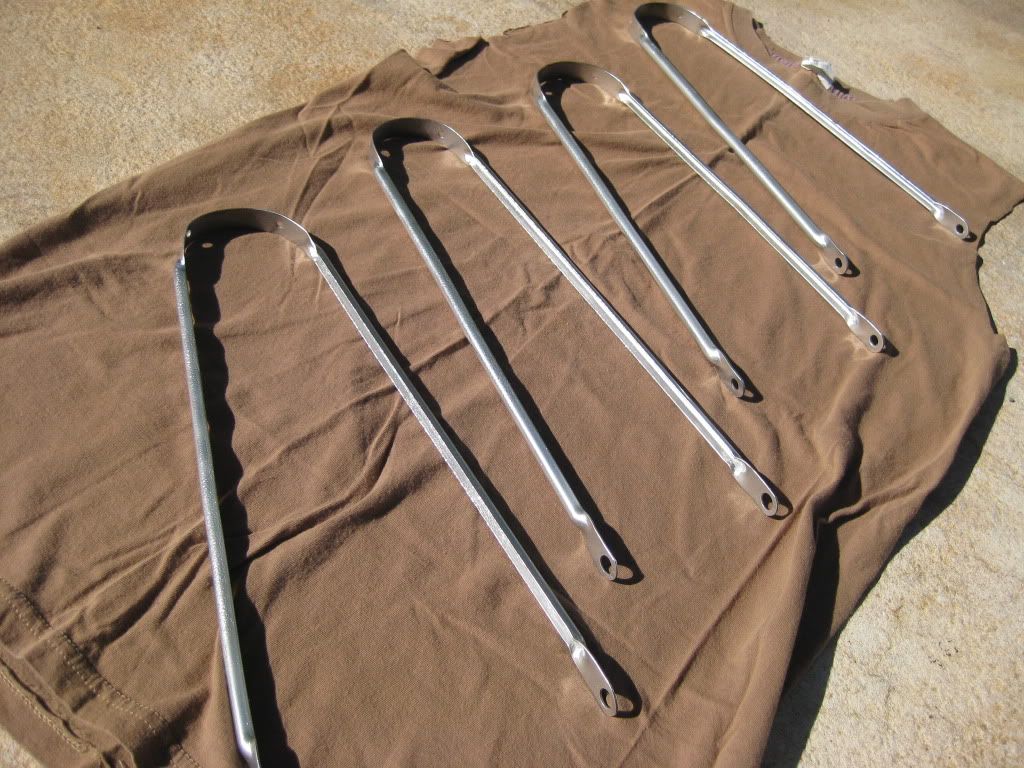
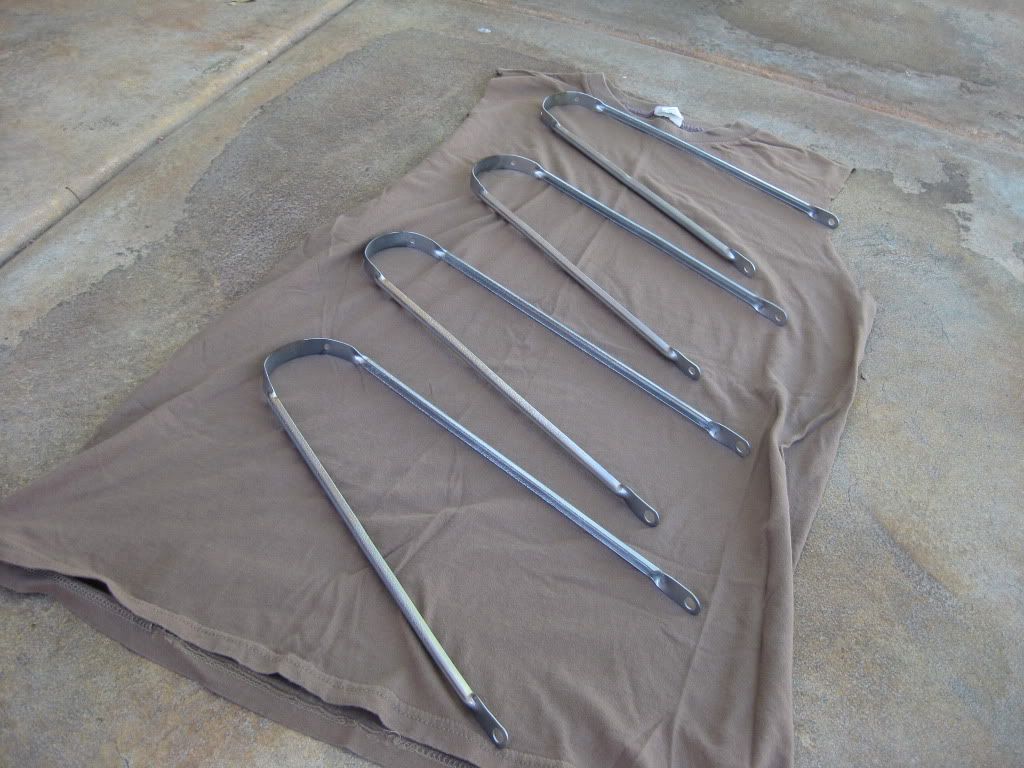
After all this we disassembled the spraypaint station and a$$essed our work on the braces. Here are two pics (sun and no sun) and I am really impressed. The paint looks great and I think the braces look sharp. Now only to see how well they hold up over time. WIll the paint chip off easily? Who knows.
Lastly I cleaned up the original Weinmann Swiss aluminum calipers. Some WD and steel wool cleaned up the gunk weird pit-looking marks and such fairly easily. After that the dremel and more Blue Magic made them really start to scream! Woohooo! :mrgreen:
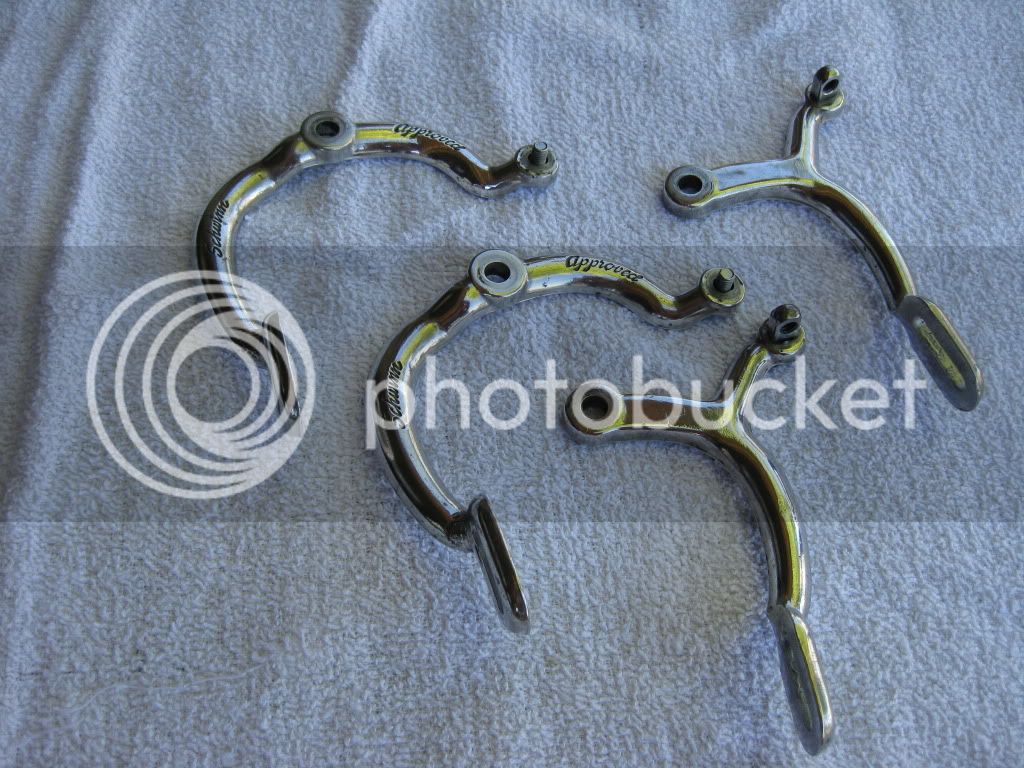
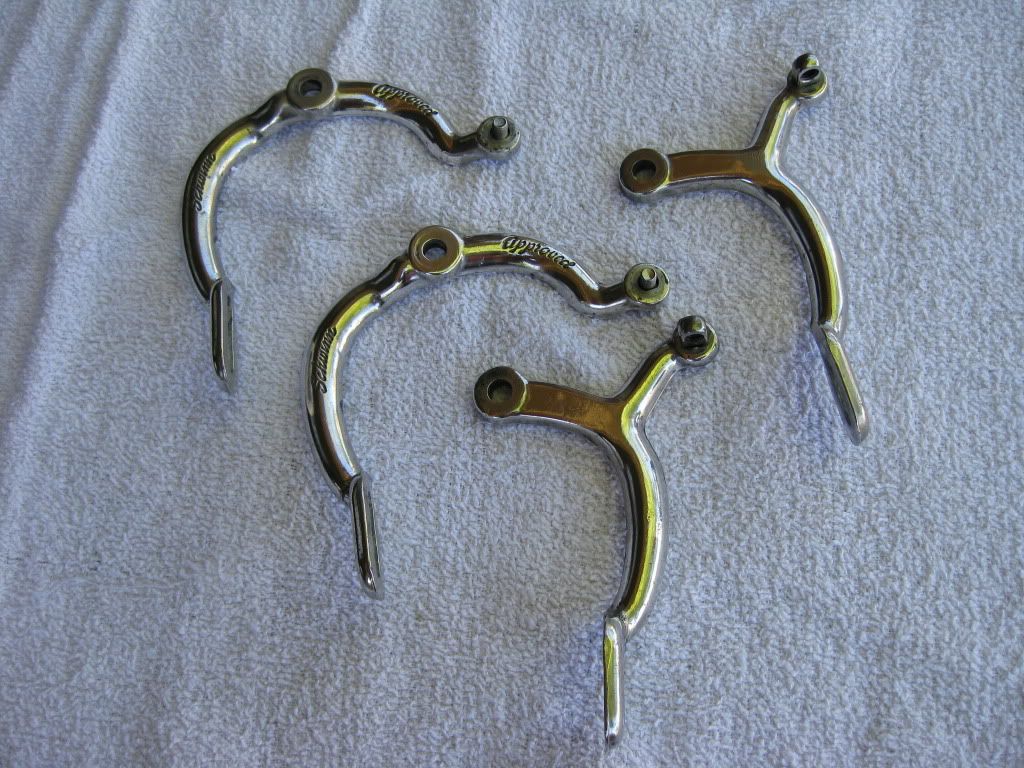
The final part of today was a nice surprise. While checking the mail before hitting the shower, I found the special delivery of 4 planet gears had arrived! Thanks to Cameron of Udall KS, he got them here in a hurry and at a fair price! I rushed them down to Al at Bike World and he's going to have my rear hub 'clicking strong' in no time!
First off, yesterday after work I looked into the vinegar bath and caliper that was soaking. I was hoping to see astounding results. Much to my dismay, the thing looked just like it did when I dropped it in there. Real nice. :roll: Now for plan B on those things.
I also worked on the frame some more and the forks too. No pics as it's really slow going. I am seeing improvements, but it's tough work as this bike has sooo much grime and years of dirt imbedded into it.
I also decided to strip off the old paint from the chain guard and just go with it. Kinda a leap of faith here, but the old stuff was looking pretty ratty. Now I can repaint it and add the decals for a sweet looking new chain guard. The old one cleaned up rather nicely with some WD40 and 0000 steel wool.
I also filed all the fender braces...again.

So today was pretty productive. I started the morning by setting up one of my sawhorses on it's highest setting, covering it with newspaper and hanging the fender braces. Once they were hung, I cleaned them (for like 20 minutes) with mineral spirits to remove any grime, fingerprints, or gunk. This was a great technique from Gary (B607, I think, here on the forum).

After that, my son and I "hit 'em" with Rustoleum Chrome paint in three seperate light coat applications. We put them aside to dry.


Next were the fenders. Man, I feel like I spent an eternity on these things today and got no where. Both were moderately dented and scraped, and I've been spending a little time every day banging out the dents from the back side of the fenders with a hammer and screwdriver butt. Today I even tried a golfball as well. Seriously, like 2 hours later, I maybe saw some light improvements. The front one was less damaged so I spent the last part of 'fender time' working on it. Lots of WD and steel wool later, it was looking okay by my eye. I then hit it with some Blue Magic metal polish and I now think we have a completed fender!


Here's what the rear fender looks like now too. A long way to go to get to looking like the front one huh?

After all this we disassembled the spraypaint station and a$$essed our work on the braces. Here are two pics (sun and no sun) and I am really impressed. The paint looks great and I think the braces look sharp. Now only to see how well they hold up over time. WIll the paint chip off easily? Who knows.


Lastly I cleaned up the original Weinmann Swiss aluminum calipers. Some WD and steel wool cleaned up the gunk weird pit-looking marks and such fairly easily. After that the dremel and more Blue Magic made them really start to scream! Woohooo! :mrgreen:


The final part of today was a nice surprise. While checking the mail before hitting the shower, I found the special delivery of 4 planet gears had arrived! Thanks to Cameron of Udall KS, he got them here in a hurry and at a fair price! I rushed them down to Al at Bike World and he's going to have my rear hub 'clicking strong' in no time!
Didn't get much done today on the bike, but I was able to spend an hour or more on the frame with the polish.
I have to say though that I am quite disappointed and kinda bummed. After more than three hours total on the frame with everything I could hit it with, I'm just not seeing the results that I had hoped for. Some areas are shining up nicely, but others look the same. I even tried the dremel tool today with the polish and that didn't seem to change much in the way of speed of removal of the dark stuff. Some WD-40 seemed to help some gunk, but there is some stuff that just wont brighten up.
Here's a before and after pic (the before you've seen earlier). I hate to say it, but I'm just not seeing the sparkle I want.
Before:
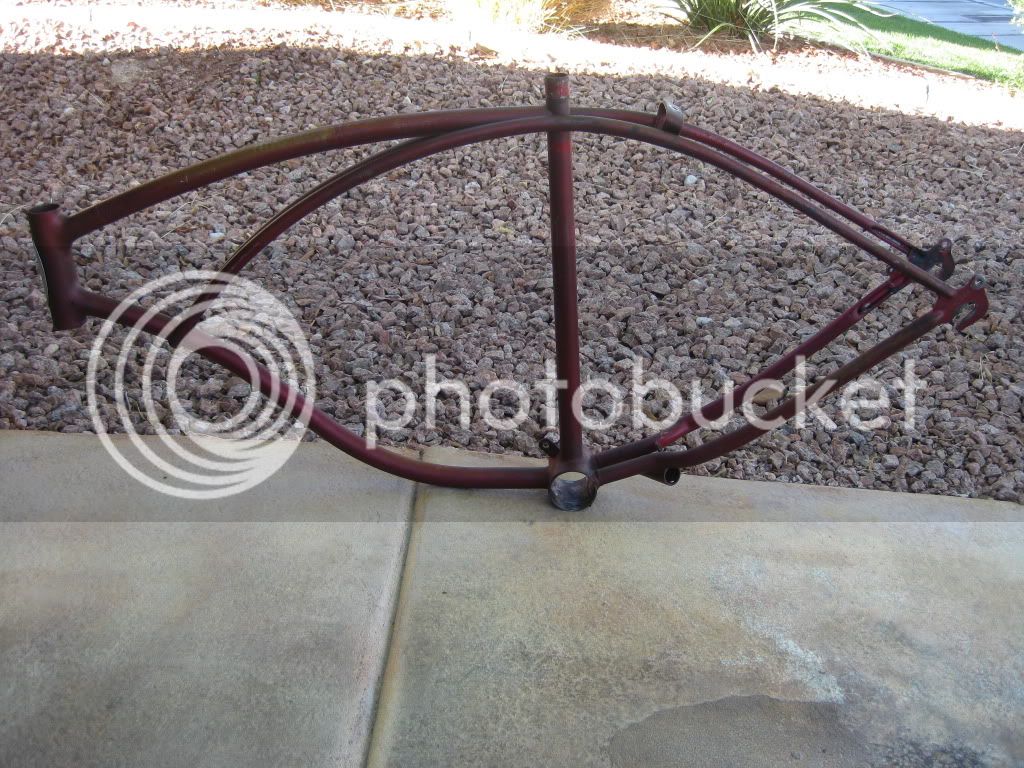
After:
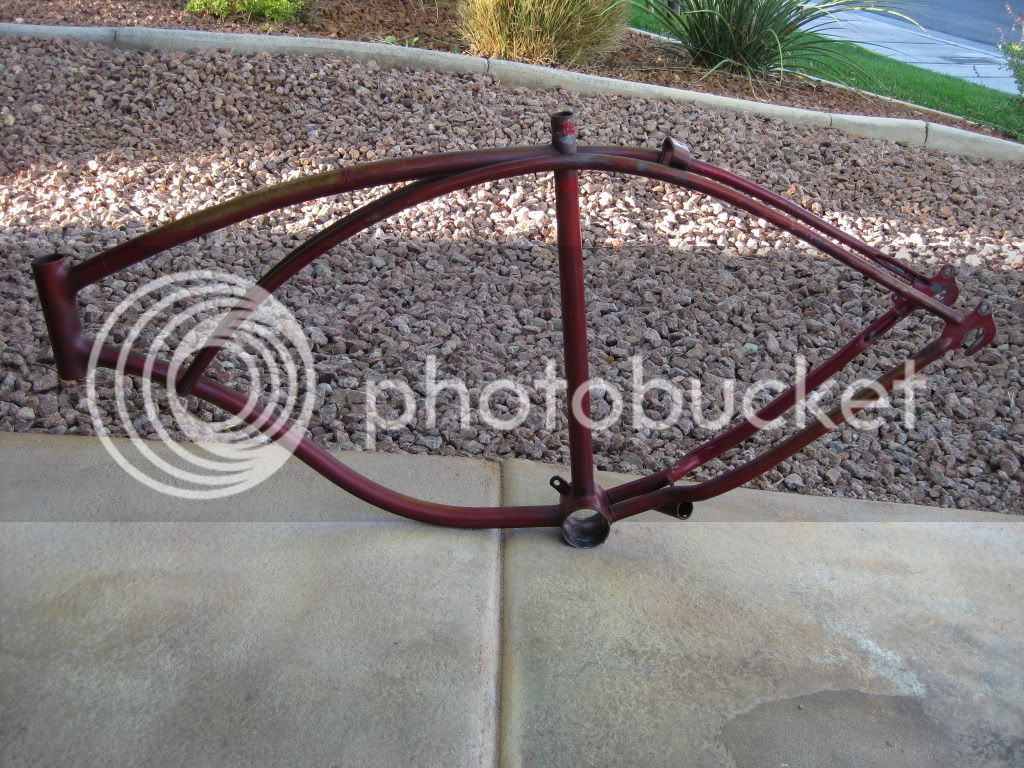
It's almost impossible to determine which one is the before or after huh? :?
So now I'm left with questions and decisions. What to do? Is this too much patina? You can see my seperate thread over in "Bike Talk" on new paint versus patina, and all the pros and cons therin. I just don't know.
I'm struck that the bike will have the proverbial 'lipstick on a pig' effect when complete. EVERY part and piece will be shiny, clean, new and sharp...but it will all be on a cruddy looking frame. "But hey it's original." Not so sure how many times I can say that before I'll want to just sandblast the crap out of everything and just start over.
How much is original paint (in lousy condition) worth over a rocking new paintjob?
I'll do some more polish here in the next few days and see if any more shine emerges, but I'm not optimistic. Guess I could put it all back together and when the timing and funds are right set up a sweet powdercoat session for eveything.
Not sure where to go from here. :roll:
I have to say though that I am quite disappointed and kinda bummed.
Here's a before and after pic (the before you've seen earlier). I hate to say it, but I'm just not seeing the sparkle I want.
Before:

After:

It's almost impossible to determine which one is the before or after huh? :?
So now I'm left with questions and decisions. What to do? Is this too much patina? You can see my seperate thread over in "Bike Talk" on new paint versus patina, and all the pros and cons therin. I just don't know.
I'm struck that the bike will have the proverbial 'lipstick on a pig' effect when complete. EVERY part and piece will be shiny, clean, new and sharp...but it will all be on a cruddy looking frame. "But hey it's original." Not so sure how many times I can say that before I'll want to just sandblast the crap out of everything and just start over.
How much is original paint (in lousy condition) worth over a rocking new paintjob?
I'll do some more polish here in the next few days and see if any more shine emerges, but I'm not optimistic. Guess I could put it all back together and when the timing and funds are right set up a sweet powdercoat session for eveything.
Not sure where to go from here. :roll:
Interesting idea to paint the fender braces. I am restoring a Schwinn middleweight of a similar year and opted against painting because I was worried about chipping. What did was first soak them in an oxalic acid mixture. After the rust was removed, I got a wire wheel for my grinder and used that on the braces. It took it down to fresh bare metal almost instantly... very little scrubbing, filing, or sanding required. I know they make a wire wheel attachments for Dremels and power drills, you might look into getting one for your other steel parts. Having the right tool makes the process so much easier!
I'd also repaint your bike since the paint is in bad condition and you've already stripped the chain guard. Regarding the chain guard, painting chrome plated surfaces can be difficult. Paint will often chip somewhat easily. Make sure to clean the chrome with rubbing alcohol first. Then apply a couple light coats of primer followed by your top coat. This creates a nice thick layer of paint that is more chip resistant.
On a side note, have you started looking for the 'correct' seat for your jaguar yet?
Lookin' good 
Shawn,
Those are some good tips...thanks! That has been my concern with the braces as well, chipping. Though I don't plan on 'dumping' my bike on its side like my son does with his little starter bike, I do wonder how well that silver paint will hold up. If after a few weeks/ months/years they start to look ratty, I will go with your technique. Or maybe just buy some 'new' ones. (that's cheating right!) :wink:
As for the paint, I appreciate your ideas and thoughts. I am leaning toward more poilishing followed by a lot of carnuba wax...for a while. I am stuck on the "it's only original once" idea and can't seem to shake that thought.
I have begun to look for an original seat, but am focusing on getting her rideable and functional first. The seat may be the last thing I do. Let me know if you hear any good leads there (or on any parts FWIW).
What are you restoring? Do you have a build thread? Please PM me with any details.
Today was another full day of real work and deployment prep. But I was able to get home and get a little done on the Jag.
I decided to go with Nate Pence's (here on the forum) Hiawatha resto advice and just friggin' steel wool it! I have a ton of 0000 steel wool and lots of polish, and my arms are tired from days of rubbing, so I gave it a go. All I can say is that the paint looks a whole lot better. But you have to be careful and not go too deep as it takes off layers real fast. I think I can actually ride this bike now and be okay with the 'patina'...at least for a while.
I don't think the pics do it justice, but after a thorough cleaning after the steel wool treatment and some carnuba wax...she's looking half her age again! :mrgreen:
Here are the comparo pics.............
Original, just washed:

From the other day after polish and rags only:

After steel wool:
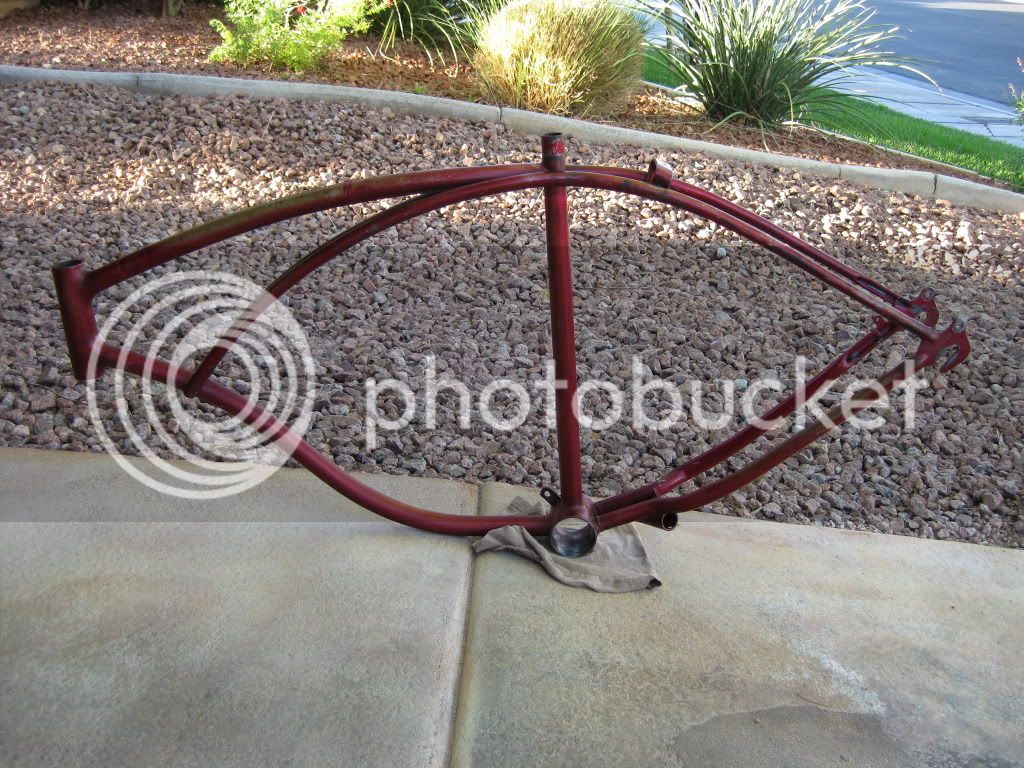
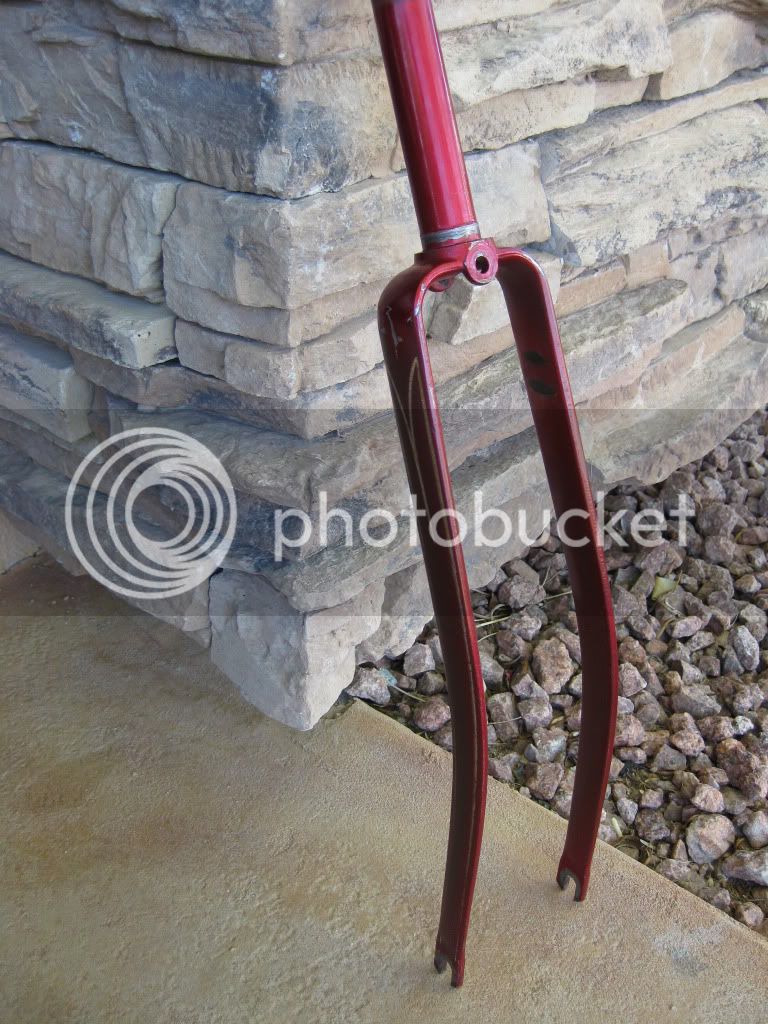
Here is the other side and the forks too:
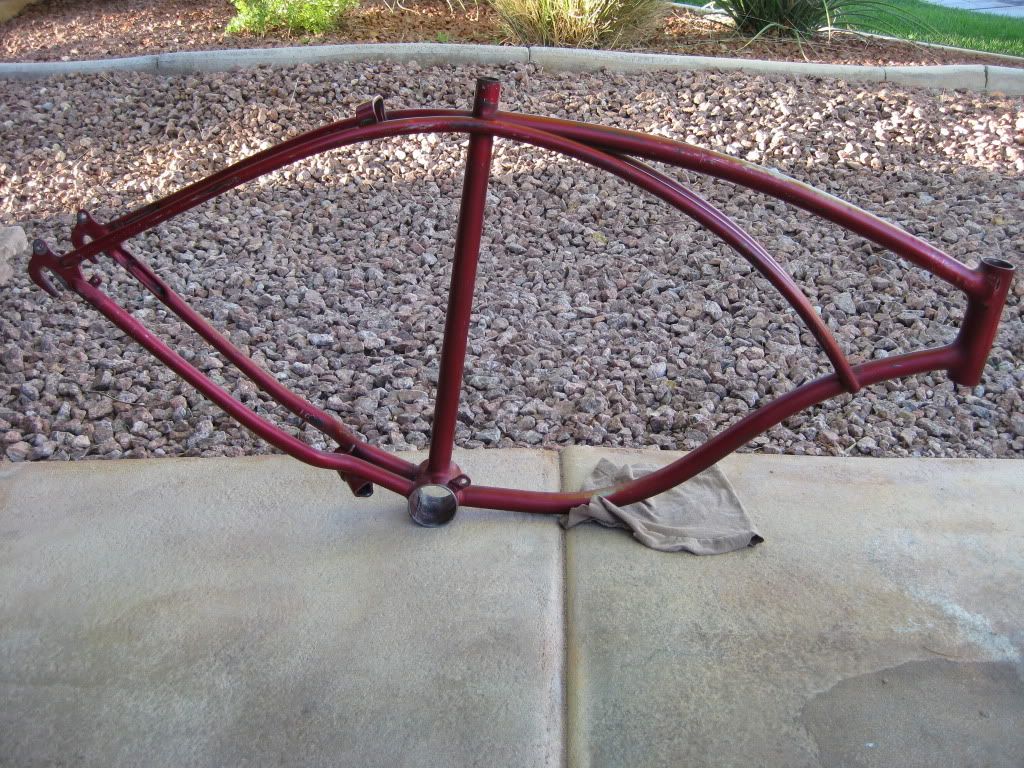
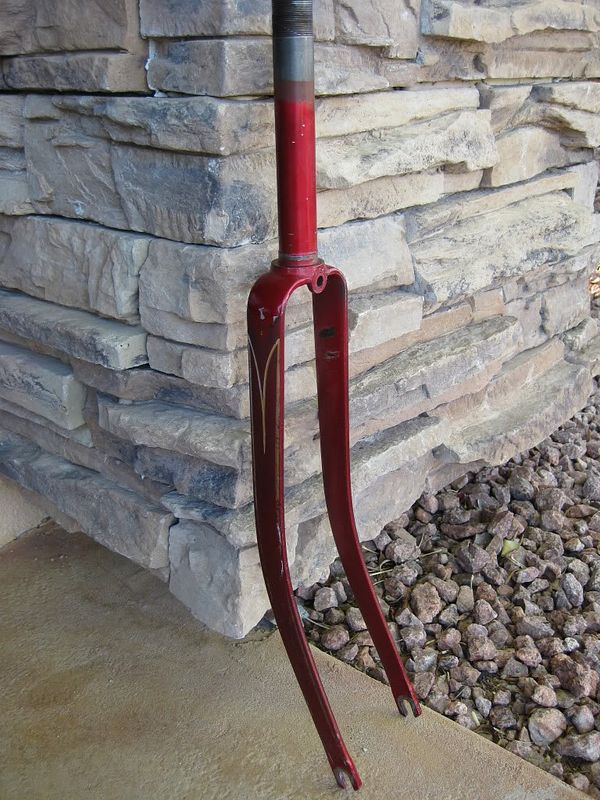
Not too shabby I suppose... 8)
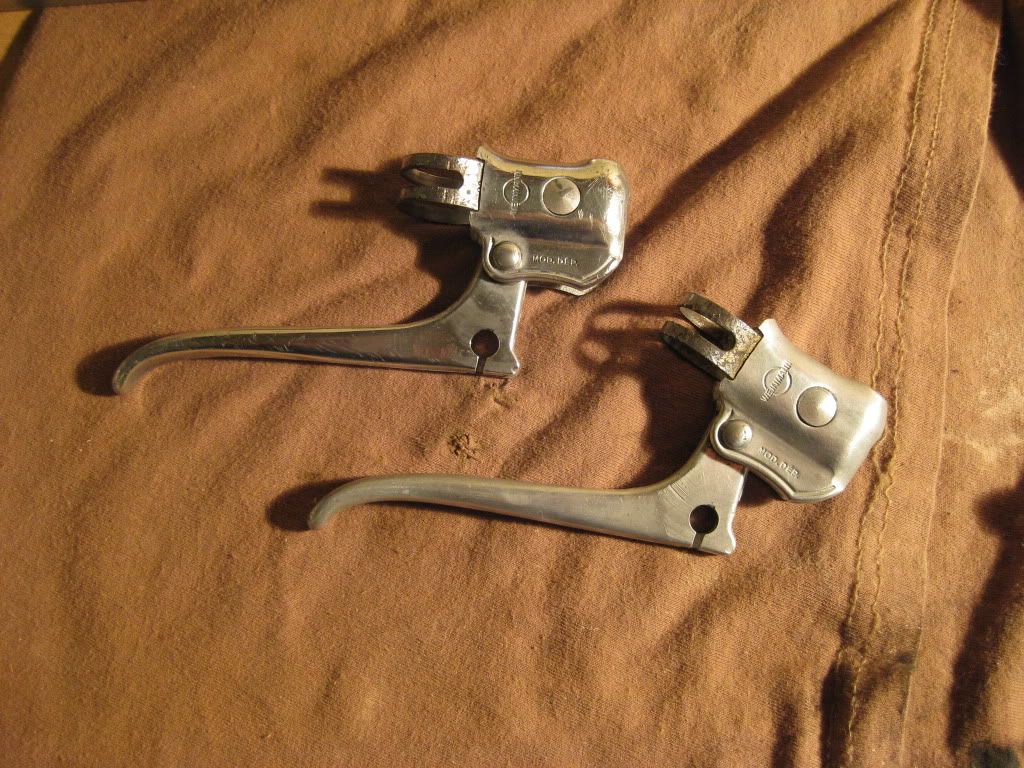
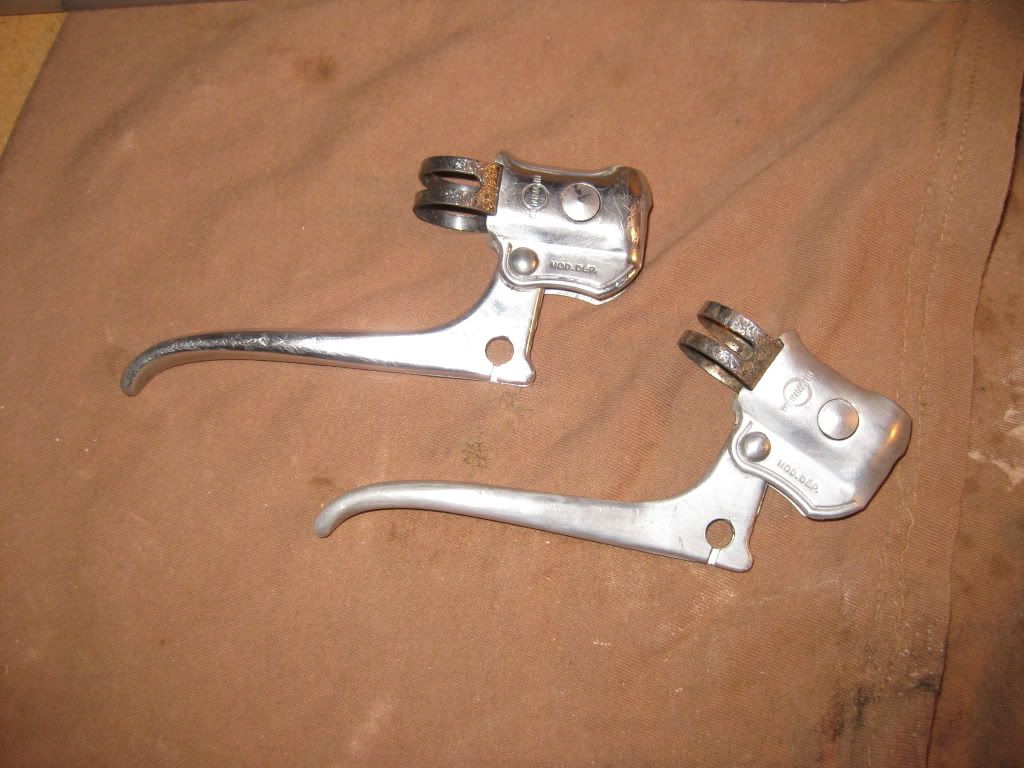
I was also able to spend a little time with the dremel and some Blue Magic again. I'd also advise you to NOT get Blue Magic in your eye...it's not too fun. :roll: These are two pics of one handbrake polished and the other just cleaned up and not polished.
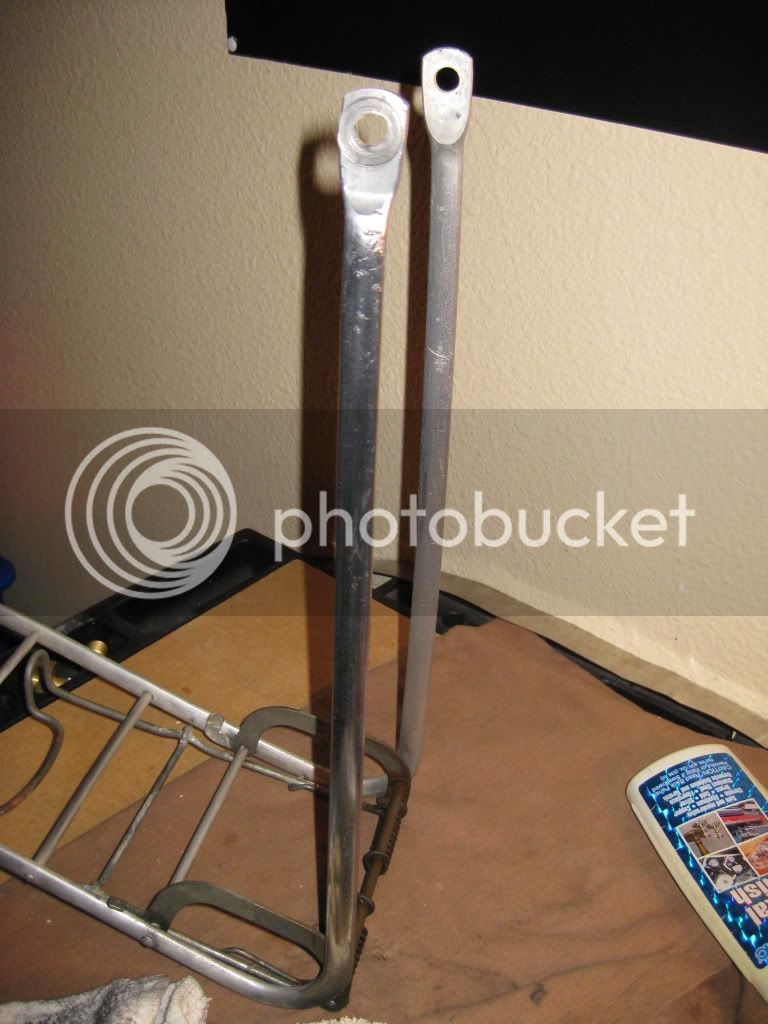
Even got the front frame straightened and started. it's gonna need some help though with that nasty spring. Here you can see one arm polished as compared to the other.
We're getting somewhere and will be soooo close to assembly, but I will wait until I return in February and it will be a blast!
I decided to go with Nate Pence's (here on the forum) Hiawatha resto advice and just friggin' steel wool it! I have a ton of 0000 steel wool and lots of polish, and my arms are tired from days of rubbing, so I gave it a go. All I can say is that the paint looks a whole lot better. But you have to be careful and not go too deep as it takes off layers real fast. I think I can actually ride this bike now and be okay with the 'patina'...at least for a while.
I don't think the pics do it justice, but after a thorough cleaning after the steel wool treatment and some carnuba wax...she's looking half her age again! :mrgreen:
Here are the comparo pics.............
Original, just washed:

From the other day after polish and rags only:

After steel wool:

Here is the other side and the forks too:


Not too shabby I suppose... 8)
I was also able to spend a little time with the dremel and some Blue Magic again. I'd also advise you to NOT get Blue Magic in your eye...it's not too fun. :roll: These are two pics of one handbrake polished and the other just cleaned up and not polished.


Even got the front frame straightened and started. it's gonna need some help though with that nasty spring. Here you can see one arm polished as compared to the other.

We're getting somewhere and will be soooo close to assembly, but I will wait until I return in February and it will be a blast!
So today I finished up the front rack (sorry, no pics). It looks pretty good for the most part. I think it could be more shiney, but overall it looks sharp. The spring and steel parts are still a bit dingy though.
I also was able to spend another hour or so on the rear fender. Got most of the dents out finally, but there are still some creases and such. Cleaned it up with some agressive 0000 steel wool and WD-40, followed by some Blue Magic. Here are the results!
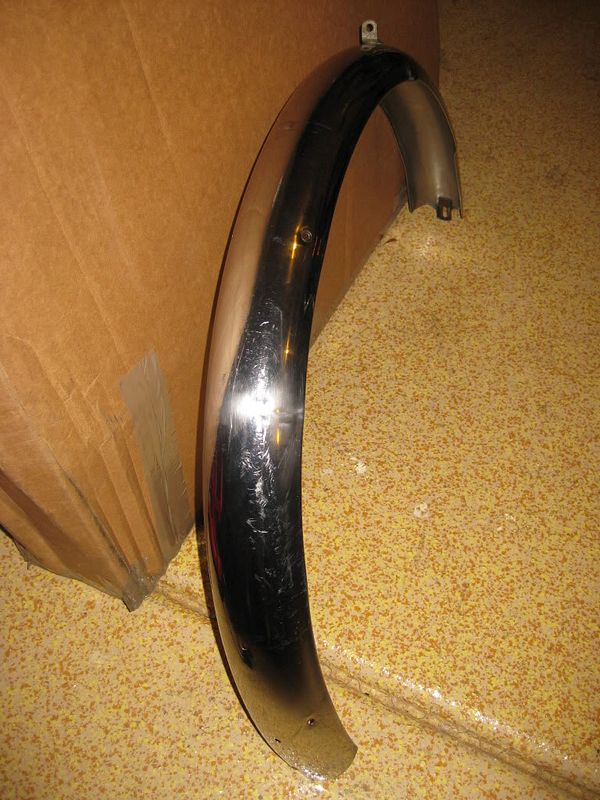
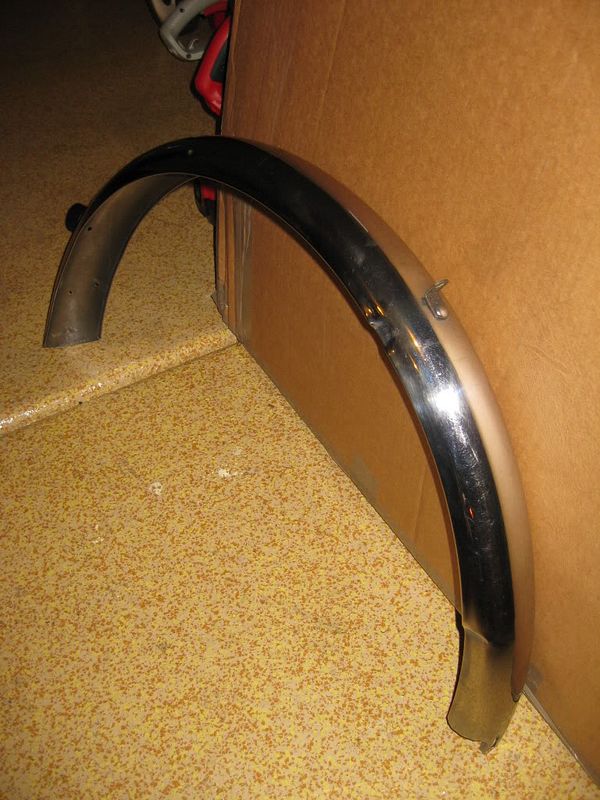
It looks pretty good I think, not perfect by any measure, but way better that when it arrived and now acceptable to ride with.
I also began to wrap up all the lose parts and labeled baggies, put stuff in boxes or cloth wraps...and label everything. I hope I can find it all in 3 months as labeled baggies and boxes are tucked away all over the garage like hidden Easter eggs! I got the frame and fork put away where they'll be safe, as well as just about eveything else.
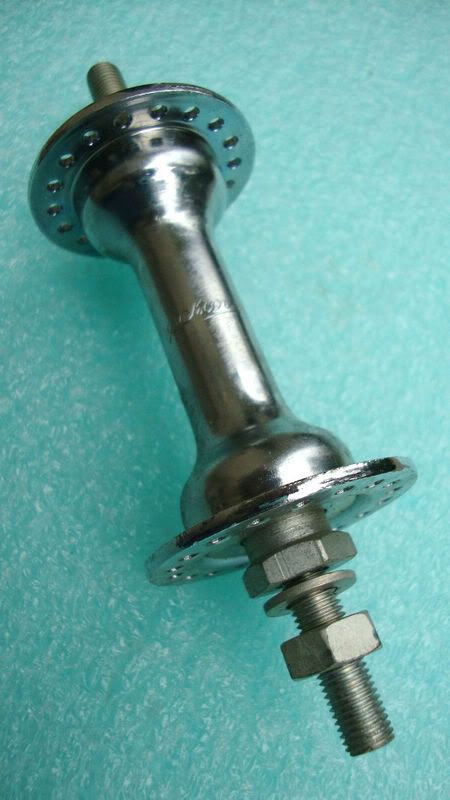
The front hub arrived too...it looks and fits perfect! As soon as Al is done rebuilding the rear hub, we're ready to lace 'em up!
Lastly, at work, my deployment date has been pushed back a few days! I was scheduled to leave on Monday, but now it will be a few days later (or so). Good news as I can spend more time with the family and maybe wrap up a few more loose ends on the Jaguar! :mrgreen:
I also was able to spend another hour or so on the rear fender. Got most of the dents out finally, but there are still some creases and such. Cleaned it up with some agressive 0000 steel wool and WD-40, followed by some Blue Magic. Here are the results!


It looks pretty good I think, not perfect by any measure, but way better that when it arrived and now acceptable to ride with.
I also began to wrap up all the lose parts and labeled baggies, put stuff in boxes or cloth wraps...and label everything. I hope I can find it all in 3 months as labeled baggies and boxes are tucked away all over the garage like hidden Easter eggs! I got the frame and fork put away where they'll be safe, as well as just about eveything else.
The front hub arrived too...it looks and fits perfect! As soon as Al is done rebuilding the rear hub, we're ready to lace 'em up!
Lastly, at work, my deployment date has been pushed back a few days! I was scheduled to leave on Monday, but now it will be a few days later (or so). Good news as I can spend more time with the family and maybe wrap up a few more loose ends on the Jaguar! :mrgreen:
Bike World called today (yay for being open Sundays) and the rear hub with the new (to me) planet gears was ready! So in my first official act of rebuilding (though it will be them and not actually me) I drove down and delivered the original and a 'new' S7 rim, tires, front hub, and tubes for rebuilding! 8) I don't have the expertise to re-lace a wheel and then tune it up so we're gonna have the pros do it. They also have some nice stainless spokes as well that we're gonna put on.
Should be cool to see 'em done, but I may be gone before that happens. Leaving in just a few days. But I'm excited for the new wheels!
Should be cool to see 'em done, but I may be gone before that happens. Leaving in just a few days. But I'm excited for the new wheels!


