BLACKBIRD (Skylark Convertible)

Rat Rod Bikes Bicycle Forum

Help Support Rat Rod Bikes Bicycle Forum:

This site may earn a commission from merchant affiliate links, including eBay, Amazon, and others.
A brawny beefy beauty....We gonna see some red stripes on the tank? Fauxtina to match the frame? Both? None?.....tune in next time for.....:D

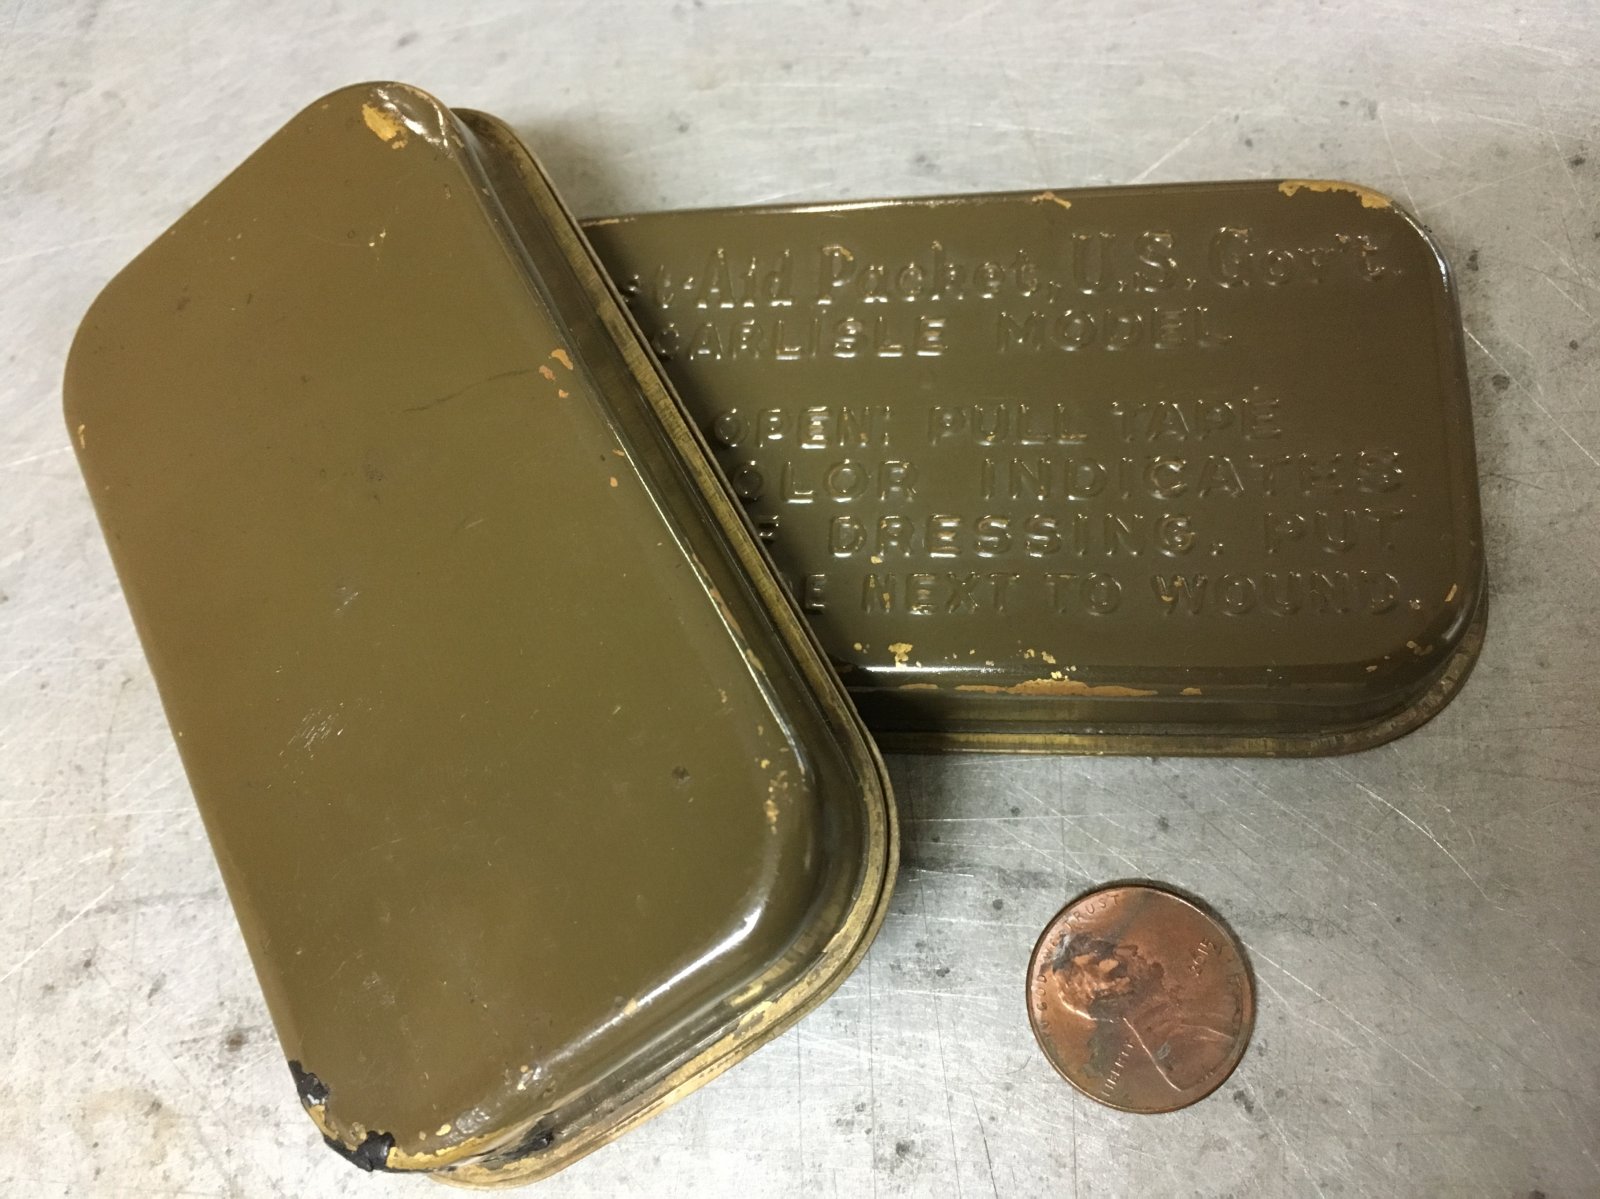
Still wondering what the heck this is for.....:39:

index.php

I was wondering if anyone remembered that from way back in the beginning. There was a little pretense in that post, the intent was to reveal the color early without anyone being fully aware until later. A sort of bait-and-switch. The actual box was never in play. It's fun to plant little clues during the build off!

I had been trying to find a color code for that color without success. Then my friend picked this up at an estate sale and I was excited to have a good example to take to the paint store for a match.

Of course a lot of the original plans have morphed into something completely different as the build has evolved. I'm really liking the Batman color scheme at this point which is something I didn't see coming!
100_7111.JPG


Some pistripes on the tank is not a bad idea.:39: I've still got about 24 hours left!
 
MO FATTA MO BETTA
Get that bad boy/girl done!!
 
Awesome stance!
 
I've had this set of NOS military bars that I had planned to use that where very similar to the original Skylark/Bluebird bars. I was going to paint it match the original color scheme, but at the last minute today decided I didn't like the look with the Batcycle motif.
IMG_1348.JPG


After sifting through what I could find in the stash, I grabbed this set with a curved cross bar that I found interesting in conjunction with the light switch pod. So I went with it.
IMG_1369.JPG


For some reason it gives it more of a motorcycle look. I'm not really sure why I think that.:39:
IMG_1370.JPG
 
Last edited:
Got some good news and bad news.
The good news is that I completed a critical part of the build this afternoon! The bad news is that it's a skunkworks project that won't be revealed for a couple more weeks.:bandit:
I had mentioned this a couple of weeks ago and now I can explain.

I knew that the oversized tires were going to be a tight fit. That was the main reason behind the low profile "Chicago" fasteners inside the fender. But I discovered that the tires were just slightly too wide for the frame also. I had checked that early on but somehow concluded that they would work when in fact they didn't.
To avoid discussing the tires (I wanted to save that one), I quietly modified the frame and moved on.

Now that the tires are revealed and everything works, here's how I did it.

I cut a notch on each side of the seat stays and chain stays. Then cut and shaped some sheet metal to fill back in.
IMG_1203.JPG


As usual I had my cousin to TIG weld the pieces in for me.
IMG_1205.JPG

IMG_1206.JPG


After filing and sanding the welds smooth, I had to realign the rear triangle because the welding heat closed the axel opening by more than an inch!
IMG_1238.JPG


I was back on track! With the fenders and skirt guards in place, non of this can be seen. :ninja:
 
The final piece of the puzzle is in place and it's done! Just have to get some pictures later today when the sun gets low in the sky.
________________________________________________​

I've wanted to play with making a head badge for years so I decided to take the Bluebird headbadge as inspiration for the Blackbird.
bluebird badge.jpg


I cut a couple of blanks out of nickle plated brass, one to use and one for a backup.
IMG_1339.JPG


Not having much time (this was done last Thursday), I burned a silk screen with a positive and negitive image of the art work and printed one of each. The reason for for two images was to have a back up if the etching failed.
IMG_1343.JPG


As it turned out the screen printing was not good enough for moving forward with etching. I wouldn't have had time anyway. The problem was that the screen that I used didn't have a fine enough mesh to get the sharp edges that I would need. So even though the back up was not great, it doesn't look that bad unless you look close (or take close up pictures).:21:
IMG_1383.JPG


The badge was the reason that I added the raised section down the middle of the light pod.

IMG_1384.JPG


Getting the bend to look good took some time yesterday but it fits like a glove!
IMG_1382.JPG


Since this has turned into a rat build anyway, I've convinced myself that the ratty screen job goes with the ratty frame! I'll probably try this again later though.:)
 
Perfect icing on the cake man!!!!
Love it!!!
 

Latest posts

Back
Top