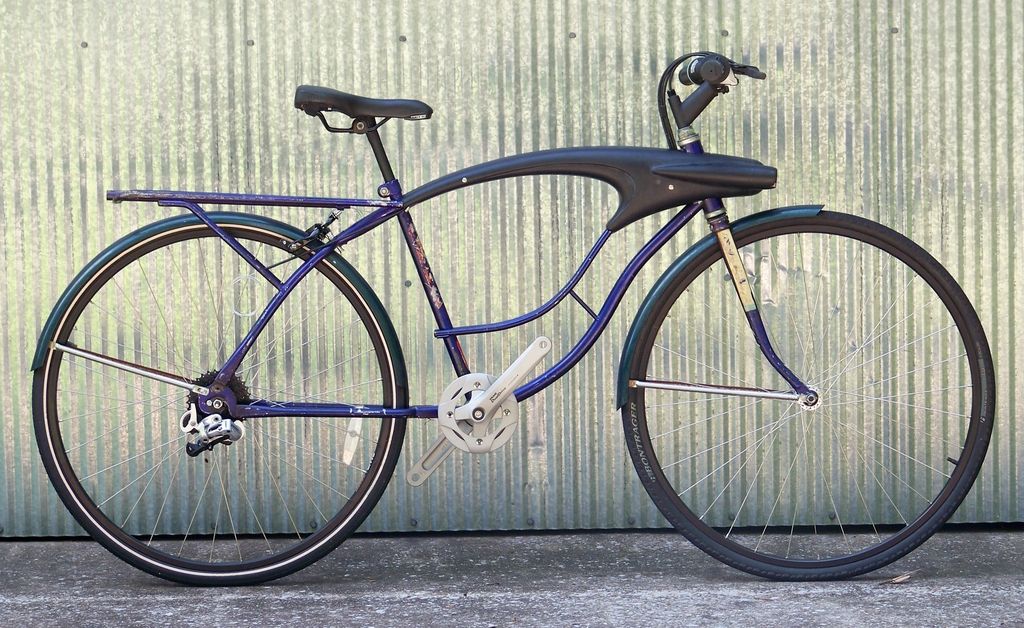
Columbia Convertible Commuter *FINISHED*

Rat Rod Bikes Bicycle Forum

Help Support Rat Rod Bikes Bicycle Forum:

This site may earn a commission from merchant affiliate links, including eBay, Amazon, and others.
Good deal. I couldn't tell if those pads were backwards or forwards in the pics.

There are lots of cool 700c tires but did you just tell us you got new tires and post up a pic of your old ones?:21:

Now what could these new tires be...hmmmmmm:39:
 
Nope, those are the new tires. Although I did use one like them in my mock-ups that was worn out and not usable.

95e63245-92a2-4b9c-98f4-ea9d64b7ac18_zps9gnb3mxi.jpg


I liked the tread pattern on it better than any others that I looked into, so I bought two new ones.
 
Looking pretty spiffy there jazzman, er, Renman...it looks so light and feathery you may have to tie a snare on there just to hold it down!:grin:
 
Nope, those are the new tires. Although I did use one like them in my mock-ups that was worn out and not usable.

I liked the tread pattern on it better than any others that I looked into, so I bought two new ones.

Oooh I see....well then...cool tires! :thumbsup:

Looking forward to the full road test report on this baby.
 
Looking pretty spiffy there jazzman, er, Renman...it looks so light and feathery you may have to tie a snare on there just to hold it down!:grin:
Haha, I played some jazz last night!
I'm very anxious to get it all together and weight it. The goal is to keep it under 30lb. We'll see. :)

Oooh I see....well then...cool tires! :thumbsup:

Looking forward to the full road test report on this baby.
Yeah, me too! Normally I would have had a test ride by now, but time has not been on my side. I had to go ahead with paint and final assembly and hope for the best. I'm still waiting for an aluminum headset that hopefully will be delivered tomorrow. It was supposed to have been here last week.:banghead:
 
Haha, I played some jazz last night!
I'm very anxious to get it all together and weight it. The goal is to keep it under 30lb. We'll see. :)

Somebody on here had a real light Spaceliner like 25 lbs? The internal gear hub will be the weight killer.

30lbs is light for a vintage frame!
I have to ask... Aluminium headset? Are we talking cups, cones and bearings or am I confused?

Luke.

Usually just the cups and cones. I've got a couple 1 1/8" black ones but I'm guessing you're using 1" threaded.
 
Well, the headset came in and it's really nice! BUT... it doesn't fit.:headbang:
There's no time left to try to find one that does fit (if it exists), so I'm painting the original cups black and putting it together with the original headset for now. I'll have to put that off until after the deadline. :blackeye:

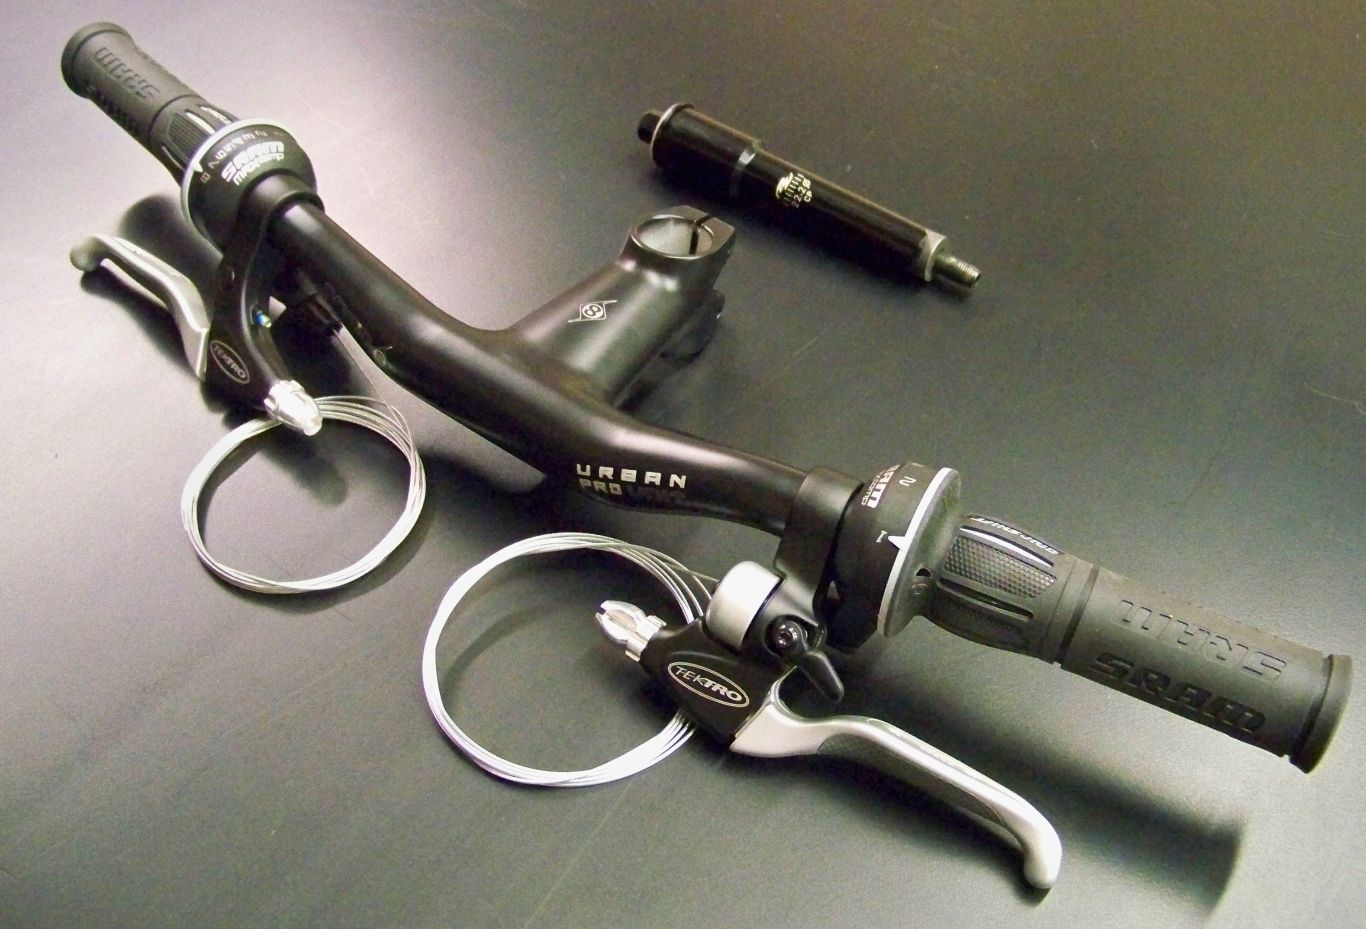
On a brighter note, I've got the handle bar and stem worked out. I had been looking for a light weight aluminum set up and found a perfect fit at my semi-local bike shop in the next county just a few days ago.

I can't wait to see it on the bike!
Handle%20bar_zpsapvc4c3d.jpg


The Tektro brake levers came from ePay. The left side has a cool little bell made into it.:)
 
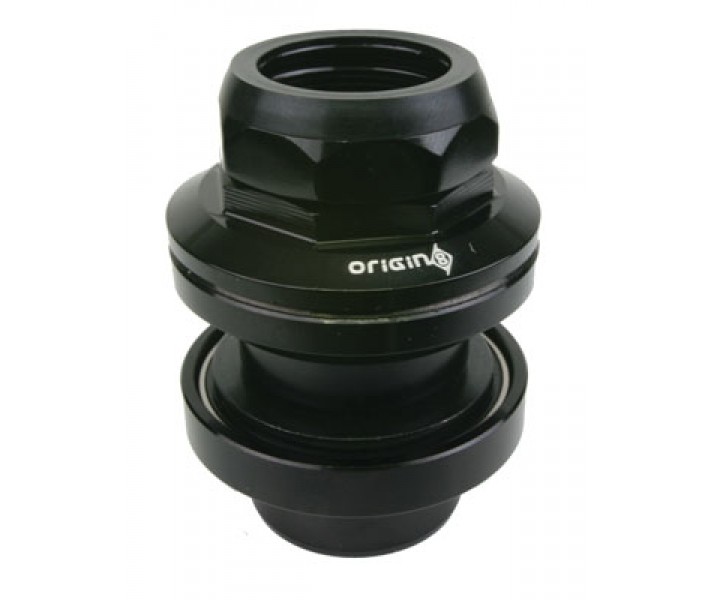
I thought that I needed a 30.2mm cup size where it presses into the head tube. It turned out to be a little too small. I'll need to get a better measurement and start searching again. I'm not sure if there will be anything compatible out there to fit this 50 year old frame. I suppose some type of shim is not out of the question. But like I said, I don't have the time at this point to figure it out.:(

The part that I got would have been really nice had it worked. It has sealed bearings, CNC machined 6061-T6 aluminum cups, and weighs only 110g.
origin8_2012_pro_threaded_headset_black_1.jpg
 
Just wrap it with some alum hvac tape until it's a snug fit?

I had to shim the headset on my Fastback. Can't remember what I used but had planned on going back and doing something better eventually.
 
Last edited:
How 'bout inserting a reducing sleeve into the headtube and then honing until you achieve a snug fit? That's how I'd do it--essentially a full-length shim. Careful with the facings, though. They must remain parallel.
 
Great bars!
 
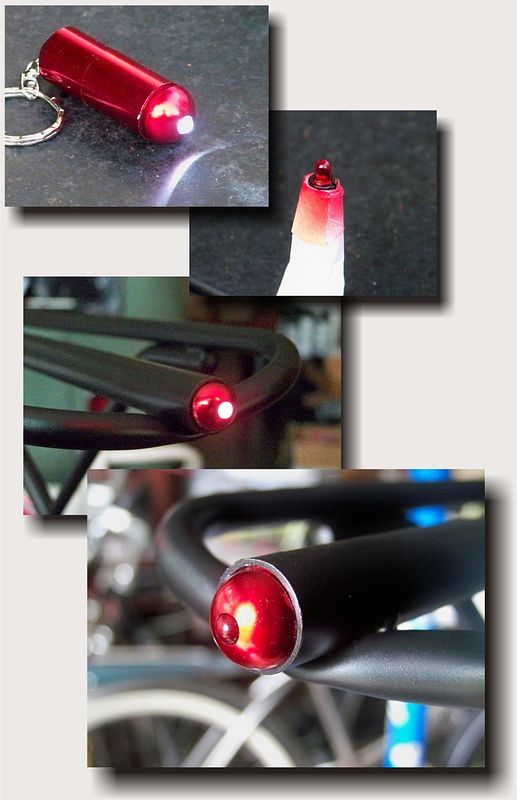
I've been waiting until after I painted the frame to take a picture of the tail light. It's a small LED flashlight that happened to perfectly fit the tubing in the center of the rack. I took the bulb out and painted it with Duplicolor red anodizing paint. The light turns on and off by pressing it in.

The red light was difficult to get a photo of, but it looks more red in person.
tail%20light_zpscye7qord.jpg
FYI you may be able to use LED bar end lights for your application. You just push them to light 'em up.


- by Gigmata
 
Just wrap it with some alum hvac tape until it's a snug fit?

I had to shim the headset on my Fastback. Can't remember what I used but had planned on going back and doing something better eventually.
How 'bout inserting a reducing sleeve into the headtube and then honing until you achieve a snug fit? That's how I'd do it--essentially a full-length shim. Careful with the facings, though. They must remain parallel.

As always, thanks for the suggestions. Waiting for the headset had already put me almost a week behind so I'm going ahead with the original (painted black) for now. I'm still open for any suggestions for after the build off though.

Those bars are something different!

Luke.
Great bars!

Thanks! As soon as I saw them I didn't hesitate about buying them. They fit perfectly with the 'modern components on a vintage frame' theme. I'm hoping that when people see the bike they will not be able to guess that it's not a brand new bike. :)

FYI you may be able to use LED bar end lights for your application. You just push them to light 'em up.


- by Gigmata
Thanks Gig, I'll keep those in mind for future builds. I've got this one squared away with the flashlight which is smaller than a handlebar end. It functions the same way by pushing it to turn it on and off also.
 
Last edited:
Now that I'm able to assemble the fork and bars, I've finally started measuring and cutting new brake and shift cables.

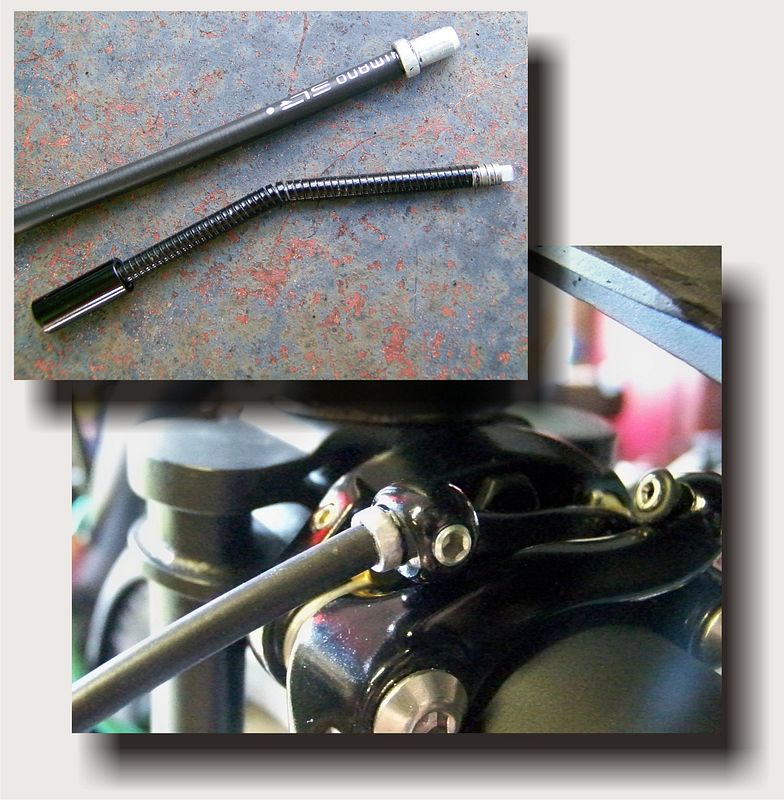
The first on the list is the front brake. This type of brake caliper is designed to be used with a brake noodle which has a shoulder on the male end to hold it in position. A noodle would have been very clumsy with the way the cable is routed but a normal cable end would not work without a shoulder to serve as a stop.

The solution was to remove the ferule from a flexible noodle and attach it to the cable end. It was fairly simple to do. I put the noodle in my vise and carefully twisted the ferule off with vice grips. Then I trimmed the plastic outer sleeve of the cable down to the metal liner and twisted the ferule onto the cable end. It's a nice tight fit and worked perfectly!

Most of the black paint got chipped up from the vice grips, so I just sanded the rest of it off and left it raw aluminum.

Noodling_zpsbmtmmeeu.jpg


Up until now I have not been able to actually test the brakes with the cable. My concern has been the effects of the additional drag on the cable with the tight bends. I'm happy to report that it works flawlessly! :dance2:
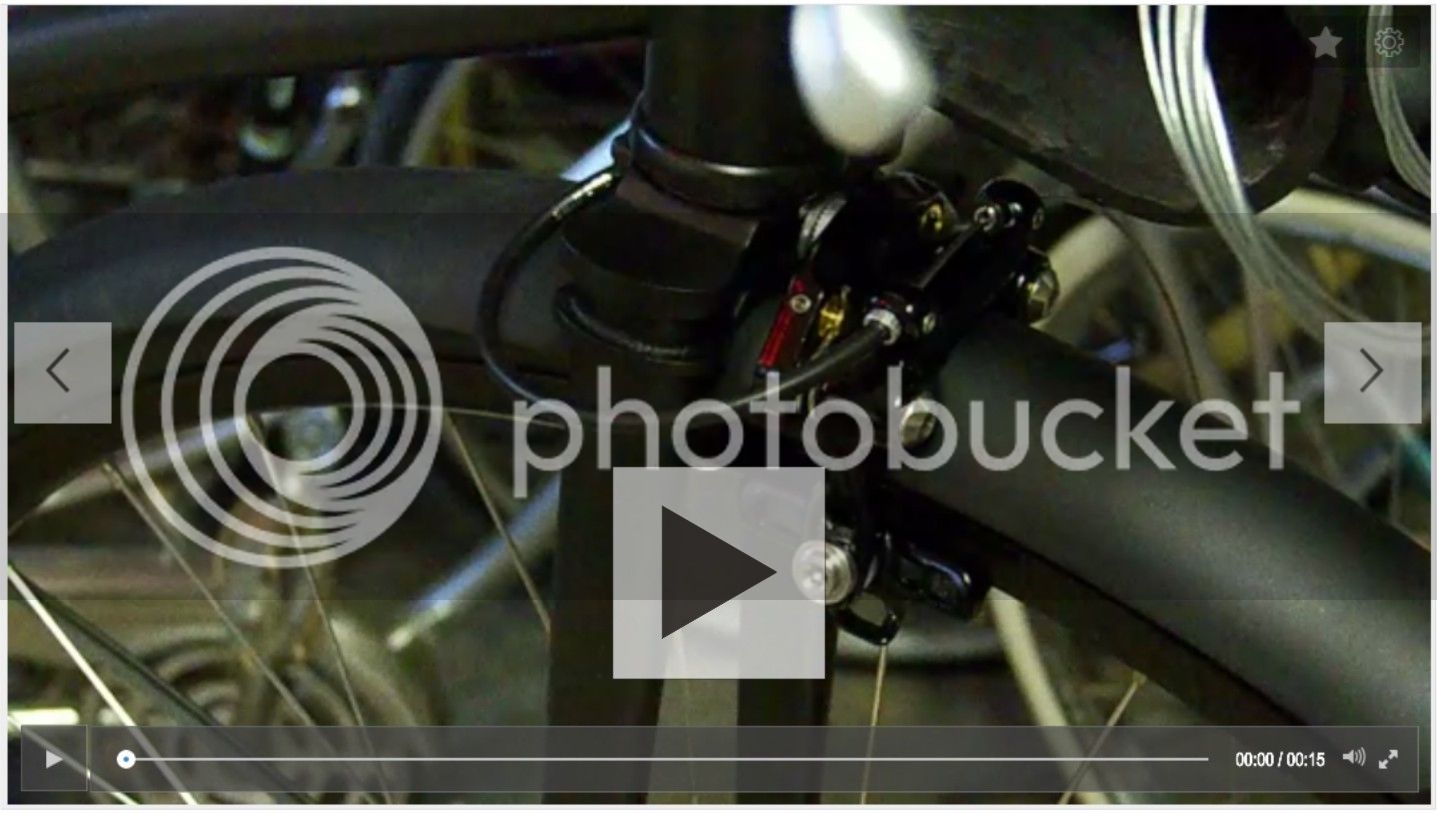

Hahaha! That suspense soundtrack! Looks like you have the brakes set up perfectly. You've heard of "bend, not break". This is "bend, and brake"...:21:
 
Hahaha! That suspense soundtrack! Looks like you have the brakes set up perfectly. You've heard of "bend, not break". This is "bend, and brake"...:21:
That's funny, the suspense music just happened to be playing when I shot the video. :21:

Very tidy work as usual. Loving all the different textures of the black. Can't wait to see the rest of it!
Thanks, I've planned the multiple sheens of black from day one. I used a play from Jake Sensi's playbook way back on the first day and gave a hint that my colors would be black, black, and black. :grin:
 

Latest posts

Back
Top