Columbia Convertible Commuter *FINISHED*

Rat Rod Bikes Bicycle Forum

Help Support Rat Rod Bikes Bicycle Forum:

This site may earn a commission from merchant affiliate links, including eBay, Amazon, and others.
Thanks, I've planned the multiple sheens of black from day one. I used a play from Jake Sensi's playbook way back on the first day and gave a hint that my colors would be black, black, and black. :grin:

Ha! Sure enough..post #7...added to my notes...:113:....the clue effect.:D

Yep, no rust at all.
I have three colors picked out. Black, black and black.:)

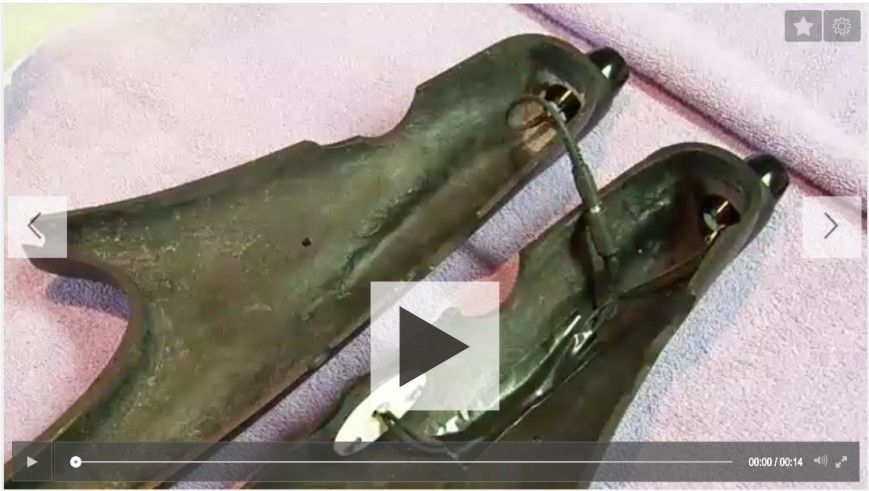
These vids have really got me dying to see the whole bike! Suspense music is great.
 
I hadn't got around to wiring the headlights and realized that I can't route any cables until the tank is ready to be mounted for the last time.
I wanted an easy disconnect for the wiring that crossed over to the opposite tank half from the switch. After several snafus with a telephone cable and jack, I came back to my first idea of using a 1/8 audio cable. It works just as I had hoped and makes it very easy to connect for assembling the tank on the frame.

 
Nice!! I love these videos. I'll bet for the next build off many more people will be using videos on their build thread. I know I will.
Thanks. I'm actually very late with the whole video thing. Luke set the bar too high for me! :chicken:

I just decided to do some short clips to show how certain things function. It works better than still pictures for showing things that move. It is fun though, I wish had done a few others before now.
 
Last edited:
Thanks Luke. A mono jack would've been all that was needed, but the one that I had laying around was stereo. I just cut the third wire out of the way. Here's a couple of photos.
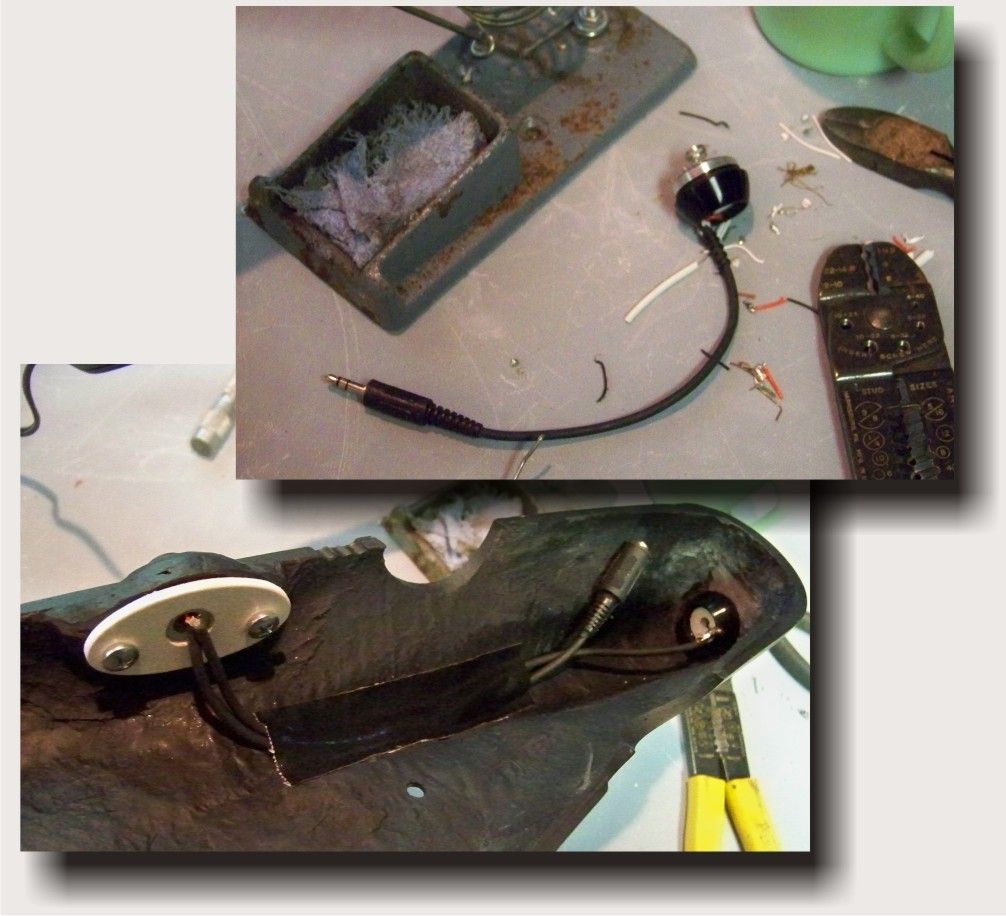
Light%20Wiring_zpsq9kerc7k.jpg
 
Looking good.:thumbsup:

Looks like you could almost hog one of those clamps out to hold both cables?

You test ride it yet?
The clamps are very specifically made for one cable, but I was told that they are developing a double.

I'm very close to riding it now. The last hold up is the seat post. I have to drill and tap two holes tomorrow and it will be ready! :happy:
 
I love how clean your bikes look. Attention to detail, that's what I like in a bike or anything for that matter.
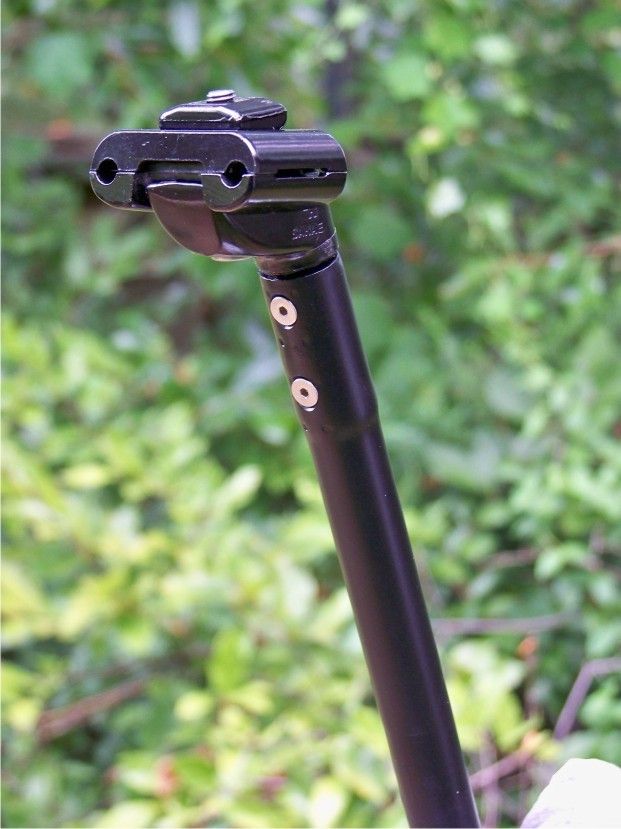
Thanks! This build has been harder in some ways than any of my rat builds. It was easier to leave things rough and crusty. I find myself now having to be very careful with all of this fresh paint and new parts. :)
 
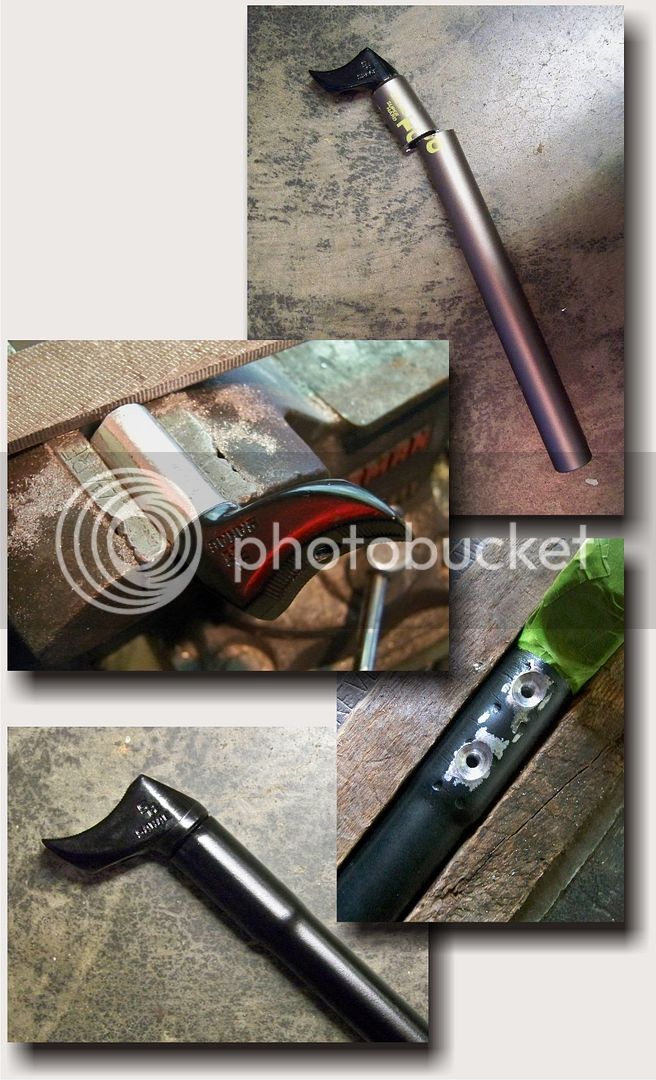
Today marked the last of any modified parts.

I had looked endlessly for a modern aluminum seat post but there's nothing out there that I could find that would fit such a small seat tube (about 3/4"). I didn't want to use a standard steel seat clamp and post for two reasons. One was for weight saving, the other was just for looks.

I finally decided to modify one. This is a bit of a late compromise because I ran out of time to get an aluminum post. Instead, I used an old Schwinn steel post and the head off of an aluminum post.

After separating the mount from the post, I filed it down to fit into the Schwinn post. Then I drilled and tapped two holes for 8-32 countersunk machine screws and put them together.

Because of the steel post, it's not as light weight as I had wanted, but it does have the look that I wanted. :)

Seat%20post2_zpsw6ogqpmt.jpg
 
Seatpost came out nice! Those cable guides are very awesome, I need to get me some of them, what a shame I am not in the running to win the ones they have promised the winner of Boten!

Tried ordering some but they only post to USA and Canada so far, will keep an eye out for when International post opens up!

Luke.
Thanks Luke.
I'll help you get some guides if you'd like. Send me a convo.
 

Latest posts

Back
Top