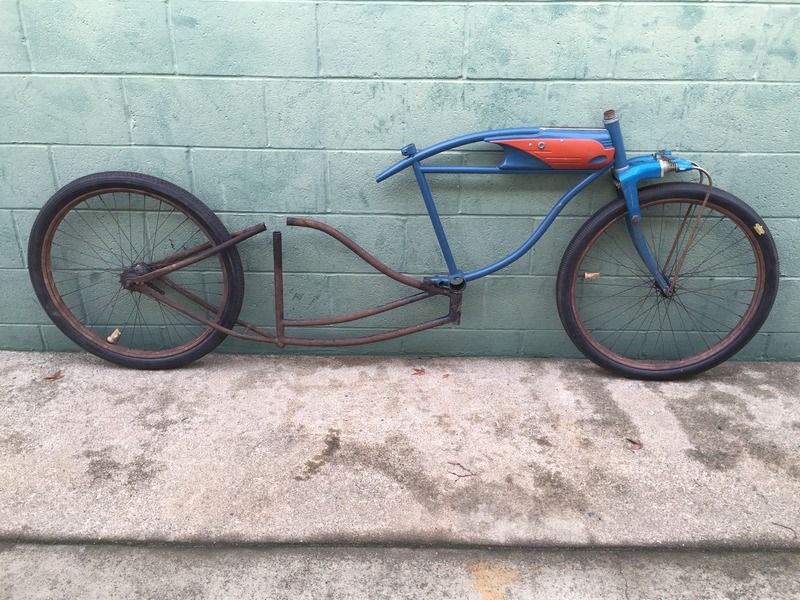
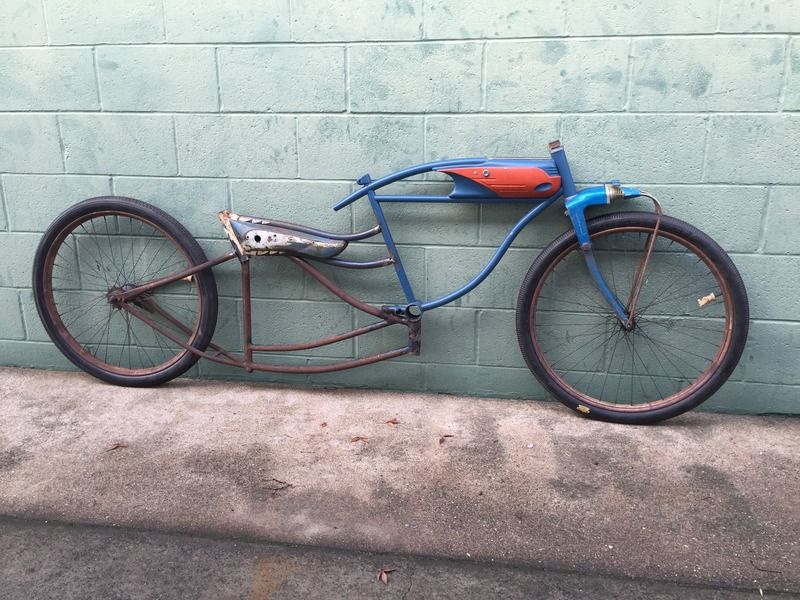
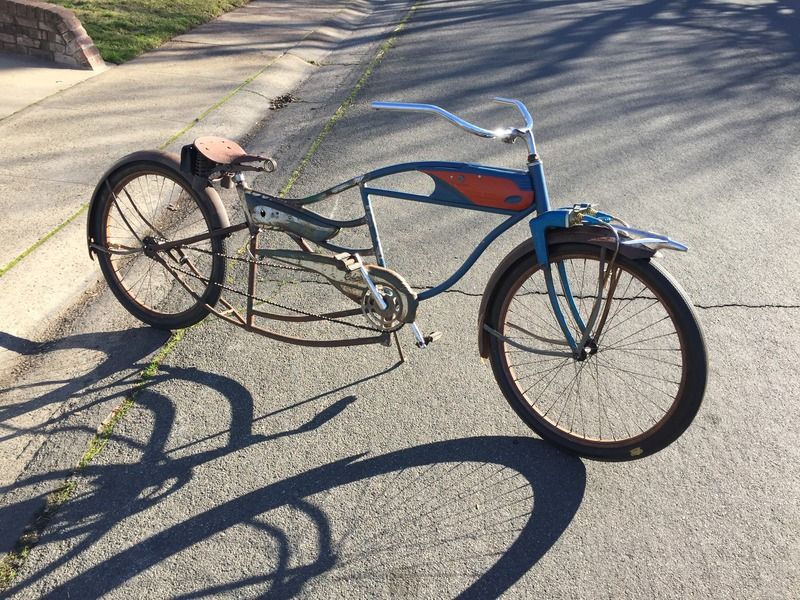
Dayton-Columbia, as close to done as it will ever be.

Rat Rod Bikes Bicycle Forum

Help Support Rat Rod Bikes Bicycle Forum:

This site may earn a commission from merchant affiliate links, including eBay, Amazon, and others.

Girls frame as seat tube?

  • No, too busy.

    Votes: 3 23.1%
  • Yeah! Get crazy.

    Votes: 10 76.9%

  • Total voters
    13
I can appreciate both sides of this discussion.
On one hand OneHorsePower, has a valid point. These frames are becoming fewer and fewer.

All though devin_science makes his side with using roached frames.

If a frame is to far gone to save, but can be cut into individual parts so it's soul can live on, then I say go for it.

I wouldn't recommend cutting up a few valuable frames to make one bike either.

We all know girls frames are dime a dozen, so I'm ok with chopping those, unless it's a rare one of a kind girls frame. At the same time, there are some boy frames that there seem to be an abundance of, spaceliner comes to mind.

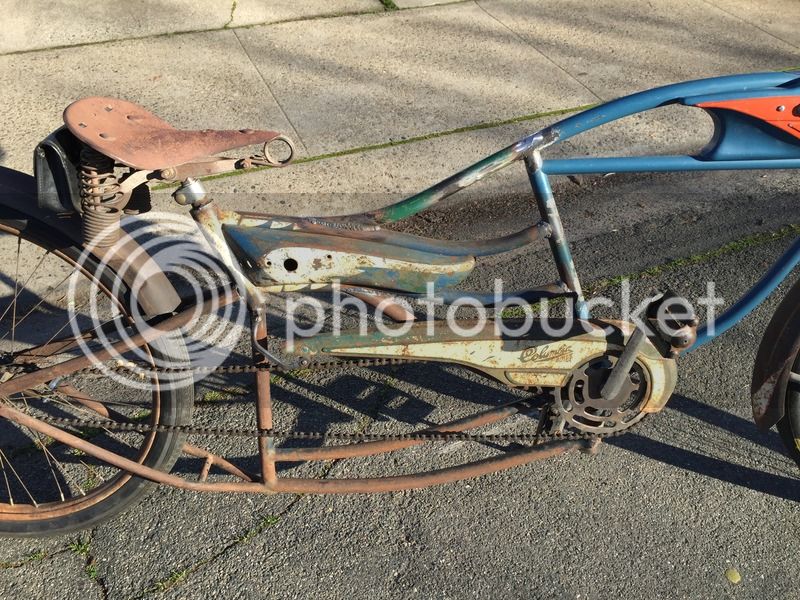
Now I love my CWC frames, but I'm not a purist either. I'd cut one if it fit what I wanted. To me it's just metal, but as I've said before, I would never chop up a 38 autocycle or a spacelander but that's just me.

Regardless of how you personally feel, these old bikes, one way or another are being kept alive. And that's a good thing in my opinion.
 
I understand what you're saying. I do. I'm just not that precious about them. I came to a turning point where I realized that most of these frames are going to rot away. Why not make an artistic bike with them that will be ridden? Look at Gaskill's builds. I count something like five frames in his builds sometimes, but when complete, his bikes are not just bikes, they're art. Now, I'm not saying I'm Gaskill, but I see something like what I'm proposing as just as much a sculpture as it is a bicycle. Otherwise, I would indeed just use my benders and roller. How to use the best pieces of each frame, or the usable pieces, as I often take frames that are roached (the boys Columbia in the front is the only one of these that I think could be built up as is).

In any case, I just felt the need to respond. I respect the purest view, that's just not me.


not a purist at all :) if you have more ,ship them to Montreal or any other big city and you will make big bucks , took allot of luck and time to find my frame around here.
bought mine cause it was the only response to a (looking for add) in 4 months and got only a bent naked frame all rusted out, just saying ;)

anyways , sorry for brigning that subject here and polluting your build thread , i should have kept my feelings for my self..
(Subject Closed everyone plz)
 
Last edited:
anyways , sorry for brigning that subject here and polluting your build thread , i should have kept my feelings for my self..
(Subject Closed everyone plz)

Not at all. We're talking about bikes. It's all good, brother! :thumbsup:
 
I was thinking that I might save this build for the build off, but...

I started working on it. Just a couple of things here and there, between my OBC build off bike, and customer stuff, but I've got an update I can make, so here goes.

Step one, I welded the head tube of one to the BB of the other, to get this thing as one piece. Man, this thing is long! Like, longer than I imagined it would be.
IMG_3933_zpsgfzemq8n.jpg
 
I don't usually care for excessively long bicycles, but I like the look of this one. I do have one idea, or maybe opinion rather...or both. In regard to the headtube under the bb, maybe you could grind off the front lowest portion of it, and weld in a curved bar that attaches to the lowest bend on the front downtube. It might create a solid, flowing line there that will otherwise be, as stated earlier, one straight line in the middle of all the curves.
 
Very Mad Max!!! Love it!
frd-23519r.jpg


My only suggestions are to get rid of the blue and orange paint (I'm sure that you've already planned that) and leave the lower head tube as is, but mount some type of weapon there.

Something like this...
042954bbb62736a6b7b1965c555f81d8.jpg
 
Last edited:
Very Mad Max!!! Love it!
frd-23519r.jpg


My only suggestions are to get rid of the blue and orange paint (I'm sure that you've already planned that) and leave the lower head tube as is, but mount some type of weapon there.

Something like this...
042954bbb62736a6b7b1965c555f81d8.jpg
Exactly what I was thinking, this build definately belongs on this site.
 
The roached girl's Columbia frame I used had the kickstand, which was this strange, internal type I'd never seen before. But the boy's frame had a similar hole, so I figured I'd be able to put it on there. Well, two days, and about four hours later, I finally got the kickstand on there. Their systems weren't quite the same. I had to do some welding, cutting, drilling, whoops, more drilling, grinding, and finally, some clamping. By the time this is all done, I assure you, the kickstand will have been one of the hardest pieces.

Then I found a crank wide enough (the BB was a hair wider than standard, for some reason), linked THREE skip tooth chains together, and finally got this thing so I could pedal it down the street.
IMG_4112_zps1f4ch5vt.jpg


The bars are not nearly swept back far enough, so I cut them up, and started making something I hoped would look like a set of Shelby bars.
IMG_4117_zpsvzj1wkix.jpg


I don't like them, though, so I may cut them up again, and try a sec..., uh, third time. Then I'll have to make a bracket for the chain guard.
 
My original plan for this bike was going to be a balance, very over the top, but also very finished, with clean edges, and a nice powdercoat job to complete it.

But as I continue to work on it, I just don't think it's going to work out that way. The Dayton frame that's on the bottom has holes rusted right through it. The stays are crumbling in places. Some of my connections such as the Columbia girl's head tube to the Dayton seat tube are rough. Combine that with my current interests, I'm changing things up on this build to be more sculpture than bicycle. It will still be rideable, of course, but this one is now all about having some fun.

With that in mind, first I put on a smaller chainring. The chain guard was from the girl's frame, and so the 26 tooth was a little too big to fit it. It also helps with it being so heavy. I then used a wrench to make a bracket for the other end of the chain guard. Worked like a charm. Threw a set of moon bars on there. They aren't as cool looking, and I may change them up, but they did make it more rideable.
IMG_4128_zps3ayyl2qm.jpg

IMG_4129_zpsgziipzbb.jpg

IMG_4130_zpsoi2ku7nz.jpg
 
After staring at this bike for days, I didn't like the gap in the front frame. The back is very busy with tubing, but the front has this open space. So, keeping in mind the new over-the-top whimsy I'm going with, I filled it in by continuing the girl's frame from where I cut it, complete with BB and chainring, which does spin, if you roll it with your hands.
IMG_4131_zpsd3paqu8s.jpg


I then extended the moon bars 3 1/2" to make them more comfortable.
IMG_4132_zpsoicep3bd.jpg


Plugged the hole in the BB with a Mexican coin, which has steel or iron in it, and can be welded.
IMG_4134_zpsnuupxmid.jpg


IMG_4133_zpskihale7j.jpg
 
Would be cool if you ran the chain up to the "extra sprocket" so i will turn when riding. or attach old spoons so it will windmill in the breeze....
 
Hooking a chain up to the second sprocket is totally possible, I'm doing it on my reload of "Winter/Spring Marriage" from last year's winter build off, a build that was inspired by your "Shelgin" btw.
 
I added a great piece to my D/C build, and thought I'd post some updated pictures. Got these Torrington style cross bars from The Black Monark. I'll extend them a few inches to improve the reach.
IMG_4204_zpsfn9cdg6c.jpg

IMG_4205_zpsbvr9pktk.jpg


It was missing a bar strap, but this old crusty brake arm strap fit the look perfectly, and matches the other side decent.
IMG_4209_zps1asnb5bh.jpg


Welded another coin on the bike, to fix the odd blank spot where I cut off the cranks.
IMG_4206_zpsgy53gh4c.jpg

IMG_4207_zpstt71mgit.jpg


Perfect amount of patina:
IMG_4208_zpsfibozixv.jpg
 
Switched around the hood ornaments, as I had this trophy topper that I really wanted to mount on the front fender.
IMG_4230_zps05jamoxa.jpg


Put the one that was on the front to the back, but I'm not sure I like it there.
IMG_4231_zpsmtcku3r2.jpg


Added a set of heavy duty wheel reflectors, then extended the bars 3 1/2", and slipped some grips over the work.
IMG_4232_zpsdkyiym65.jpg


Almost forgot to show, these bars were missing one of the straps to hold the cross bar, but an old rusty coaster brake strap seemed to match it almost perfectly.
IMG_4209_zps1asnb5bh.jpg


The bike as it stands now:
IMG_4233_zpsmvokbsqu.jpg
 

Latest posts

Back
Top