I love this idea, and think it showcases your frame in a really great way.Discussing wheel/tire size combo's on LeMadHatter's BO thread, I thought I might throw a pic up to show my original intention: small 20"fatty on the back and a tall 26" or 29" skinny/moderate width tire up front. I like how LMH's stance sits with same dia. wheels front & rear. I have some options. Opinions, thoughts, comments?View attachment 235578
You are using an out of date browser. It may not display this or other websites correctly.
You should upgrade or use an alternative browser.
You should upgrade or use an alternative browser.
FearSteer (a.k.a. crash and burn)
- Thread starter 68z27
- Start date


Help Support Rat Rod Bikes Bicycle Forum:
This site may earn a commission from merchant affiliate
links, including eBay, Amazon, and others.
Is that Teutel Jr?full grown bunch of men, BBQ= beer, wait, lots of beer consumed + male ego.
I'm watching, popcorn and all...
It will be, like the Red Bull soapbox races
View attachment 232790
Awesome frame! In a way I like to colours like this, retro destruction derby race styleDiscussing wheel/tire size combo's on LeMadHatter's BO thread, I thought I might throw a pic up to show my original intention: small 20"fatty on the back and a tall 26" or 29" skinny/moderate width tire up front. I like how LMH's stance sits with same dia. wheels front & rear. I have some options. Opinions, thoughts, comments?View attachment 235578
")
Is your bottom bracket moving to the front? Because there might be a long seatpost involved later on.
Digging your progress so far!
That is a pretty cool concept.
I almost bought one of those trail-a-bikes for a similar project bike.
It was like brand new and beautiful and the price was right, but when I looked at the quality of the welding around the rear stays I decided that it was distinctly substandard for any actual bicycle.
I have three kiddie bike frames laying about and they all have the some really ugly welding. They might eventually become garden ornaments or scrap steel.
Before I started this build I noticed what you are referring to. The welds on the rear triangle leave a lot to be desired, but that is not an issue with me since I will be cutting off most of it behind the BB to make room for my rear steer bracketry/components, etc. The remainder of welds on the main tubes look really good on these frames but the tubes are thin. I could see future problems with bent/kinked tubes....future gussets maybe....That is a pretty cool concept.
I almost bought one of those trail-a-bikes for a similar project bike.
It was like brand new and beautiful and the price was right, but when I looked at the quality of the welding around the rear stays I decided that it was distinctly substandard for any actual bicycle.
I have three kiddie bike frames laying about and they all have the some really ugly welding. They might eventually become garden ornaments or scrap steel.
Also regarding price...,they were past purchases from 15+ or so years ago when the kids were young. No big loss if they crash and burn
Well yes, as long as you don’t take a hit when the thing comes apart at speed.


$19.99
Electra Glide Wall Decal 2ft Long Sport Harley Davidson Bike Motorcylce Sticker Man Cave Garage Boys Room Decor
FatCat Wall Graphics


$455.36
$509.99
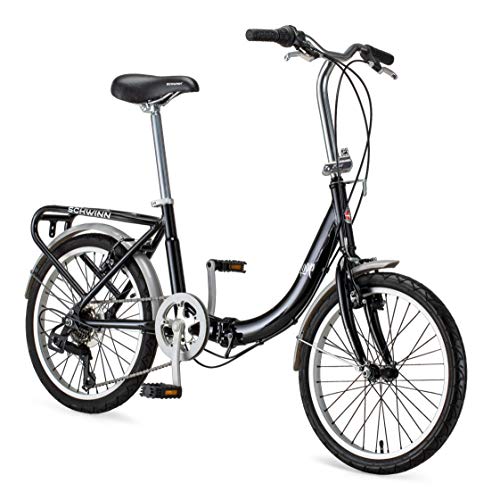
Schwinn Loop Adult Folding Bike for Men and Women, 20-inch Wheels, 7-Speed Drivetrain, Rear Cargo Rack, Carrying Bag, Black
OJCommerce


$29.95
Crossroads Home Décor A Biker's Prayer, Gift for Motorcycle Riders, Inspirational Bike Picture Frame, 6451BW
Crossroads_Home_Decor


Only a few bad words were muttered when I cut thru a weld while cleaning it up. There is some porosity due to a slow learning cure for welding tubes this thin. I'll add more steel later. So I thought I would change gears. This mongoose and a Specialized (both w/ 24" wheels) that I rescued 5 to 10 years ago were hiding behind the shed (because I forgot about 'em). Hmmmmm. rear suspension, huh?....

![weld_cleanup_grind_thru[1].jpg](https://cdn.imagearchive.com/ratrodbikes/data/attach/236/236876-weld-cleanup-grind-thru-1-.jpg "weld_cleanup_grind_thru[1].jpg")
I keep looking at a couple mountain bikes and wonder how I can get the suspension to work on a build not intended for it. One has a teter totter thing with a shock think it's a Genesis
Kinda like this CL posting? I thought about grabbing it but I already have 2 that are not of this style, but I am running out of places to hide things and Storage units here in town are quite pricey..I keep looking at a couple mountain bikes and wonder how I can get the suspension to work on a build not intended for it. One has a teter totter thing with a shock think it's a Genesis

- Joined
- Aug 27, 2022
- Messages
- 948
- Reaction score
- 1,947
I like this... I like it a lot!! lovin the mullet look!Discussing wheel/tire size combo's on LeMadHatter's BO thread, I thought I might throw a pic up to show my original intention: small 20"fatty on the back and a tall 26" or 29" skinny/moderate width tire up front. I like how LMH's stance sits with same dia. wheels front & rear. I have some options. Opinions, thoughts, comments?View attachment 235578
The mullet....business in the front, party in the back......
Yeah same kind of setup for the suspension.Kinda like this CL posting? I thought about grabbing it but I already have 2 that are not of this style, but I am running out of places to hide things and Storage units here in town are quite pricey..View attachment 236843
Well, a Rube Goldberg-esk moment. The heim joint I wanted to use for the rear steer was more $$ than I wished to spend (low buck w/ using parts on hand) and I would have had to wait for shipping, so, I thought of using a 1/2" drive u-joint!

I wanted to remove the spring loaded detent ball. Did someone say Sparks

The grinder didn't remove the ball but did allow me to use a very fine punch to get in there and dig it out with success.
The part I was sure that would NOT work is drilling thru to the other side so that I would have a hole going all of the way thru. I was right, the drill bits wouldn't touch the hardened steel. So I tried my small carbide bit that I use for head porting and it bored thru.
![20230615_204613[1].jpg](https://cdn.imagearchive.com/ratrodbikes/data/attach/237/237050-20230615-204613-1-.jpg "20230615_204613[1].jpg")
Now to start figuring out some brackets....
I wanted to remove the spring loaded detent ball. Did someone say Sparks
The grinder didn't remove the ball but did allow me to use a very fine punch to get in there and dig it out with success.
The part I was sure that would NOT work is drilling thru to the other side so that I would have a hole going all of the way thru. I was right, the drill bits wouldn't touch the hardened steel. So I tried my small carbide bit that I use for head porting and it bored thru.
Now to start figuring out some brackets....
I realize that I am jumping around a bit - front, middle, back, - frame, rear steer, etc,....... but weather, noise from the grinder, parts, etc kinda dictates which side of the house/yard I work at.
Next up is rear steer fork. I had a couple of CrMo forks for this task but certainly not wide enough.
1+1=0 ?!?!

Perhaps tomorrow will shine some light on this issue.......
Next up is rear steer fork. I had a couple of CrMo forks for this task but certainly not wide enough.
1+1=0 ?!?!
Perhaps tomorrow will shine some light on this issue.......
Attachments


BB shell question: Well I have been looking around on the net and have not seen anything for my issue. Has anyone ever seen or built a "block off" plate for the larger BB shell for 1 piece cranks? I plan to install a BB further forward on the frame but do not wish to render the current BB permanently unusable. Thoughts, comments?
To have a useable currect BB shell:BB shell question: Well I have been looking around on the net and have not seen anything for my issue. Has anyone ever seen or built a "block off" plate for the larger BB shell for 1 piece cranks? I plan to install a BB further forward on the frame but do not wish to render the current BB permanently unusable. Thoughts, comments?
With the extra chainlength, you could chop off a crank and attach a spring On the other side, thus making a chain tensioner of some sorts.
Or use the unused bb shell for a large (double?) kickstand.
Maybe you could buff or paint fender washers and use Chicago screws to hold them together on either side of the BB.
To have a useable currect BB shell:
With the extra chainlength, you could chop off a crank and attach a spring On the other side, thus making a chain tensioner of some sorts.
Or use the unused bb shell for a large (double?) kickstand.
Thanx for the input: a couple of good ideas. I have a little time to make a final decision but not too much time.......tick tock, tick tock
With all of the design considerations for this Build, I'm not sure I'm gonna make it......
On another note, I like your possible chain tensioner idea but to make a jack shaft out of 2 single piece cranks! Take 2 kiddie cranks ('cause I ain't going to use them for anything else), cut the ends, carefully jig them up for trueness and weld them back together. Voila, free single speed jackshaft for a fatty tire. I can't wait to use that on something......
The bulk of the rear fork is completed. I need to:
1. cut both steering tubes even
2. and determine the appropriate length before cutting them
3. weld up and install a box to limit steering arc
4. attach steering box to frame
5. measure, fabricate and attach steering tube assembly
6. Per mfg the paint should be fully dry in 24 hrs. In 93F (33C) weather it should take a less than that.
No sweat....
Oh, BTW, I forgot to mention earlier. This applies to anyone purchasing bearings for whatever application. A brg may say its 1" but it might actually be 25mm not 25.4mm. My brgs were 25mm not 25.4 as advertised and it required me to burn up a couple of hours (2 fork steering tubes) grinding and filing them down for the brg to fit.

