You are using an out of date browser. It may not display this or other websites correctly.
You should upgrade or use an alternative browser.
You should upgrade or use an alternative browser.
J.B. 40
- Thread starter Galtbacken
- Start date


Help Support Rat Rod Bikes Bicycle Forum:
This site may earn a commission from merchant affiliate
links, including eBay, Amazon, and others.
nice job, I respect your job
Thanks for the kind words! 
Well deorman, maybe we will, but even more likely we'll someday see someting a little more like a bobber. :wink: But my next bike will be another racer...
Here's what I've been up to the last couple of days:
I've made a mold from mdf-board to make fiberglass fenders.
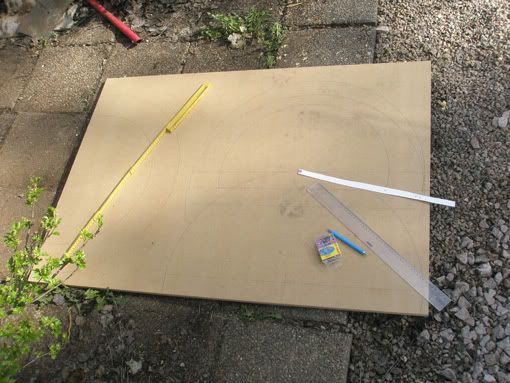
Some glue and a some screws hold it together.
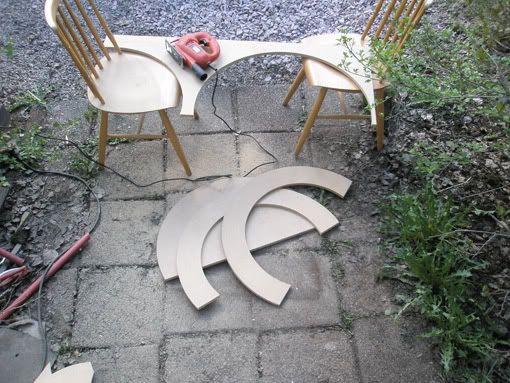
Went to a friend to get some help rounding off the edges with a plunge router. First i sanded the edges to make it nice and smooth.
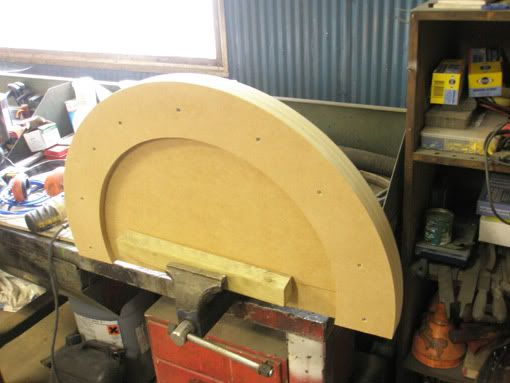
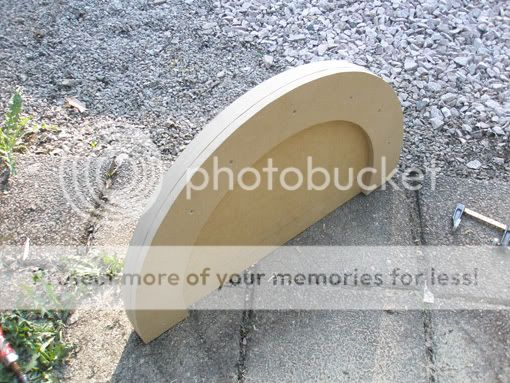
This is what it looks like now. What's left to do before I can use it is to saw out a wedge to make it collapsable and then clearcoat it.

Oops, forgot to rotate the photo...sorry!!
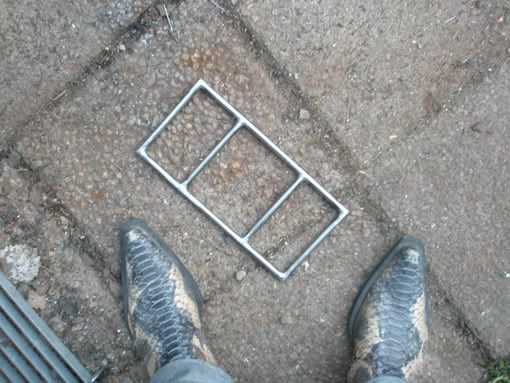
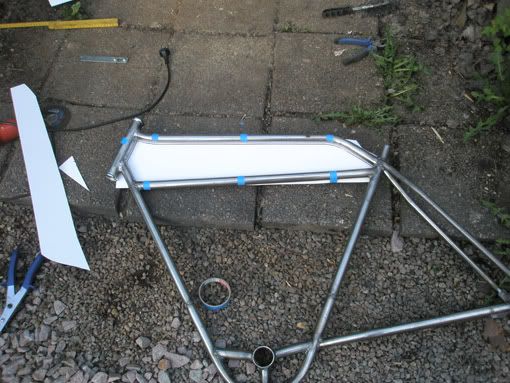
Onto the next thing to do, the carrier rack.
First I made the top part.
I did the sides in sections. Here they are half done.
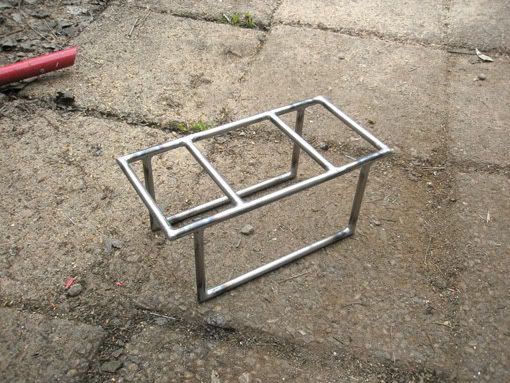
And all done!
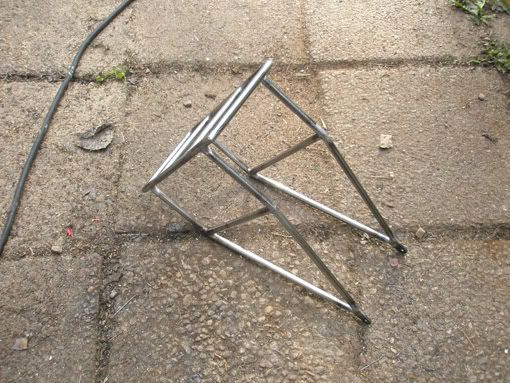
Gdcast, here's the lamp!
Eh, well not quite, but what will become the lamp.
After some bending.
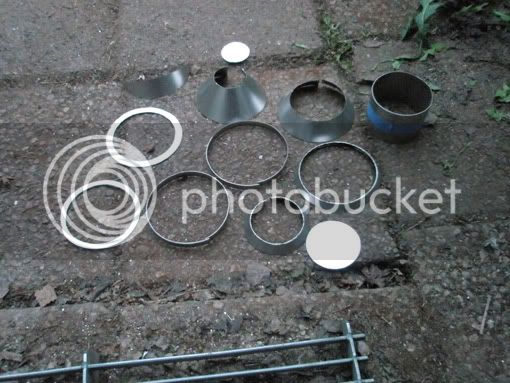
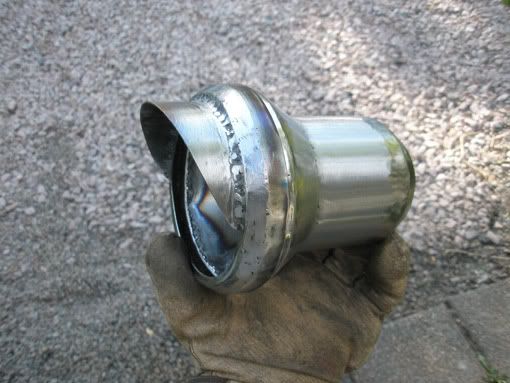
Now here's the lamp...tadaa!
Went on to make the chainguard.
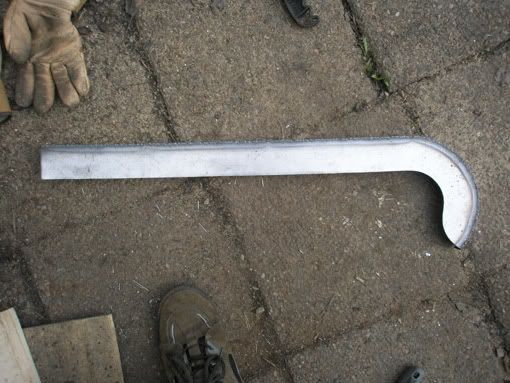
I'll leave it like that until I've made the brackets for it so I know how much I'll need to trim off the edges.
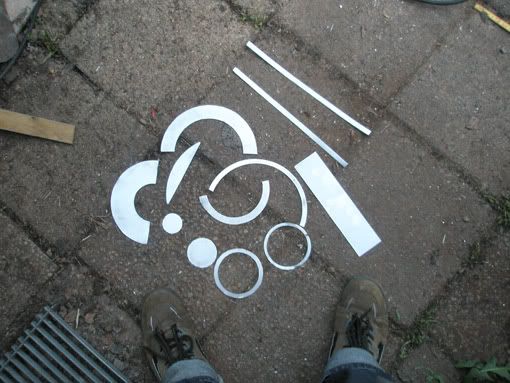
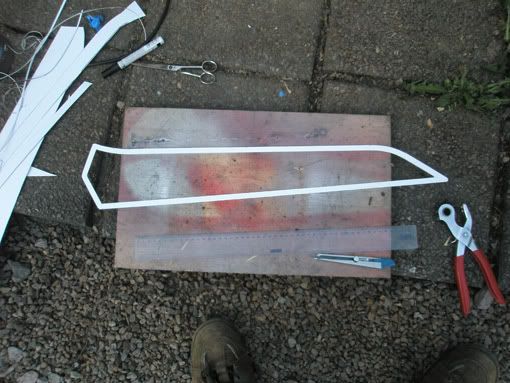
After the chainguard I made templates for the frame plate.
Taped a piece of cardboard to the frame and drew the shape of it with a marker pen.
Cut it out and trimmed the edges to make it fit properly.
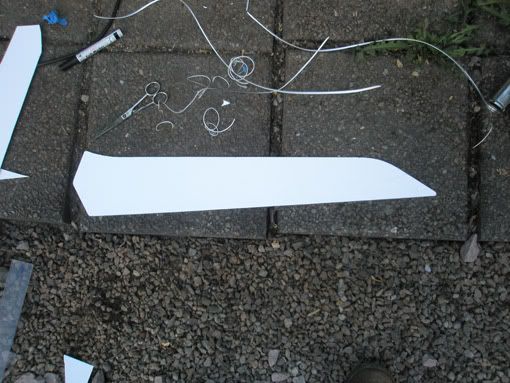
This template will be used to make two sheetmetal pieces. I'll make another fiberglass mold with the same shape as the hole in the middle.
That's it so far. More to come soon!
Well deorman, maybe we will, but even more likely we'll someday see someting a little more like a bobber. :wink: But my next bike will be another racer...
Here's what I've been up to the last couple of days:
I've made a mold from mdf-board to make fiberglass fenders.
Some glue and a some screws hold it together.
Went to a friend to get some help rounding off the edges with a plunge router. First i sanded the edges to make it nice and smooth.
This is what it looks like now. What's left to do before I can use it is to saw out a wedge to make it collapsable and then clearcoat it.
Oops, forgot to rotate the photo...sorry!!
Onto the next thing to do, the carrier rack.
First I made the top part.
I did the sides in sections. Here they are half done.
And all done!
Gdcast, here's the lamp!
Eh, well not quite, but what will become the lamp.
After some bending.
Now here's the lamp...tadaa!
Went on to make the chainguard.
I'll leave it like that until I've made the brackets for it so I know how much I'll need to trim off the edges.
After the chainguard I made templates for the frame plate.
Taped a piece of cardboard to the frame and drew the shape of it with a marker pen.
Cut it out and trimmed the edges to make it fit properly.
This template will be used to make two sheetmetal pieces. I'll make another fiberglass mold with the same shape as the hole in the middle.
That's it so far. More to come soon!
I can´t believe the result! That lamp is absolutely awesome!
Now I got hooked with the fenders and the tank.
I´ll be paying attention cause I want to learn your technique to use it on my projects, that If it´s ok with you of course.
Take care and keep up the excellent work! :wink:
Billy
Now I got hooked with the fenders and the tank.
I´ll be paying attention cause I want to learn your technique to use it on my projects, that If it´s ok with you of course.
Take care and keep up the excellent work! :wink:
Billy
Hey thanks Billy, I'm only glad if what I build can inspire you and give you ideas of what you want to build yourself! I'll make sure to take pics of every step when I make the fender and tankplate. Feel free to use anything you see buddy!
Thanks deorman! I'm slowly learning a little more for every build...one day I might actually feel like I know what I'm doing! :lol:
Thanks deorman!
I'm slowly learning a little more for every build...one day I might actually feel like I know what I'm doing! :lol:

$142.80
$189.99
RoyalBaby Freestyle Kids Bike Boys Girls 18 Inch BMX Childrens Bicycle with Kickstand for Ages 5-8 years, Green
Amazon.com


$19.99
$24.99
Top Brass Bicycle/Motorcycle Chain Picture Frame 5" X 7" Photo - Faux Bike Chain
Old River Outdoors (USA Merchant)


Hi, what an awesome piece of work you got there - youre a true artist, and an inspiration..keep posting pics ...
that headlight is truely a piece of work - your brother is a lucky guy..
regards
Flemming
Copenhagen,Denmark
that headlight is truely a piece of work - your brother is a lucky guy..
regards
Flemming
Copenhagen,Denmark
Thank you very much blink and Flemming!! I'll keep the pics coming!
I was wondering how long it would take for someone to react on those! :lol: My welding boots....nah!! :wink:
Glad you like the fork, I'm really happy with it too!!
The honor's all mine Gdcast!
I've almost finished the fiberglass work on the frameplates. I'll post pictures of that soon, along with some other things.
snfargle said:im diggin them boots in the first picture of the carrying rack
I was wondering how long it would take for someone to react on those! :lol: My welding boots....nah!! :wink:
Glad you like the fork, I'm really happy with it too!!
The honor's all mine Gdcast!
I've almost finished the fiberglass work on the frameplates. I'll post pictures of that soon, along with some other things.
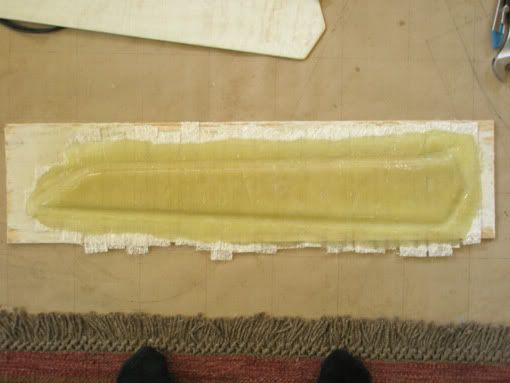
So here's some more photos of the frameplate!
I made a simple mold from thin plywood.
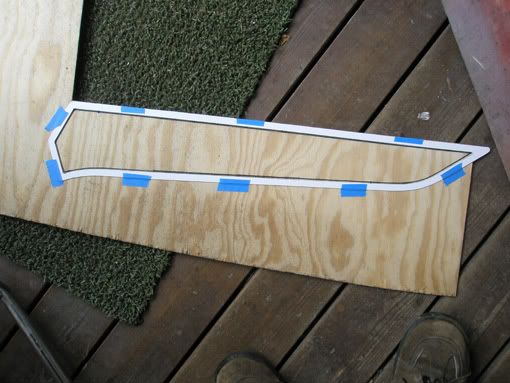
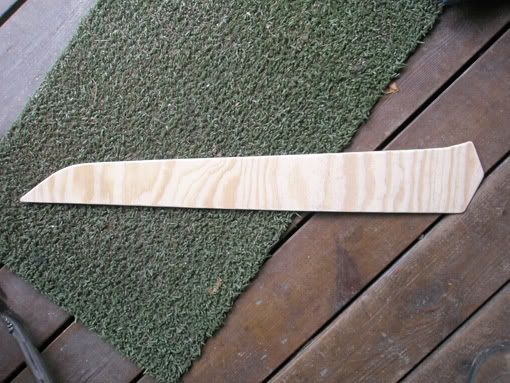
I prepared it with car wax to prevent the polyester from sticking to it.
Then I cut strips from fiberglass. Enough of them to cover the mold with two layers.
You know how you sometimes get an idea out of the blue? This was one of those moments. I decided to cover the mold in plastic food wrap. I had no idea whether the polyester would melt it or if it would work as I hoped, and make the finished plate to come loose from the mold easier.
The plastic wrap worked great! The polyester cured without sticking to it at all! What was a little tricky though was that the fiberglass needed to be held down against the mold while it cured.
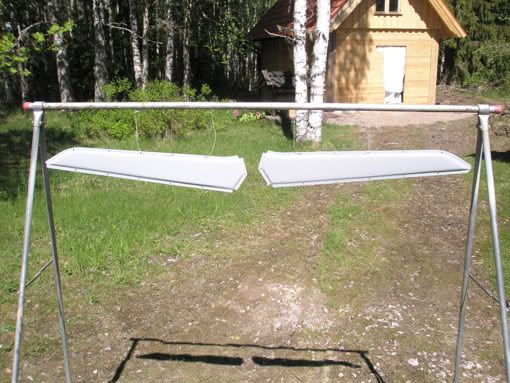
Here's the raw fiberglass plate. I made one more plate, mirrored to this one.
I cut two metal pieces (from the cardboard template) that are 10mm wide...
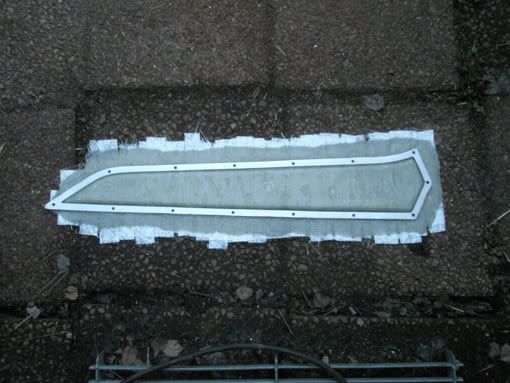
...and trimmed the edges of fiberglass plates to fit. Drilled holes through all the pieces. These metal strips will camouflage the brackets that the plates will bolt on to on the frame.
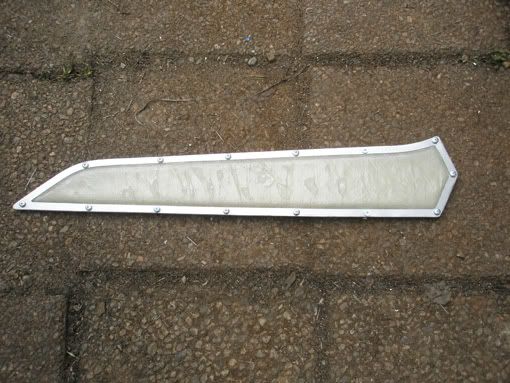
What's left to do on the plates now is make them smooth with some filler and sanding.
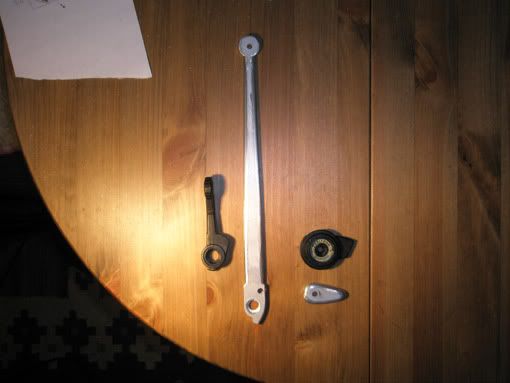
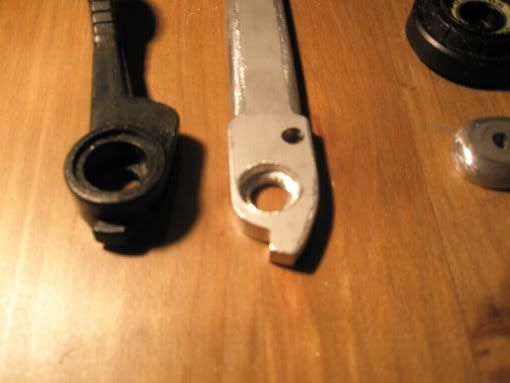
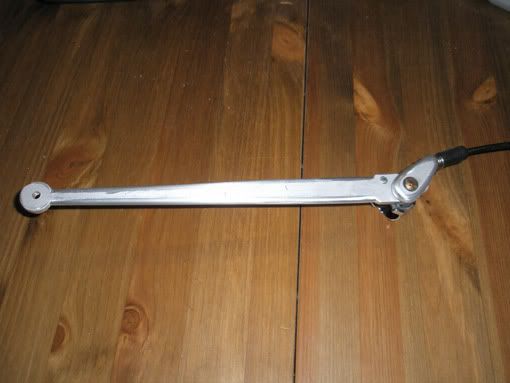
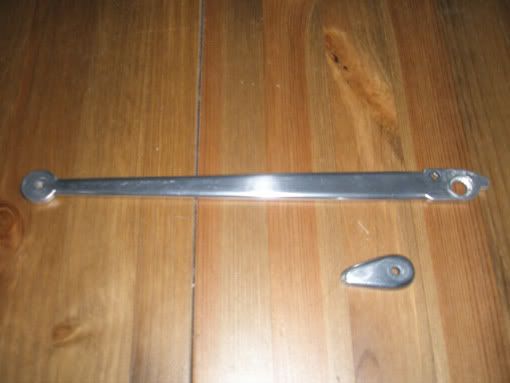
I've also finished the shifter!
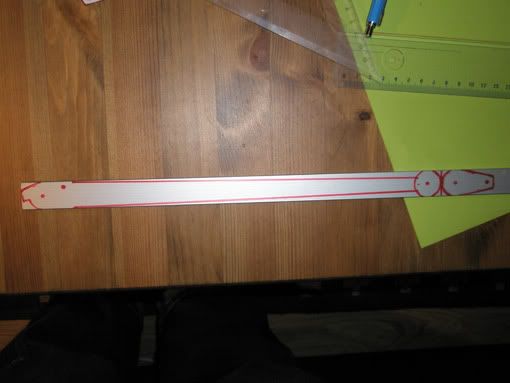
The original shifter parts and the templates for the parts that I'll make.
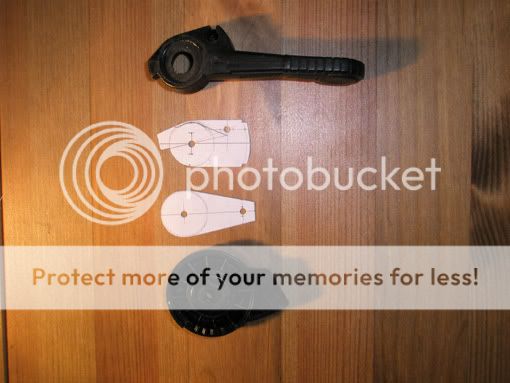
The parts drawn onto a piece of aluminum.
After some drilling and lots of grinding this is what I got.
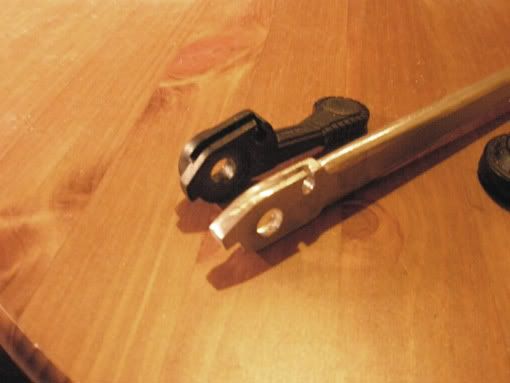
I'll make a little wooden piece to go on top of the shifter.
That's all for now, I'll post more pics as soon as I've got some more to show you!
I made a simple mold from thin plywood.
I prepared it with car wax to prevent the polyester from sticking to it.
Then I cut strips from fiberglass. Enough of them to cover the mold with two layers.
You know how you sometimes get an idea out of the blue? This was one of those moments. I decided to cover the mold in plastic food wrap. I had no idea whether the polyester would melt it or if it would work as I hoped, and make the finished plate to come loose from the mold easier.
The plastic wrap worked great! The polyester cured without sticking to it at all! What was a little tricky though was that the fiberglass needed to be held down against the mold while it cured.
Here's the raw fiberglass plate. I made one more plate, mirrored to this one.
I cut two metal pieces (from the cardboard template) that are 10mm wide...
...and trimmed the edges of fiberglass plates to fit. Drilled holes through all the pieces. These metal strips will camouflage the brackets that the plates will bolt on to on the frame.
What's left to do on the plates now is make them smooth with some filler and sanding.
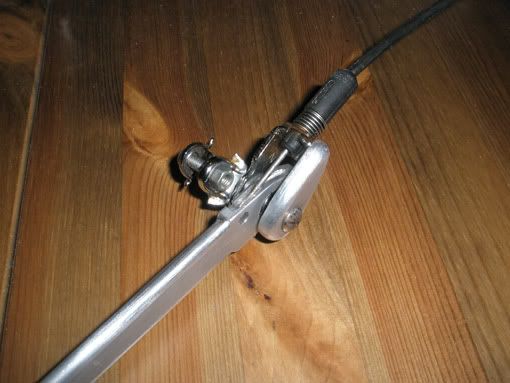
I've also finished the shifter!
The original shifter parts and the templates for the parts that I'll make.
The parts drawn onto a piece of aluminum.
After some drilling and lots of grinding this is what I got.
I'll make a little wooden piece to go on top of the shifter.
That's all for now, I'll post more pics as soon as I've got some more to show you!
That`s great, very neat.
Similar process I used to make this two tanks:


At the beginning I did use plastic food wrap, later on I discovered that a simple plastic garbage bag is better, specially if you want the surface to be smoother, which means less filler and less wight. Try it next time and let me know the result.
Please keep inspiring us, your job keeps getting better and better,
regards, Billy...
Similar process I used to make this two tanks:
At the beginning I did use plastic food wrap, later on I discovered that a simple plastic garbage bag is better, specially if you want the surface to be smoother, which means less filler and less wight. Try it next time and let me know the result.
Please keep inspiring us, your job keeps getting better and better,
regards, Billy...
Great looking bikes Billy!!
I'll try the garbage bags next time! Every trick to use minimum amount of filler is definitely worth a try, man it's boring to sand that stuff!!
Thank you so much for showing appreciation, it's a good feeling to hear that people like what you do! That's like a little energy boost!
I'll make sure to keep an eye on your builds, cause you make nice bikes yourself!! My turn to be inspired... :wink:
/Petter
always great to see and read about your techniques. Very inspiring. Cool to see how you did the fibreglass tanksides. To have a vision is one thing, to turn it into reality is a competely different ballgame. You seem to get the job done. As always. And like your previous build, this one is going to be top notch.
That is some hardcore sheet metal work! So in depth and detailed and pretty much all from scratch. I really like it. You my friend really know what youre doing. How long have you been building bikes?
Thank you!!
Indeed!! But that's one of the things that makes it so much fun! And I've realized that I'm able to construct and make more things than I thought possible with very simple tools and materials. The only "machines" I got is a power drill, an angle grinder, a cheap MIG-welder and a Dremel. Imagination and patience goes a long way!
I started building my first bike pretty much exactly a year ago. If you search for "vincent" in the gallery section you'll find it. Before that I had never welded before, had never even used an angle grinder. Never made things from metal, but I've always enjoyed making things with my hands. I've sewn since I was a kid, painted and drawn a lot also and I've worked with wood and clay and whatever might have come in my way. So believe me when I say that I don't really feel that I know what I'm doing when it comes to making things from metal!! I know that there must be so much that I don't know yet, so much more I have still to learn. I try to study the material, see how it feels in my hand, how it bends and things like that and look at what others have made and try to figure out how they did it....and I try to remember how I've seen it being done on "biker build off" on the discovery channel... :lol: The rest is mostly a process of "last time I did this and that happened" or "maybe if I do it like this...I'll give it a try!". I try to learn by doing, and not being afraid to try things I haven't done before.
Your opinion is as good as mine!
Here's what I've been doing since the last update:
I forgot to show you photos of the shifter when it's assembled, just showed you the parts...where are my manners!!?
It's polished now, I'll take more photos of it.
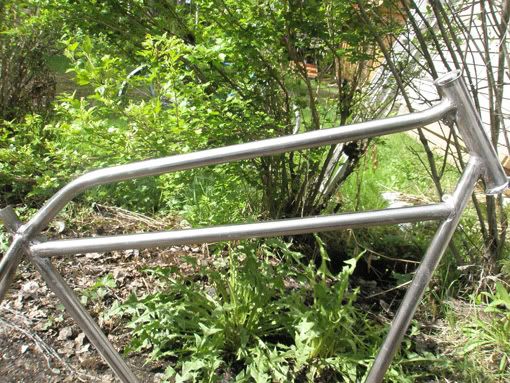
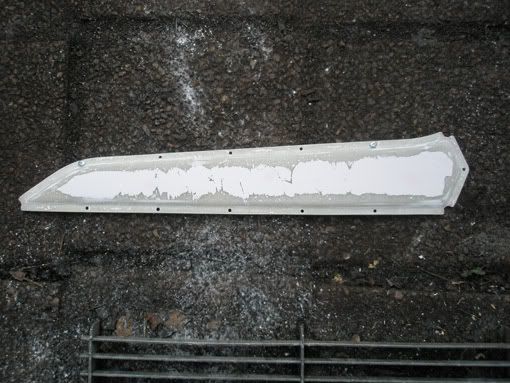
Did some more work on the frameplates too!
Welded on three brackets on the frame.
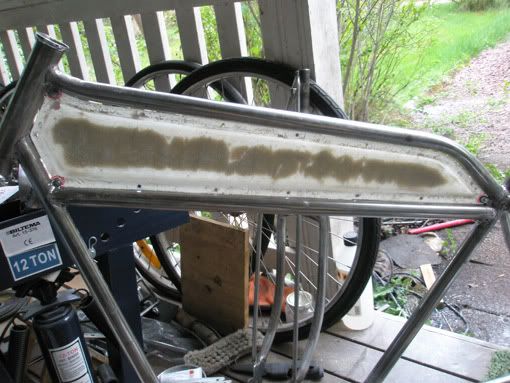
Filler and sanding...filler and sanding...then I attatched one of the fiberglass plates to the frame and marked how much I should remove to make room for the brackets (The metal strips are what will hold them to the frame).
Cut away what I've marked on both sides, and now they're ready for paint!!
I've been searching for where I could buy the tool for the bottom bracket bearing cups, but couldn't find any store that sold them, so I made my own. Haven't actually tried it out yet but it's a simple tool and I think it will work fine. I'll post a pic of it next time...
Take care until next time!!
herr_rudolf said:To have a vision is one thing, to turn it into reality is a competely different ballgame.
Indeed!! But that's one of the things that makes it so much fun! And I've realized that I'm able to construct and make more things than I thought possible with very simple tools and materials. The only "machines" I got is a power drill, an angle grinder, a cheap MIG-welder and a Dremel. Imagination and patience goes a long way!
Pack Rat said:How long have you been building bikes?
I started building my first bike pretty much exactly a year ago. If you search for "vincent" in the gallery section you'll find it. Before that I had never welded before, had never even used an angle grinder. Never made things from metal, but I've always enjoyed making things with my hands. I've sewn since I was a kid, painted and drawn a lot also and I've worked with wood and clay and whatever might have come in my way. So believe me when I say that I don't really feel that I know what I'm doing when it comes to making things from metal!! I know that there must be so much that I don't know yet, so much more I have still to learn. I try to study the material, see how it feels in my hand, how it bends and things like that and look at what others have made and try to figure out how they did it....and I try to remember how I've seen it being done on "biker build off" on the discovery channel... :lol: The rest is mostly a process of "last time I did this and that happened" or "maybe if I do it like this...I'll give it a try!". I try to learn by doing, and not being afraid to try things I haven't done before.
Gdcast said:I just hope my humble opinion can contribute a little in this great project.
Your opinion is as good as mine!
Here's what I've been doing since the last update:
I forgot to show you photos of the shifter when it's assembled, just showed you the parts...where are my manners!!?
It's polished now, I'll take more photos of it.
Did some more work on the frameplates too!
Welded on three brackets on the frame.
Filler and sanding...filler and sanding...then I attatched one of the fiberglass plates to the frame and marked how much I should remove to make room for the brackets (The metal strips are what will hold them to the frame).
Cut away what I've marked on both sides, and now they're ready for paint!!
I've been searching for where I could buy the tool for the bottom bracket bearing cups, but couldn't find any store that sold them, so I made my own. Haven't actually tried it out yet but it's a simple tool and I think it will work fine.
I'll post a pic of it next time...Take care until next time!!
I cant wait to so your skills 5 or 10 years from now. You are just a natural at this. Keep it up I love seeing your updates on your progress. I too only have a few power tools as well and I dont really care to get more. I do fine with what I have.
Thanks Tommy! I too look forward to see what I'll be able to make in 5 or 10 years. This is such a great site! To see what other people sharing the same interest do, and to show and get feedback on what I'm learning to do makes it such a good environment to pick up new ideas and share mine. I've never come across a site with a friendlier or more helpful atmosphere than this one either! It's a good place to hang!
A few more pics!
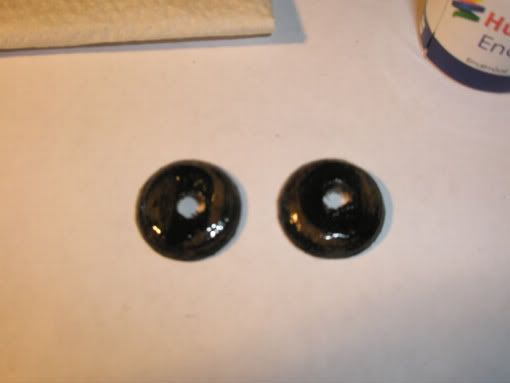
Polished shifter. I guess it would look even nicer if I'd polish it some more, I'll see if I get time to do that. If not, I think it will do ok as it is.
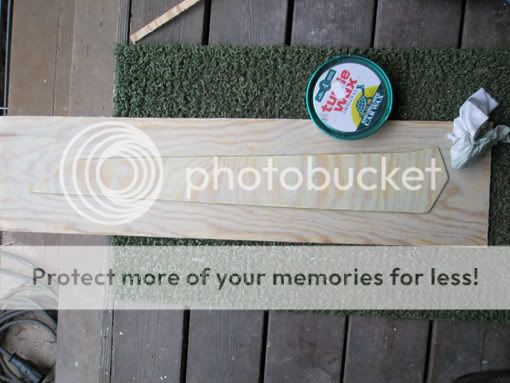
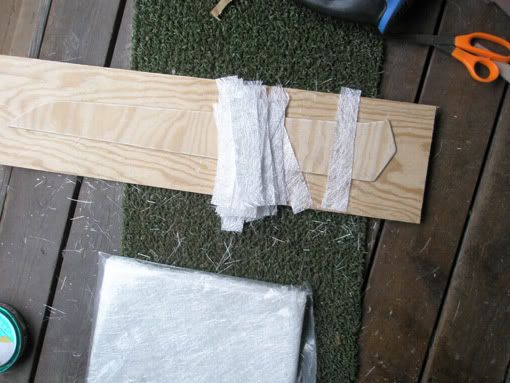
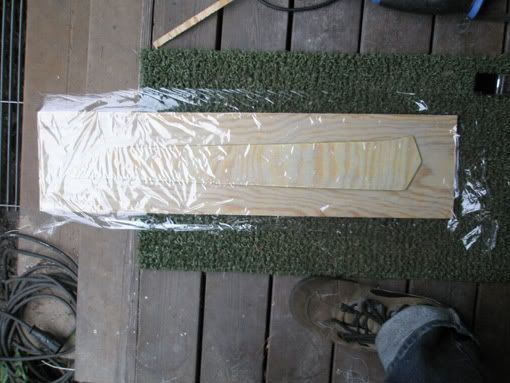
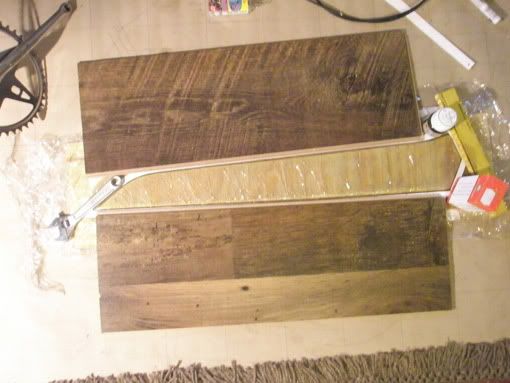
I've made two wooden side pieces for the shifterhandle. Since I only work with really exclusive materials I decided to use...some plywood for this elaborate work! :wink:
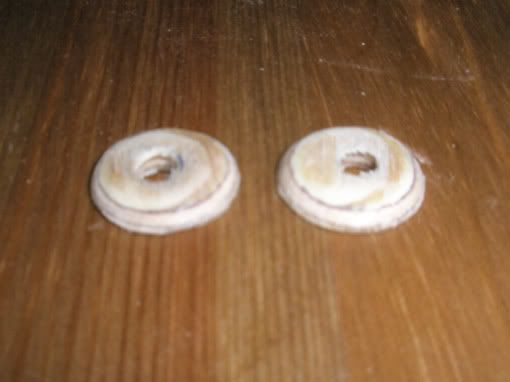
Painted them with translucent black paint so that the wood grain shows. Then a coat of clear enamel lacquer.
I also had time to prime the frameplates before I had to go to work.
Here's the tool I made for the bearing cups:

That's all the pics I've got for you today!
This is such a great site! To see what other people sharing the same interest do, and to show and get feedback on what I'm learning to do makes it such a good environment to pick up new ideas and share mine. I've never come across a site with a friendlier or more helpful atmosphere than this one either! It's a good place to hang! A few more pics!
Polished shifter. I guess it would look even nicer if I'd polish it some more, I'll see if I get time to do that. If not, I think it will do ok as it is.
I've made two wooden side pieces for the shifterhandle. Since I only work with really exclusive materials I decided to use...some plywood for this elaborate work! :wink:
Painted them with translucent black paint so that the wood grain shows. Then a coat of clear enamel lacquer.
I also had time to prime the frameplates before I had to go to work.
Here's the tool I made for the bearing cups:
That's all the pics I've got for you today!