Making your own headlight

Rat Rod Bikes Bicycle Forum

Help Support Rat Rod Bikes Bicycle Forum:

This site may earn a commission from merchant affiliate links, including eBay, Amazon, and others.
Joined
Oct 16, 2016
Messages
61
Reaction score
109
Rating - 0%
0   0   0
Does anyone have some experience in making their own headlight from scratch? I can figure out the actual construction of it; my inquiry is more about bulbs and batteries.

A certain size bulb obviously needs a certain amount of power, so how do I figure that part? I have no idea what bulb I will use. Maybe there is a typical setup people use?
 
There are now LED bulbs that are a drop in replacement for the old bulbs used in flashlights and many headlights. I also believe most are rated by voltage too. So you can figure it by what batteries you have or inversely by what batteries you need.

Carl.

sent from a banana phone...
 
I like making my own for the rare occasions i ride at night,but i just build around a led flashlight three AAA battery type there so cheap ,and fit inside a bicycle grip ,i do that for shock absorbtion,ive made them out ofthin aluminum diamond plating ,pvc pipe cut on a angle ,put flashlight in old moped headlight ,let me find a pic.my woody bike is a fake headlight but easily could be transformed,its four inch black pvc pipe with end cap ,old leather belt for visor ,drilled holes in sides for that simple mount ,a zip tie !!!
Second pic is aluminum diamond plating,cardoor protectors and a rubber fish soap holder for lens ,a flashlight pushbutton on rear stuffed inside a bicycle grip extra grip sections around flashlight for a shock absorbing snug fit ,also to go with the look made fenders bent so alu stock rectangle in shape and rivoted the plating on but on the underside i put shower pan rubber sheeting 77sprayed glued on again wrapped in car door protectors lol.all still on bike and solid .mud guards ,taillight,toolboxes chainguards all made this way .
just and idea if you feel creative .aloha DCMOTO
3230b789821370196ebe67c8304f3207.jpg
c963162d76efeba63b9aab9ced9d82f4.jpg
e5eed0de03642816df698e7a5ff5d787.jpg


Sent from my SM-G360T using Tapatalk
 
On a couple of my night riders, I have used cushioned loop clamps and LED flashlights from the dollar (or 99.9 cents only) stores. A dash -14 clamp fits the 7/8" handle bar, and a dash -16 clamp fits the flashlight housing. The flashlights come in colors and in plastic or anodized aluminum; they have 9 LEDs and take 3 AAA batteries. I use two (2) each, just for proper balance.
 
This is my parts list from my latest LED light build since I haven't yet found a good all around 1W or better LED bulb to use. Normally I'll take apart LED flashlights from Walmart for my light builds, however I decided to do this one a little different.

Light Housing
http://r.ebay.com/ebg4WB
LED ( have to disassemble to bypass resistor for lower voltage)
http://r.ebay.com/gYyjTt
Batteries
http://r.ebay.com/Rlt2xv
Battery Holder
http://r.ebay.com/n9brWg
LED RF Remote Control
http://r.ebay.com/ht9X2V
Toggle Switch
http://r.ebay.com/welSns
Ni-MH Charger (if you want to make it rechargeable)
http://r.ebay.com/zJ25SA
DC Power Jack
http://r.ebay.com/Xm6Ylo
12V Power Wall adapter for charger
http://r.ebay.com/gv0euG

33236769553_294be6dcde_z.jpg


Video
https://www.flickr.com/photos/88658996@N06/33236769553/in/dateposted-public/
 
Last edited:
I have recently had good luck with using a drop-in LED replacement for a Maglite or other flashlight. These have their own voltage control circuitry built into them, so all you have to do is supply the proper power. If you use a LED rated for a 3 to 6 C or D cell flashlight - which would mean it can use 4.5 to 9 volts - you can power it off of the kind of spare battery bank you would use to charge cell phones and other items.

You can adapt this type of LED bulb into an existing light, like an old generator light head, or you can even use it by itself, without any traditional reflector and enclosure. While a reflector will gather some of the light that spills out the side of an LED like this, the great majority of the light shines forward from the emitter - it's not like an old fashioned bulb where the light shines in a nearly 360 degrees spread. The light spreads maybe 180 degrees, but concentrates forward from the bare LED emitter.

I'm going to stop here and go take some photos - I'll edit to add them.

SO, I'm back :)

battery.jpg


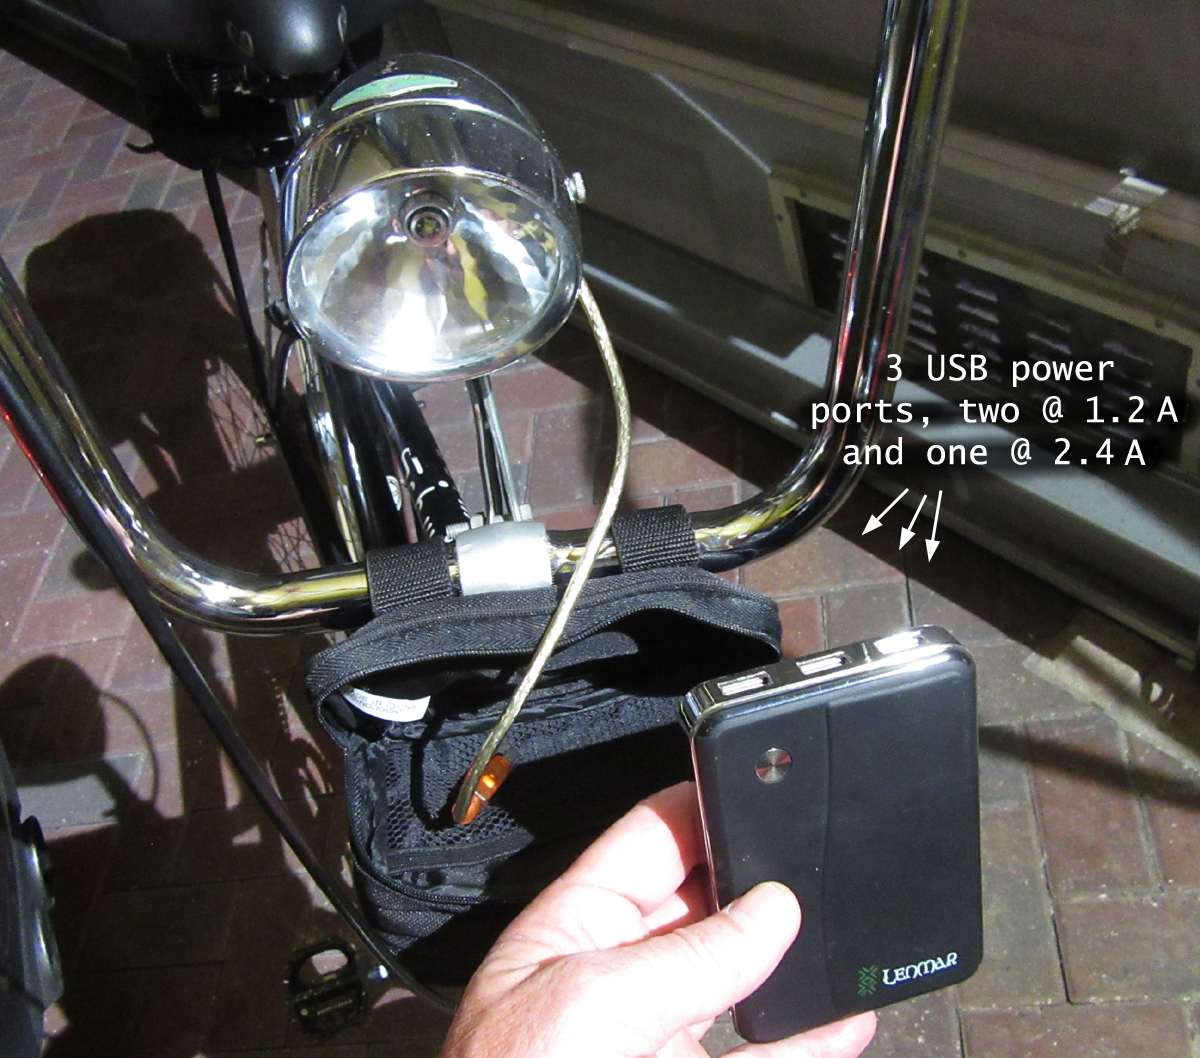
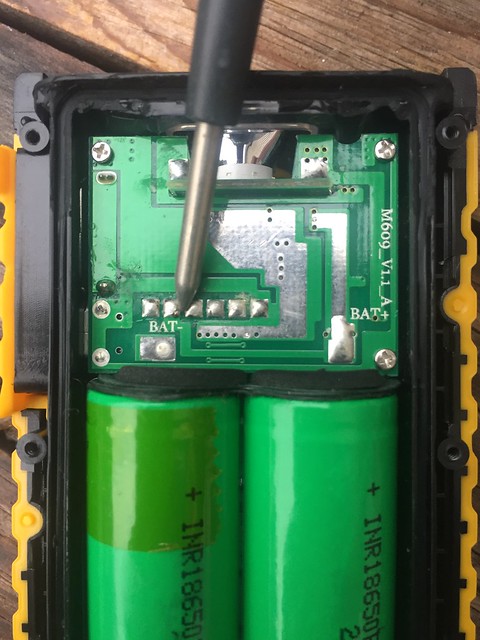
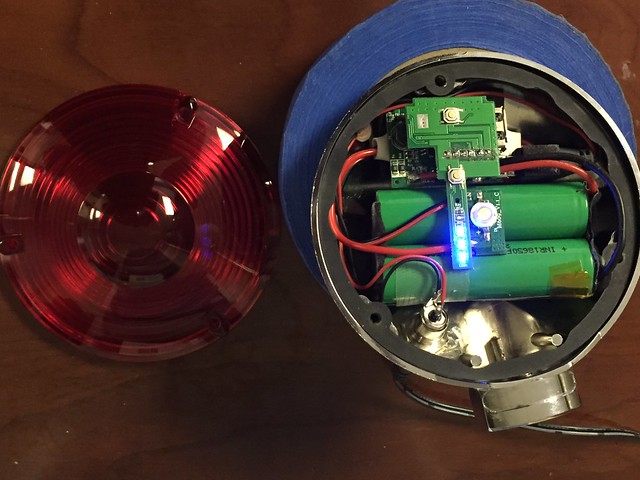
The battery pack, above

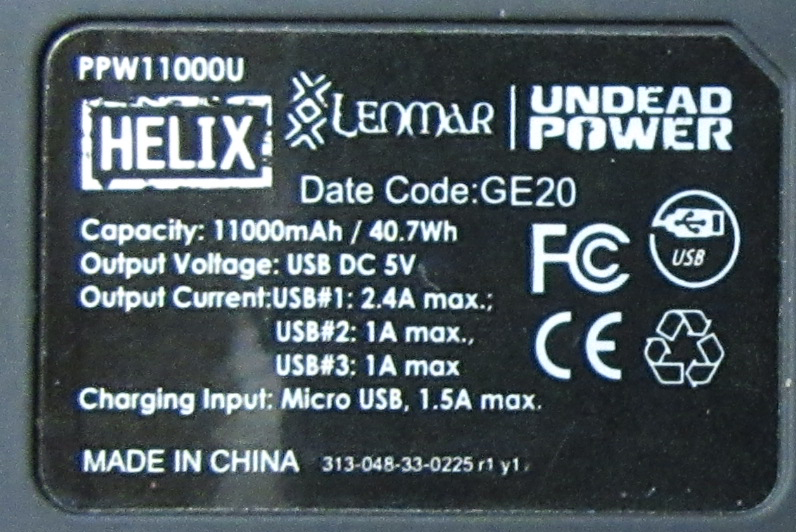
Specs on the battery pack, below

label.jpg


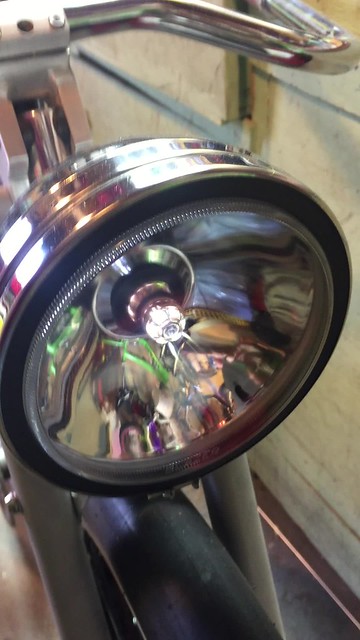
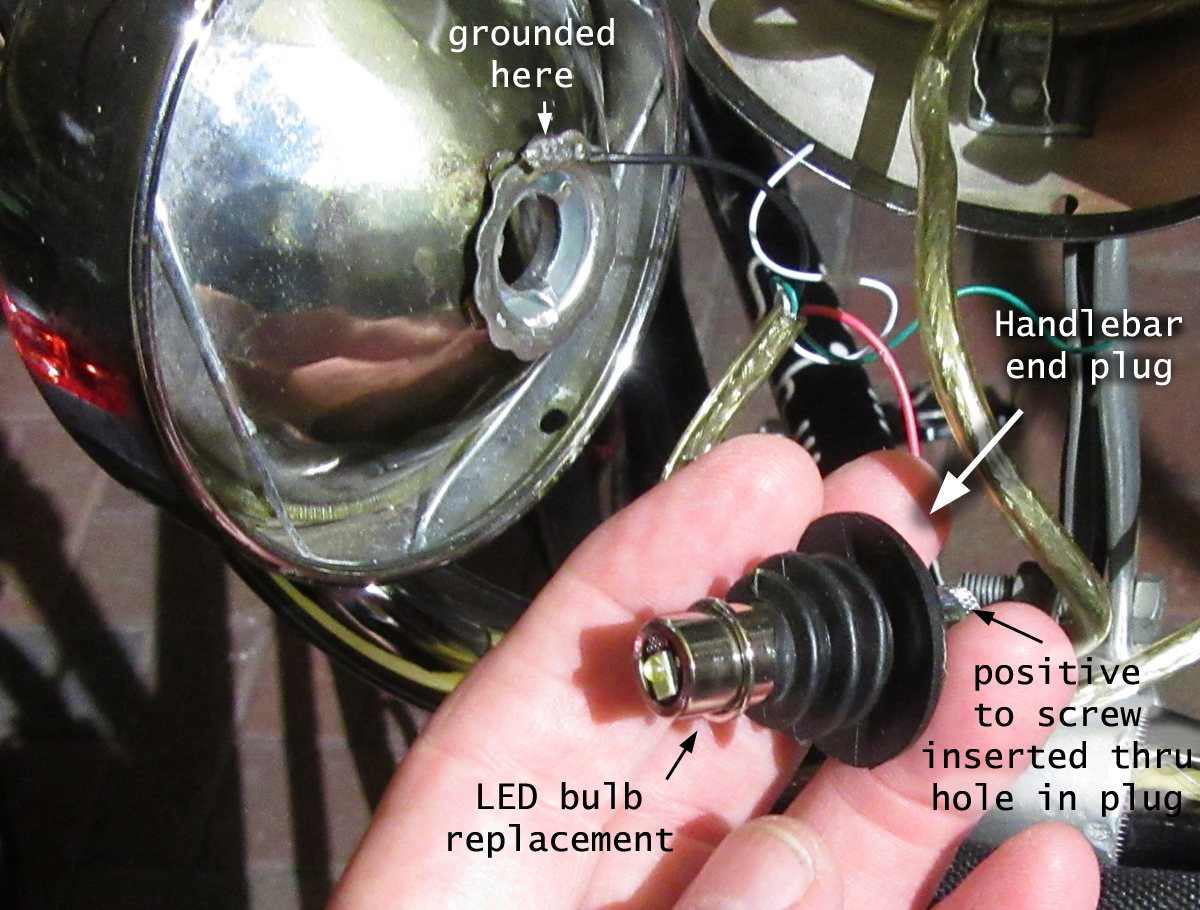
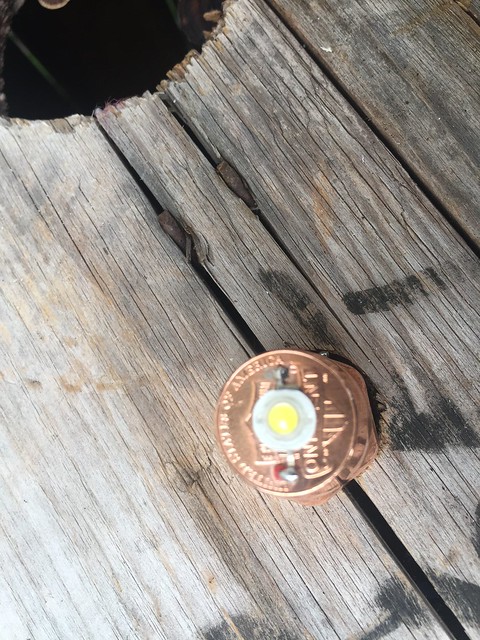
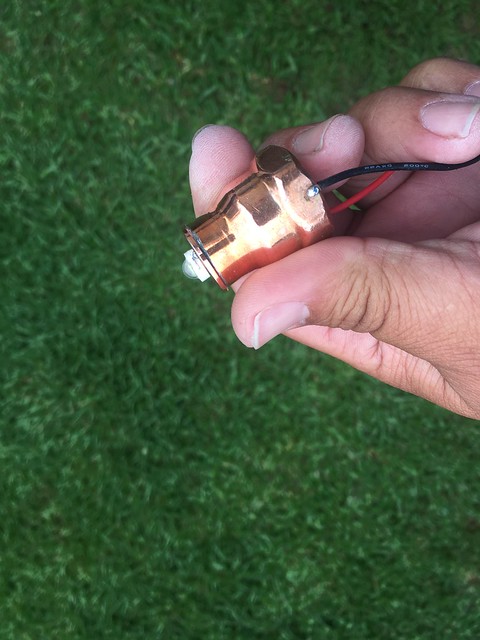
The bulb replacement taken out of the generator light head, below

bulb.jpg


As you can see, the bulb replacement is very small. You could cut and strip a USB cable, identify the positive and negative wires and attach them to this little bulb, and that would be the entire headlight if you wish. You'd just need to figure out a way of attaching it to the bike and running your cable to the battery pack.

If you use two of these and a battery pack with multiple ports, you could conceivably mount one LED on each side of your fork, and they would barely even be noticeable when not in use. You could hide one or two inside the crown of the fork if you have a little room there. All you'd notice are the cables. If you have a little room between tire and fender, this could even go under the front edge of the fender.

In my example, I made a hole in the center of a plastic bar end plug that was just big enough to fit the LED bulb very snugly. I put a screw through it so the screw head became the positive pole against which the tip of the bulb is inserted.

I grounded the housing of the light head so the circuit is complete when the bulb is inserted through the reflector. There's no switch. I just plug it into or unplug it from the battery pack, which on my bike is in a little bag on the handlebars.

The great things about this setup:

1 - It's a rechargeable battery pack

2 - It has multiple ports. I can charge a phone or run 1, 2, or 3 such lights off of it, which could include tail light(s.)

3 - I have used it for about 6 hours and it looks like it is still at half capacity.

4 - The battery pack charges off the same charger and micro usb cable as a phone.

5 - You could install this type LED in almost any kind of old headlight, a beer can, a 35 mm film canister, a cigar tube, in the eyes of a skull... whatever... it is very small. You could also use it with no housing at all - you'd just have to solder the wiring directly to the LED package and run the cable to a power source.

6 - There are tons of other devices you could run off the battery pack. I have a six foot length of electroluminescent wire, for example, that draws hardly any power at all. You could wrap that stuff all around the frame or other parts of the bike if you wanted.

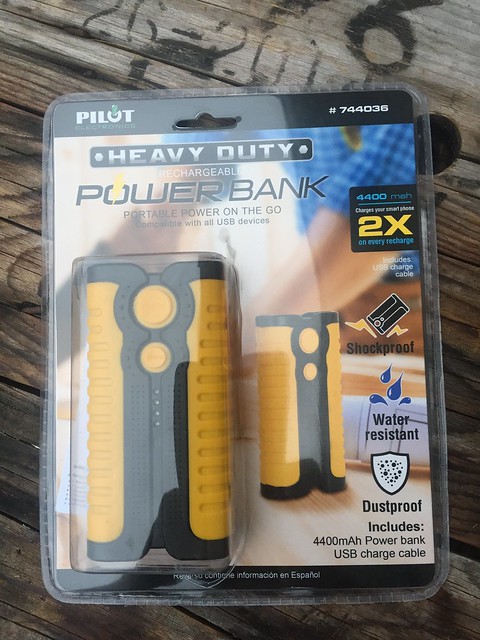
You could use a much cheaper battery pack, but a more expensive one gives you more capacity and more ports. You could spend as little as $10 or $20 on the battery pack. (This one might have been $40 or $50)

The LED replacement bulb I am using produces about 160 lumens. That's enough for my use in casual night riding. I would not want to do aggressive off road riding with it, but I think you could run three of these on the same battery pack and do that.

If you're using a battery pack like this it puts out about 5 vdc. If you use an LED package good for 3 to 6 C or D cells, it can handle 4.5 to 9 vdc, so you are in a very safe voltage range. The internal circuitry in the package means you don't need any other voltage regulating circuitry.

You don't have to do or know any electronics - all you need to know is how to cut and strip the USB cable and identify the right wires - typically red for positive and black for negative. And, you need to know how to attach the wires to the LED package - either a housing that holds them tight or solder them.

Hint: try to find a very stout, older USB cable for this purpose. Generally, one of the heavier USB cables that came with a printer years ago - clear insulation with visible braided shielding and a device-side tip (the more square type USB plug that goes to an old printer.) This will have heavier,more durable wires inside it. If you are cutting up a USB cable that came with a phone charger, it will have very thin copper conductors that will be easy to break or accidentally cut. The very light weight cables will have really wimpy copper strands that break off really easily.
 
Last edited:
Back to your original question: the bulb has a voltage rating like 1.5, 3, 4.5, 9, or 12 volts DC or AC. With battery powered bulbs you want DC. Batteries have ratings like 1.5, 3, 9, or 12 volts DC. You just need to match voltages and you need to know the polarity of the bulb if it has one. LED bulbs will definitely have a polarity, incandescent bulbs probably doesn't matter. A really, really bright bulb will be so bright in part because it draws so much current. Imagine voltage as being the "pressure" or the electricity and amperage as being the "volume." Voltage is kind of like how much force the electrons provide and amps is like how many individual electrons flow through the circuit at one time. At any given voltage, the brighter light will be allowing more electrons through the circuit - but the battery has to be capable o providing that flow, which is expressed in amp/hours. The amp/hours rating usually won't matter much with bulbs - it will matter more with motors and devices that draw more current than a bulb.

If your voltage is too low, the light may work but may be dim. If the voltage is too high, it will likely burn up the light prematurely.

Incandescent bulbs can typically be hooked up directly to the battery. LEDs normally need some kind of regulating circuitry - but a prefab LED package like a bulb replacement will typically have that built in.

Advantages of the LEDs: more light for the amount of power used, longer battery life, usually more flexible in terms of acceptable operating voltages, amount of light produced does not noticeably fade away as the battery runs down until it gets so low the LED will suddenly stop working. (Compare to an incandescent bulb which will steadily get dimmer as the battery runs down - so that at half of battery life you might have half as much light.) The LED circuitry is capable of regulating the flow of juice so that the level of light is fairly even across a range of battery life.

You should know which terminal on your bulb or LED circuit is for positive and which is negative. You should know which terminal of your power supply is positive and negative. Wire pos to pos and neg to neg.

Do NOT try to put devices that use electricity in parallel or in series without learning more about electricity. (Google parallel and series circuits)

Batteries are commonly used in series (end to end.) A 1.5 volt battery end to end with another 1.5 will give you 3 volts but about the same amp/hour rating as alone.

In parallel they give you 1.5 volts but a higher amp/hour rating.

It is possible to build up complicated arrays of batteries, where some are in series and some are in parallel, to produce a high voltage and high amp/hour rating like 36 volts @ 11 amp/hours to run an electric bike motor. That's what you find when you open an ebike battery pack.
 
Goodness! Thank you everybody for your input. It's too much for me to analyze right now, but I have no doubts that you people have answered my question. Answered my question and then some. Thank you so much I'll be sure to show my progress on the subject.
 
I've had good luck with using those little LED flashlights that run off of 3 AAA batteries. They've been getting brighter, and with a little work you get the battery pack and the bulb in one package.
 
Just walk thru a thrift store or a Walmarf and check out LED lanterns. The guts from them work well in an old bike light and the reflectors are plastic and can be cut down too.

Carl.
 
Sorry if my post was overwhelming :) I was just about ready to start a post showing how I did this light, so I sorta highjacked your thread to show it off instead.

I do think that the advent of packaged LED bulb replacements makes this much easier. They take a range of voltages and they use the range more flexibly.
 
I found a good conversion donor at Lowes for cheaper ($14.89) than you can buy a decent flashlight. You just need some soldering skills.
33436117003_f9e9765427_z.jpg

It has two 3.7v Lithium-Ion batteries and has a USB rechargeable circuit onboard, yeah! The LED put's out close to 300 lumens.
34205687706_fe1c7cb75f_z.jpg

You have to install your own external switch on these two leads to turn the light on and off.
33405123734_c5d992ac67_z.jpg

Ok, it's not a headlight, but it's the same idea!

34206317436_6cd261997b_z.jpg

If you cut the wire on the USB plug it comes with it only has two wires black (-) Red (+). I used a DC jack and my own 5v dc wall power supply to charge it rather than have to disassemble the light each time want to charge with a USB. This way everything is all enclosed and waterproof. Enjoy!

Ok, here's the headlight LED conversion using the LED from another of the same PowerBank.
34205960576_4123d809f1_z.jpg

34116289241_22ceaec2f1_z.jpg

Copper penny and plumbing makes for a good LED heatsink.
 
Last edited:
I found a good conversion donor at Lowes for cheaper ($14.89) than you can buy a decent flashlight. You just need some soldering skills.
33436117003_f9e9765427_z.jpg

It has two 3.7v Lithium-Ion batteries and has a USB rechargeable circuit onboard, yeah! The LED put's out close to 300 lumens.
34205687706_fe1c7cb75f_z.jpg

You have to install your own external switch on these two leads to turn the light on and off.
33405123734_c5d992ac67_z.jpg

Ok, it's not a headlight, but it's the same idea!

34206317436_6cd261997b_z.jpg

If you cut the wire on the USB plug it comes with it only has two wires black (-) Red (+). I used a DC jack and my own 5v dc wall power supply to charge it rather than have to disassemble the light each time want to charge with a USB. This way everything is all enclosed and waterproof. Enjoy!

Ok, here's the headlight LED conversion using the LED from another of the same PowerBank.
34205960576_4123d809f1_z.jpg

34116289241_22ceaec2f1_z.jpg

Copper penny and plumbing makes for a good LED heatsink.
Nice work!
 

Latest posts

Back
Top