I saw someone online bend chain stays by filling it with water and putting in the freezer. I might try that next timeFilling the tubing with something like sand and taping the ends off, will help keep it from kinking or getting out of round. I did one arched bend in 3/4" copper and filled my tube with ordinary table salt. (was cheaper than sand too)
Carl.
You are using an out of date browser. It may not display this or other websites correctly.
You should upgrade or use an alternative browser.
You should upgrade or use an alternative browser.
(MBBO #4 Class 2) Mustang Phatty -(FINAL MOCK UP PHOTOS)-
- Thread starter Roadie64
- Start date

Help Support Rat Rod Bikes Bicycle Forum:
This site may earn a commission from merchant affiliate
links, including eBay, Amazon, and others.
I googled cone calculator. When I clicked on some of the web sites, my head exploded!!I've always hated math and when I saw a bunch of letters in the place of numbers, I knew this was not for me. When I went to college for automotive design we were told there would be NO math classes!! We are to design it, it's up to the engineers to make it work.

And that's why I hate algebra... Who decided captions and the alphabet belong in math?
I'm an engineering student and I still don't get it.
It's not like you have to use a slide rule...
Pick up a scientific calculator, got me thru electronics in college.
Carl.
Fv2
Don't know what I'm doing, gonna do it anyway.
My professor says no calculators allowed.It's not like you have to use a slide rule...
Pick up a scientific calculator, got me thru electronics in college.
Carl.
That's what I've always said. Math is about numbers, so why in the heck did some idiot mix letters in with it?!!!!And that's why I hate algebra... Who decided captions and the alphabet belong in math?
I'm an engineering student and I still don't get it.
I now have a solid brake handle and mechanism for the suicide brake. This took a lot of time and "skillbilly" engineering, at least 10 hours.
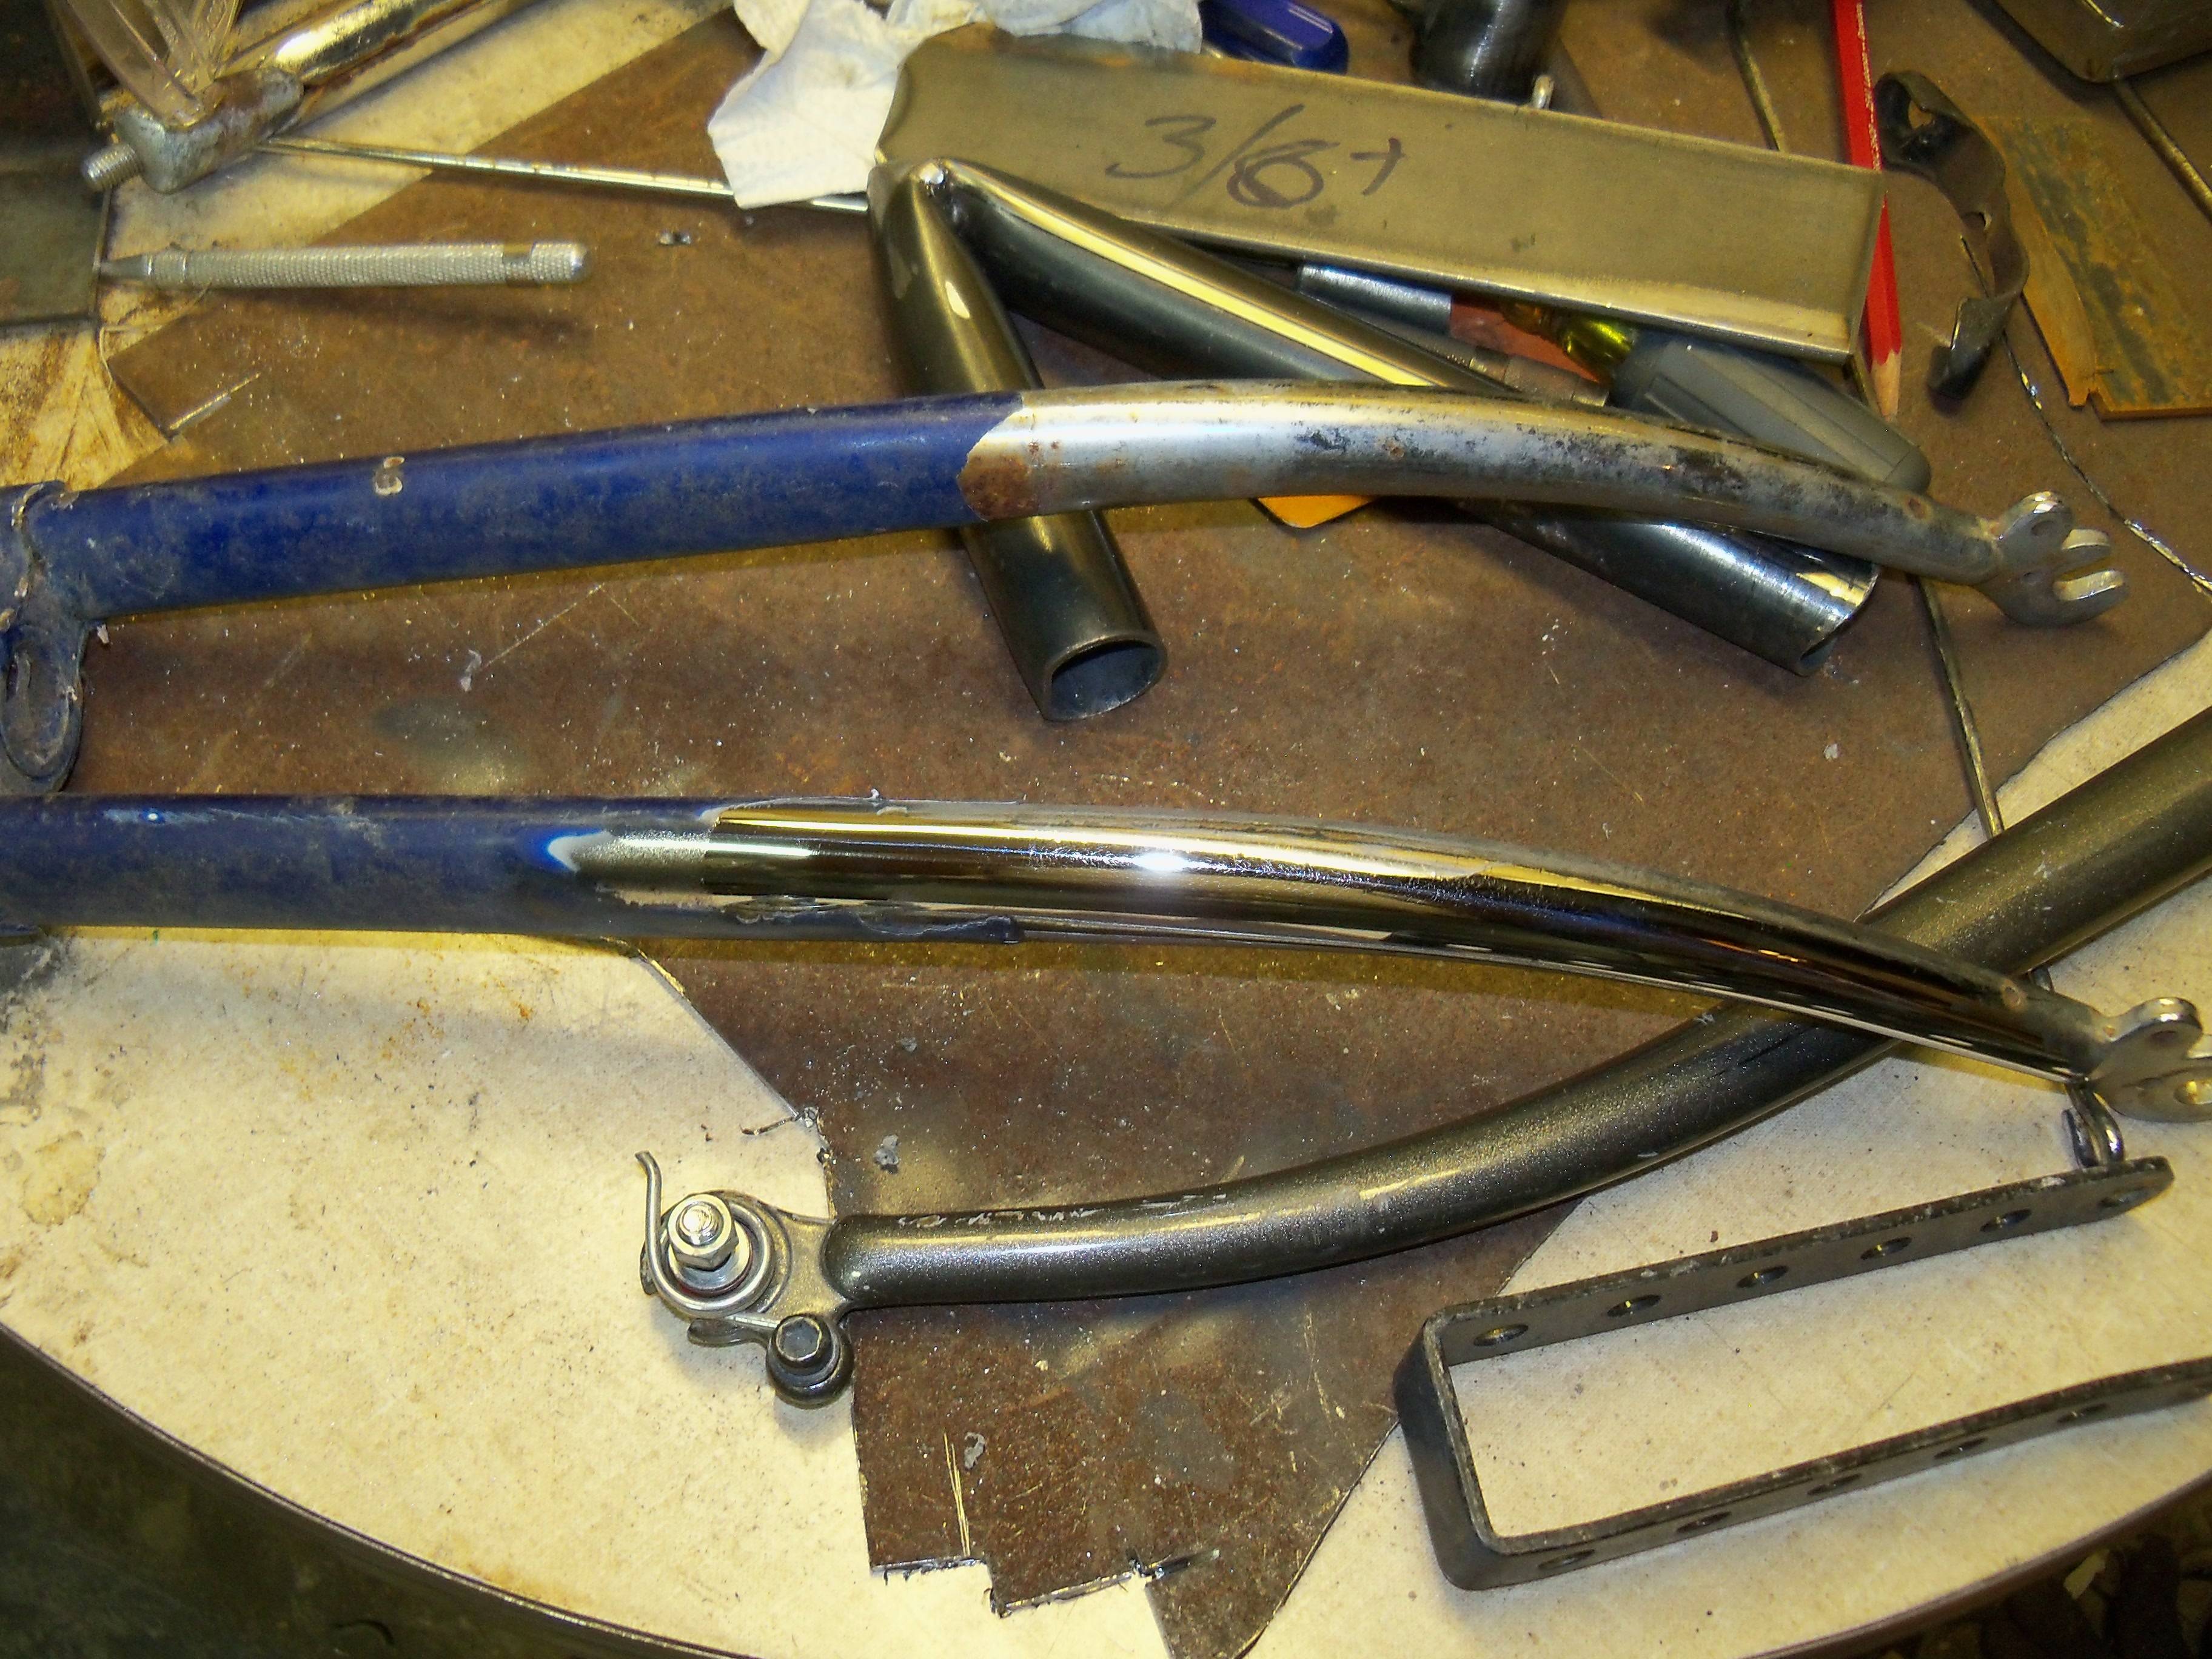
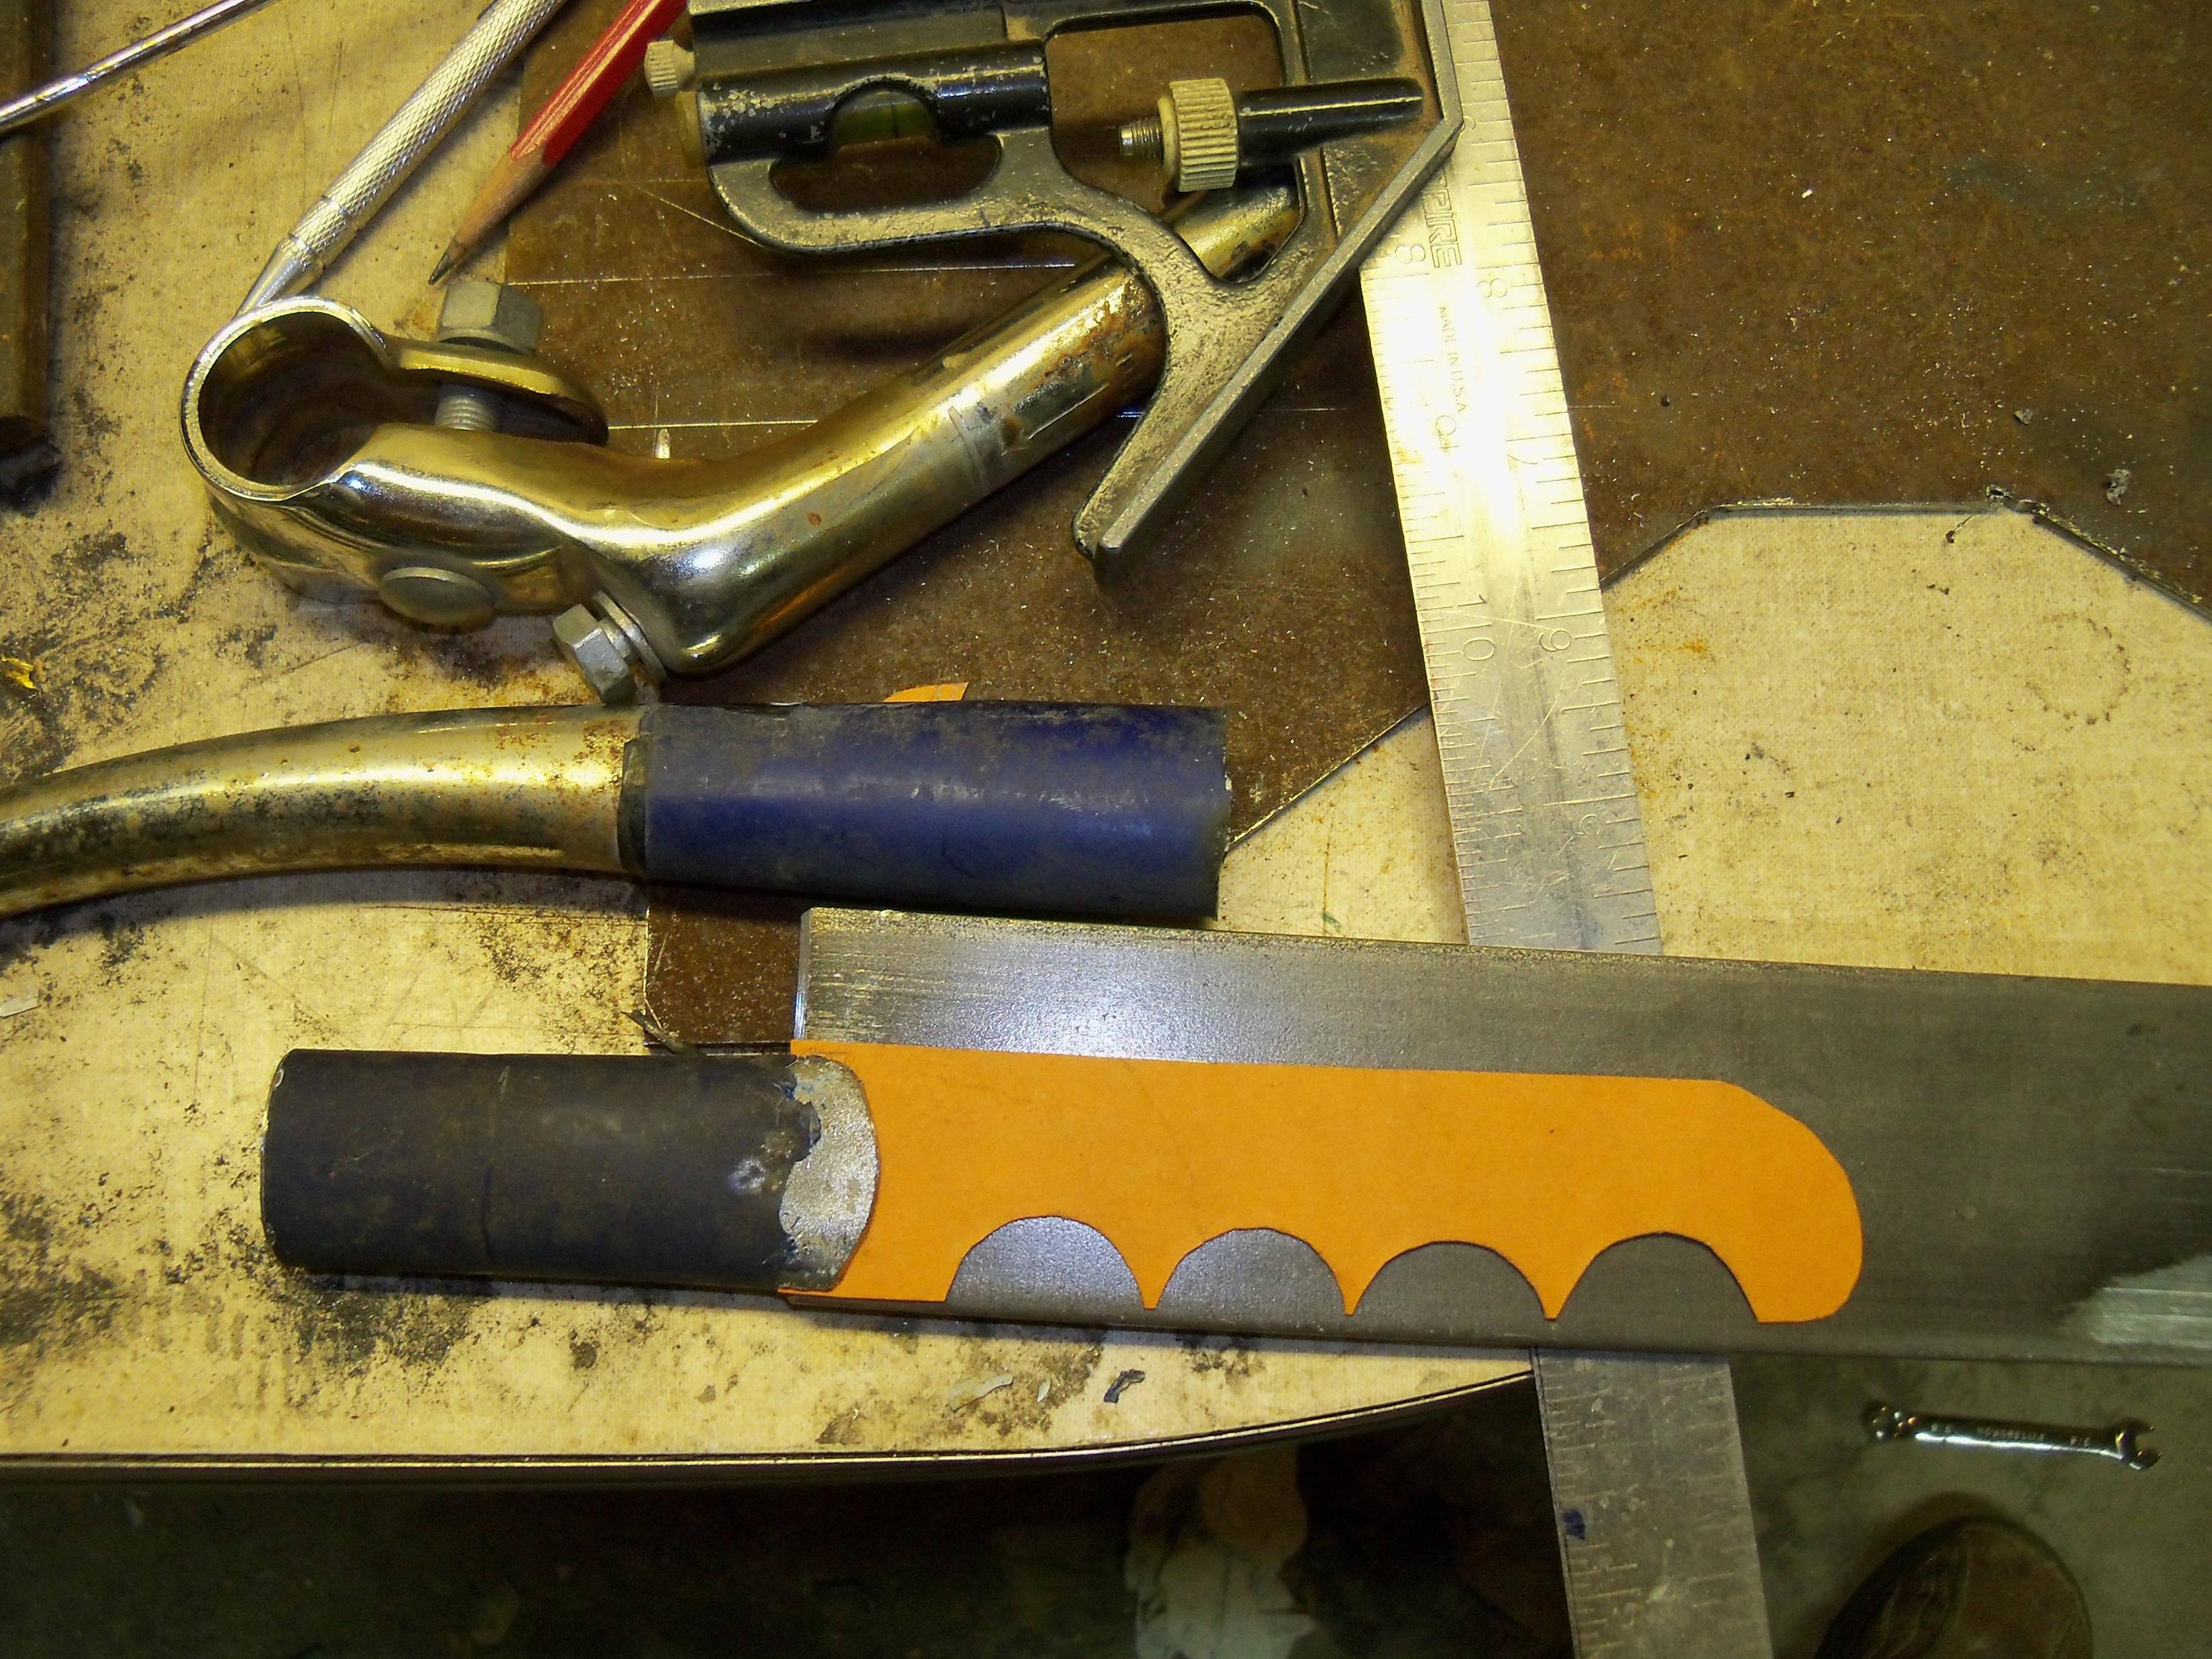
The suspension spring perch sure made this easier. It provided the right width, strength, and cool hardware to start with. That's 20$ in hardware... I only used maybe 5$.
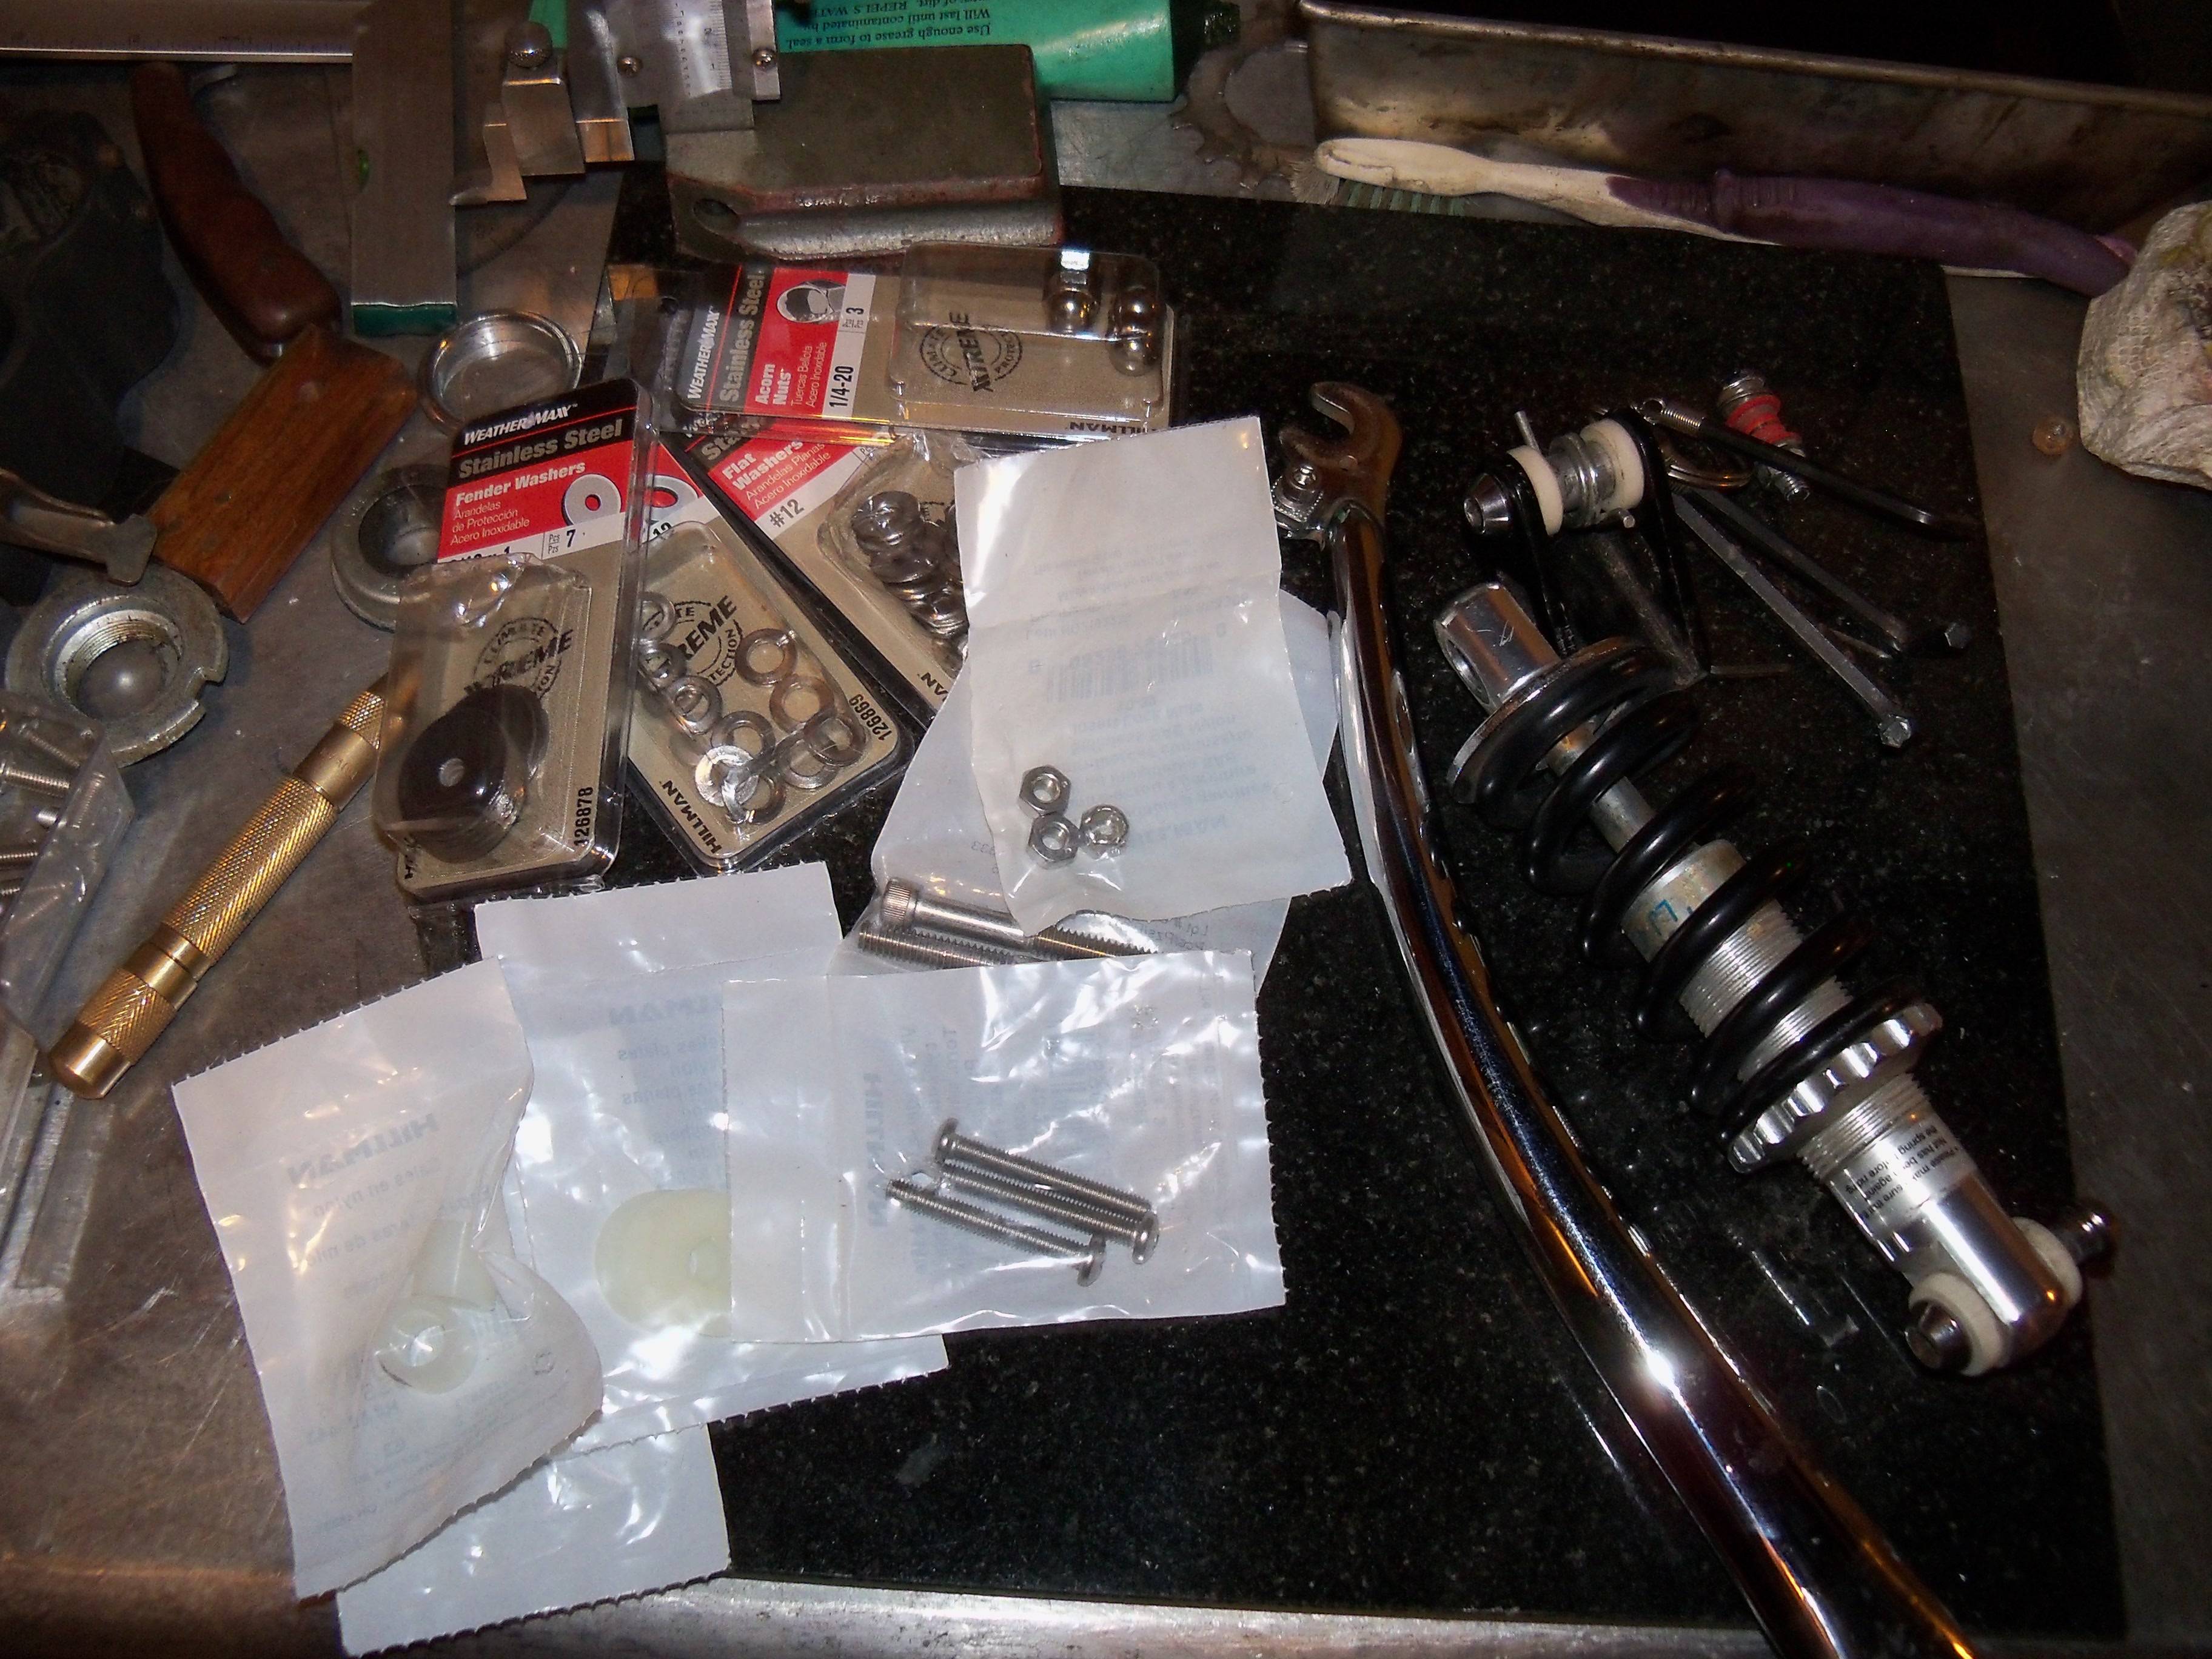
I tried to just enlarge the hole in the fork end and slide over the aluminum bushing but it was way too sloppy and the handle had a lot of side play. I wound up welding and filling and drilling to size to fit the metal sleeve.
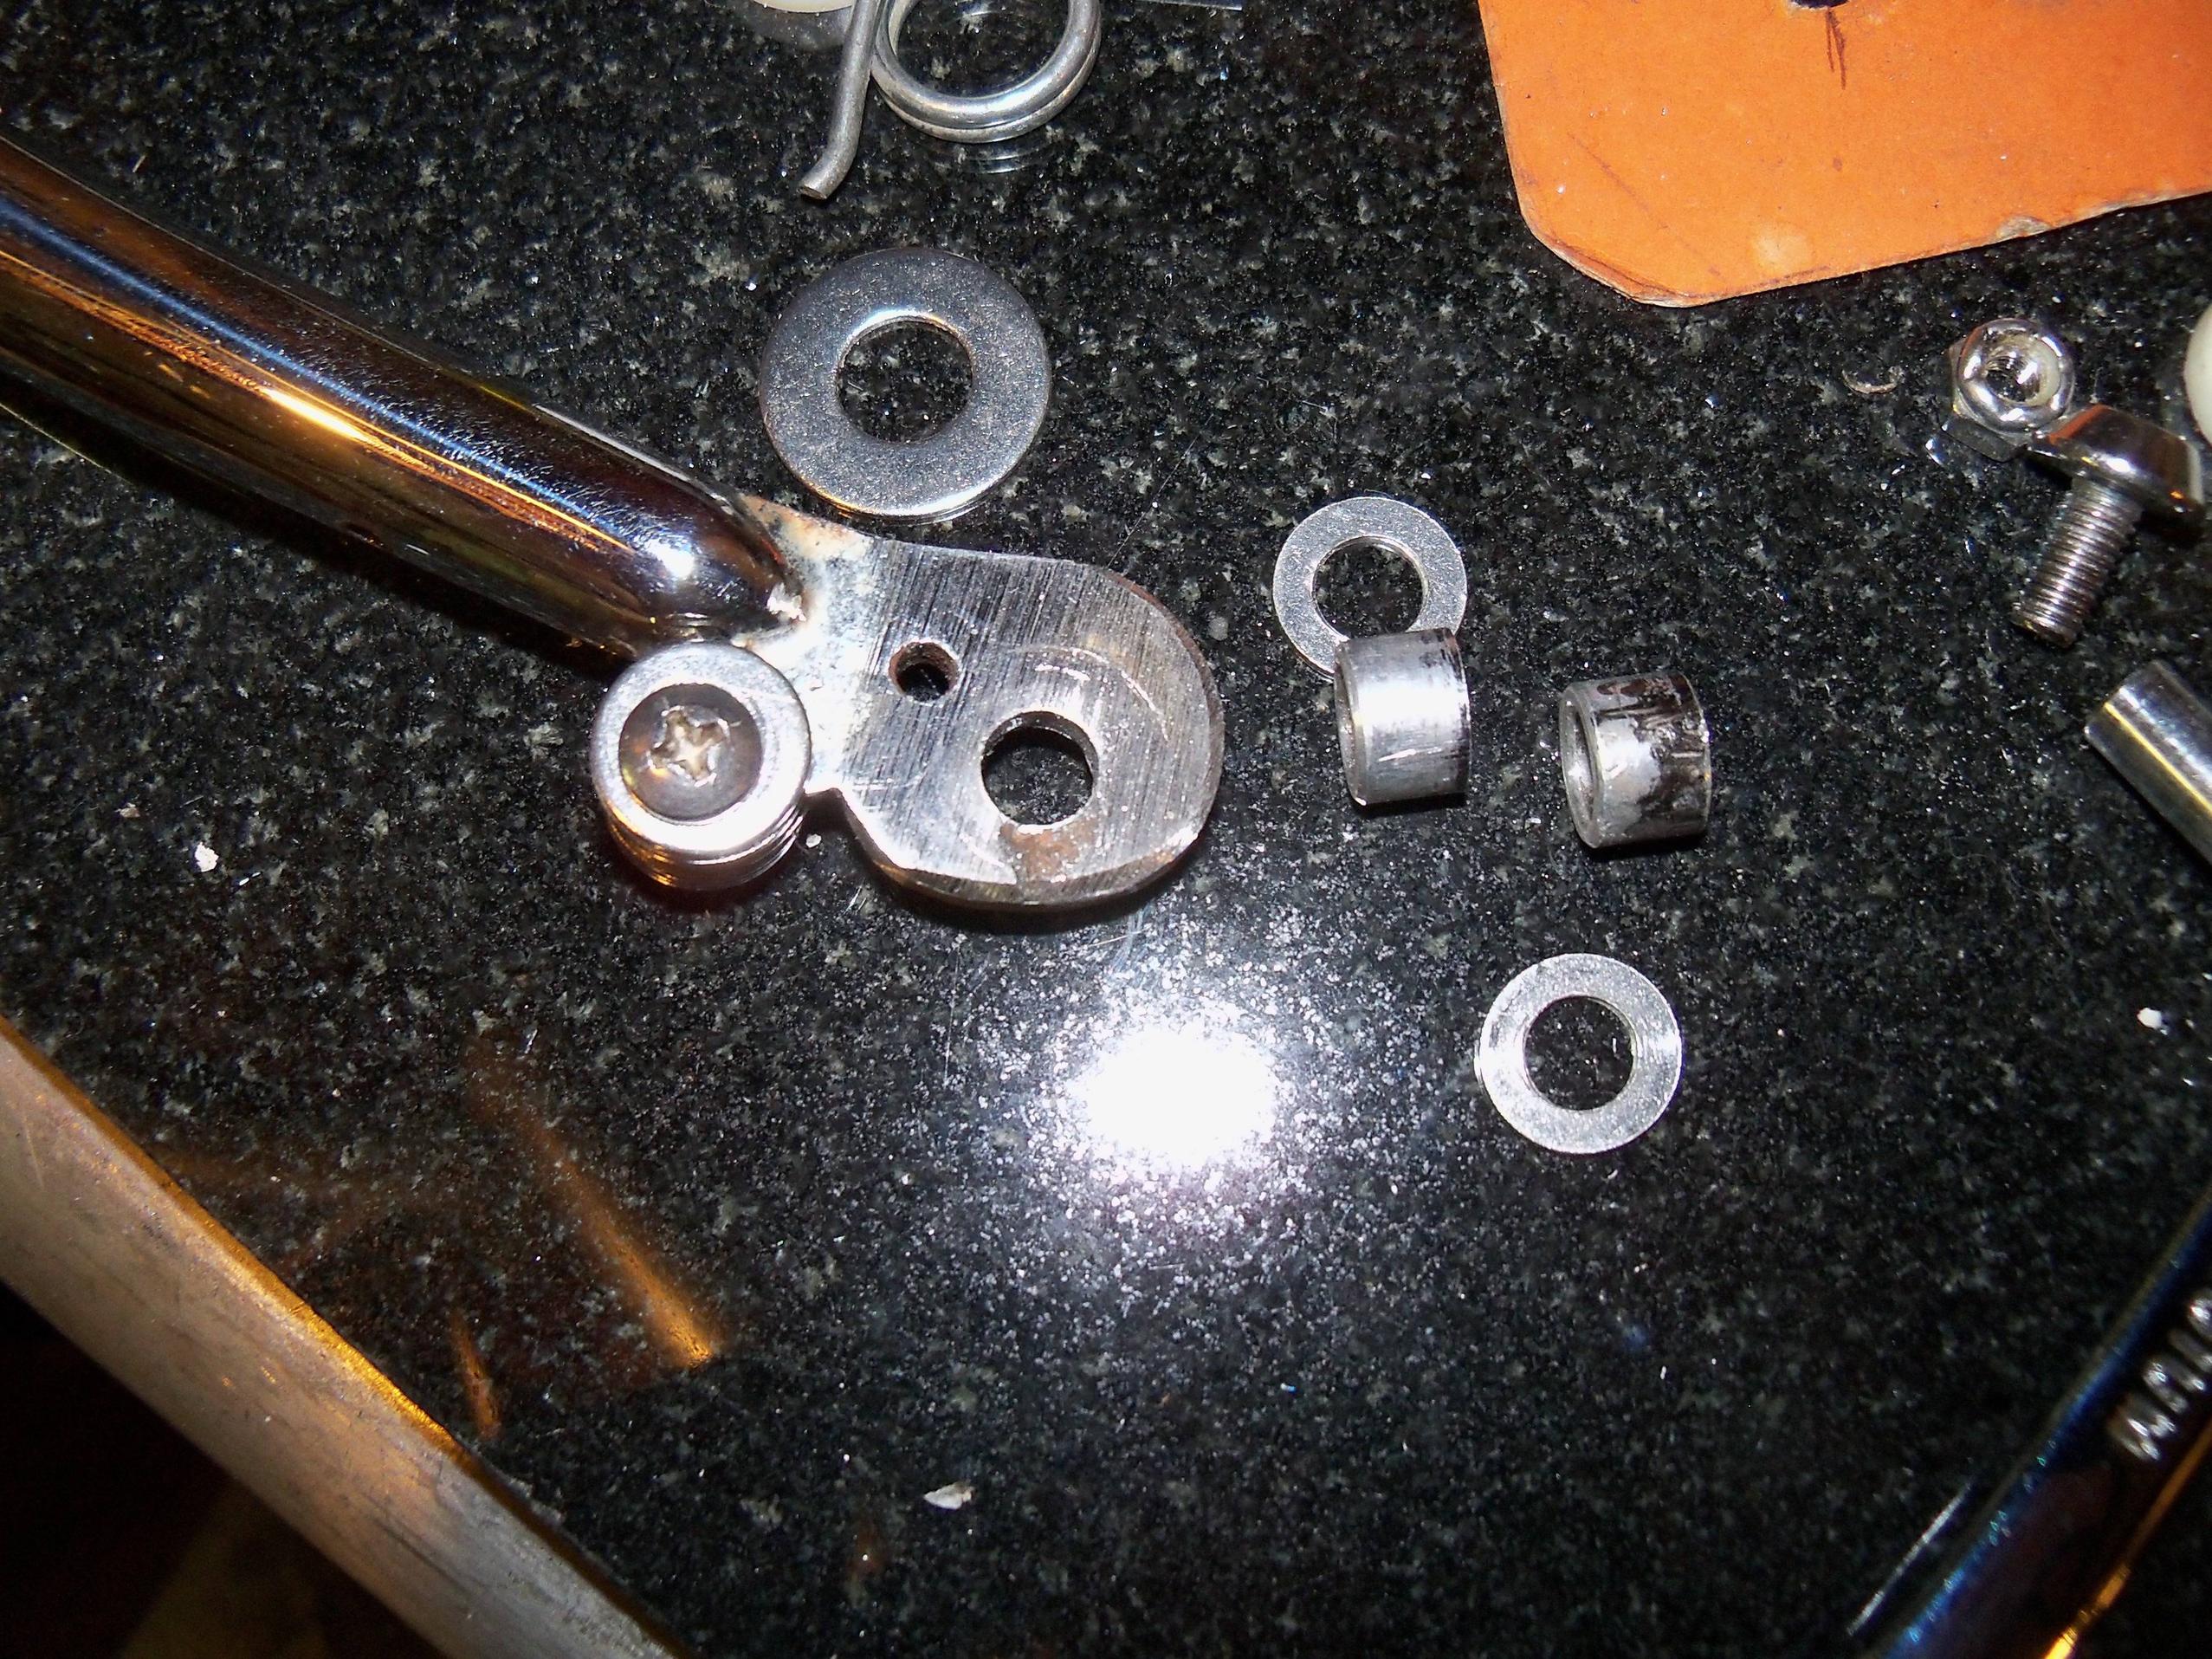
The fender/rack mount hole was perfect for the upper spring perch. I ground a couple of stainless washers flat and they catch the spring great.
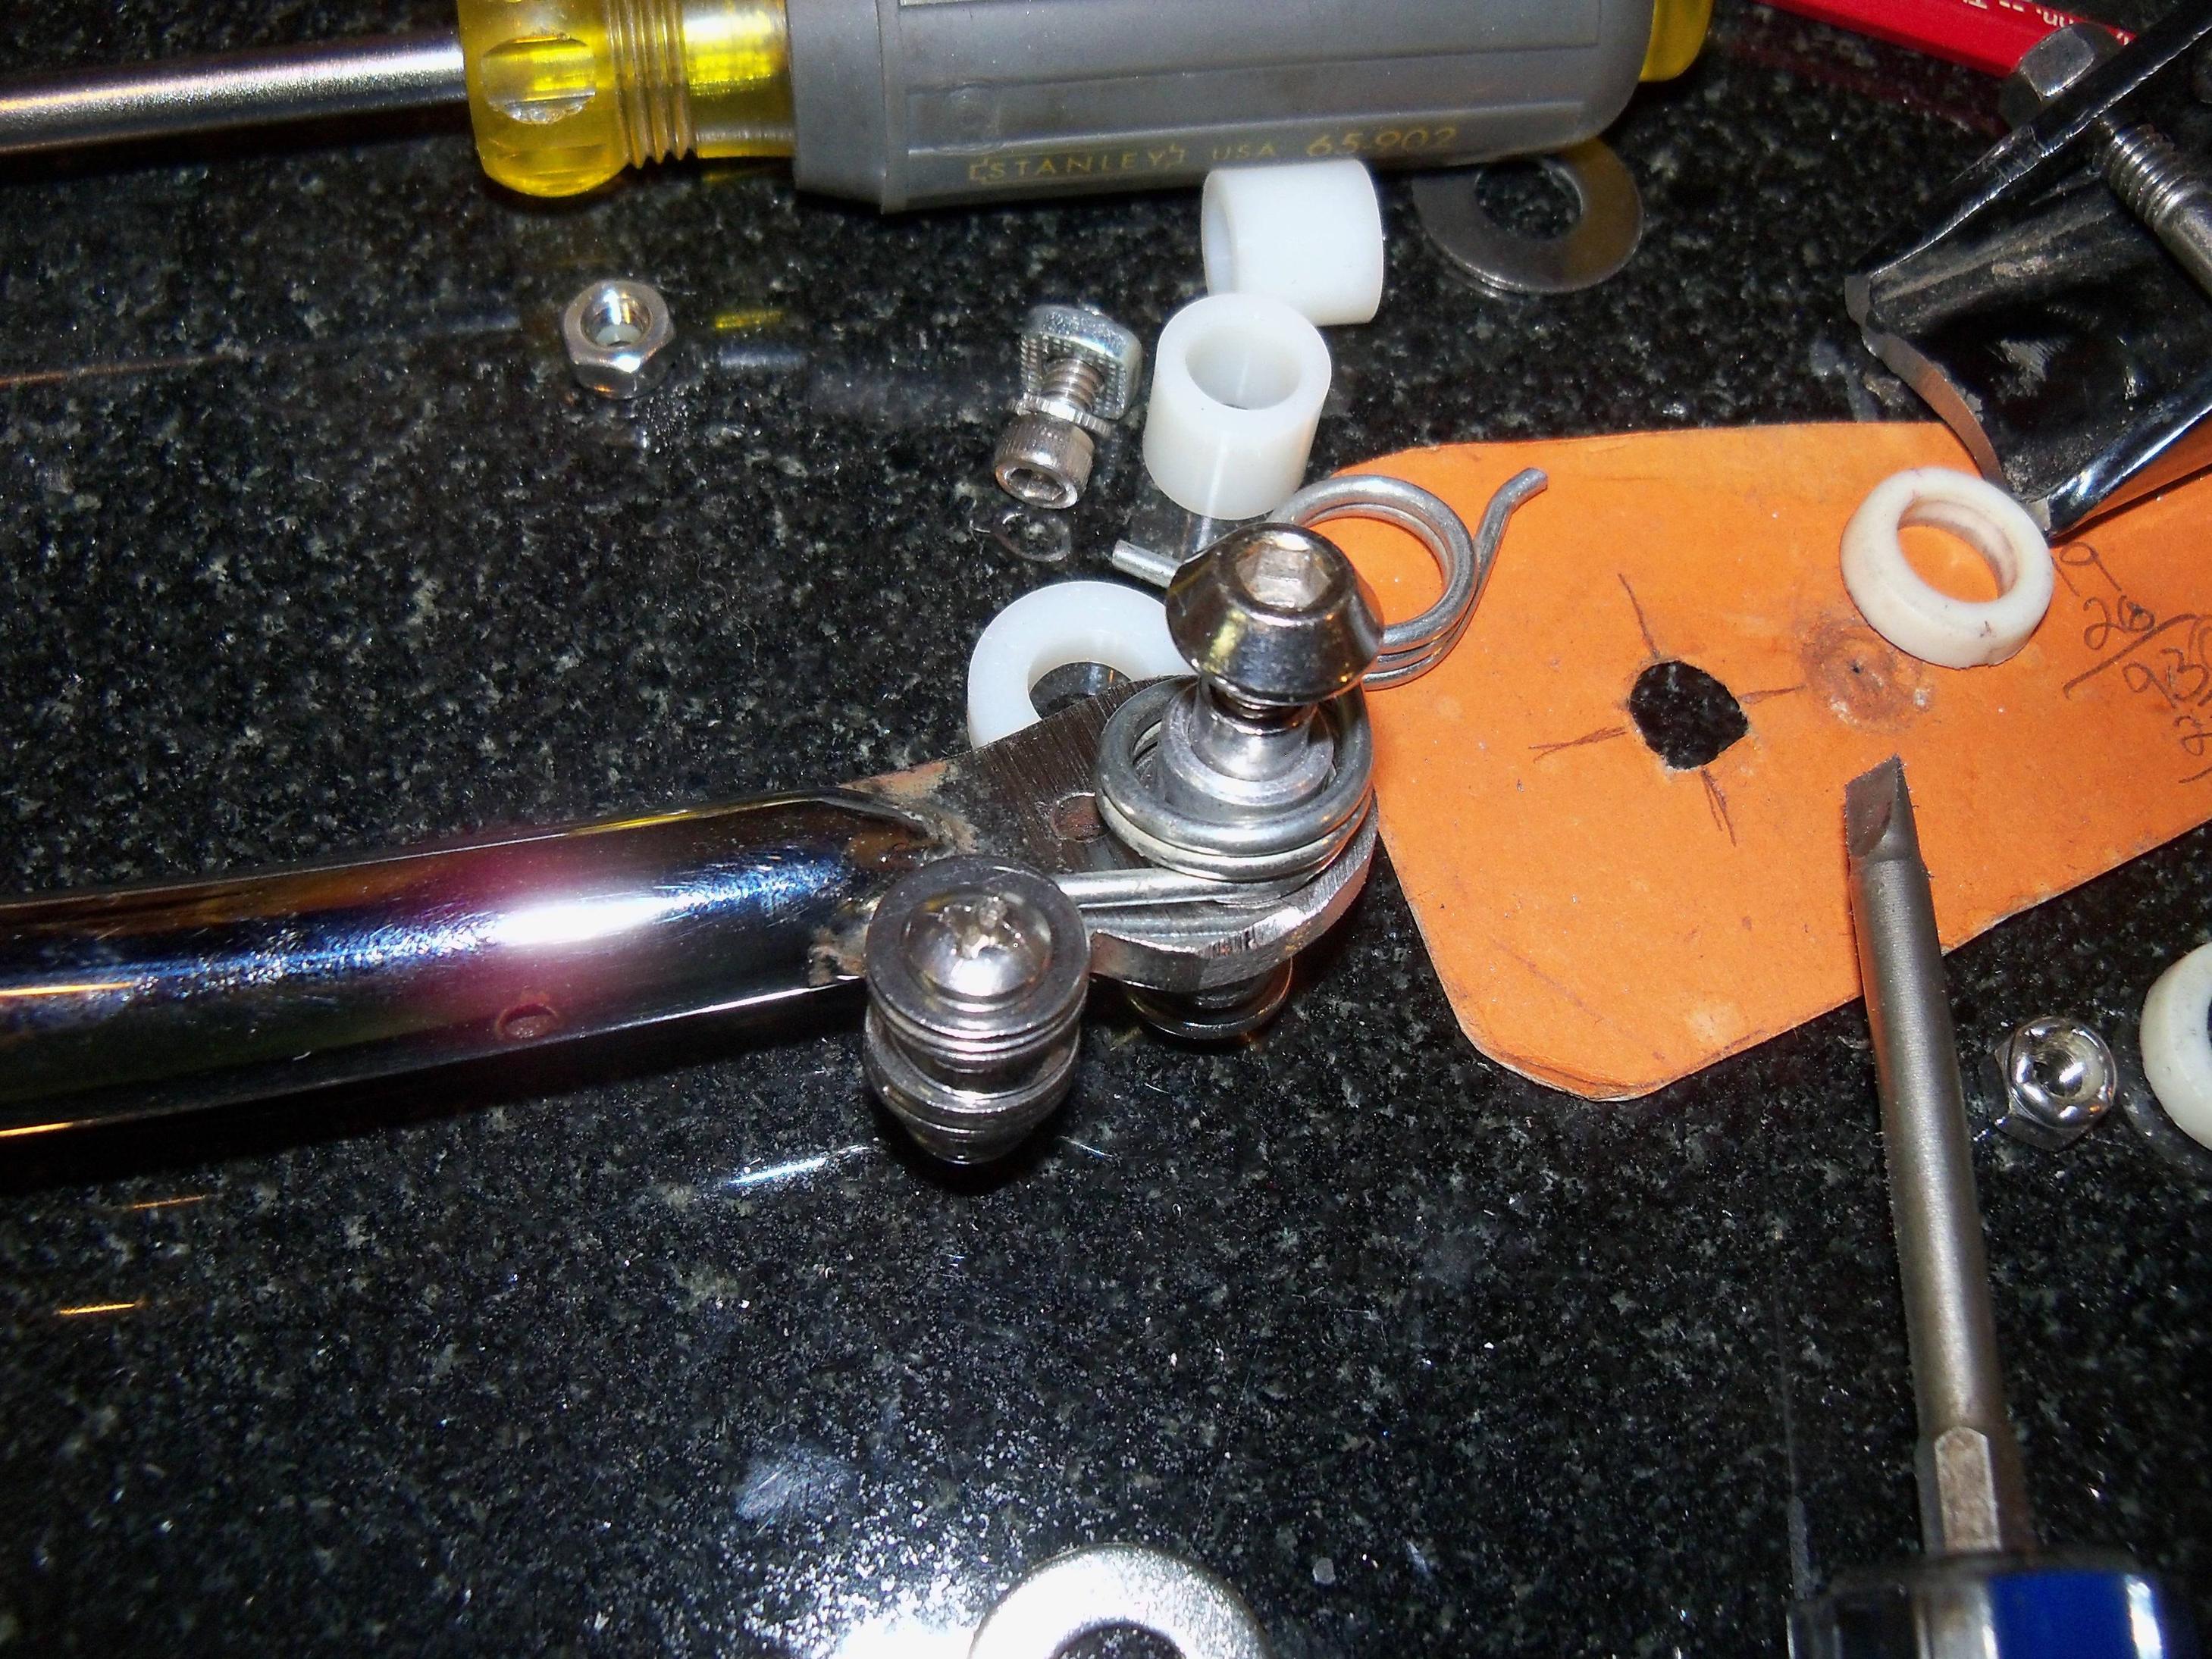
I cut the aluminum bushing in half and sized them fit, then used stainless washers against the fork. This is solid and I can compress just enough so the side to side play is less than 3/4" at the tip of the handle.
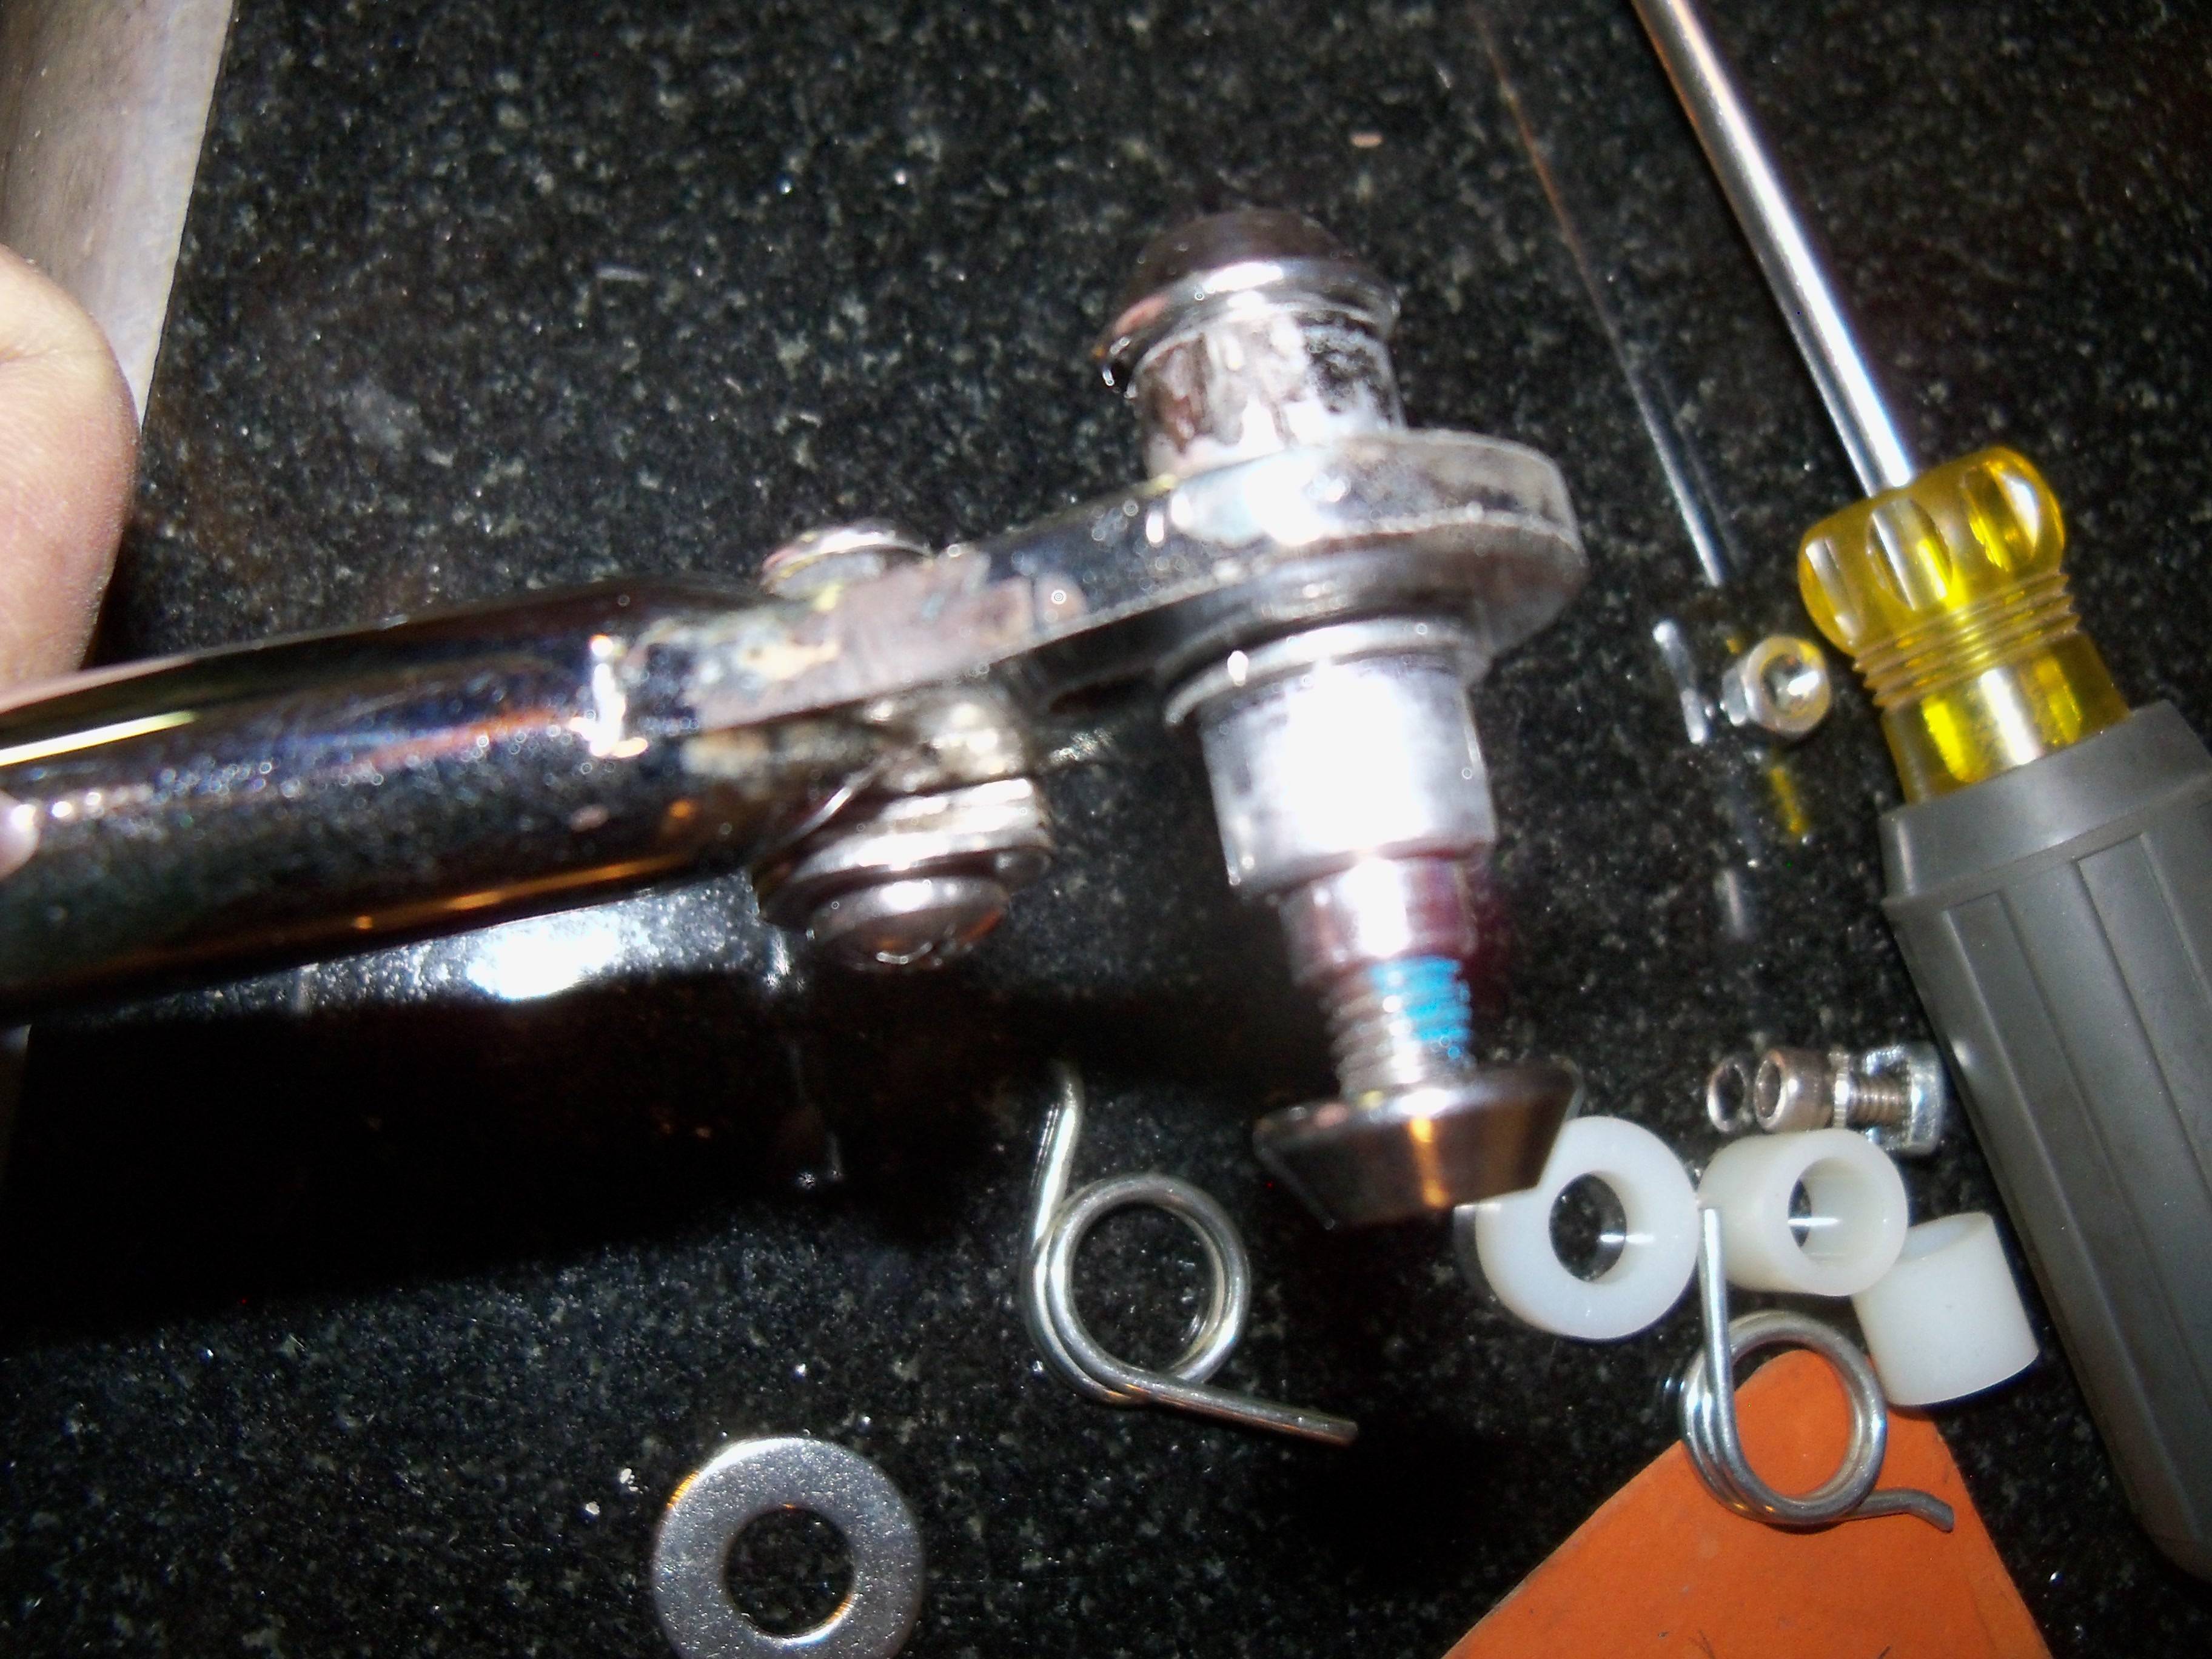
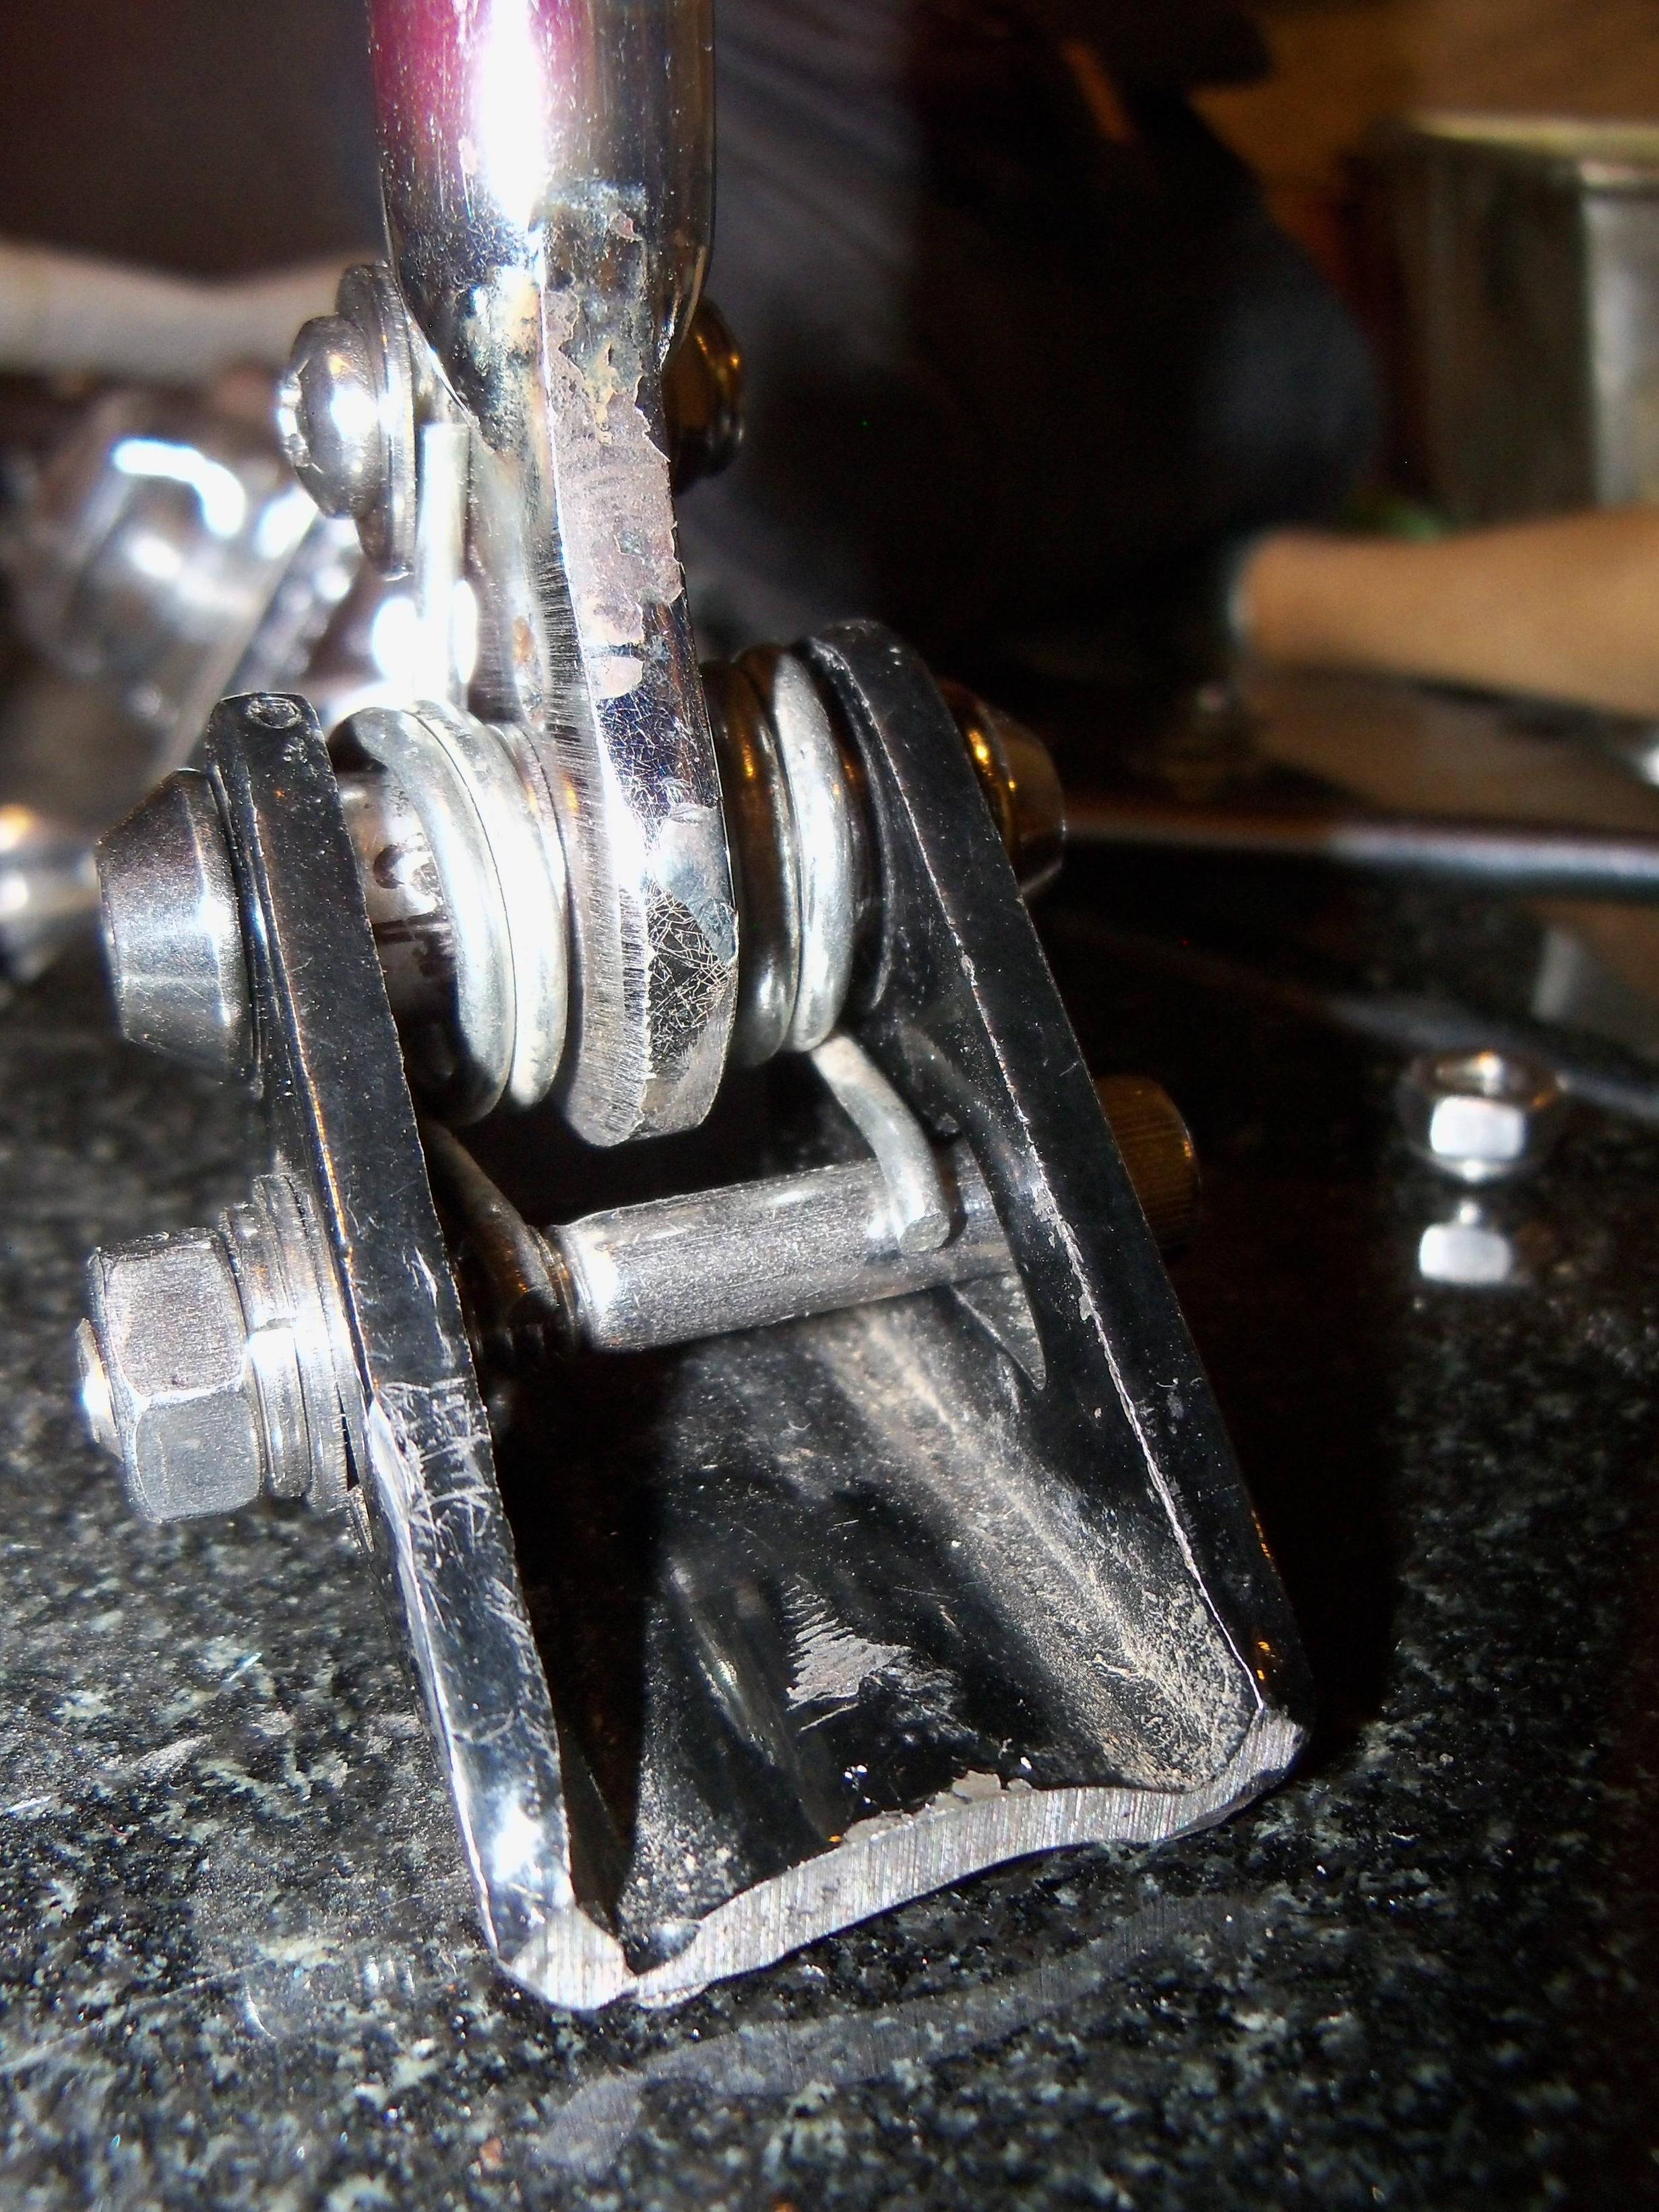
The bumper holds the springs slightly compressed.
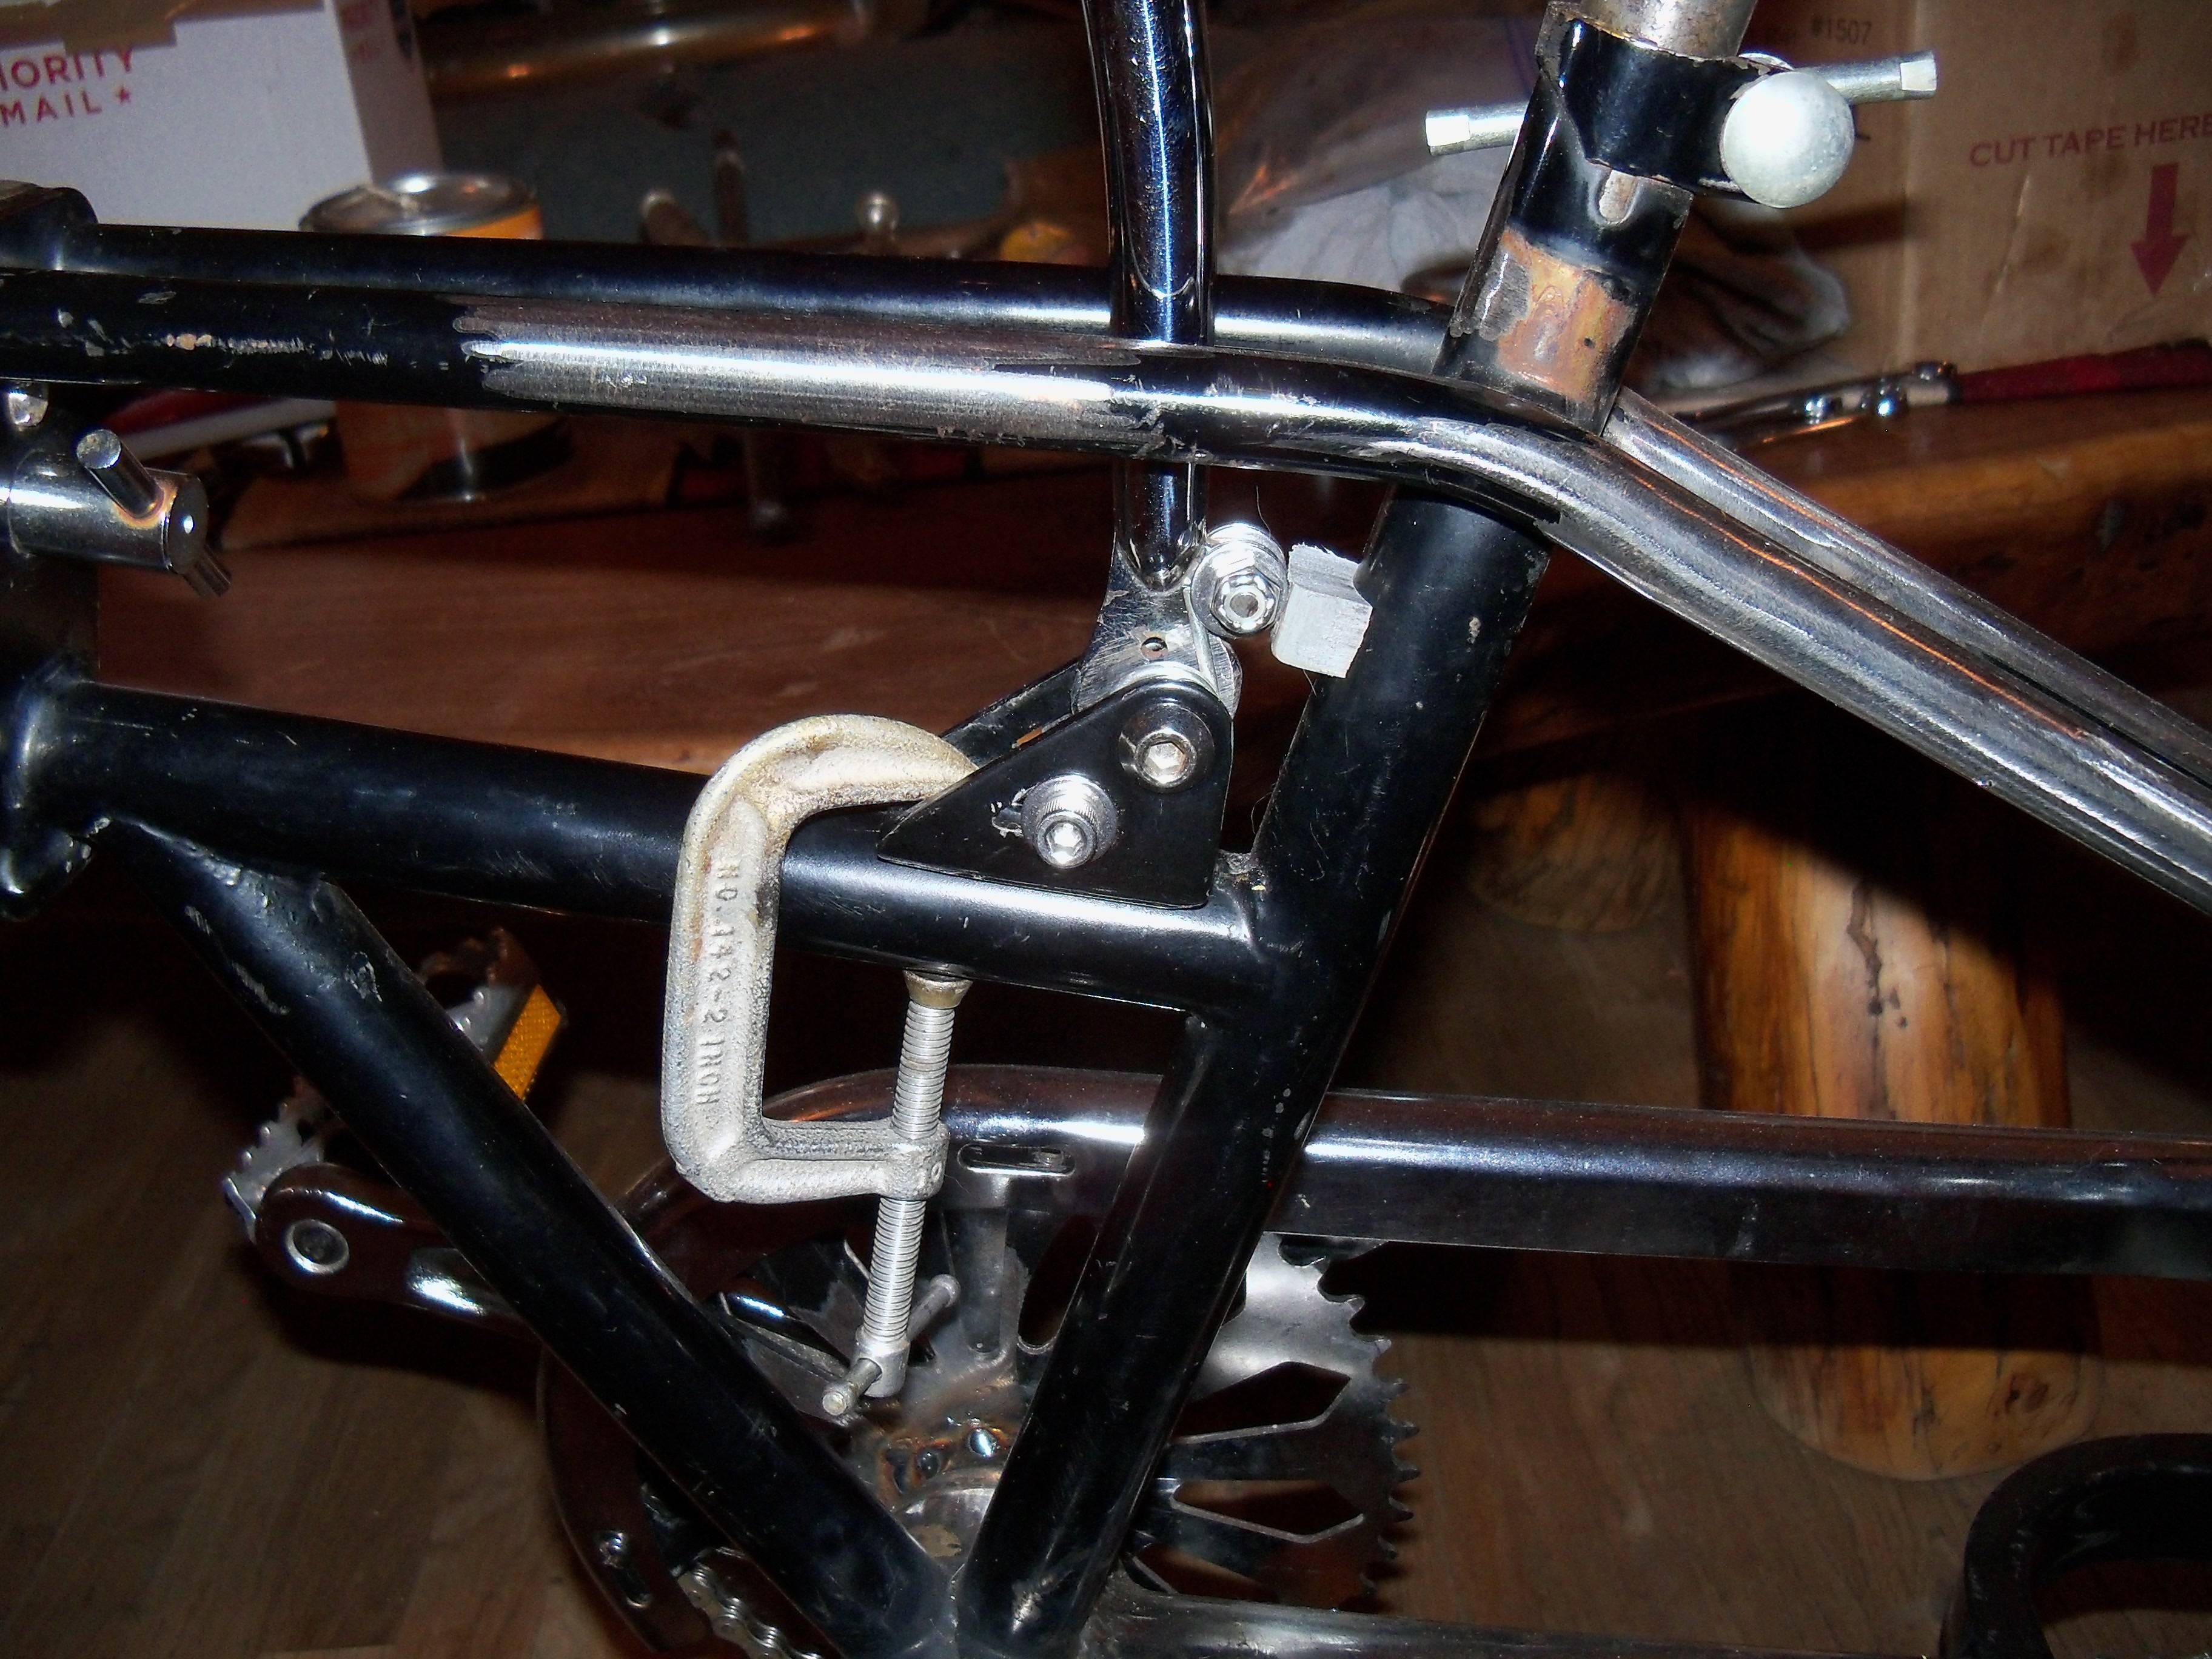
This is different.... but I think it will work. My goal is to be able to "spin some broadies" on this bike.
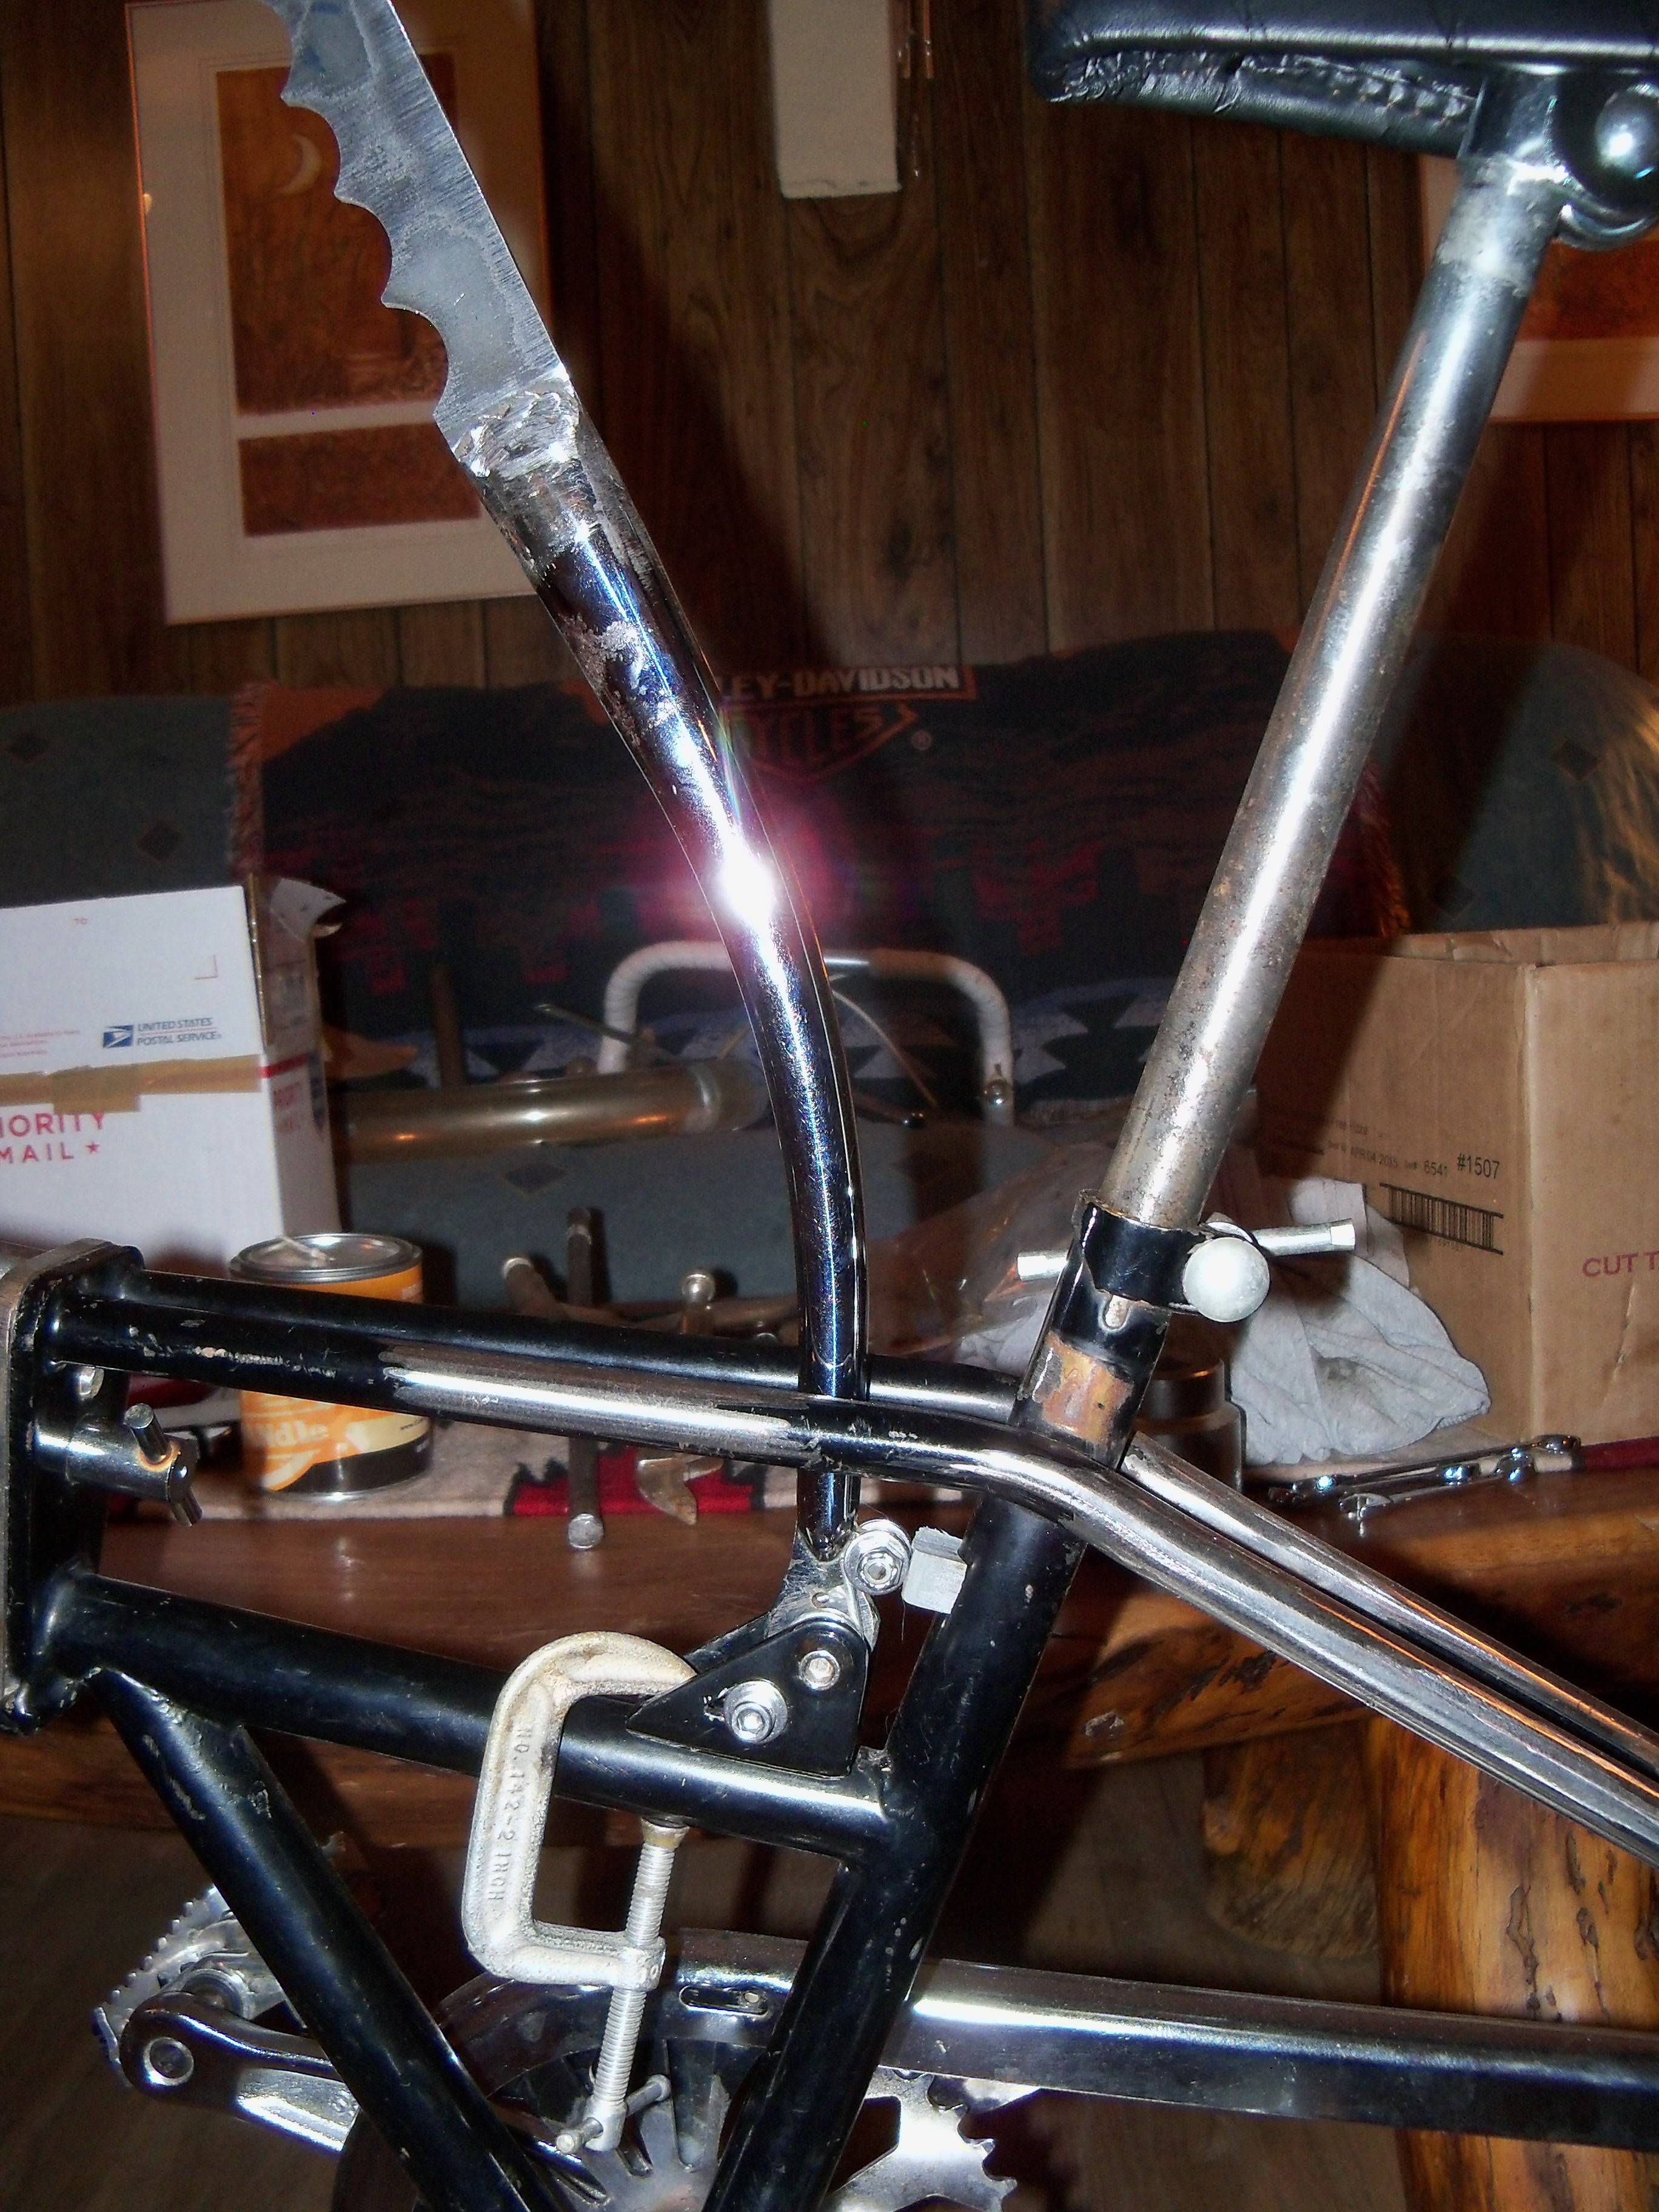


The suspension spring perch sure made this easier. It provided the right width, strength, and cool hardware to start with. That's 20$ in hardware... I only used maybe 5$.

I tried to just enlarge the hole in the fork end and slide over the aluminum bushing but it was way too sloppy and the handle had a lot of side play. I wound up welding and filling and drilling to size to fit the metal sleeve.

The fender/rack mount hole was perfect for the upper spring perch. I ground a couple of stainless washers flat and they catch the spring great.

I cut the aluminum bushing in half and sized them fit, then used stainless washers against the fork. This is solid and I can compress just enough so the side to side play is less than 3/4" at the tip of the handle.


The bumper holds the springs slightly compressed.

This is different.... but I think it will work. My goal is to be able to "spin some broadies" on this bike.

Last edited:

$169.99
$229.99
Huffy Stone Mountain Women's Mountain Bike, Gray, 26 Inch Wheels/17 Inch Frame
HuffyDirect

$19.99
Electra Glide Wall Decal 2ft Long Sport Harley Davidson Bike Motorcylce Sticker Man Cave Garage Boys Room Decor
FatCat Wall Graphics

$99.99
$108.99
Schwinn Toggle Quick Build Kids Bike, 12-Inch Wheels, Smart Start Steel Frame, Easy Tool-Free Assembly, Blue
easiness
Impressive work!
Luke.
Luke.
Yeah, thanks for the step-by-step pics. Well thought out and resourceful! Your use of the brake caliper springs and the nylon bushings is pure genius. And that term....Skillbilly...love it! 
To that I give a hearty Yabba Dabba Doooo!

To that I give a hearty Yabba Dabba Doooo!
Impressive work!
Luke.
Yeah, thanks for the step-by-step pics. Well thought out and resourceful! Your use of the brake caliper springs and the nylon bushings is pure genius. And that term....Skillbilly...love it!
To that I give a hearty Yabba Dabba Doooo!
Now that's cool never seen that before .
Sent from my iPhone using Tapatalk
Thanks guys! We'll see how it works.
- Joined
- Apr 14, 2015
- Messages
- 2,619
- Reaction score
- 4,835
Back in the day my idea of a suicide brake was to wedge my foot between the back tire & the frame , wore a groove out in the side of your sneakers in a hurry . LOL [emoji13]Thanks guys! We'll see how it works.
Sent from my iPhone using Tapatalk
- Joined
- Apr 14, 2015
- Messages
- 2,619
- Reaction score
- 4,835
It's only a wast of time if you got caught !!![emoji6]What a great way to waste an afternoon at work when I should have been, well, working!! Really enjoyed reading about the build from the beginning-you are an artist and a craftsman, my friend!!
Lol
Sent from my iPhone using Tapatalk
Fv2
Don't know what I'm doing, gonna do it anyway.
Back in the day my idea of a suicide brake was to wedge my foot between the back tire & the frame , wore a groove out in the side of your sneakers in a hurry . LOL [emoji13]
Sent from my iPhone using Tapatalk
I did the same thing,had to get a specially designed chair to sit in after my dad ripped me a new one for tearing up shoes.
Great work on this one. Suicide brake is radical but I'm not seeing how it works? Is there going to be a brake it attaches to?
Great work on this one. Suicide brake is radical but I'm not seeing how it works? Is there going to be a brake it attaches to?
Yes, Chad. Down low, maybe in line with the top tubes, I'm going to either drill the tube and run the cable through it or weld a tab on the side to accept the brake cable. It will be attached to the rear rim, I'm planning on a disc brake. The handle and mechanism is designed to be a push brake.
Last edited:
I started on the pattern for the mags. At the shop I traced the original mag onto a piece of cardboard. The layout and dimensions are simple. If you want to copy the mag like I did, I'm sharing them with you guys in millimeters, it's just easier that way. My OD is smaller than the original. My center D is smaller also. Because I don't need to mount to a hub, mine will be welded to the axle, I'm just adding a couple of mms to the actual ID of the rim to get my steel to taper. If you have any questions on the pattern don't hesitate to ask. This is a pretty cool lil mag!
The original mag is 16 gauge.
I had to adjust this pattern. I had the opening at 100mm, not the spoke width.
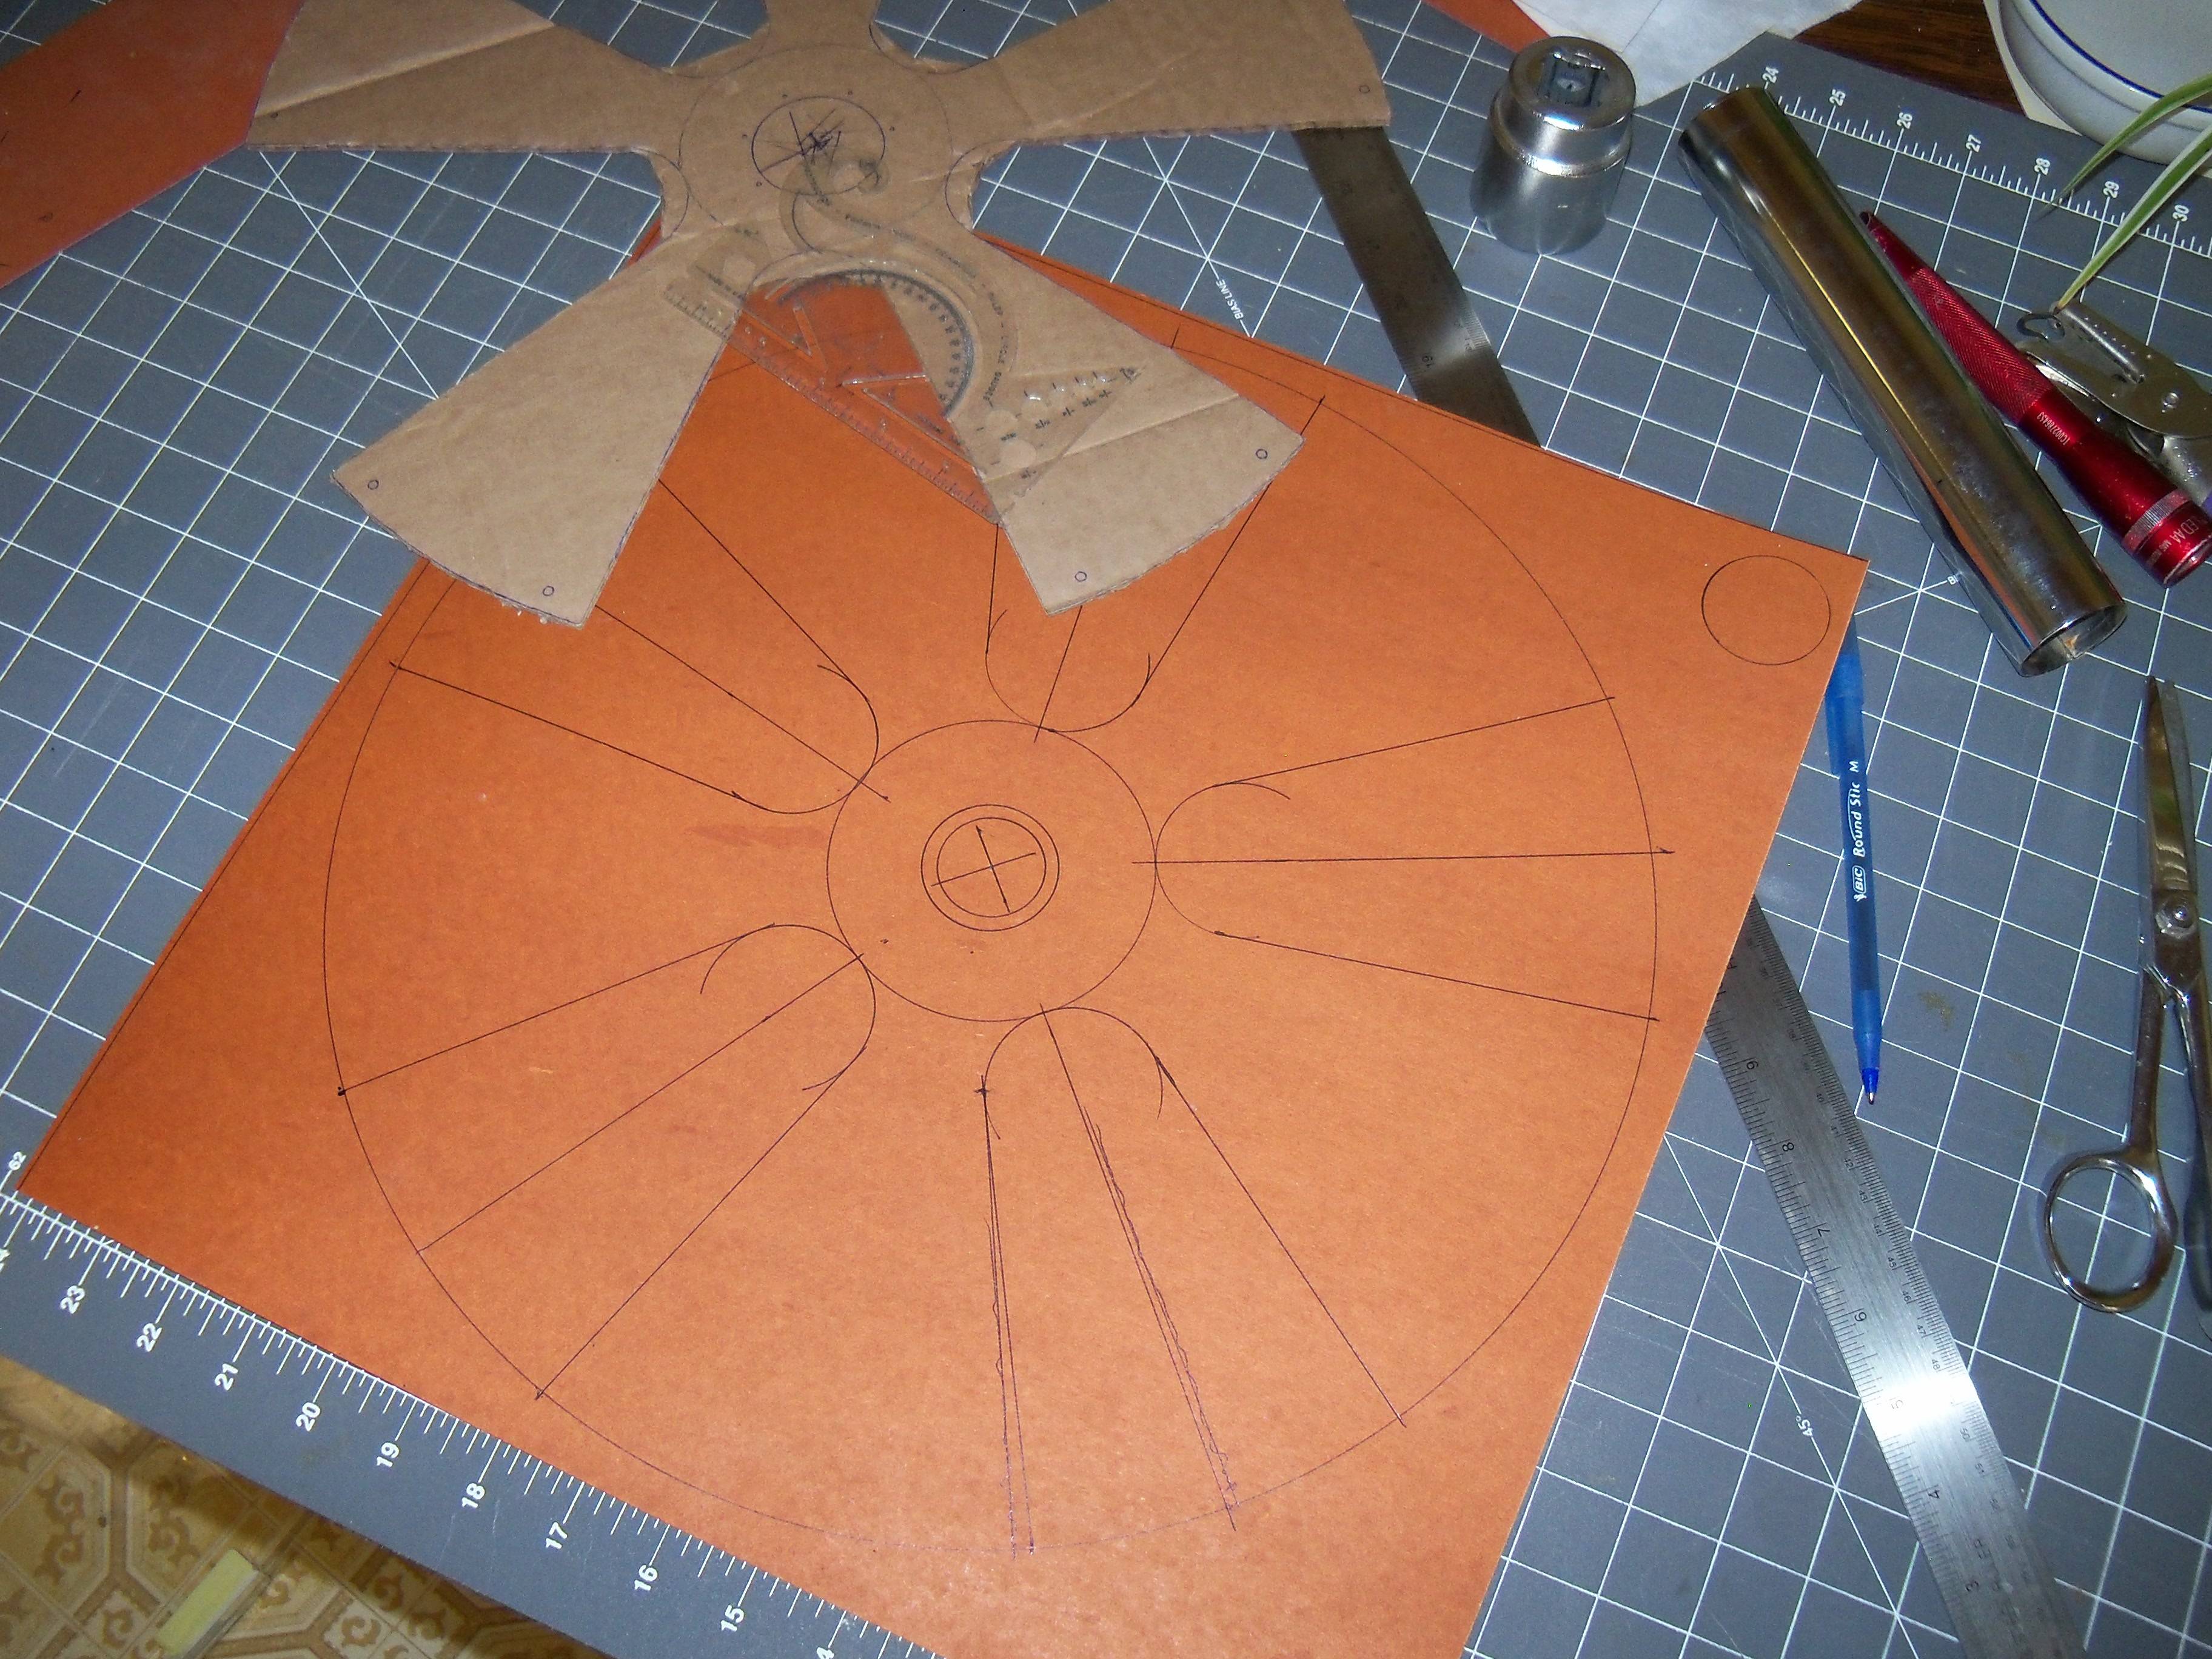
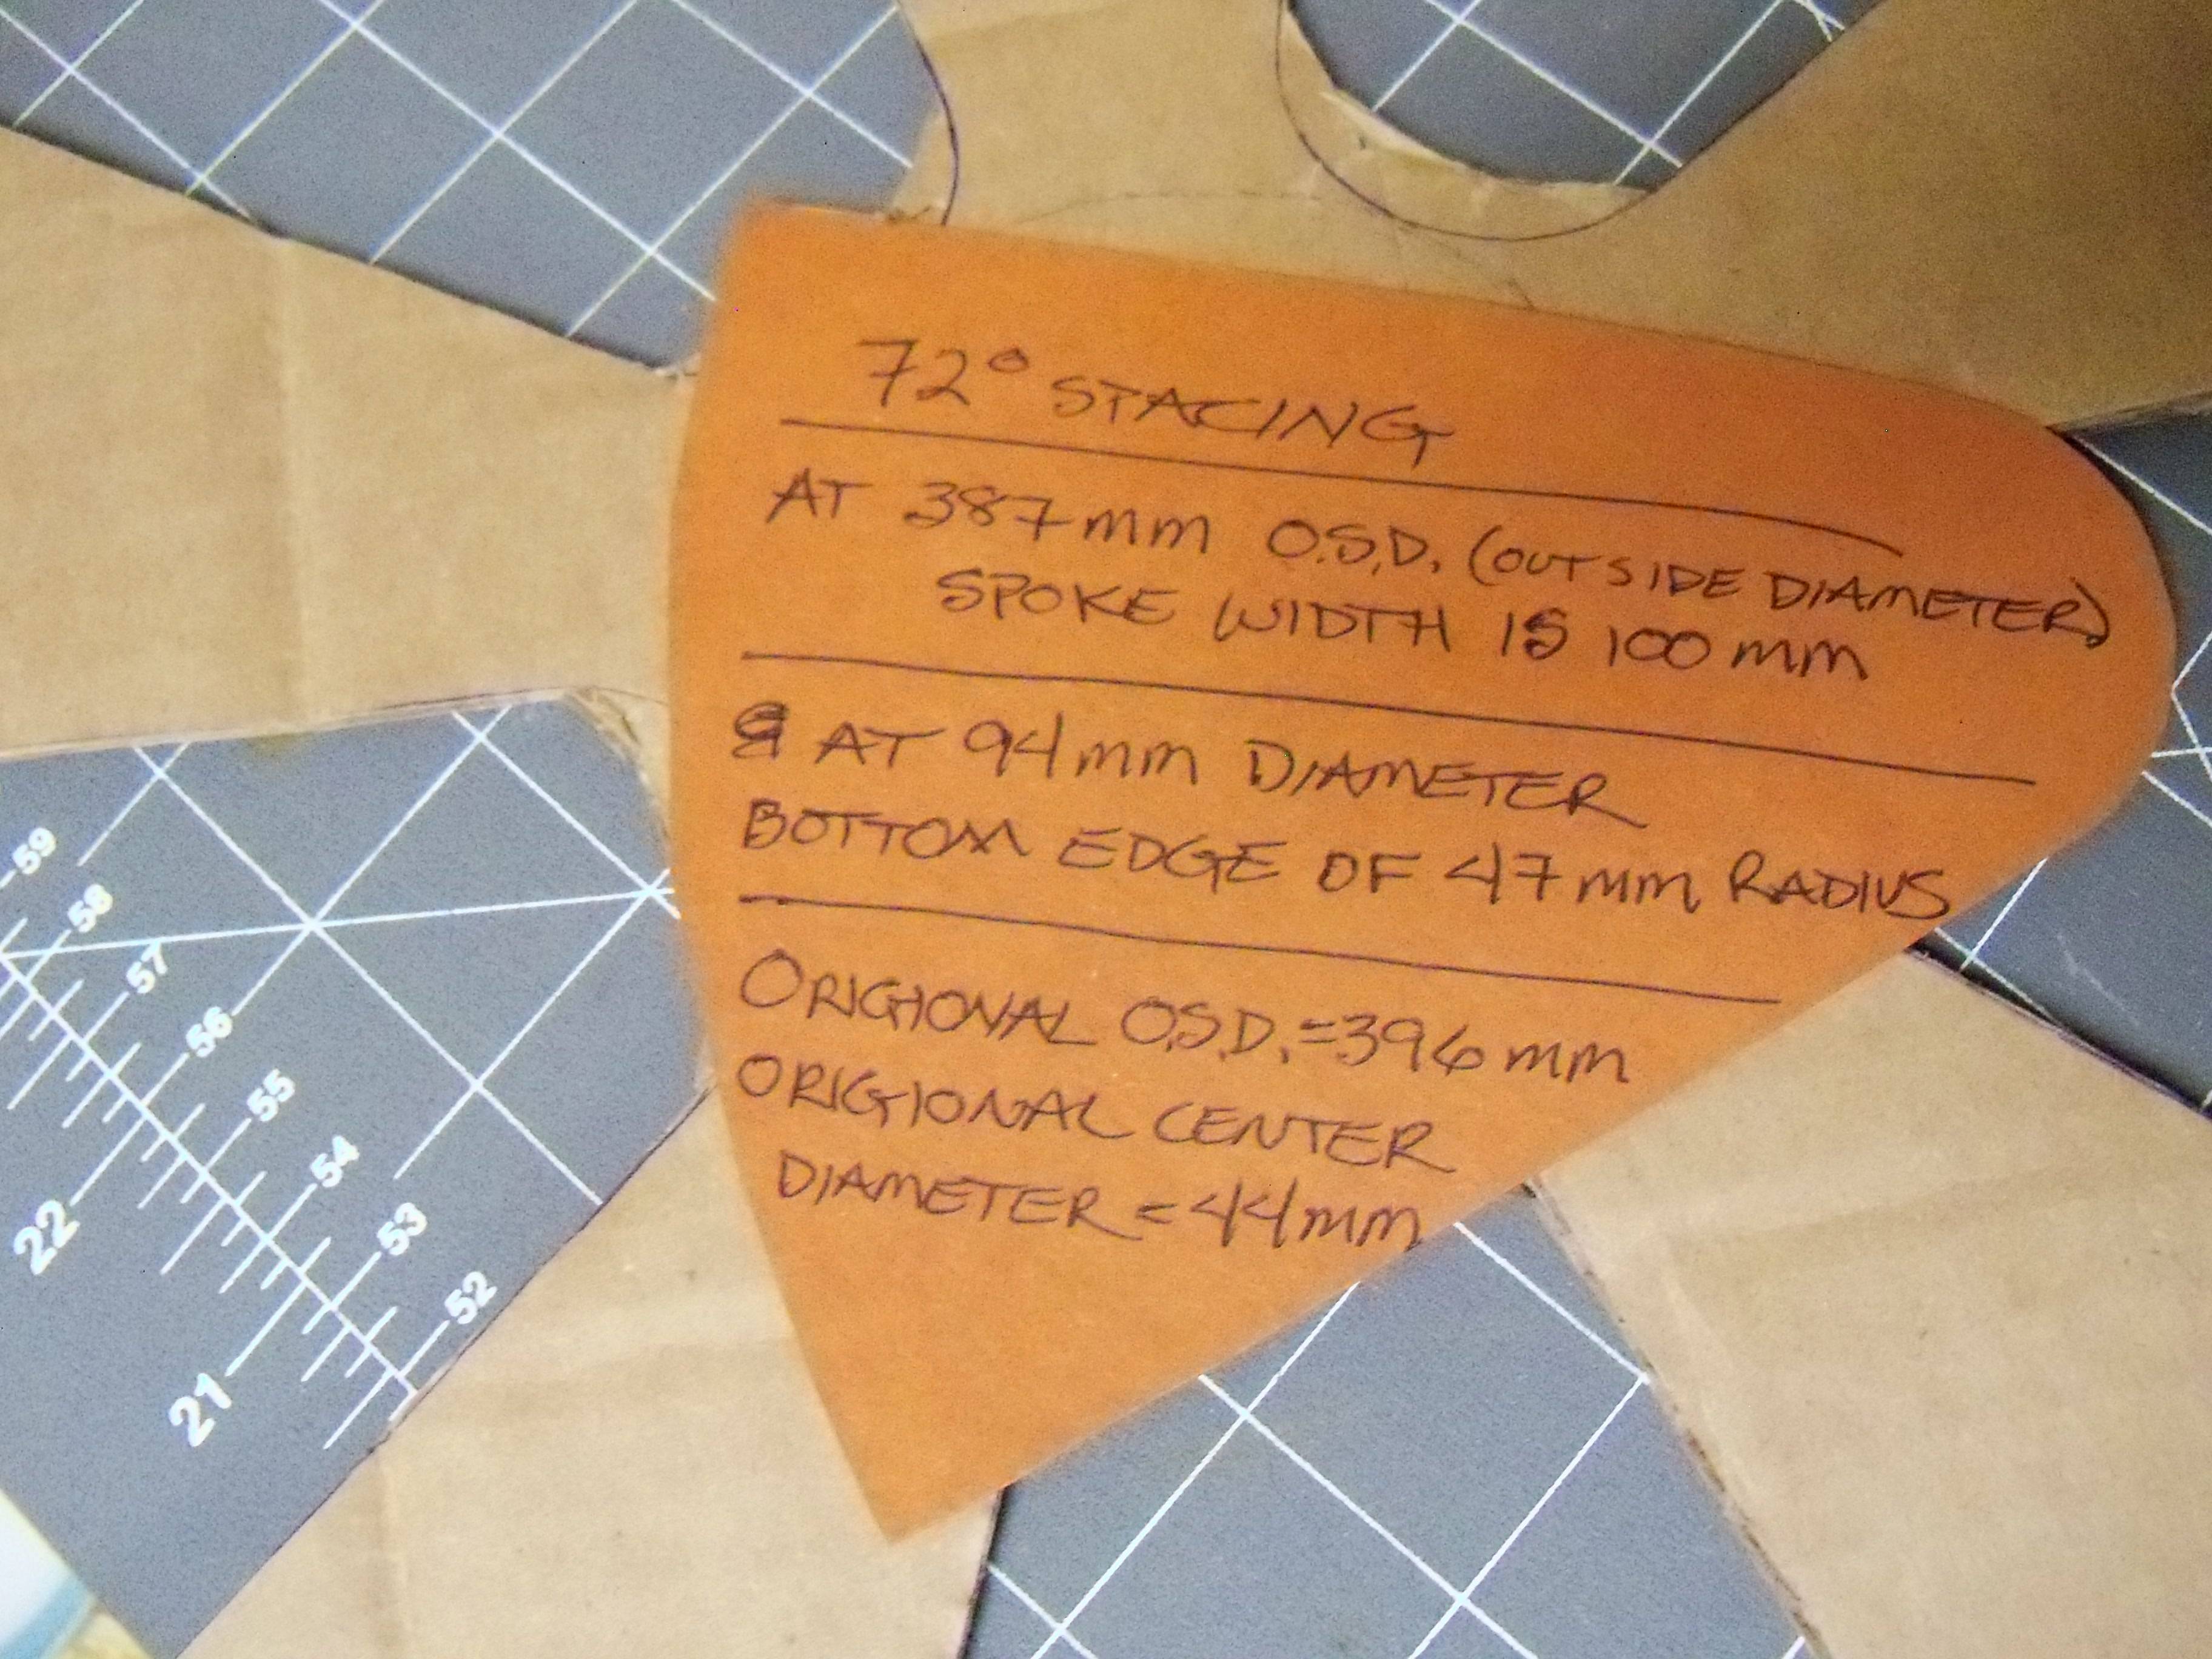
The original mag is 16 gauge.
I had to adjust this pattern. I had the opening at 100mm, not the spoke width.


Last edited:
Awesome! Saving those pics to my file...I started on the pattern for the mags. At the shop I traced the original mag onto a piece of cardboard. The layout and dimensions are simple. If you want to copy the mag like I did, I'm sharing them with you guys in millimeters, it's just easier that way. My OD is smaller than the original. My center D is smaller also. Because I don't need to mount to a hub, mine will be welded to the axle, I'm just adding a couple of mms to the actual ID of the rim to get my steel to taper. If you have any questions on the pattern don't hesitate to ask. This is a pretty cool lil mag!
I had to adjust this pattern. I had the opening at 100mm, not the spoke width.


Looking forward to seeing it happen!
Luke.
Mag-nificent!
So many cool builds, but I think this one is my favorite.


