(MBBO Class 1) Powerglide

Rat Rod Bikes Bicycle Forum

Help Support Rat Rod Bikes Bicycle Forum:

This site may earn a commission from merchant affiliate links, including eBay, Amazon, and others.
They were supposed to be wings, for my build named "Little Wing" for the annual build off. I was never able to get it started, so I guess they are flames now.
 
Great to see this build coming along! That wheelie bar/drop stand is genius!

The plan today was to get the drop stand modded for the wheelie bar and get it completed and also get the brake arm bottle opener done. By 3pm it was too hot and I called it quits for today. I still need to do some bending and add a couple of bolts to the stand and I didn't even get to the bottle opener.

281clv.jpg


I just had to comment on how behaved your pet is. I could never get anything done in our garage, my dog, 1 cat and 2 kittens wouldn't allow me! Our living room is my work area. I have short stool while working in the garage and my dog has her face always on mine or asking to be played with, while the cats are either using my back as a scratching post or perched on my shoulders and head. hahaha!
 
We picked up Maxie a month or so ago, already trained. He only barks when necessary, unlike the other dogs here that bark all night long.

The old bike frame may not hold up to my weight with a wheelie, and the length of the frame may be too long for me to even pull a wheelie, but I purposely got a 26" stand so it can go on any bike in the future.

11tpqis.jpg
 
The second coat didn't do much either. Powder coat in 1959? So I sanded for a couple of hours and called it quits. It isn't as good as I wanted, but when it gets scratches it won't be a problem. I was almost out of my one allotted can of primer when I remembered the dropout extensions. And lucky for me one can of red barely did the whole thing. I'm out of bike budget.

34q8ihj.jpg
 
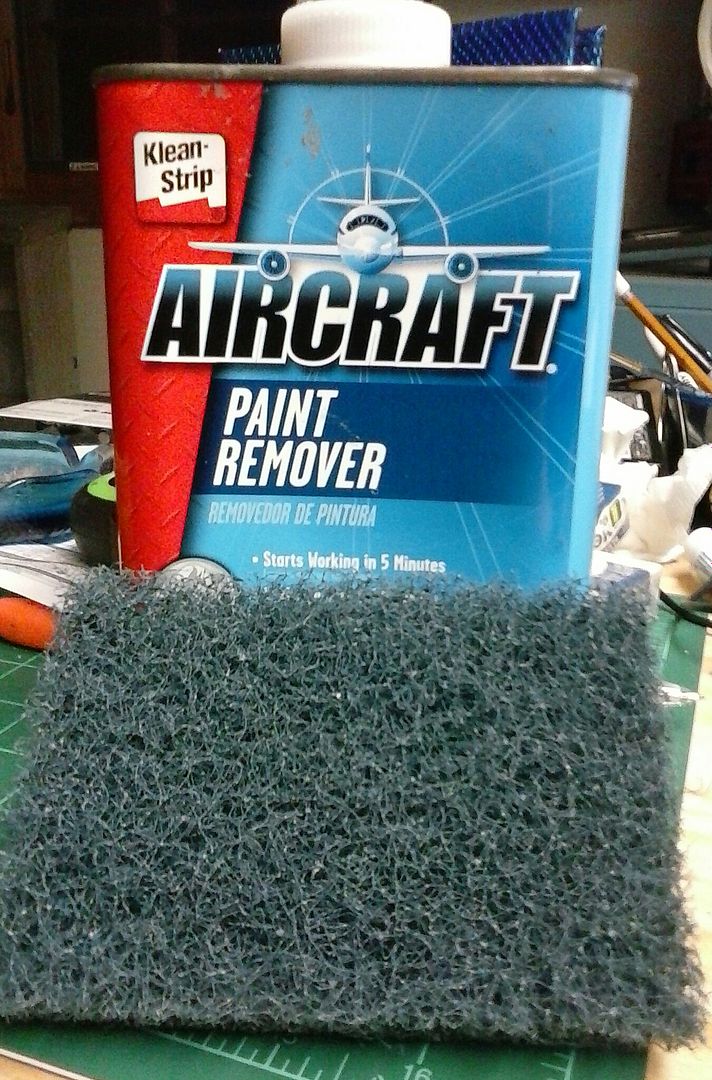
You have to scratch up the surface when you use paint stripper. It gives the stripper something to start chewing on. I use Aircraft Stripper made by Klean-Strip. Pad is made by 3M. Best to use it out side when it's warm.
1219140024.jpg
 
She's turning out great Barry! I have never looked back on trading this baby with you. Seeing all of the love and fun you put into this rare folder is a blast. You were the perfect person to breath life back into her old bones.
 
I sure would like to use that 46/47 CWC for the winter build off! But I've got to stay focused on this to get it done. Next is to get some shiny washers and c clips to put it all together and some correct size bolts for the dropouts and wheelie bar.


vrykxe.jpg
 
I sure would like to use that 46/47 CWC for the winter build off! But I've got to stay focused on this to get it done. Next is to get some shiny washers and c clips to put it all together and some correct size bolts for the dropouts and wheelie bar.


vrykxe.jpg
It is my favorite part of the whole process when it gets to this part... don't let us hold you up!:thumbsup:
 
Even though there's no bike budget, Santa invited me over to the big bike shop. I've got new red pedals, a new cottered chain wheel set, made in Japan! same as the bike. It's 44 teeth instead of the English 46 tooth that was on it. The old one is there for comparison. I'll have more launch out of the hole, but a little less top end. Easier to pull a wheelie too. And another can of the same red paint too. There were a couple spots that looked purple from not getting enough paint. There's a chrome rear rack that may or may not make the build.

Also, I stopped by a junk shop and got a piece of flat bar to change out the home made piece of pipe that is the brace for the handlebars. That will be the most work, cutting and drilling holes. I'll make 2 or 3 braces out of that, that should give enough support.

sgpl61.jpg
 
More work done today. The flat bar was long enough for 3 braces but I just cut out 2. It was painted gray, so I skipped the primer and painted them red. Then I touched up the bike's paint where it was thin and noticed how crappy the paint job was. LOL! No problem, I plan to get it dirty and scratched up riding it in traffic here. Then I needed to wire brush all the shiny stuff. I even cleaned up the old washers, how's that for cheap? Most of it came out very well using my poor man's bench wheel. It's my old drill with wire brush clamped into the vise. It made the whole job easier and faster. I just made sure I didn't crush the drill in the jaws of the vise. Then I put all those little bearings, 50 total, back in the headset and assembled it. I tried on the new chain wheel just to see how it looks, then I realized it's the same style as the original. That's it for today. Time for a nap.


im1iyp.jpg


1zdpvd1.jpg


2vim88y.jpg


34payia.jpg


xexvp.jpg


2rc5pb8.jpg
 
The cranks are the same length as original, the english crank was a bit longer. That's even better because it's sitting lower than original. It must be the angle of the camera, the pedal looks huge.
 
Back
Top