


I got into the old school BMX bikes a couple of years ago with the acquisition of a survivor Redline 500A with all the original parts. I next found a GT Interceptor at a pawn shop and started messing with that. I am now building a Redline MXII and a Californian Mongoose. I noticed that my wallet was getting a bit thin buying parts for these bikes. I always liked the look of the Tuf Neck and Redline sprockets with the four spokes. I had purchase a red Tuf Neck sprocket, but I was going to use it on a future build. I had obtained a 44 tooth solid sprocket in a lot of parts that I had purchased and I considered using it, but it just looked too mid school for me. That is when I got the idea to build my own four spoke sprocket using the Tuf Neck sprocket as a pattern.
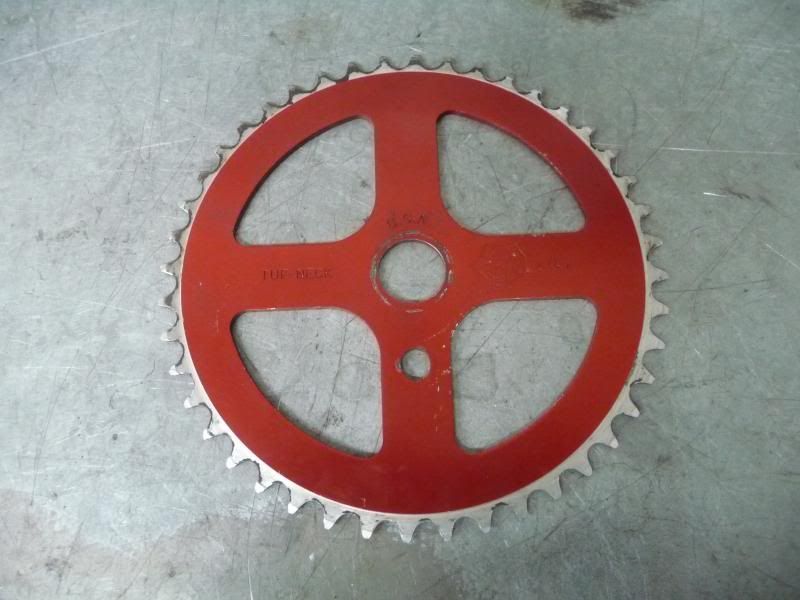
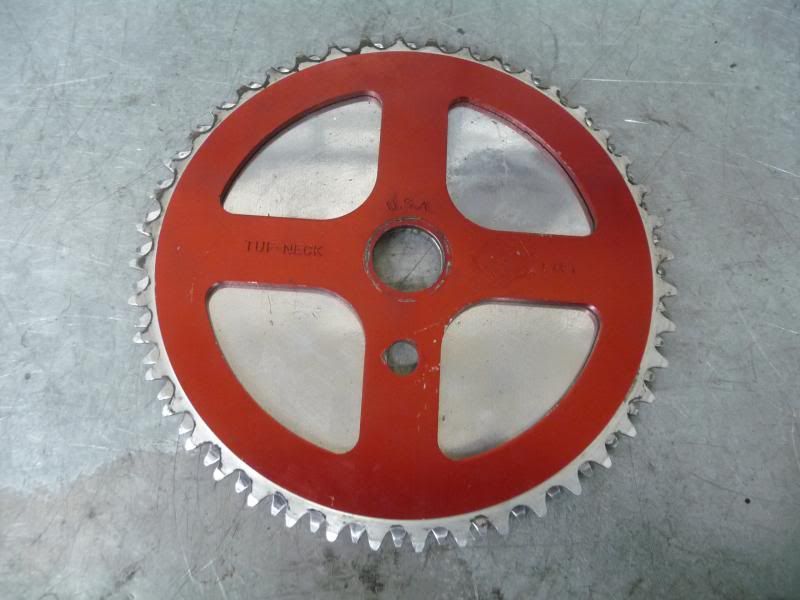
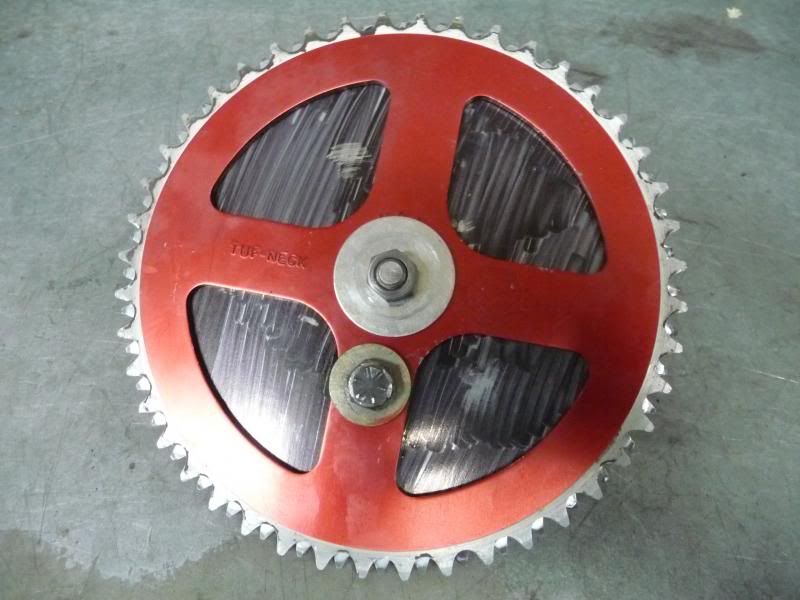
Here is the red Tuf Neck sprocket:
Here is the solid 44 tooth sprocket I was going to use. It was black anodized and had some cool gang symbols done in Liquid Paper when I got it. It looks like it could be a GT or Mongoose piece:
Laying the Tuf neck sprocket on top of the solid one reveals that they are exactly the same diameter:
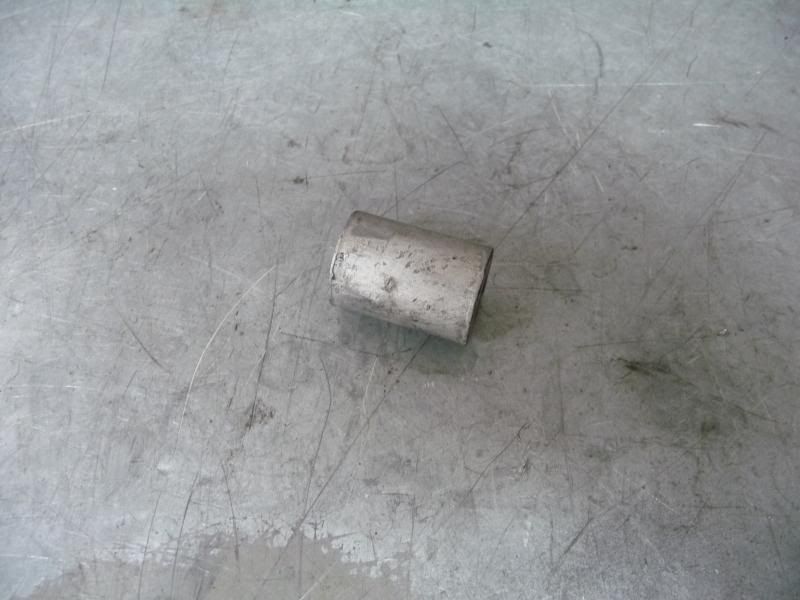
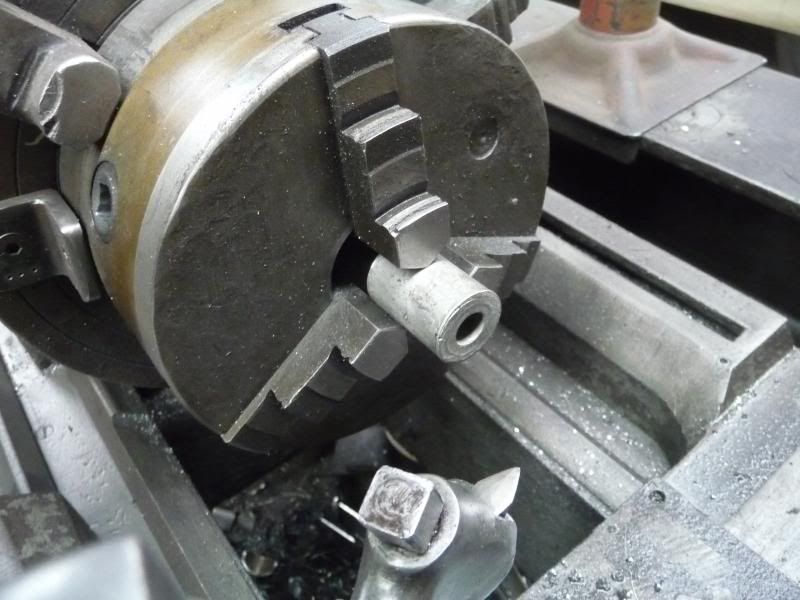
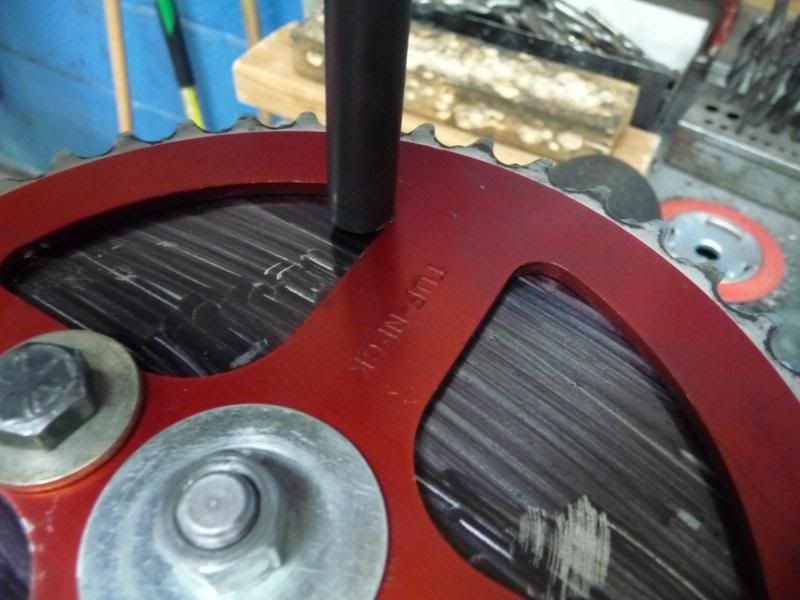
While I could have used some clamps to hold the two sprockets together, I opted for something a bit more precise. I would build a small mandrel to solidly and accurately clamp the two sprockets together. Rummaging through my automotive parts bin revealed a piece of aluminum stock with a hole drilled in it. The piece was slightly larger in diameter than the hole in the two sprockets:
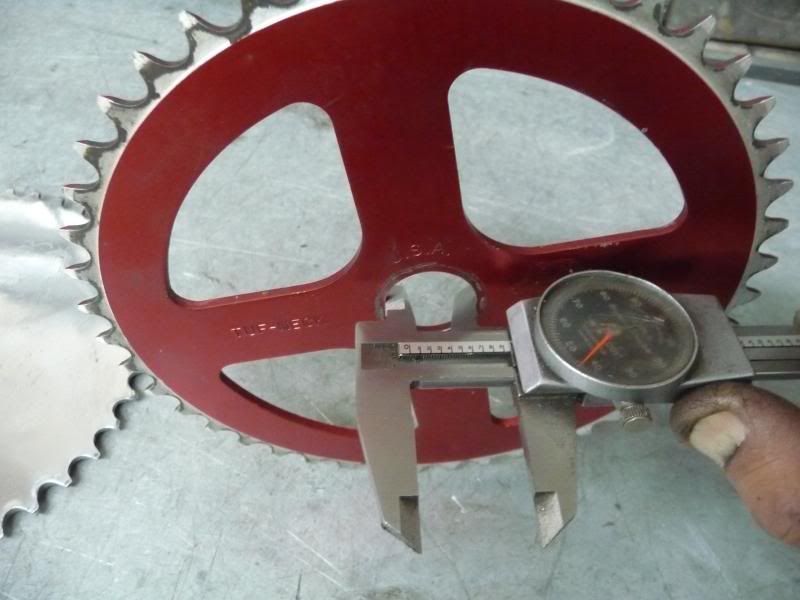
The hole in the two sprockets was .943":
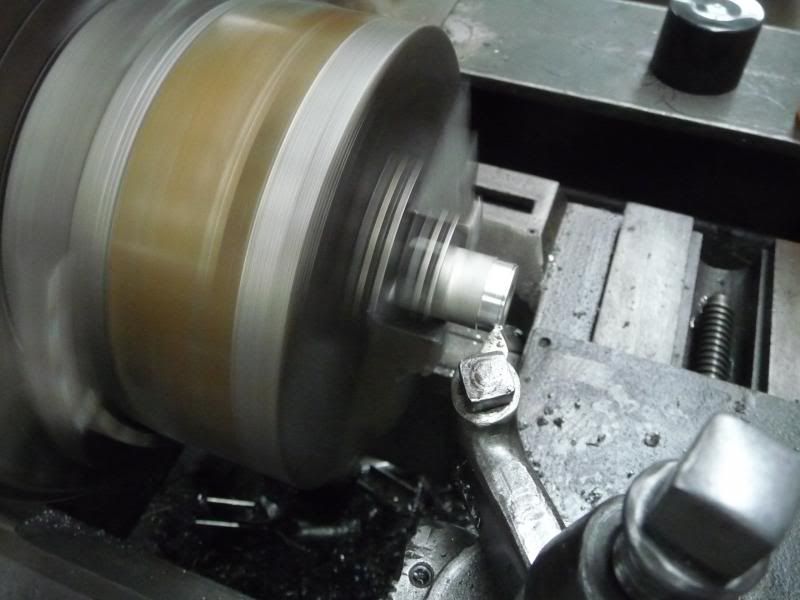
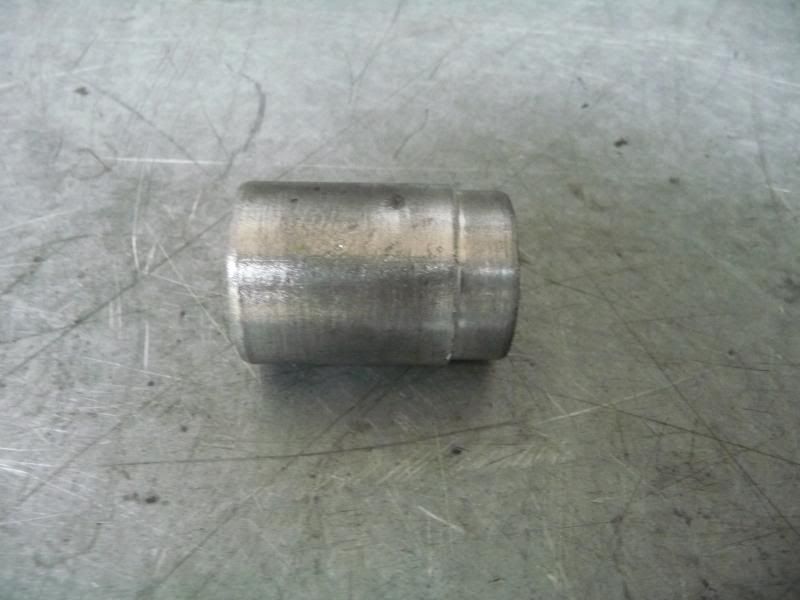
Chucking the piece up in the lathe and turning a .300" long shoulder to .943" would allow the piece to accurately hold the two sprockets together:
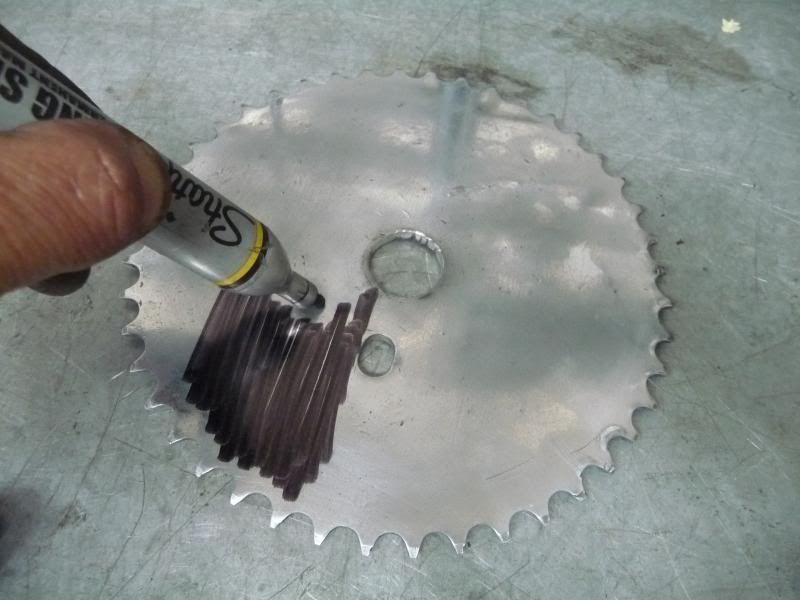
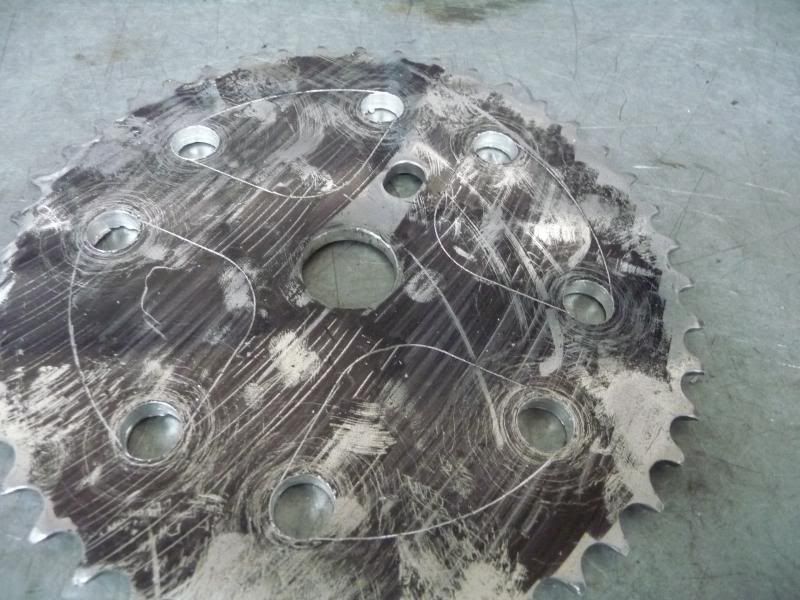
The solid sprocket was coated with some poor mans layout dye on both sides:
Using a couple of bolts and washers as well as the mandrel, the two sprockets were bolted together:

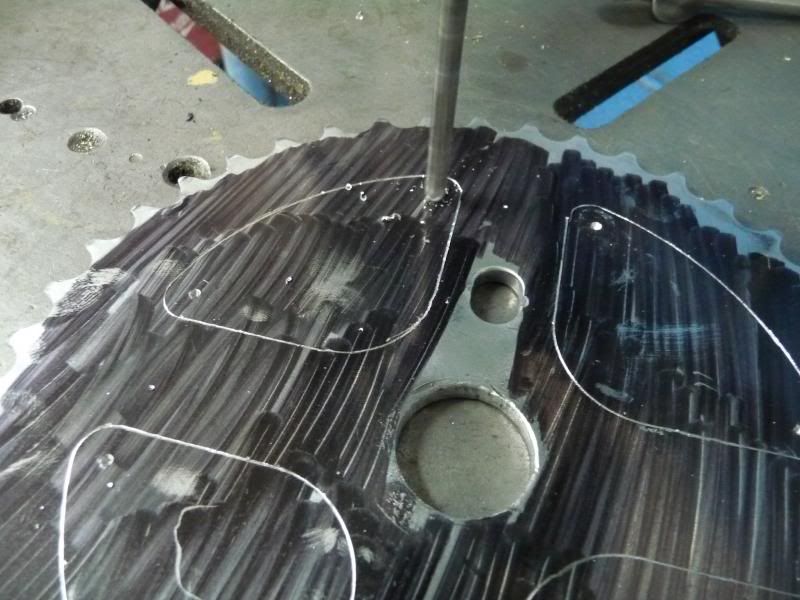
A 31/64" transfer punch was used to accurately center punch the small rounded corners of the solid sprocket:
The reason for center punching the small rounded corners is so I can drill holes that will be exactly the size of the corner needed on the solid sprocket. I also grabbed my trusty scribe, and using the Tuf Neck sprocket as a guide, I scribed the edges on the solid sprocket on both sides:
I next center drilled the previously center punched marks with a 3/16" drill bit:
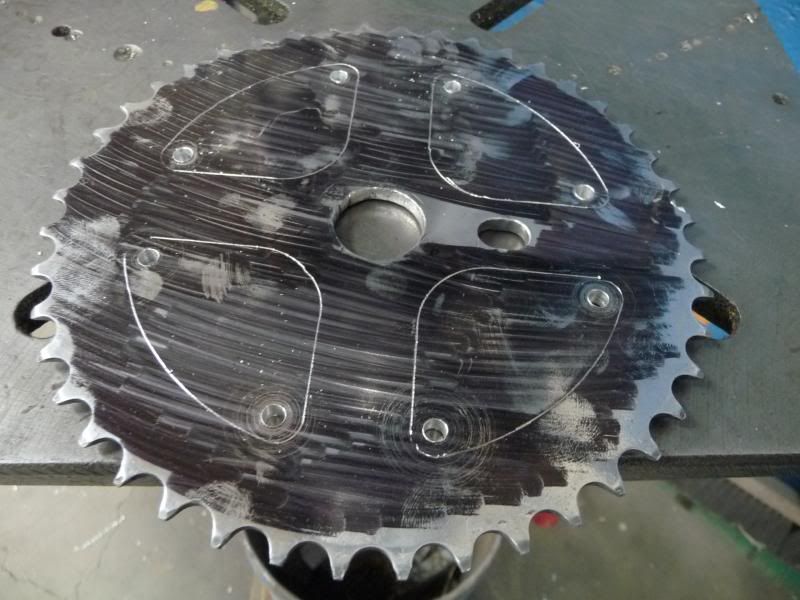
Followed my drilling the center drilled holes with a 31/64" drill bit. I now had the small rounded corners done:
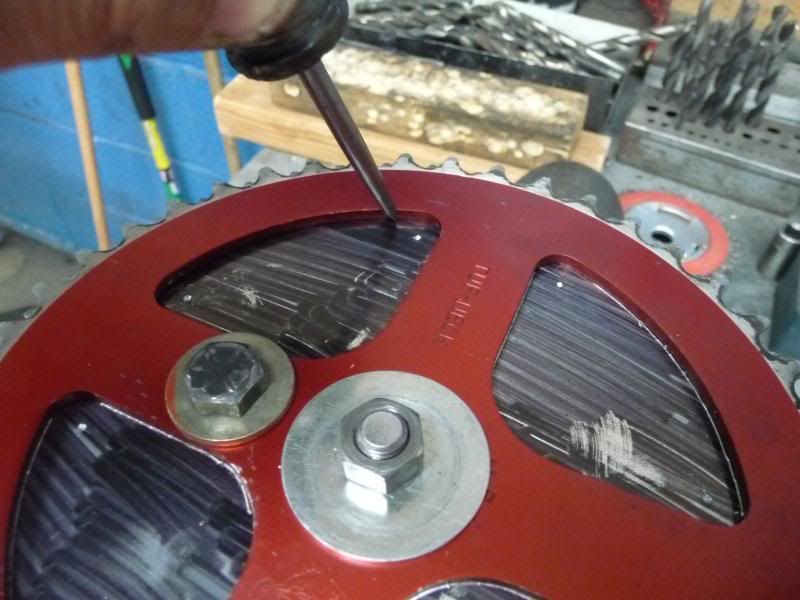
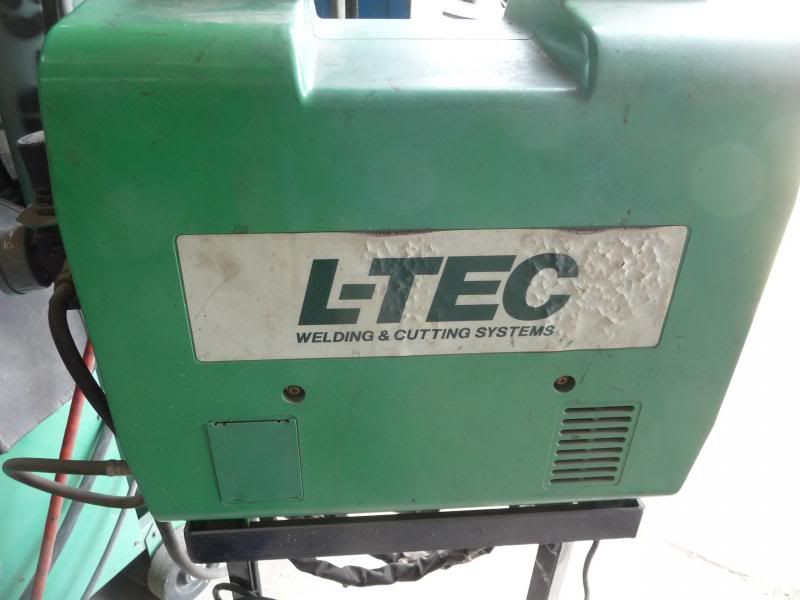
The next step will be cutting close to the scribed lines to open up the "windows" in the sprocket. A small saber saw with an aluminum cutting blade could be used, but I cheated and used my L-Tec plasma cutter:
I cut about 1/8" from the scribed lines in order to finish up with my high tech finishing tool...........

........which is a half round file:
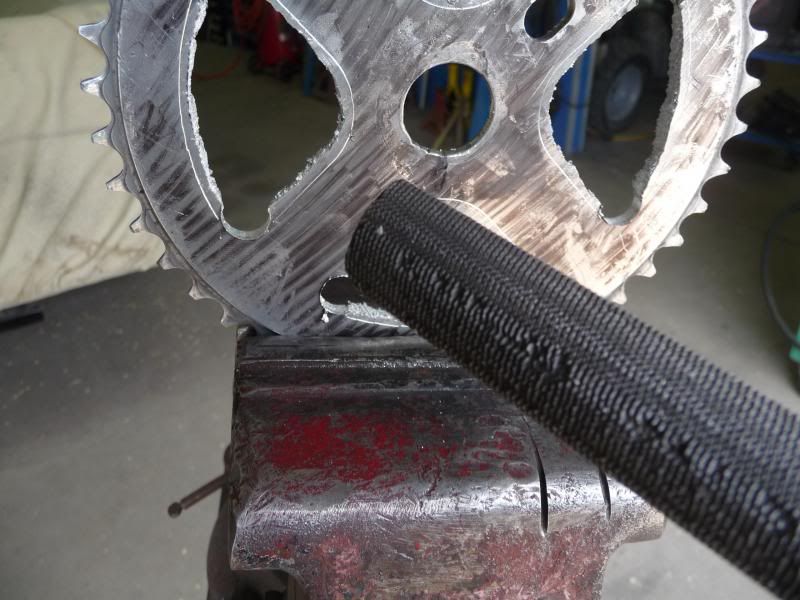
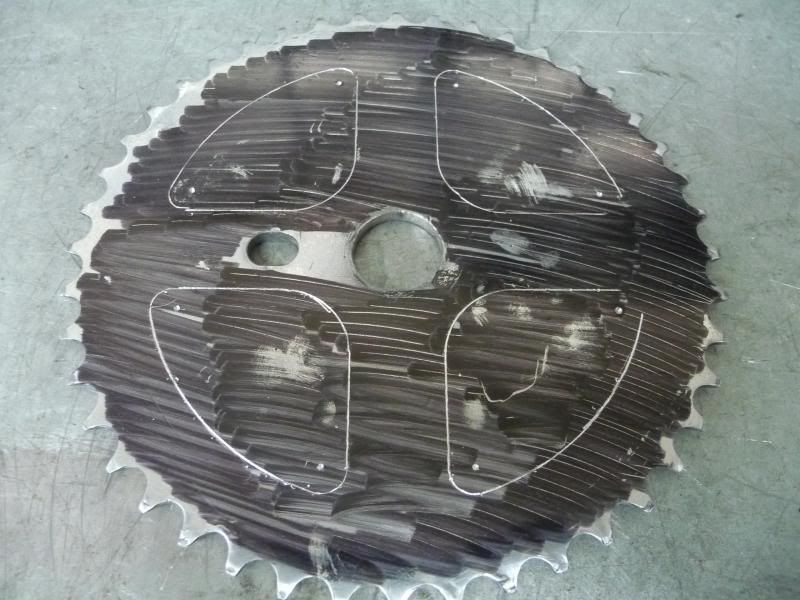
Here I have one window completely done. I simply file to the scribed line on each side of the sprocket:
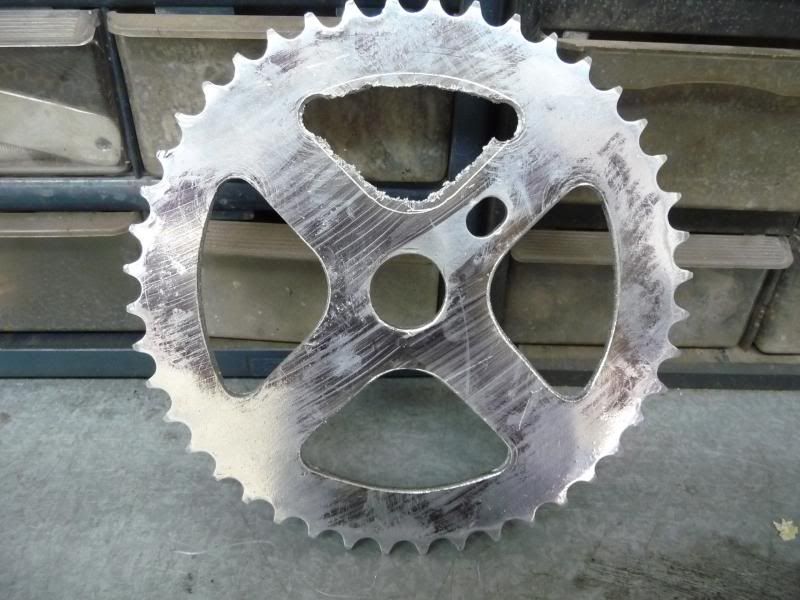
Here I have three windows done:
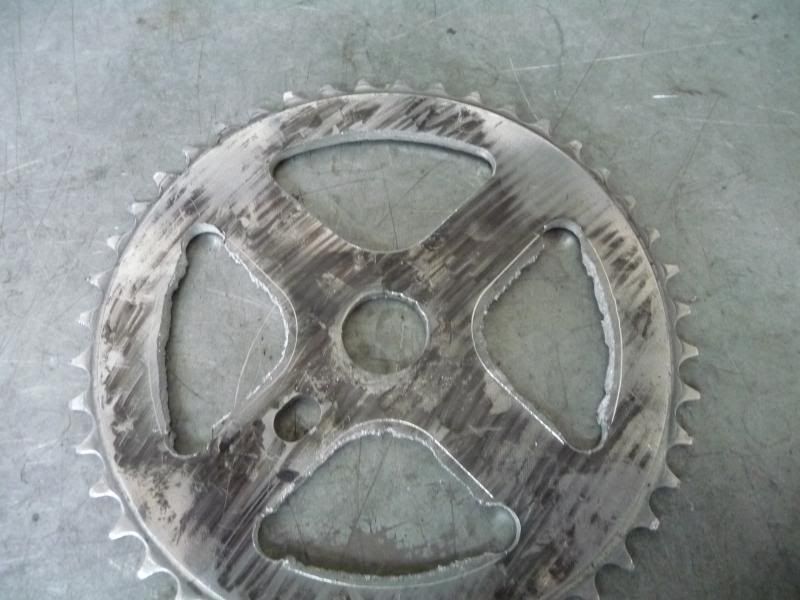
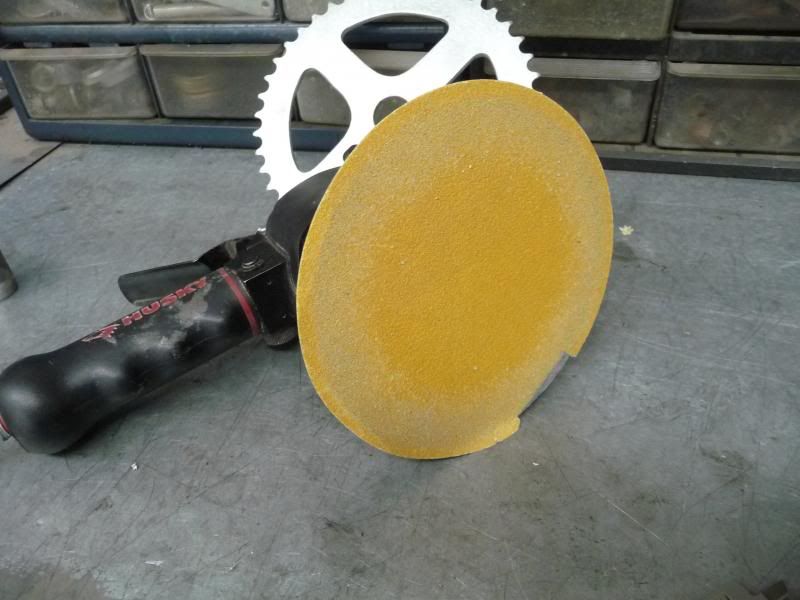
Now I grab my D/A sander, and completely sand both sides of the sprocket with 80 grit discs:
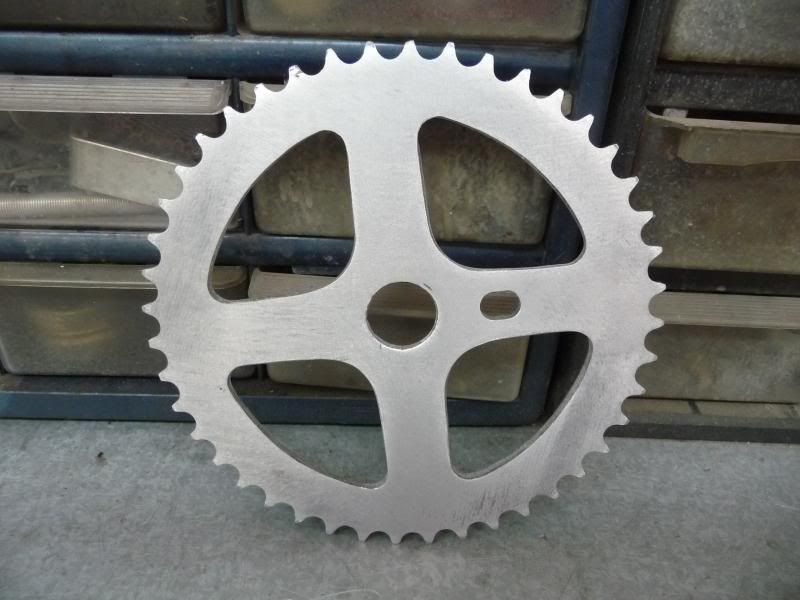
Here she is after the 80 grit session:
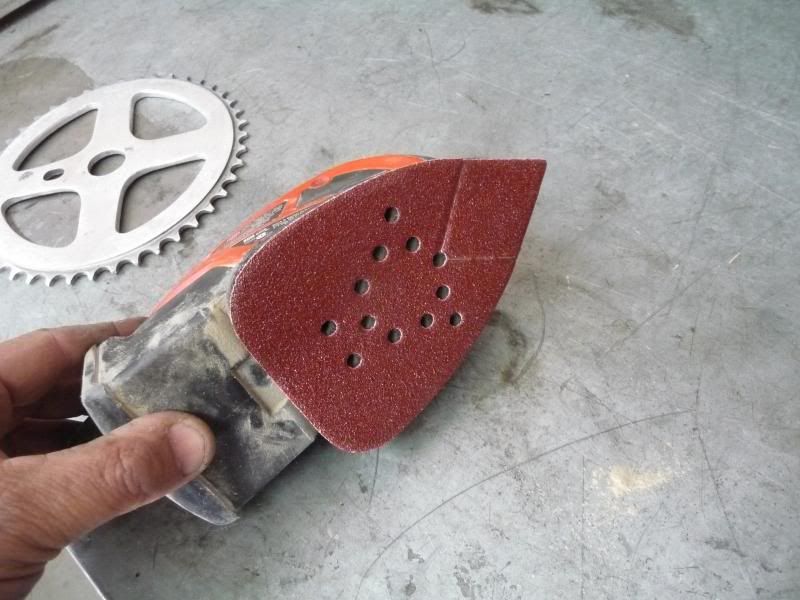
Then I grab my "Mouse" and hit it with 120, 240 and 400 grit sandpaper:
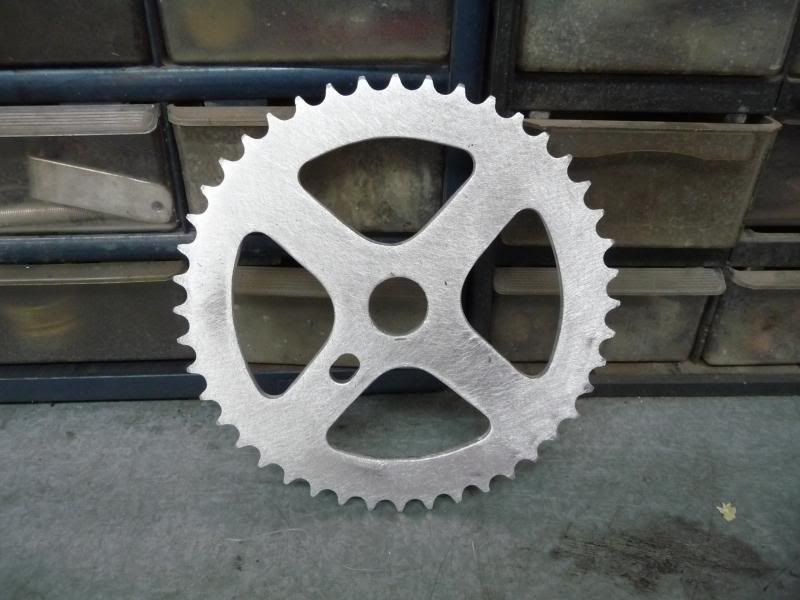
Here it is after the 400 grit session, ready for polishing:
And finally after the white rouge treatment on my buffing wheel:
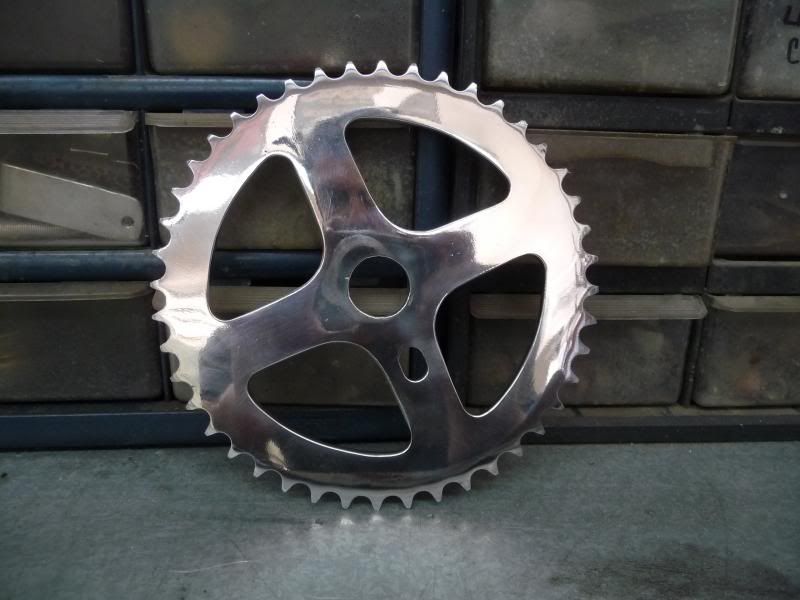
I have about 2 1/2 hours total from start to finish, and while it is not a "real" Redline or Tuf Neck sprocket, it will look pretty cool once installed on the bike.
Here is the red Tuf Neck sprocket:

Here is the solid 44 tooth sprocket I was going to use. It was black anodized and had some cool gang symbols done in Liquid Paper when I got it. It looks like it could be a GT or Mongoose piece:

Laying the Tuf neck sprocket on top of the solid one reveals that they are exactly the same diameter:

While I could have used some clamps to hold the two sprockets together, I opted for something a bit more precise. I would build a small mandrel to solidly and accurately clamp the two sprockets together. Rummaging through my automotive parts bin revealed a piece of aluminum stock with a hole drilled in it. The piece was slightly larger in diameter than the hole in the two sprockets:

The hole in the two sprockets was .943":

Chucking the piece up in the lathe and turning a .300" long shoulder to .943" would allow the piece to accurately hold the two sprockets together:


The solid sprocket was coated with some poor mans layout dye on both sides:

Using a couple of bolts and washers as well as the mandrel, the two sprockets were bolted together:


A 31/64" transfer punch was used to accurately center punch the small rounded corners of the solid sprocket:


The reason for center punching the small rounded corners is so I can drill holes that will be exactly the size of the corner needed on the solid sprocket. I also grabbed my trusty scribe, and using the Tuf Neck sprocket as a guide, I scribed the edges on the solid sprocket on both sides:


I next center drilled the previously center punched marks with a 3/16" drill bit:


Followed my drilling the center drilled holes with a 31/64" drill bit. I now had the small rounded corners done:

The next step will be cutting close to the scribed lines to open up the "windows" in the sprocket. A small saber saw with an aluminum cutting blade could be used, but I cheated and used my L-Tec plasma cutter:

I cut about 1/8" from the scribed lines in order to finish up with my high tech finishing tool...........

........which is a half round file:

Here I have one window completely done. I simply file to the scribed line on each side of the sprocket:

Here I have three windows done:

Now I grab my D/A sander, and completely sand both sides of the sprocket with 80 grit discs:

Here she is after the 80 grit session:

Then I grab my "Mouse" and hit it with 120, 240 and 400 grit sandpaper:

Here it is after the 400 grit session, ready for polishing:

And finally after the white rouge treatment on my buffing wheel:

I have about 2 1/2 hours total from start to finish, and while it is not a "real" Redline or Tuf Neck sprocket, it will look pretty cool once installed on the bike.