You are using an out of date browser. It may not display this or other websites correctly.
You should upgrade or use an alternative browser.
You should upgrade or use an alternative browser.
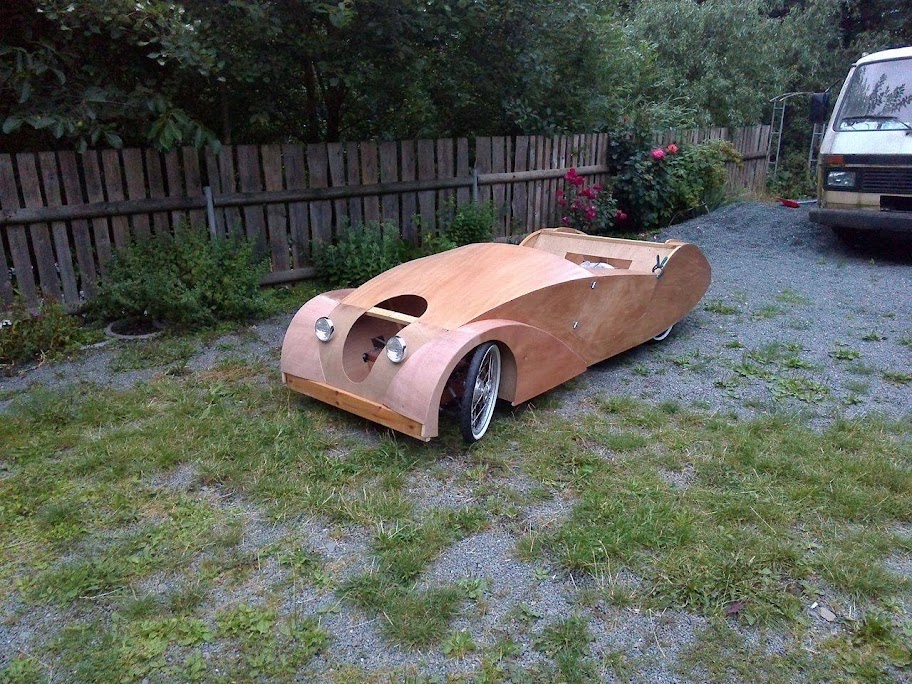
Phantom Retroadster Mk 2
- Thread starter Plycar
- Start date

Help Support Rat Rod Bikes Bicycle Forum:
This site may earn a commission from merchant affiliate
links, including eBay, Amazon, and others.
Dang brother! That's some rad stuff there!
I admire your craftsmanship , the thing looks like a blast to ride and is a beauty !
i do some woodworking but can't quite understand how you joined the thin sheets of wood togeter, at some places their seem to be no tassos of framing to join them , could you share the secret of how you achieved that ?
i do some woodworking but can't quite understand how you joined the thin sheets of wood togeter, at some places their seem to be no tassos of framing to join them , could you share the secret of how you achieved that ?
Fv2
Don't know what I'm doing, gonna do it anyway.
That's a good question, my initial thought was stitch and glue method. But I see no wire or fiberglass.I admire your craftsmanship , the thing looks like a blast to ride and is a beauty !
i do some woodworking but can't quite understand how you joined the thin sheets of wood togeter, at some places their seem to be no tassos of framing to join them , could you share the secret of how you achieved that ?

Wow.
Sent from my iPhone using Tapatalk
Sent from my iPhone using Tapatalk

$458.25
$509.99
Schwinn Loop Adult Folding Bike for Men and Women, 20-inch Wheels, 7-Speed Drivetrain, Rear Cargo Rack, Carrying Bag, Black
Amazon.com

$29.95
Crossroads Home Décor A Biker's Prayer, Gift for Motorcycle Riders, Inspirational Bike Picture Frame, 6451BW
Crossroads_Home_Decor

$19.99
Electra Glide Wall Decal 2ft Long Sport Harley Davidson Bike Motorcylce Sticker Man Cave Garage Boys Room Decor
FatCat Wall Graphics
In fact I have planned to use stitch&glue method for this project.
But as it turns out, I was too lazy to try new things.
Only the chassis frame is glued with epoxy, using square edge stringers (20mm square) for taking up the tension/pressure forces
Due to the long curing time and the mess caused by the epoxy, I stayed away from building the body the same way.
For the bodywork, I used my old method to join the 4mm okoume panels edges with spruce stringers (15mm square) + wood glue and little screws.
All curved edges were glued together using also curved stringers.
I still have not tried steam bending these stringers.
Instead, each of them was made from 3 layers of 15x5m battens, glued over a template of the same shape as the particular edge.
The templates are simply a row of brackets, following the curve I wanted.
All three battens were clamped to these brackets, when the glue in between is still wet.
The following pic shows the making of the curved dashboard frame, in this case laminated from 5 layers of 15x5mm battens
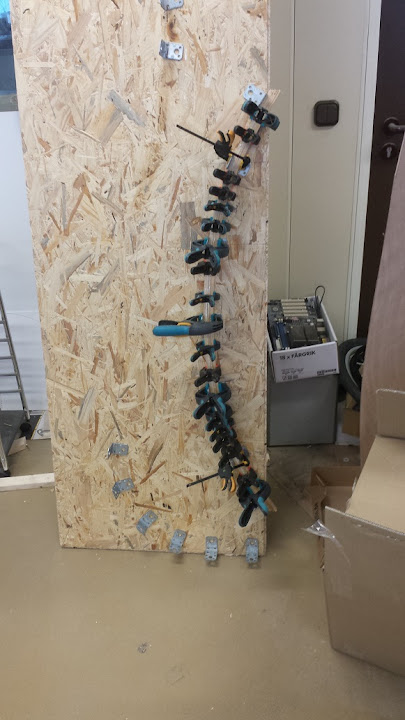
After the glue has cured (30minutes), I mostly planed the stringers with the hand plane or the belt sander.
Finally the stringers were used to connect all the panels.
I screwed all parts together each 10cm/4in with galvanized wood screws
All in all it's a rather time consuming method, although it's real fun for me to work this way.
I also found out the PVCA glue is quite corrosive to the galvanized screws.
Surely the time I need to learn the stitch&glue skills is a good investment.
My next project will be a fully wooden monocoque, without much framing inside.
This will match the design principles for stitch&glue much better.
PS: Thanks for your words !
I hope to finish it in spring, best time for photos and vids...
But as it turns out, I was too lazy to try new things.
Only the chassis frame is glued with epoxy, using square edge stringers (20mm square) for taking up the tension/pressure forces
Due to the long curing time and the mess caused by the epoxy, I stayed away from building the body the same way.
For the bodywork, I used my old method to join the 4mm okoume panels edges with spruce stringers (15mm square) + wood glue and little screws.
All curved edges were glued together using also curved stringers.
I still have not tried steam bending these stringers.
Instead, each of them was made from 3 layers of 15x5m battens, glued over a template of the same shape as the particular edge.
The templates are simply a row of brackets, following the curve I wanted.
All three battens were clamped to these brackets, when the glue in between is still wet.
The following pic shows the making of the curved dashboard frame, in this case laminated from 5 layers of 15x5mm battens

After the glue has cured (30minutes), I mostly planed the stringers with the hand plane or the belt sander.
Finally the stringers were used to connect all the panels.
I screwed all parts together each 10cm/4in with galvanized wood screws
All in all it's a rather time consuming method, although it's real fun for me to work this way.
I also found out the PVCA glue is quite corrosive to the galvanized screws.
Surely the time I need to learn the stitch&glue skills is a good investment.
My next project will be a fully wooden monocoque, without much framing inside.
This will match the design principles for stitch&glue much better.
PS: Thanks for your words !
I hope to finish it in spring, best time for photos and vids...
Last edited:
OK,
I was very lazy, since the last posting.
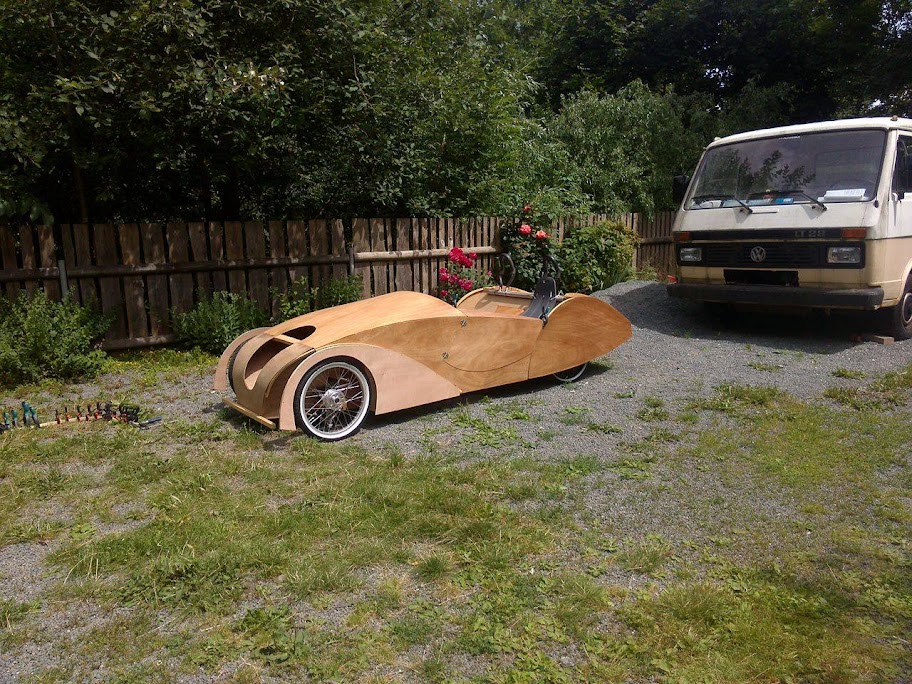
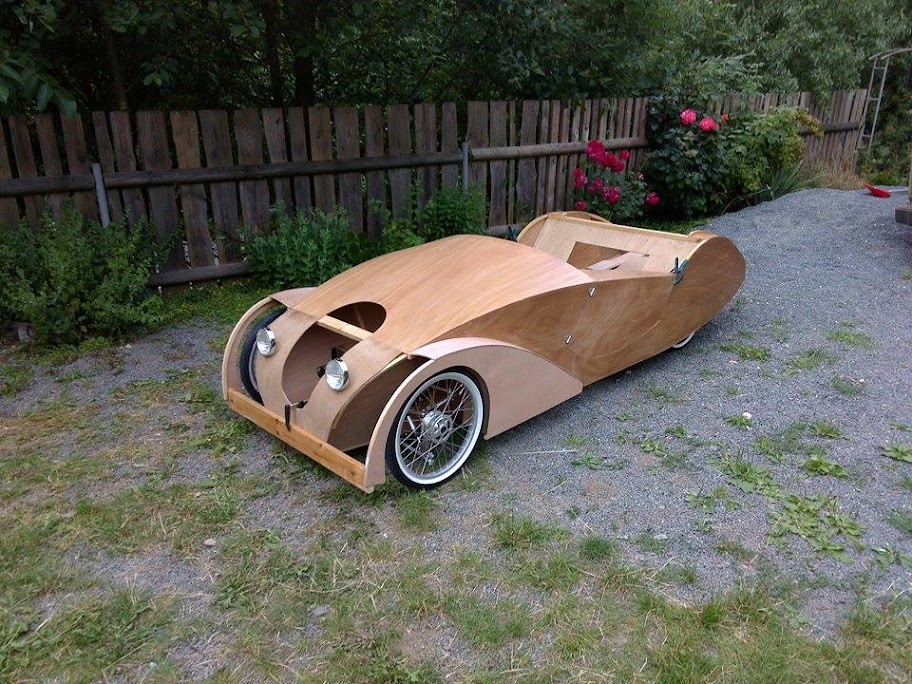
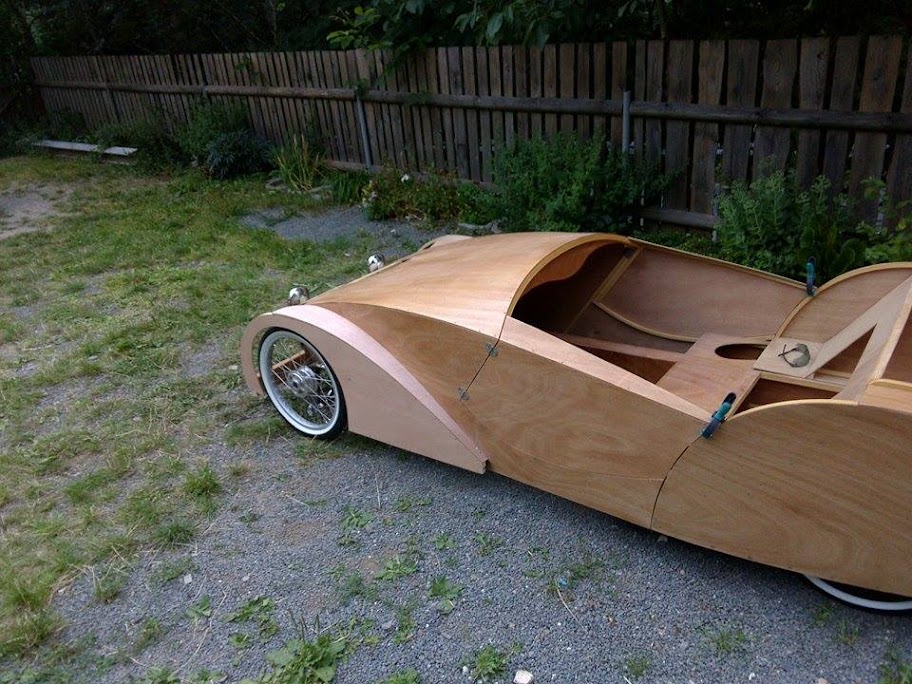
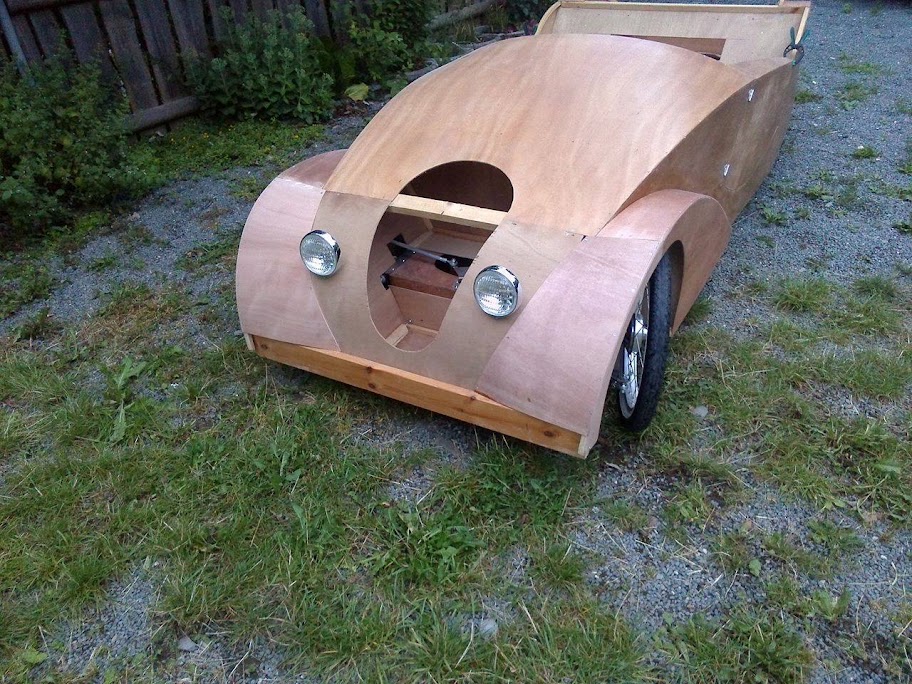
The new velocar is still not ready, BUT here are three recent pics.
I photogrphed both velocars for comparison.


Next steps are transmission and front fenders.
I was very lazy, since the last posting.
The new velocar is still not ready, BUT here are three recent pics.
I photogrphed both velocars for comparison.


Next steps are transmission and front fenders.
Awesome !!! very nice work on both! , i wish i had space to build and park a velocar like this
Incredible.
Sent from my iPhone using Tapatalk
Sent from my iPhone using Tapatalk
Very, very cool!
Luke.
Luke.


