I could KF, but then I couldn't ride it comfortably. I know, "low for show high to go"....
- COMPETITIONS
- THE COMPETITION ARCHIVES
- RRBBO OFFICIAL COMPETITIONS
- BUILD OFF 11 (2016)
- BUILD OFF 11 BUILD JOURNALS
You are using an out of date browser. It may not display this or other websites correctly.
You should upgrade or use an alternative browser.
You should upgrade or use an alternative browser.
One-Liner.... Now in FINISHED BIKES thread !
- Thread starter OddJob
- Start date


Help Support Rat Rod Bikes Bicycle Forum:
This site may earn a commission from merchant affiliate
links, including eBay, Amazon, and others.
Allrighty then! Got home from the northwoods with some daylight left to finish off the seat placement on One-Liner. And when I say finish, I mean done. El Fine. 
I notched the front of the rusty seat pan to sit down over the Chadpost (aka lay back seat post fabricated by Chad / slowriderz on this site). As for the seat clamp, I simply turned it upside down and it fit like a glove! And, I now have the spring rails 'snapped' into place under the seat pan and up against the rear brace.
Just put in a couple mile ride, and this baby is going to be fun! Also, tightened up the chain a bit, no rattles at all.


Now to move back to the front end and think tank ( ) and other accoutrements......that one was for you @OneHorsePower ....
")
I notched the front of the rusty seat pan to sit down over the Chadpost (aka lay back seat post fabricated by Chad / slowriderz on this site). As for the seat clamp, I simply turned it upside down and it fit like a glove! And, I now have the spring rails 'snapped' into place under the seat pan and up against the rear brace.
Just put in a couple mile ride, and this baby is going to be fun! Also, tightened up the chain a bit, no rattles at all.
Now to move back to the front end and think tank (
) and other accoutrements......that one was for you @OneHorsePower ....Liking the seat placement, works really nice with the post, all the angles look good!
Luke.
Luke.
You've hit the comfort/cool ratio pretty good with that. If there is enough meat on the dropouts you could swing the sissy mount towards the back. You're real close to hitting the angle just right with that sissy I think. Ratty seat with cover is cool!
Thanks Luke!Liking the seat placement, works really nice with the post, all the angles look good!
Luke.
Thanks Chad!You've hit the comfort/cool ratio pretty good with that. If there is enough meat on the dropouts you could swing the sissy mount towards the back. You're real close to hitting the angle just right with that sissy I think. ratty seat with cover is cool!
Okay, so.....in an effort to really put this build 'over the top', I am considering adding some color to this already fully rusted frame and rustina-ed tank. Couple of parameters for this: I will use Rust-Oleum rattle can paint (my go to), I will spray from below the frame (wheels, seat, fender, etc removed) and try to get the effect of the patina on these three trucks that I found on the net. For colors I am considering a cream, light blue, or sage for the paint.
Things to keep in mind:
1. My frame tubes are really small, and the only real surface area is the tank, which will remain rusty on the top 2/3rds . So will the effect even work in this scenario? I don't have acres of sheet metal like the trucks to show off the transition.
2. This may not work at all, and I could easily screw up a 'paint' or 'look' that I am pretty pleased with at the moment.
3. It could be 'cooler than dangit' * if it works out!
4. Take a good long look at my middle photo in post #202....
that could be my final pic in the voting booth if this really goes in the toilet....
And now, in this election year, it's time to cast your vote:
______ Keep One-Liner as is
______ Go for it!
______ I could care less, it's your build
*Falstaff on the ghost flame tank job post #75


Mine would probably look most like the bottom pic, lots of rust on the top of the tubes / tank, with paint creeping up from the bottom...
Things to keep in mind:
1. My frame tubes are really small, and the only real surface area is the tank, which will remain rusty on the top 2/3rds . So will the effect even work in this scenario? I don't have acres of sheet metal like the trucks to show off the transition.
2. This may not work at all, and I could easily screw up a 'paint' or 'look' that I am pretty pleased with at the moment.
3. It could be 'cooler than dangit' * if it works out!
4. Take a good long look at my middle photo in post #202....
that could be my final pic in the voting booth if this really goes in the toilet....
And now, in this election year, it's time to cast your vote:
______ Keep One-Liner as is
______ Go for it!
______ I could care less, it's your build
*Falstaff on the ghost flame tank job post #75
Mine would probably look most like the bottom pic, lots of rust on the top of the tubes / tank, with paint creeping up from the bottom...
All three of those trucks look great. As far as paint goes, I say go for it. It's paint, it can be redone.
Color wise, a lot of the girls Murray frames were blue. But im digging the sage idea.
Someone last year did a rusted paint look using randomly torn bits of masking tape as an edge to the rust, I'll try to get a link.
Color wise, a lot of the girls Murray frames were blue. But im digging the sage idea.
Someone last year did a rusted paint look using randomly torn bits of masking tape as an edge to the rust, I'll try to get a link.
Blue, turqoise and i recently saw mint green all contrast rust well. Matching the 50year patina, can be a challenge, but possible. With your skills at laying down rattle can color, i have confidence you will make it look great!!
I vote go for it!!
Justa Thought...., worst case you have to play with some xylene to clean it off.
I vote go for it!!
Justa Thought...., worst case you have to play with some xylene to clean it off.
I think it would be cool. Maybe use some scrap piece of something to practice on to get the look you want before laying it on the bike.
The Renaissance Man
__CERTIFIED DIVER__ (Open Water & Open Dumpster)
Staff member
Moderator
Pro Member
ditto.I think it would be cool. Maybe use some scrap piece of something to practice on to get the look you want before laying it on the bike.
Thanks all for the "vote" of confidence !
Plenty of time for a redo if needed!go for it, if it works it will look great, if not you got 2 months to try something else...
Luke.
I vote to go for the paint idea. And also the practice on something else idea. 
The Renaissance Man
__CERTIFIED DIVER__ (Open Water & Open Dumpster)
Staff member
Moderator
Pro Member
While @2dawgs is going with the slash and burn method for weathered paint, I know you are going with rattle methodology. I'll probably rob ideas from both of you!
Here's a technique that I experimented with on 'Bhuzzard' last year.
After I established my rust layer (which both of you have jumped that hurdle without any problem), I blocked out planned/random areas with a stiff art brush and even held it up right and flicked it with my finger to get random splatters. for this blocking you can literally use anything that will stick to the surface and wash back off with water like cake icing, face cream, mud or anything that you can put your hands on that is sticky and water soluble. I would stay away from anything petroleum based like Vaseline, grease etc. Think in reverse, the banana pudding that your putting on at this point will be the rust that's coming through the paint later. Block more than you leave unblocked. You can go back and repeat if it's not enough to suit you but you can't take it back if you don't block enough.
When you're satisfied that you've blocked the areas that make you happy, break out the rattle can paint and spray a light to medium coat of color on your subject. Without waiting for the enamel to dry, spray it all off with a garden hose with the nozzle set to a hard enough pressure to knock off the gunk.
That's it! You can dab it dry if you want to or wait for it to dry on its own. This is all just made up stuff so run with it and see what else works also!
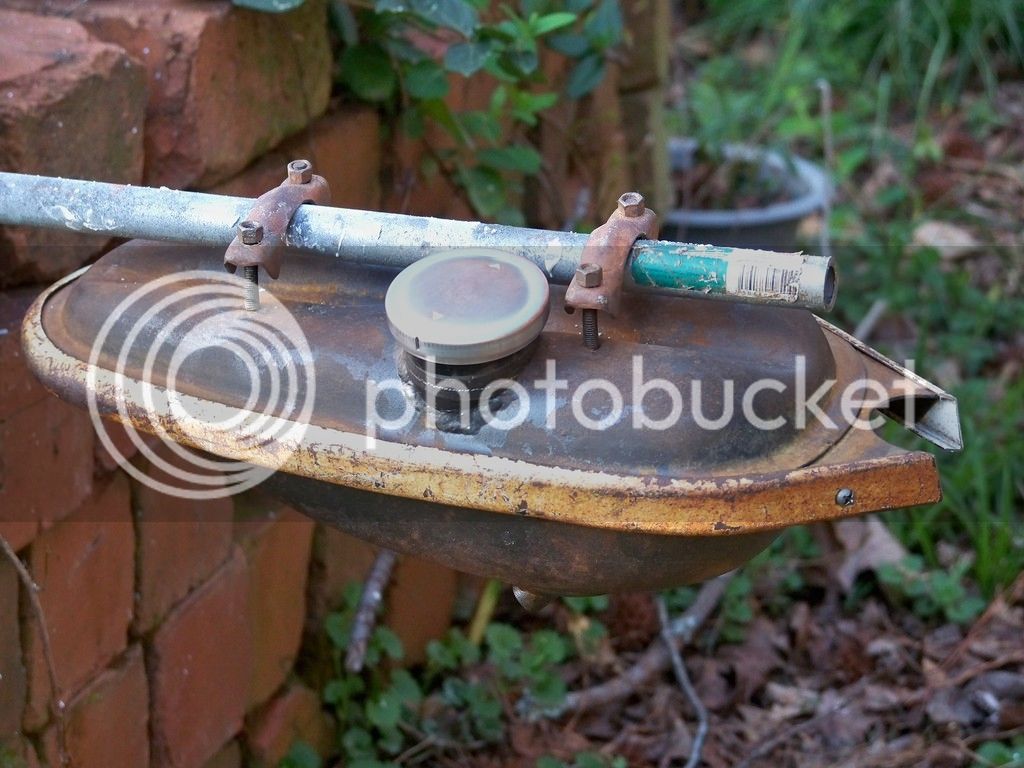
Here's how my tank turned out. This started as a brand new shiny black Chinese motor kit tank. The glossier looking charcoal color is what I sprayed on after the mask.
Here's a technique that I experimented with on 'Bhuzzard' last year.
After I established my rust layer (which both of you have jumped that hurdle without any problem), I blocked out planned/random areas with a stiff art brush and even held it up right and flicked it with my finger to get random splatters. for this blocking you can literally use anything that will stick to the surface and wash back off with water like cake icing, face cream, mud or anything that you can put your hands on that is sticky and water soluble. I would stay away from anything petroleum based like Vaseline, grease etc. Think in reverse, the banana pudding that your putting on at this point will be the rust that's coming through the paint later. Block more than you leave unblocked. You can go back and repeat if it's not enough to suit you but you can't take it back if you don't block enough.
When you're satisfied that you've blocked the areas that make you happy, break out the rattle can paint and spray a light to medium coat of color on your subject. Without waiting for the enamel to dry, spray it all off with a garden hose with the nozzle set to a hard enough pressure to knock off the gunk.
That's it! You can dab it dry if you want to or wait for it to dry on its own. This is all just made up stuff so run with it and see what else works also!
Here's how my tank turned out. This started as a brand new shiny black Chinese motor kit tank. The glossier looking charcoal color is what I sprayed on after the mask.
Your tank turned out well! So the large blotches of rust on top of the tank were the areas covered by your "block" material....as well as the smaller areas and flecks and dots on the yellowish rim portion? I like the effect....tomorrow might be the day....highs in mid 70's...low winds... Thanks for the tips Jim!
The Renaissance Man
__CERTIFIED DIVER__ (Open Water & Open Dumpster)
Staff member
Moderator
Pro Member
The rim as you call it is real patina. It started as a Higgins fender brace that I reshaped to trim the edge of the tank.
Here's how the tank looked before I started the paint 'aging'.
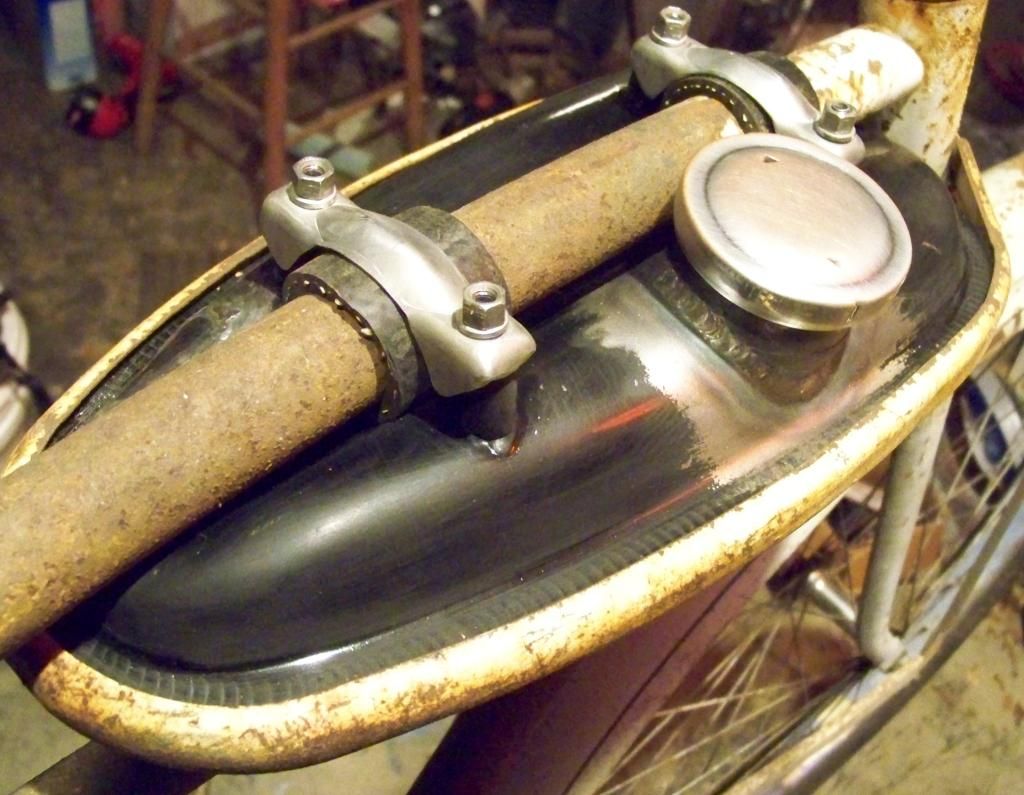
Here's how the tank looked before I started the paint 'aging'.
- Joined
- Jul 30, 2013
- Messages
- 1,923
- Reaction score
- 2,671
Bring on the K-Y JELLY! (That stuff's water-based, right?)
- Joined
- Apr 14, 2015
- Messages
- 2,619
- Reaction score
- 4,835
Looking great odd job . I say go for some faint rusted color . You will get it figured out I'm sure .it will add to the build & your skill level for future builds .
Rat it Ride it don't Buy it ! [emoji232][emoji232][emoji232]
Sent from my iPhone using Tapatalk
Rat it Ride it don't Buy it ! [emoji232][emoji232][emoji232]
Sent from my iPhone using Tapatalk