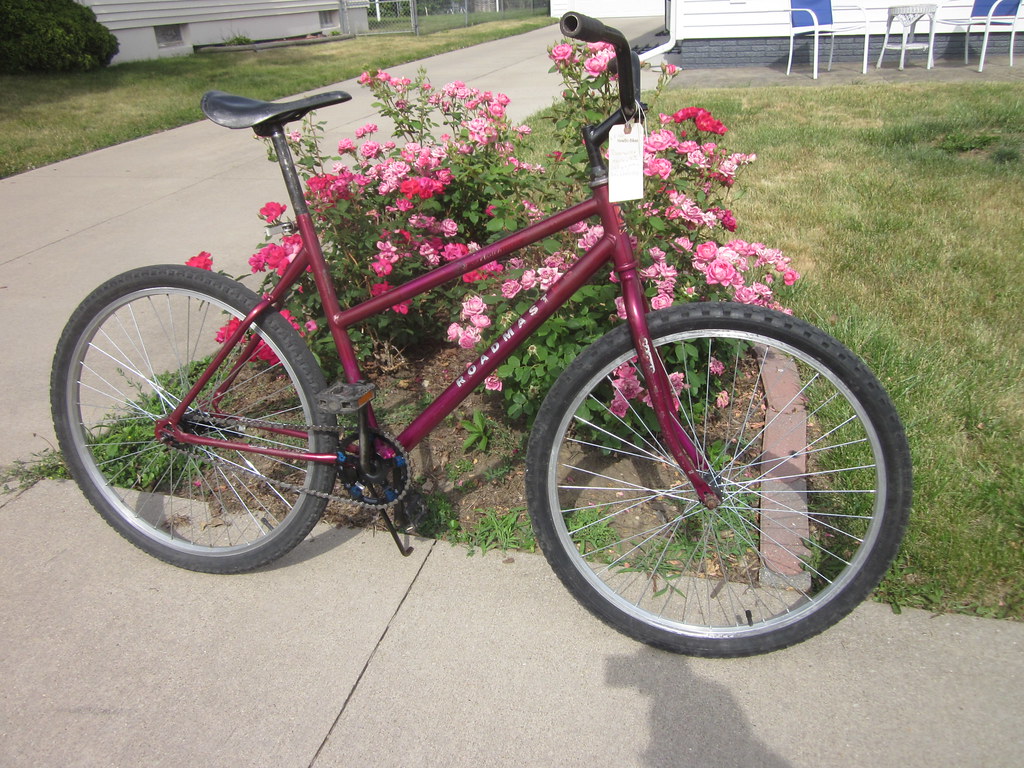
STBO A Ladies RoseMaster

Rat Rod Bikes Bicycle Forum

Help Support Rat Rod Bikes Bicycle Forum:

This site may earn a commission from merchant affiliate links, including eBay, Amazon, and others.
Joined
Apr 24, 2007
Messages
1,881
Reaction score
4,030
Location
Iowa
Roadmaster Mt Climber with a rose to purple fade paint job.

2 x 5 speed index thumbies. Looks to have very low miles.

verifying date codes:
Lee Chi brake levers copywrite 1991, 97
brake calipers 97
Shimano front derailleur dated UL 1996 December
Shimano 5 speed freewheel UJ 1996 October

so perhaps a 1997 model year.


Img_3402.jpg

RoadMaster.Mt.Climber (2).JPG

some earlier Roadmaster builds:
53832681841_1e9795cdfb_b.jpg


44304900072_818c803413_b.jpg


52963028006_428da9f7ef_b.jpg


49814827503_bfb3aa056e_b.jpg
 
Last edited:
Todays progress.

bike dismantled.
freewheel, rear hub brake levers, brakes, derailleurs, sprockets into the parts bin.
The dual sprocket was stamped from a single piece of steel. No reducing that to 1 sprocket.
cranks are 165 so I'll be looking for longer cranks and a suitable sprocket.
wheels unspoked.
Yikes the steel rims are heavy.
1040 grams & 1015 grams.
after washing, 1010 and 1000. They didn't look that dirty. Perhaps I scrubbed off 20g of paint in prep for painting. The average boxmart aluminum rim is 400 grams. I have 1 on hand, will have to fetch another tomorrow. Aluminum rims will be nearly 3 pounds of weight reduction.
The stock tires are 1.75 and are more like 1.5" Nobbies. May look for some thing smoother and lighter.

Img_3403.jpg


Cable stops ground off. brush primer. I got a couple small bottles of paint that are similar in color for touch up.
IMG_3405.JPG
IMG_3404.JPG


White primer and paint for the rims.

headset cups factory painted. Cheaper than zinc plating?
IMG_3408.JPG

Decals heat gun removed.

IMG_3354.JPEG


Big welds. Look like they were squeezed out of a toothpaste tube.
IMG_3407.JPG
 
Last edited:
aluminum rims primed and drying.

crank options. I'll stick with the stock black crank. I have other bikes that would like the 175 bmx crank.

paint touched up on the frame. front hub repacked. hs & bb cleaned up.

aluminum.rims.primed.JPG
crank options.JPG
 
A bit of a disaster. Pink paint? Nope, runny clear with pink sparkles flying all over the place. Some landing on my car 20 feet away. It does work better on the piece of brick that I had on the outdoor work table as a paper weight. The very rough surface keeps it from running. Lots of overspray on the cardboard table cover. Not good for bikes with skinny, round and smooth surfaces. It might work better over solid pink paint. I'm sure I'll be seeing those tiny pink glitters for months to come.


Pink.glitter.spray (2).JPG
Pink.glitter.spray (3).JPG
Pink.glitter.spray (1).JPG
 
sprocket & rims today.

RoadMaster.sprocket (1).JPEG


I took another look at the sprocket assembly. It is 2 sprockets that were joined with faked rivets. They punched the inner sprocket through holes in the outer, then formed the pushed through metal to look like a small bolt head. Even cheaper than using actual rivets that are often faked to look like bolts.

RoadMaster.sprocket.fake.rivits.1.JPEG
RoadMaster.sprocket.punch.through.rivit.jpeg


I ground off the fake rivet heads.

RoadMaster.sprocket (6).JPEG

pried the sprockets apart.

RoadMaster.sprocket (5).JPEG

ground off the nubby left over.
RoadMaster.sprocket (4).JPEG


prime.
RoadMaster.sprocket (3).JPEG

paint.
RoadMaster.sprocket (2).JPEG


This hot pink paint flows nice and covers well. I've learned that color really affects paint. Some are a pita to use, others go on with no issues.


Another pair of rims also primed and painted. I think I'll try the pink glitter on the sprocket as a test. There isn't much left in the can. I really used a lot trying to cover the first pair of rims.
 
The pink paint dries slow. Still tacky after several hours. And it's very dry, warm and windy here.
I tried some of the pink glitter on the poppy pink enamel on the sprocket and that looks better. The sparkle spray is 2 parts. The clear is like normal spray paint in width but the sparkle comes out very wide. Just seems weird that the glitter doesn't stick to the clear in the can or while it's in the spray. The aerosol vortex sends the glitter all over. What lands on the clear then sticks. Seemed to work best at about 2 feet from the target. I think it would work better on wide items but not skinny bike parts. The cameras just don't capture the bling well.


IMG_3443.JPG
 
Last edited:
The glitter/flake makes the sprocket pop. Was the clear paint the same brand/line as the rustoleum glitter pink?
 
1040 grams & 1015 grams.
after washing, 1010 and 1000. They didn't look that dirty. Perhaps I scrubbed off 20g of paint in prep for painting. The average boxmart aluminum rim is 400 grams. Aluminum rims will be nearly 3 pounds of weight reduction.
This is insanity. I can't fathom how a rim could weigh 2+ pounds
 
Sprocket paint order:
white primer
poppy pink paint
pink glitter (clear with the glitter in it)
extra layer of clear.

The suggestion of using the glitter on matching paint is good.
The glitter works best on larger surfaces. Bike tubes/rims are too narrow. The The spray pattern is so wide it's mostly going to waste.

IMG_3475.JPG
IMG_3477.JPG
IMG_3504.JPG

IMG_3503.JPG
 
Last edited:
After the test ride..

Installed the rear wheel reflector.
Changed the 18t cog to a 19t. It seemed a touch over geared. 38 x 19 now.
Put knobs back on.
27.56 pounds now.
I'd rather use the Schwinn branded Kenda Komfort look-alike tires on another build. Those are one of my favorite urban/trail tires. I hate to give them away. I've bought used Schwinn bikes in the past just to get the tires off them. Change tires and flip the bikes.
I was looking at pink and purple tires. Which to get or do both? $55. Nope.
The bike is ready to go to one charity or another.
 
IMG_3441.PNG
 

Latest posts

Back
Top