DRAG KING ___Raceliner Dragster___

Rat Rod Bikes Bicycle Forum

Help Support Rat Rod Bikes Bicycle Forum:

This site may earn a commission from merchant affiliate links, including eBay, Amazon, and others.
I have no advice, looking awesome to me so far. I am however stealing a LOT of ideas on this build!
I prefer to call it borrowing!;)
Wishful thinking on my part about it being a rider soon. This build is chock full of cool features.

Great idea on using the composite material to test out your ideas first. I got some spare superstrut you can borrow.
:)
I'm wishing I could ride it now! I'll keep the superstrut in mind.:p
just keeps getting better and better!!!!!!

Troy
AWE mazing! :crazy2:

:thumbsup:
Thanks and thanks!
 
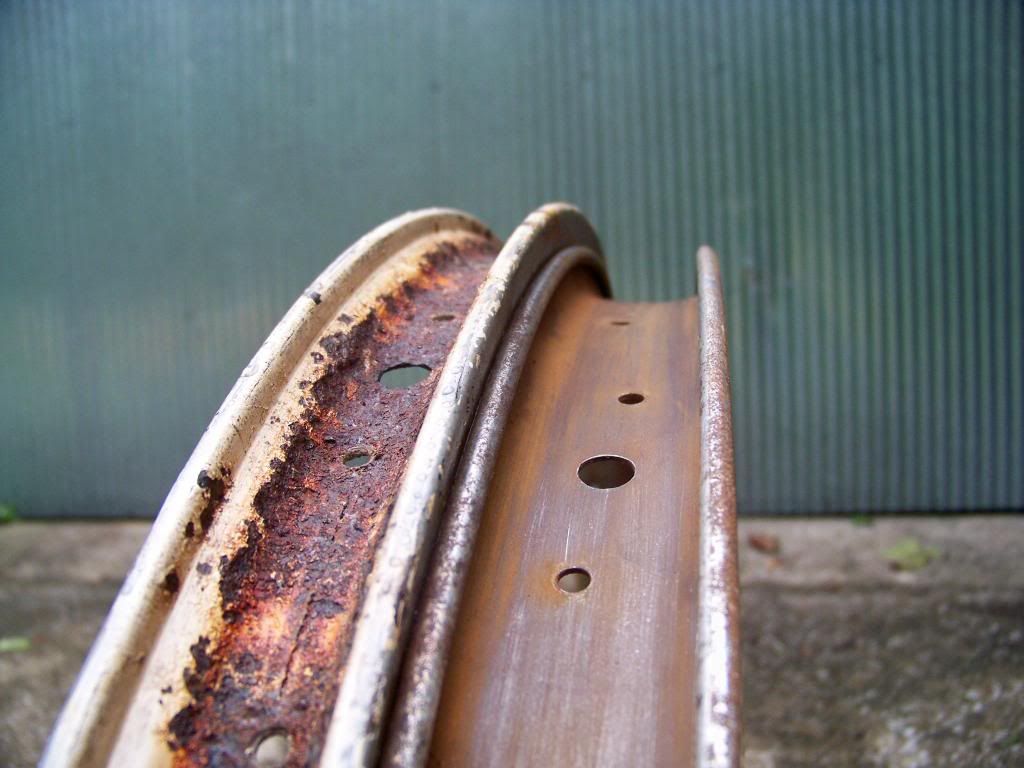
Today's project is swapping rims on the Bendix hub. When I got the Jerald, it wouldn't fit on the wheel that came off of a Schwinn Typhoon. It's puzzling to me because it had a 26x1 3/4" tire on it. There's always something new for me to learn about these old bikes. The widest rims that I have in my parts stash are from one of my early 50's Monark bikes. So, at least for now, that's what I'll be going with (and the Jerald fits fine).
This is the rim with the tire on it...
100_6899_zps58fcf495.jpg


Here's a side by side comparison of the Typhoon riml (left) and the Monark rim...
100_7032_zps0cdad968.jpg


Can anyone explain how these are both 26" rims?:39:o_O


.
 
OK, I'll concede that 1 3/4 is different from 1.75 (in the cycling world), but 26x XX is not different from 26x XX. I'm sure your correct, but I still don't get it.:43:
Neither do I... I had some huge trouble with 28" tires and being a British colony many 28" tires over here were marked as 700's but then there is 700a, 700b, 700c etc, none of which is interchangeable...

Luke.
 
Yep. Early on Schwinn did their own thing so you had to buy THEIR parts to work on your Schwinn bike...

Carl.
 
Measurements of the inside of the hoop not the outside diameter should be the same? The Schwinn hoop just has a higher drop shoulder (deep section) then the Monark.
That would seem logical, but there's 1/2" difference on both O.D. and I.D. between the two.

I just finished re-lacing the Monark hoop to the Bendix and I had to go buy 1/4" shorter spokes to make it work.

Yep. Early on Schwinn did their own thing so you had to buy THEIR parts to work on your Schwinn bike...

Carl.
I can believe that!
 
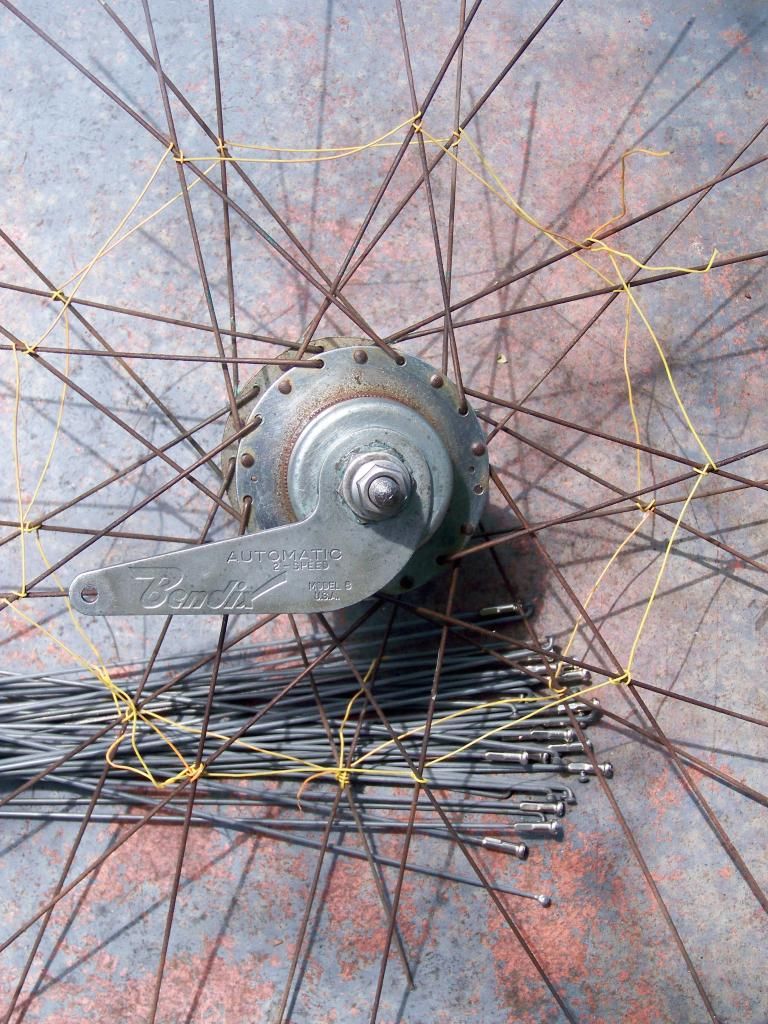
Here's a useful trick that most of you probably know, but some may not.

If you ever need to remove your rim (to paint it, swap it or whatever), but don't want to have to think about the re-lacing pattern, just take a string or wire (I used thin telephone wire) and go around the spokes wrapping each pair where they cross. When you remove the rim, the spokes don't move, and it's simple to put it back together.
In this case, I had to swap the spokes, but I still used the wire as I replaced each one. It was probably slower, but I didn't have to think about the pattern at all when I reassembled it.:D
100_7033_zpsa837d7ec.jpg
 
It is all about the BSD (Bead Seat Diameter).

As mentioned above, Schwinn used non-standard sizing so you had to buy tires from them. The 26" S7 rim used a BSD of 571mm while a standard 26" middle weight rim was 559mm (which was the same as S2 and standard balloon tire rims).

There actually are no other hard set standards in the industry governing rim and tire sizes. The total outside diameter on "26 inch" wheel/tire combos varies from one to the next as does rim wall height, rim depth, etc in some cases.

Today's project is swapping rims on the Bendix hub. When I got the Jerald, it wouldn't fit on the wheel that came off of a Schwinn Typhoon. It's puzzling to me because it had a 26x1 3/4" tire on it. There's always something new for me to learn about these old bikes. The widest rims that I have in my parts stash are from one of my early 50's Monark

Can anyone explain how these are both 26" rims?:39:o_O


.
 
It is all about the BSD (Bead Seat Diameter).

As mentioned above, Schwinn used non-standard sizing so you had to buy tires from them. The 26" S7 rim used a BSD of 571mm while a standard 26" middle weight rim was 559mm (which was the same as S2 and standard balloon tire rims).

There actually are no other hard set standards in the industry governing rim and tire sizes. The total outside diameter on "26 inch" wheel/tire combos varies from one to the next as does rim wall height, rim depth, etc in some cases.
Thanks for the info.:)
I'm glad that I hadn't planned on using that rim and went to all of the trouble to paint it and put it together only to find that out after the fact!
 
Back brace!?! Can't wait to see that :)
Briefly on the wheel tyre size thing, check out Sheldon Brown on the link below, there's all you need to know and more on the subject plus all sorts of bike related info.
sheldonbrown.com/rim-sizing.html


Sent from my iPhone using Tapatalk
 
The rim sizing thing is painful. I had an Araya 26x1-3/8 rim that was different diameter than a no-name American 26x1-3/8 rim. So it goes deeper than the the decimal vs. fraction thing. Again, painful.
 
Got home from work today and started the idler redesign, but stopped to go bike riding with the kids 'till dark. Hopefully I'll have something to see by tomorrow evening.
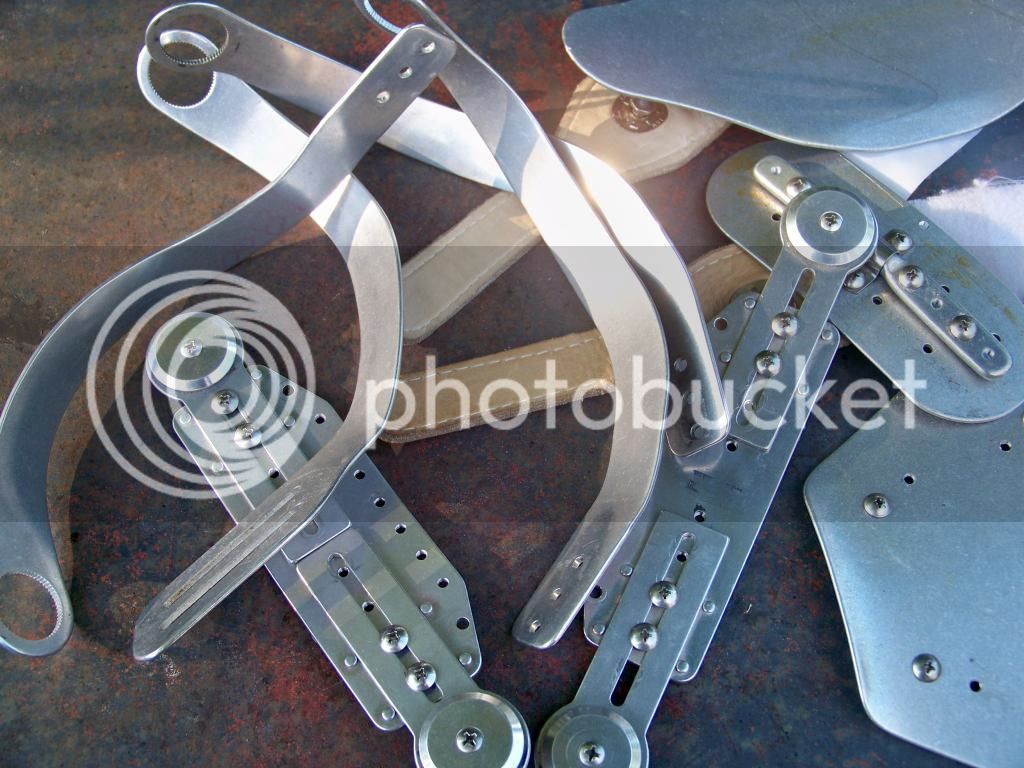
I didn't think to take a picture of the brace before I took all of the pieces apart, but I did take one of the pile of parts that was left. There's some great pieces that I will be able to use.

It reminds me of my Erector sets that I had as a kid. I used to love those sets!:happy:
100_7046_zps1381334f.jpg
 
I can think of a few great re-uses of those parts!
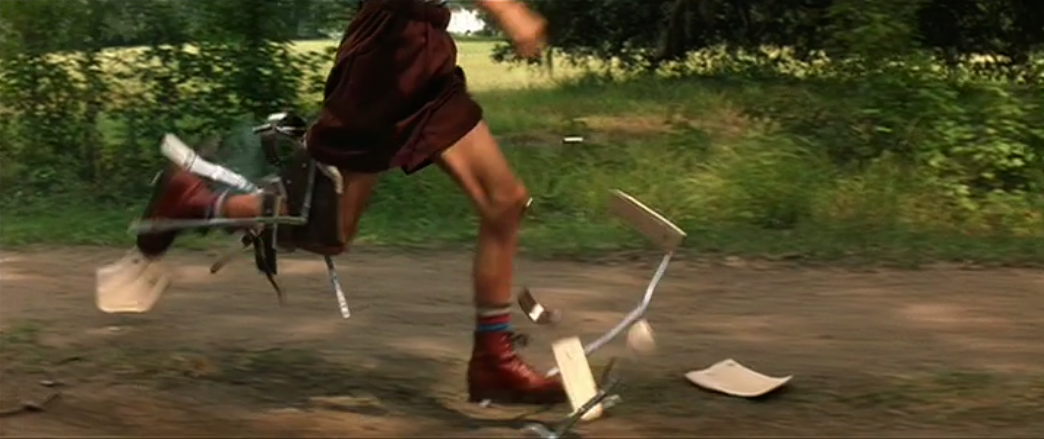
I think I know where you got those too.
RUN FORREST RUN!!!
Picture-39.png
 
The back brace pieces turned out to be absolutely perfect for the idler mount!:dance2:

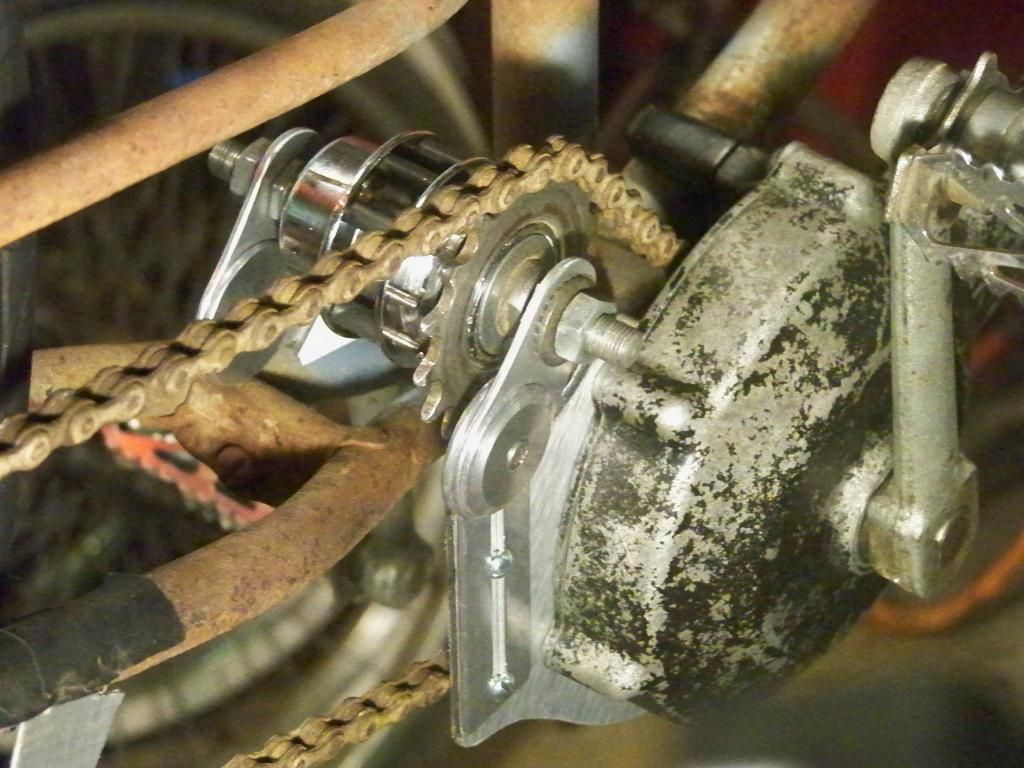
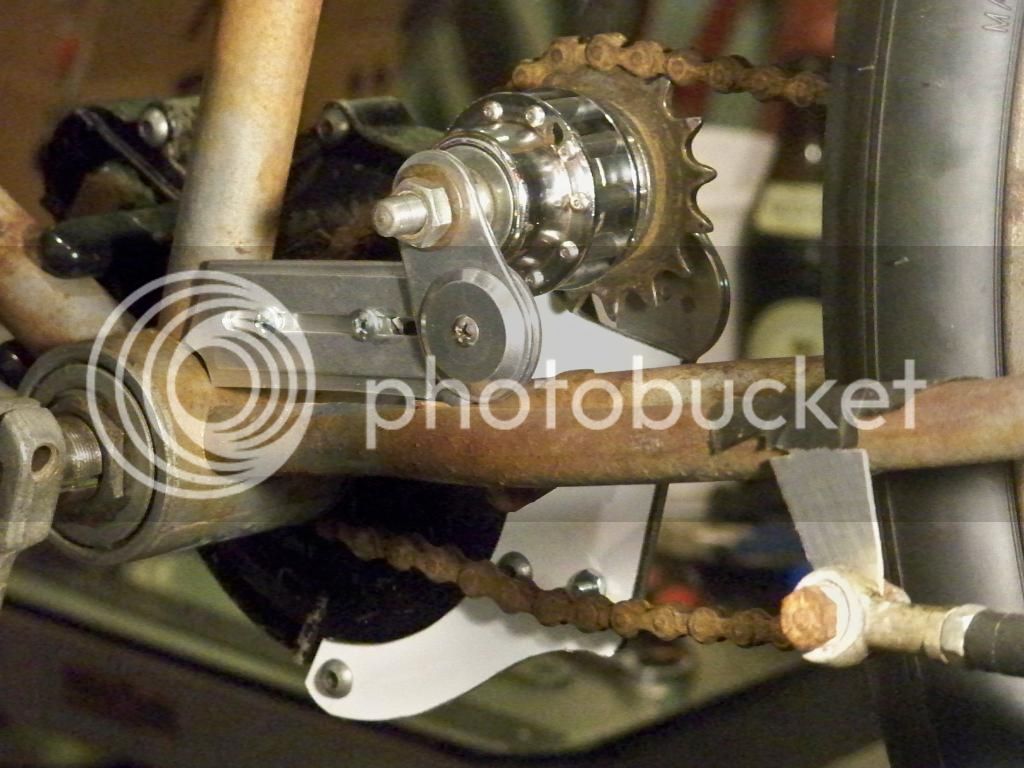
I had been trying to work out how to adjust the idler cog, and as it turns out, the brace parts resolved how to make it easily adjustable for chain alignment. I used the splined knuckle brackets that have slotted mounting plates. Using the slots, the bracket on the chain side moves up and down while the slots on the left side bracket allows it to move fore and aft giving it the ability to be aligned on an XYZ axis! The bonus is that not only does it solve a problem, but to me, it looks cool also.:happy:


Once again, the mock up uses the temporary composite material for the mounts, but I'm convinced enough with it to move forward with the real pieces now!
100_7064_zpsd369a122.jpg

100_7062_zps452f09e1.jpg
 
Last edited:
Back
Top