Haroing

Rat Rod Bikes Bicycle Forum

Help Support Rat Rod Bikes Bicycle Forum:

This site may earn a commission from merchant affiliate links, including eBay, Amazon, and others.
This is getting outside of the scope of the thread I suppose, but when using a spray gun and something like House of Kolor paints, the wait time for applying the clear is measured in minutes, not days. The tech sheets list as soon as 15 minutes and no longer than 4 hours. You can then polish the clear 24 hours later. Or if you really have your technique down you can do a flow coat and not have to polish it at all.

Every time I use spray cans I swear that next time I'll break out the gun. Then "next time" I get lazy and try to use spray cans again. And swear that NEXT time I'll use a gun... For bicycles and guitars spray cans always seem to win out. For motorcycles it's guns every time.
 
Exact same brands and types that I used on my summer build off and I had wrinkling as well. I had it on the two-tone fade silver and I also had it on my all black parts. Once I went back and cleaned it up and switched to the krylon clear I didn't have another issue

I'm not saying that's the case here but just a bit more evidence for you
 
I'm not trying to flame, it's an honest question. What would "Acetone compatible" mean? That acetone is a reducer for that type of paint and can be used to thin it, or that acetone isn't reactive to that type of paint and won't soften it?

If you can clean up with it after you're one, it's not something I'd want on the finish before spraying clear. You aren't trying to soften the finish in prep for the clear, it should bond by itself with no chemical help before hand. If you only want to cut any oil that may be on the finish, you're basically using a flamethrower to light the birthday candles. Sure you can do it, but there are other ways that are less likely to bite you in the butt. I can only see a downside to rubbing acetone on any paint finish I'm not trying to destroy.

Acetone is literally a paint thinner. What is the rationale behind wiping it on a finish you just let harden/set up in prep for the next step? Again I'm not trying to flame, I truly don't understand the logic.
skip the acetone just uses a tach rag between coats to clean dust partials off. to prep between coats.
 
Last edited:
I'm not trying to flame, it's an honest question. What would "Acetone compatible" mean? That acetone is a reducer for that type of paint and can be used to thin it, or that acetone isn't reactive to that type of paint and won't soften it?

If you can clean up with it after you're one, it's not something I'd want on the finish before spraying clear. You aren't trying to soften the finish in prep for the clear, it should bond by itself with no chemical help before hand. If you only want to cut any oil that may be on the finish, you're basically using a flamethrower to light the birthday candles. Sure you can do it, but there are other ways that are less likely to bite you in the butt. I can only see a downside to rubbing acetone on any paint finish I'm not trying to destroy.

Acetone is literally a paint thinner. What is the rationale behind wiping it on a finish you just let harden/set up in prep for the next step? Again I'm not trying to flame, I truly don't understand the logic.
Was just trying to make sure I didn't leave any dust or residue from my hands or the gloves when removing the paint stencils.
 
Thanksgiving morning I went ahead and gave the frame a wet sand and worked on the wrinkles trying not to get down to the color and get light spots. Then Saturday afternoon I went ahead and resprayed the clear and had a lot better outcome no more wrinkles.
IMG_20221126_144518616_HDR.jpg

Next thing I did was take these handbrakes apart I got from @Oak Tree to straighten the handles and give the black parts a fresh coat of black paint.
IMG_20221127_131628737.jpg

I took and clamped them to a piece of I-beam slid a pipe on and used a little pressure and got them pretty much straight
IMG_20221127_131901342.jpg
IMG_20221127_132322745.jpg

Gonna give it a few days then I can start putting it together ready to see how it's going to look.
 

Attachments

  • IMG_20221127_131628737.jpg
    IMG_20221127_131628737.jpg
    1.5 MB
  • IMG_20221127_132322745.jpg
    IMG_20221127_132322745.jpg
    2.3 MB
  • IMG_20221126_144518616_HDR.jpg
    IMG_20221126_144518616_HDR.jpg
    1.5 MB
Took some time after work today and started putting the bike together. Got the fork stem mounted then the bottom bracket, seat, and the rear wheel so I could check the chain line while adjusting the bottom bracket. Then I had to put the front wheel on to see how it was looking.
IMG_20221201_201338347_HDR.jpg

It will be sometime this weekend before I will get anymore done mainly brakes and chain.
 
Over the weekend I got the chain,pedals, and rear brake done.
IMG_20221204_161746093.jpg

Then I got to the front brake and ran into a little trouble trying to figure out how to get the cable to connect to the other side of the u brake arm without a end on it. I ran it how I tell by looking at pictures of one on another haro but didn't see any pics showing the other side. Could someone please tell me what I'm supposed to do?
IMG_20221204_162007927.jpg

This weekend I went to a car show and swap meet and picked up this 75 Schwinn mini scrambler so I could possibly be in for another build. Looks like everything is there except for the front reflector. Going to need tires n tubes and maybe a fork if I can't straighten it but not much of anything else.
IMG_20221204_162438276.jpg
IMG_20221204_162337734.jpg
 
Over the weekend I got the chain,pedals, and rear brake done.View attachment 219079
Then I got to the front brake and ran into a little trouble trying to figure out how to get the cable to connect to the other side of the u brake arm without a end on it. I ran it how I tell by looking at pictures of one on another haro but didn't see any pics showing the other side. Could someone please tell me what I'm supposed to do? View attachment 219080
This weekend I went to a car show and swap meet and picked up this 75 Schwinn mini scrambler so I could possibly be in for another build. Looks like everything is there except for the front reflector. Going to need tires n tubes and maybe a fork if I can't straighten it but not much of anything else.View attachment 219081View attachment 219082
you need to buy the gable stop guides. like in my pictures
DSC02892.JPG
brake cable feeds threw right side. ankers to the left side for pull teanching of cable. with these to parts.
DSC02893.JPG
DSC02891.JPG
 
Thanks I've been looking but only thing coming up is some automotive thing made of brass
most local bike stores will not carry what you need. but pork chop BMX or EPICBMX would have it and can mail it out. if you have older 90's 990 AD U brakes all you need( like in youtube video) can be robed off 70's/ 80's caliper brakes. but if your U brakes are 2000 and up. like mine. you need the ones I pictured.

older 90's front fork U brakes use these. barrel adjuster on opposite side of chain/sprocket side
sunlite-adjusting-barrel-w-mount-298939-1.jpg


https://www.brandscycle.com/product...98939-1.htm?gclid=Cj0KCQiA7bucBhCeARIsAIOwr-9
and this cable Anker stop on other side arm.
br2795.jpg

same parts found on caliper brakes.

but ass you can see there are diff styles/ types of U brakes

s-l1600 (25).jpg

IMG_20200126_223505.jpg
 
Last edited:
most local bike stores will not carry what you need. but pork chop BMX or EPICBMX would have it and can mail it out. if you have older 90's 990 AD U brakes all you need( like in youtube video) can be robed off 70's/ 80's caliper brakes. but if your U brakes are 2000 and up. like mine. you need the ones I pictured.

older 90's front fork U brakes use these. barrel adjuster on opposite side of chain/sprocket side
View attachment 219189

https://www.brandscycle.com/product...98939-1.htm?gclid=Cj0KCQiA7bucBhCeARIsAIOwr-9
and this cable Anker stop on other side arm.
View attachment 219190
same parts found on caliper brakes.

but ... you can see there are diff styles/ types of U brakes

View attachment 219191
View attachment 219192
Yeah I got the rant u brakes I had the barrel adjuster and mount just wasn't sure what to do on the other side. I ordered the cable stop from pork chop and installed it the other day so brakes are good except now waiting for a gyro.
IMG_20221208_201934472.jpg
Then I decided to throw a couple stickers on and some pegs.
IMG_20221208_202110731.jpg
IMG_20221208_202200892.jpg
 
Got the gyro in but I wasn't noticing that even though it was a haro gyro that some used removable tabs which this came with.
IMG_20221214_184847223_HDR.jpg

This frame wasn't set up for that but @Captain Awesome hooked me up with a diagram showing where to drill the hole for the little nub and the threaded hole. bought a cheap caliper and tap set put some tape on the head tube marked out for the nub drilled that hole.
IMG_20221217_134453801_HDR.jpg
Then instead of marking the threaded hole I used a drill bit same size as the hole in the tab to mark the hole then drilled through with a small bit then used the self drilling tap to thread it.
IMG_20221217_155824596_HDR.jpg

Mounted the tabs hooked up the brakes and done a little adjusting took it for a little test ride. It rode good but I need either just a longer seatpost or probably will get a lay back seat post.
IMG_20221217_154336772_HDR.jpg

IMG_20221217_155419532.jpg
 
Got the gyro in but I wasn't noticing that even though it was a haro gyro that some used removable tabs which this came with. View attachment 220003
This frame wasn't set up for that but @Captain Awesome hooked me up with a diagram showing where to drill the hole for the little nub and the threaded hole. bought a cheap caliper and tap set put some tape on the head tube marked out for the nub drilled that hole. View attachment 220010Then instead of marking the threaded hole I used a drill bit same size as the hole in the tab to mark the hole then drilled through with a small bit then used the self drilling tap to thread it.View attachment 220009
Mounted the tabs hooked up the brakes and done a little adjusting took it for a little test ride. It rode good but I need either just a longer seatpost or probably will get a lay back seat post.
View attachment 220011
View attachment 220012
Very nice 👍

That color red is really growing on me!
 
Got the gyro in but I wasn't noticing that even though it was a haro gyro that some used removable tabs which this came with. View attachment 220003
This frame wasn't set up for that but @Captain Awesome hooked me up with a diagram showing where to drill the hole for the little nub and the threaded hole. bought a cheap caliper and tap set put some tape on the head tube marked out for the nub drilled that hole. View attachment 220010Then instead of marking the threaded hole I used a drill bit same size as the hole in the tab to mark the hole then drilled through with a small bit then used the self drilling tap to thread it.View attachment 220009
Mounted the tabs hooked up the brakes and done a little adjusting took it for a little test ride. It rode good but I need either just a longer seatpost or probably will get a lay back seat post.
View attachment 220011
View attachment 220012
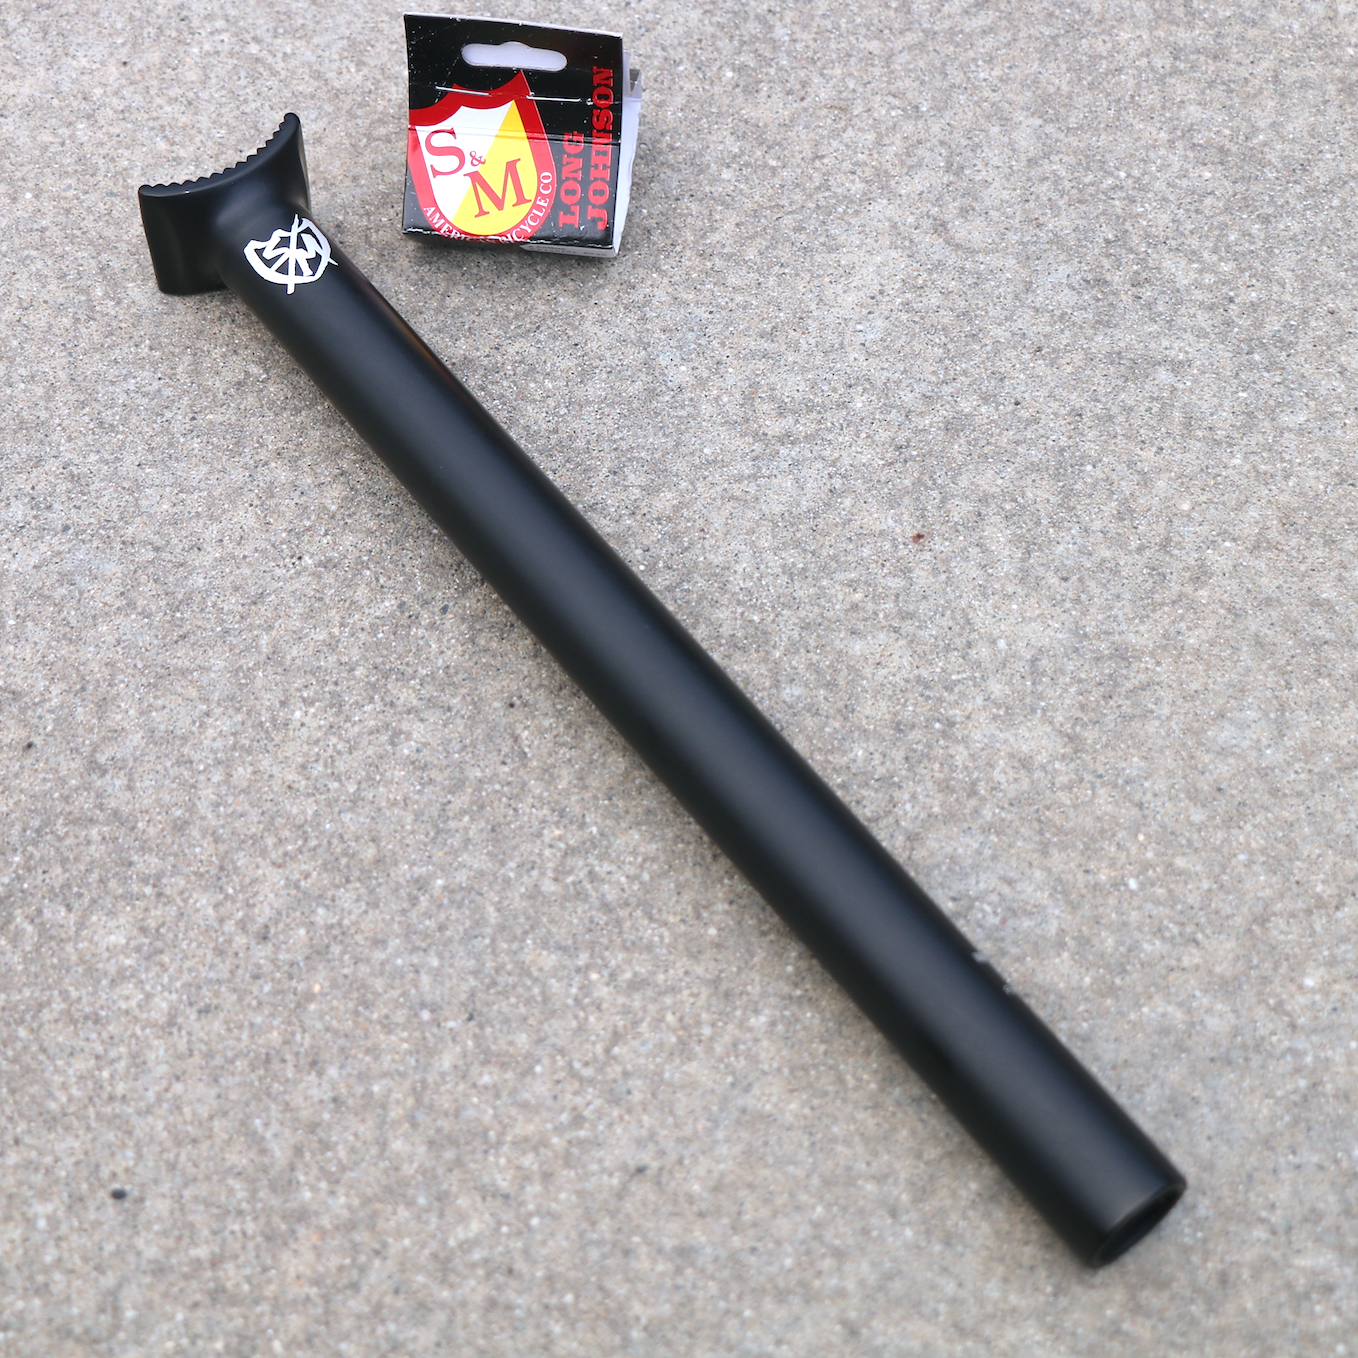
they keep seat post stubby. so it's out of the way of your junk. when busting tricks. but if all you want to do is cruise on it. buy a S&M long john post. plenty of height on them.
s-l1600.png
 

Latest posts

Back
Top