TRADITIONAL Hops and Gnarly

Rat Rod Bikes Bicycle Forum

Help Support Rat Rod Bikes Bicycle Forum:

This site may earn a commission from merchant affiliate links, including eBay, Amazon, and others.
I like Regretstoration. It reminds me of when I worked at Unique Motorcars helping develop jigs and molds for a new kit car, we had the term 'F&R Department'. It was a little different meaning but similar. It wasn't about restoration but it did come with regrets.

F&R was a substitute for R&D (research and development) which meant 'F-up and Re-do'. :21:
 
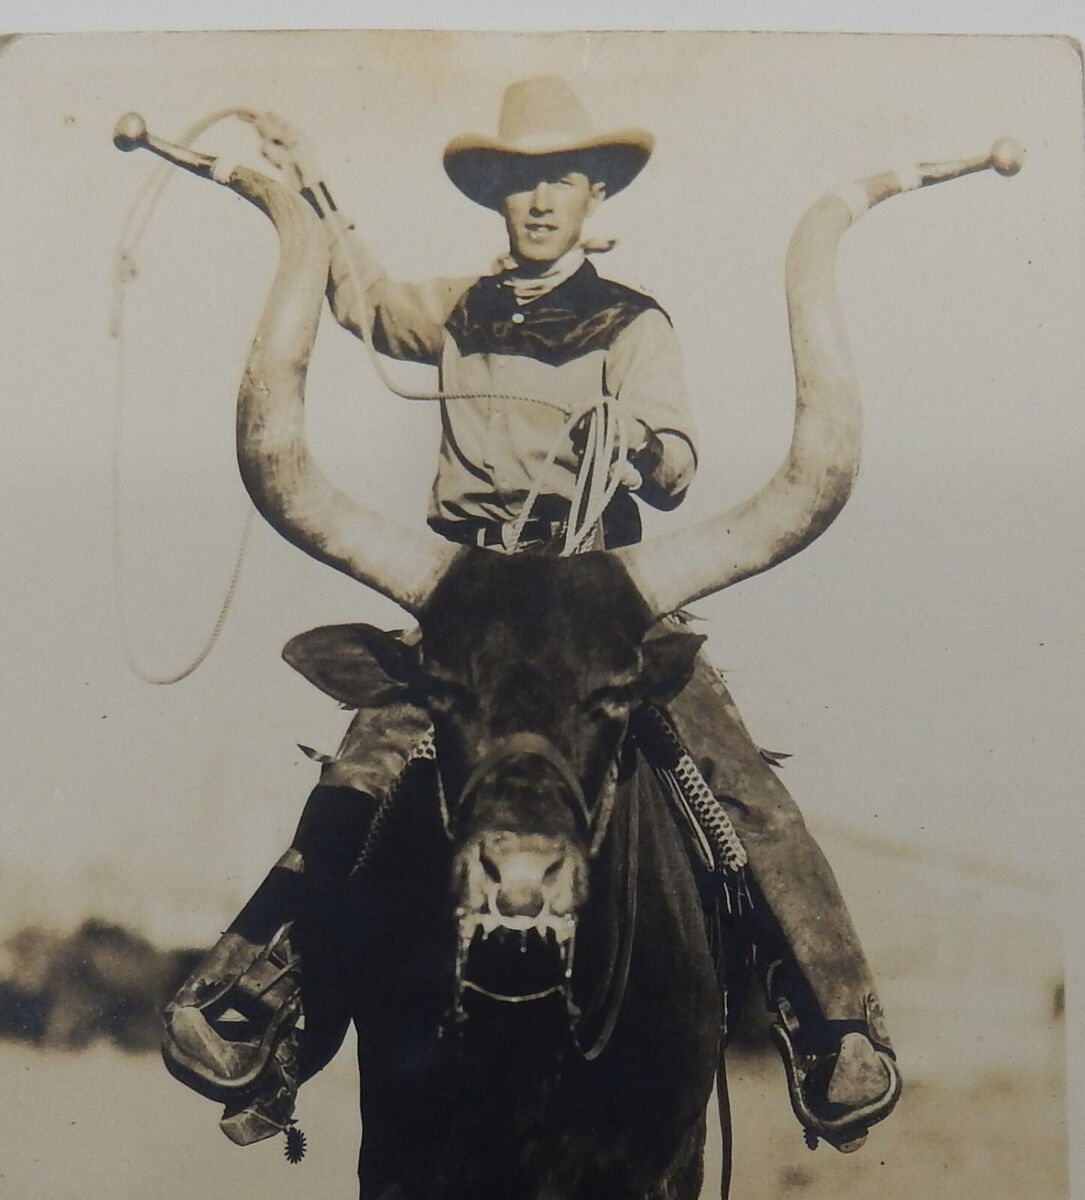
The Hopalong Cassidy bike came with these cool 'Longhorn' handlebars.


IMG_7745.JPG


I'm not sure if they were exclusive to the bike or if any other bikes used them, but they certainly fit perfectly with the cowboy theme!

IMG_7743.JPG

IMG_7744.JPG


I can just imagine a kid pretending to be riding on the back of a Texas Longhorn Steer!

s-l1200.jpg
 
Never heard of those before. The Torrington longhorns that I've seen have always wider than normal cross-braced bars, but those truly fit the moniker much better. Those must have been re-chromed in that condition. Are you going work some aging back on them?
 
There are several pieces that have been re-chromed. For now, I'm not messing with it. I will let the owner make the final decision on the direction that I go with the chrome. This project will most likely go beyond the deadline of the build-off so some of the details like that will have to come later.

There are only a couple more weeks left in the build-off but I have a plan to have it ready to ride and photograph for the competition and then blow it apart again to finish it to the owner's liking.
 
I've had what I believed were long horn handlebars, but they didn't have
that extra curve at the neck. Really does make them look like cattle horns.
Very cool.
View attachment 273213
Never heard of those before. The Torrington longhorns that I've seen have always wider than normal cross-braced bars, but those truly fit the moniker much better. Those must have been re-chromed in that condition. Are you going work some aging back on them?

I'm not sure if that is the correct name for them. I saw some referred to as 'Longhorn' on a Google search. 'Hopalong' handlebars is probably a more accurate name.
 
The fenders are the roughest parts of this project. I made some patch pieces from a junk fender to have butt welded in place. I took the fender to a friend to weld them with an oxy-acetylene welding torch. He didn't get very far before deciding that some of the metal was too thin to weld without burning holes.

So I decided that the only way to make the repairs is to put a backing plate on the underside of the fender to have something to weld to.

The first repair is a dime-sized hole where one of the decorative rivets had somehow broken through.

IMG_7664.1.JPG

This is the plate on the underside. I used my spot welder to weld it in.

IMG_7755.JPG

This shows the round plug welded to the backer.

IMG_7754.JPG

Due to my old eyes, I covered it with a piece of white tape to mark the center and center punch it. Much easier to see!

IMG_7756.1.JPG

Lastly I broke out the Roper Whitney punch, selected the size die needed, and pressed a hole. If you have a need for making clean holes in sheet metal, this tool is a must!

IMG_7757.JPGIMG_7758.JPGIMG_7759.JPG

This is all that I'll need to do other than add some paint because the replacement rivet will hide the repair.

IMG_7761.JPG


More repairs tomorrow.
 
Last edited:
Another thing is the chrome rivet. There has been some discussions about aging chrome and I still don't have a good process (yet) but here's what I've got so far.

All I have done is rough it up a little with varying grits of sandpaper. I will probably follow up with some wood stain later.

Here's a new one next to the one I worked on.

IMG_7762.JPG
 
Depending on the degree of "aging" you're trying to achieve, you may want to
consider this: place a piece of 80 grit sandpaper on the object and give it a rap
with a mallet. Just a hit, and check the results. Usually enough to get a few small
random, uneven dimples. I like the results that you got on that rivet. Doing it!
 
Lot of wear, but it really looks cool even like it is.
 
Unlike the hole that I repaired, the edges of the fender will be seen and required a similar approach with a couple of different considerations.


First I cleaned up the rotted and broken area.

IMG_7749.JPG


Then I cut and spot welded a backing plate but had to stay outside of the rolled edge.

IMG_7750.JPG

IMG_7751.JPG


I also cut a piece to match the void and spot welded it to the backer.

IMG_7752.JPG
 
I took the fender back to my friend that does oxy acetylene welding and had him weld the seams together. This time the backing material helped to prevent him from burning through.

Normally he would be able to flow the metal together similar to how solder flows out, but I told him that I had no concern for how ugly the weld might get as long as everything stuck. I have no problem with grinding it smooth.

Here it is after welding.

IMG_7767.JPG


And the final result after grinding and primer. I'm happy.

IMG_7769.JPG

IMG_7771.JPG


I don't remember if you said it outloud, but these fenders are a real challenge! 🤯
Yes they are! They are original and very hard to find so I'm trying my best to salvage them. This is a patina restoration but the fenders are way past the target (which is the original tank). So I'm working in two directions! The bare metal parts have fresh paint that needs to look old and these fenders are crusty and need to look better! :43:

I wish that I could've started in the first month of the build-off. Two months is really pushing me!
 
I took the fender back to my friend that does oxy acetylene welding and had him weld the seams together. This time the backing material helped to prevent him from burning through.

Normally he would be able to flow the metal together similar to how solder flows out, but I told him that I had no concern for how ugly the weld might get as long as everything stuck. I have no problem with grinding it smooth.

Here it is after welding.

View attachment 273691

And the final result after grinding and primer. I'm happy.

View attachment 273692
View attachment 273693


Yes they are! They are original and very hard to find so I'm trying my best to salvage them. This is a patina restoration but the fenders are way past the target (which is the original tank). So I'm working in two directions! The bare metal parts have fresh paint that needs to look old and these fenders are crusty and need to look better! :43:

I wish that I could've started in the first month of the build-off. Two months is really pushing me!

Good job on blending the repair spot in with the rest. The voids and bumps match up well with the crustiness of the rest of the surface.
 

Latest posts

Back
Top