LaidBack - TransWorld Motobike Rat - Patinafication & Details - 85 Years

Rat Rod Bikes Bicycle Forum

Help Support Rat Rod Bikes Bicycle Forum:

This site may earn a commission from merchant affiliate links, including eBay, Amazon, and others.
...Tempted to do Ver.3.0 though, there are a few things I’d change and tweak.

If you do decide on a version 3 tank, you might consider putting in some louvres...

MazdaFlyer_Louvre.jpg


That would look cool :nod:

It's looking great the way it is though. :thumbsup:

Glen.
 
[emoji106] back at you! Enjoy touring!
Looks really good. The tank is the extra mile that makes it a contender. I've got the same chainring, but all barked up on my '53 Spitfire. I'm thinking about moving into the 60's and ditching the skiptooth...

Carl
Sent from the edge of an alternate universe...
Thanks! Thinking the tank is a couple of extra miles based on effort expended. I’m lost in the ‘30s-‘40s at this point...skiptooth is what it’s all about. Getting something working thats older than me is a challenge I like.
Love to see the shadows on that cleaning supply tray! Bring it on! We've got near 80 scheduled for Thurs - Fri next week.
Better days ahead!
If you do decide on a version 3 tank, you might consider putting in some louvres...

View attachment 95030

That would look cool :nod:

It's looking great the way it is though. :thumbsup:

Glen.
Love the louvres!!! Thanks, I have no idea on how to make them.
@Glen the louvre man strikes again! :giggle:
Love the louvres!


Sent from my iPhone using Tapatalk
 
Fantastic build so far ! Really want to build a tank for my 34 D.P Harris now.
 
Fantastic build so far ! Really want to build a tank for my 34 D.P Harris now.
Thanks! Go for it. With some planning and patience it can be done. Beats buying a pricey original one at this point.
You’ve seen the basic tools I used. A metal shear and an adjustable brake would improve the result. Spot welder would eliminate the rivets. Could also solder the joints.


Sent from my iPhone using Tapatalk
 
Future decisions.
58d3cf5eb17f412f4e5749e1ad8303a6.jpg


Sent from my iPhone using Tapatalk
 
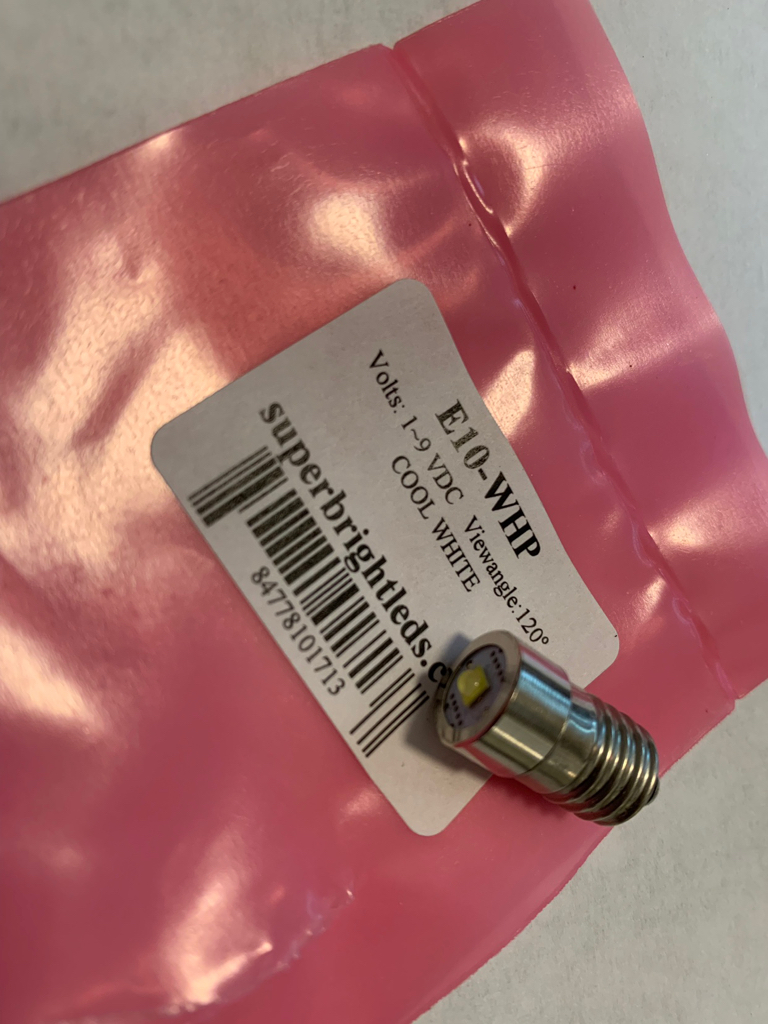
Cold and damp again so I tinkered with the teacup light. The iron cord from an earlier post became a vintage donor cord for this build. OJ and TRM were right all along. Good eyes. Anyway I got the LED bulb (E10-WHP 1watt) yesterday and it fits the light socket to a T. After trimming off the cord I left it in its original length for now. I removed the insulation from the ends, tinned the wire ends and attached to the light terminals. I had to hunt up one terminal screw.
88c7cace8f51243fd55a320288ab48f2.jpg
45c5ef141638076a98454649fd0b5c09.jpg
39484f50d9e20d3047dcdcf217f9c3cc.jpg

I had a 12V battery pack the bulb is rated 9V so I added a jumper wire across the contacts for two of the batteries. Thus eliminating 3V for an output of 9V.
c93e9a47eb2d3b5917c7af0e80ba6ebe.jpg

Experimental circuit in my lap.
3bda7e75a80aba41a2554f18fa04739c.jpg

Anyway we have modern high tech light at the old teacup. The red jewel in the back bleeds some light as well. Cord evolution, iron to light.
8654f594e96c7ada8acb8a31b4458696.jpg

79e541da6c45665425fe3810726d3e7b.jpg
fb4c0afb0ca35661f3579a13653bac76.jpg
533161867f1d6fd5d48d13cbfde59fab.jpg

Now I’ll have to adapt my “Flare Tube” to a battery pack illusion. Not sure how I’m going to do the hanging brackets. The batteries could go in tank but the battery tube will be more period correct. Thanks for watching.


Sent from my iPhone using Tapatalk
 
Last edited:
I posted in @OddJob 's thread how a guy on the H.A.M.B. did some home made louvres... http://www.ratrodbikes.com/forum/in...the-backforty-pg-6.108692/page-7#post-1105036
Glen.
Ps: You could be that someone too ;)
Thanks for reposting the “how to” sample. That would be icing on the cake but looks like it would take some time to perfect the jig and fixtures not to mention another tank.
Lots of time but still lots of basic stuff to do with this build. And a bunch of family stuff on the horizon. The louvres would be a cool touch.
We're all learning from you. Once a teacher, always a teacher! Stay dry.
Sometimes you can learn by others’ mistakes. Part of the fun with these builds is showing the weird stuff we do. I did spend 33 years in a classroom plus more years working with architectural interns. One of my best and influential teachers was my HS Industrial Arts teacher.
You just keep posting those things, and now even I'm considering those louvres...
Go for it show your tooling or loan it to me.
Lots of Cool happing here! Keep up the great work. :thumbsup:
Thanks! How are things in the Windy City?


Sent from my iPhone using Tapatalk
 
Last edited:
Proverbial napkin sketches...battery tube mount.
feb62a447516aa538731a6b2c3b5e31e.jpg


Sent from my iPad using Tapatalk
 
It’s been cold and wet here in Chicago for what feels like for ever. Looks
Like the sun will come out Monday. I have been gathering parts for my build looking forward to getting started. I’m enjoying your build.
 
That cord adaptation turned out great! Nice vintage touch.
When you mention battery pack, I immediately go to that awesome PVC rustification job on Classic Rat in BO 10.
classic rat battery holder.jpg


Maybe a little 'rustification' or weathering technique on your custom tank would tie it in with your vintage headlight job. I watched this yesterday, and am planning on implementing some of this technique into my own build. Fascinating!

 
At it again. Fixed my wife breakfast and lunch, she’s on her mom alone tine. Doing what she wants. Do I’m back at bike details for an hour or so. She chose dining out this evening rather than lunch. All is good, dogs even had some turkey burger at lunch.
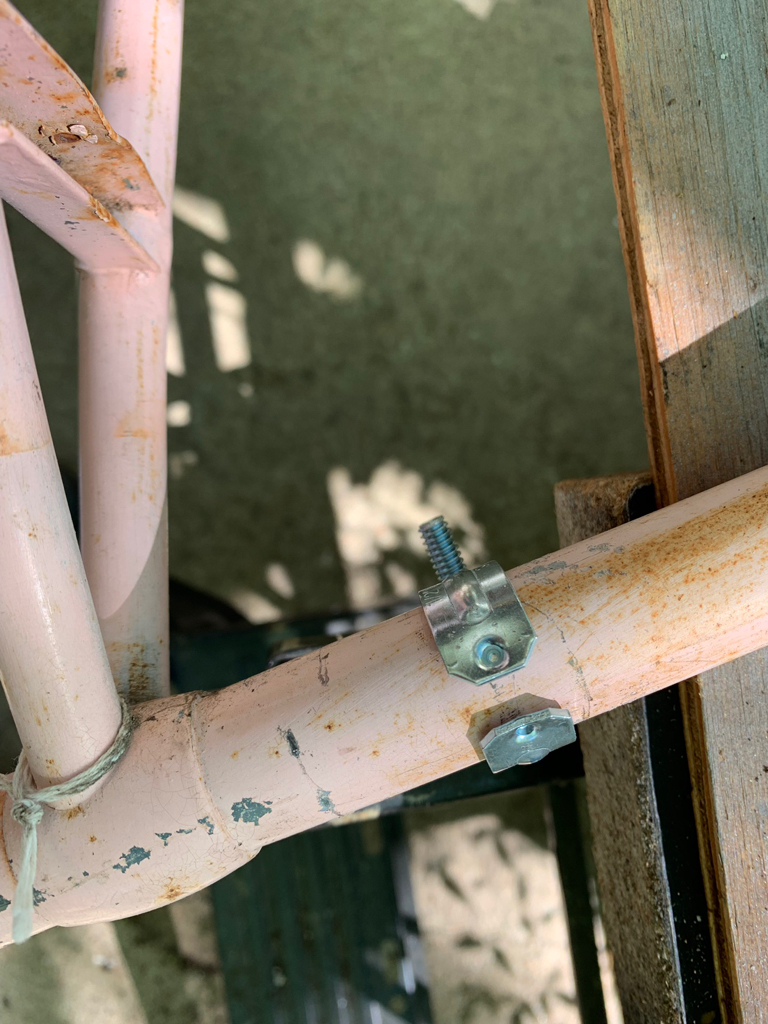
Anyway I’m experimenting with battery tube brackets. I picked up some 1/2” EMT conduit brackets. I reshaped them to fit 1” tubes. A pair should work.
0b90641f2e09817b8c892718b14d9aca.jpg
70341eaa923421e29bb97433437c9431.jpg

ca02f6f2c0748b427846ccba14d189e6.jpg
e8d53d9f06da4cb0e22c177397f36f8b.jpg


Sent from my iPhone using Tapatalk
 
Then I remembered I had some perforated strap hanger material.
48a0988a93c2ea7adad24d17168f6ee7.jpg

I formed a couple of pieces for attaching to brackets on the battery tube which needs to be shortened.
662ec56e69280fac528dd5d6117d237f.jpg

5b62961b8c63ed7f46fa151acd396e9f.jpg
8b06a2a2c2ba43968fbb1eadf583bbf8.jpg

I pulled out the stand and frame and did a test fit. The radius of the brackets needs to be tightened up some. The hanging strap portion appears to be a little long as well. The vision is stating to take shape though.
Now to shorten the tube, add a switch and complete the wiring.
6640300bf15b2b078697409febb5af2a.jpg
7311c3b3b6865324c375c28824631837.jpg


Sent from my iPhone using Tapatalk
 
Back
Top