Motor Build Round Two

Rat Rod Bikes Bicycle Forum

Help Support Rat Rod Bikes Bicycle Forum:

This site may earn a commission from merchant affiliate links, including eBay, Amazon, and others.
Joined
Feb 20, 2009
Messages
325
Reaction score
2
Location
Bellingham WA
Rating - 0%
0   0   0
So last time I built up my roadmaster with a motor it went okay, but the chinese 80cc tin motor wasn't very satisfying, so I'm moving on to bigger and better things.

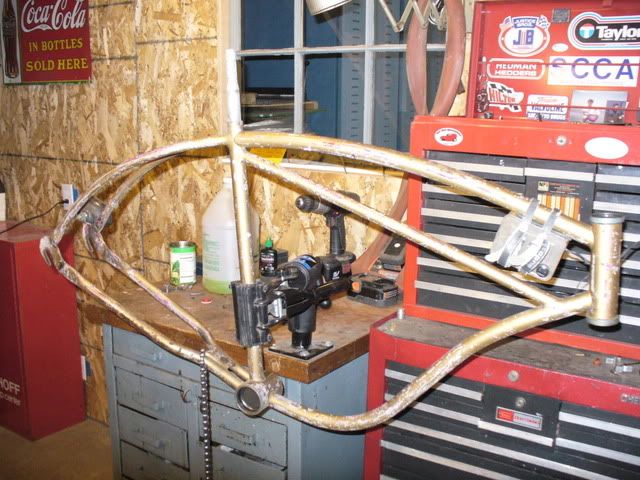
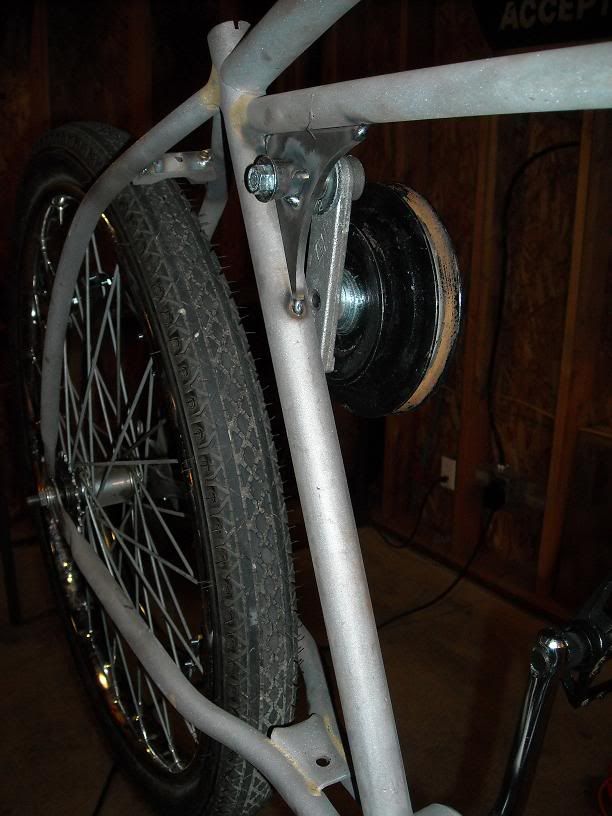
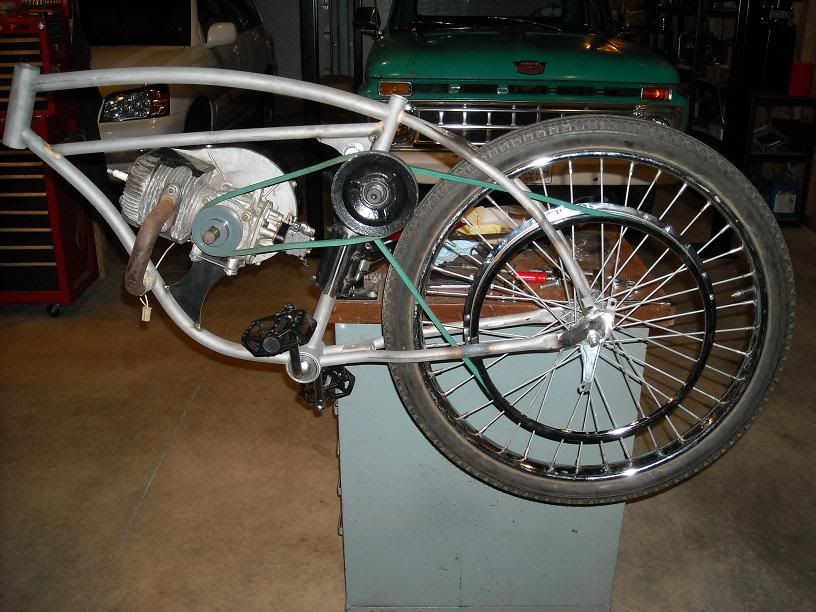
I've had this old snowblower thumper of a two stroke laying around for a long time, I was planning on running it on a vintage mini bike, but never found a suitable gas tank for that project. Yesterday I tried fitting it in the frame, and with the exception of being a little wide, I know I can make it work. Since it's wide I'm going to try and use the clutch/jackshaft system off an old Whizzer (if I can find one, I'm looking, got one?) which would both work as my clutch and I'd be able to run another belt off of it toward the rear wheel, or I might have to borrow a friends lathe and use what I learned in school and make one myself. I've also been throwing around the idea of using a centrifugal mini bike clutch on it somewhere, but it's all in my head now. If that didn't make sense, just wait and it will once I get building.

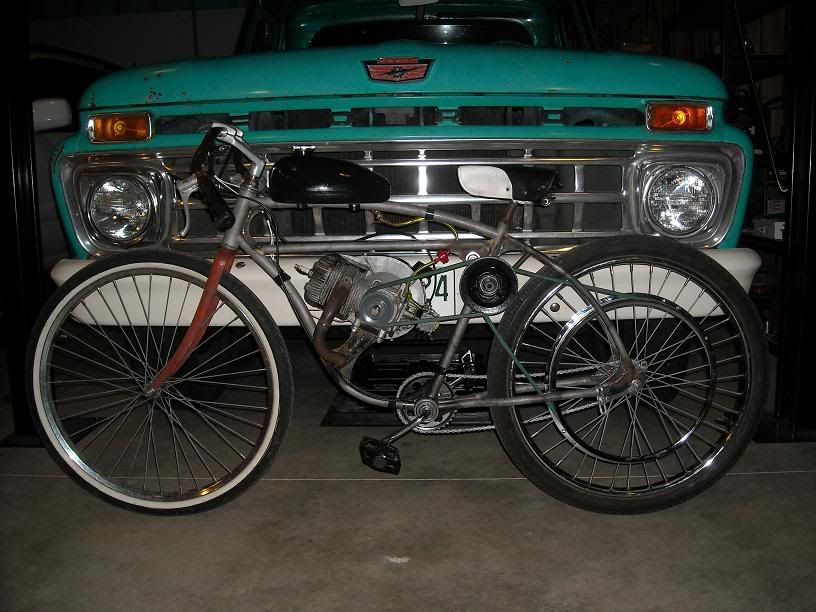
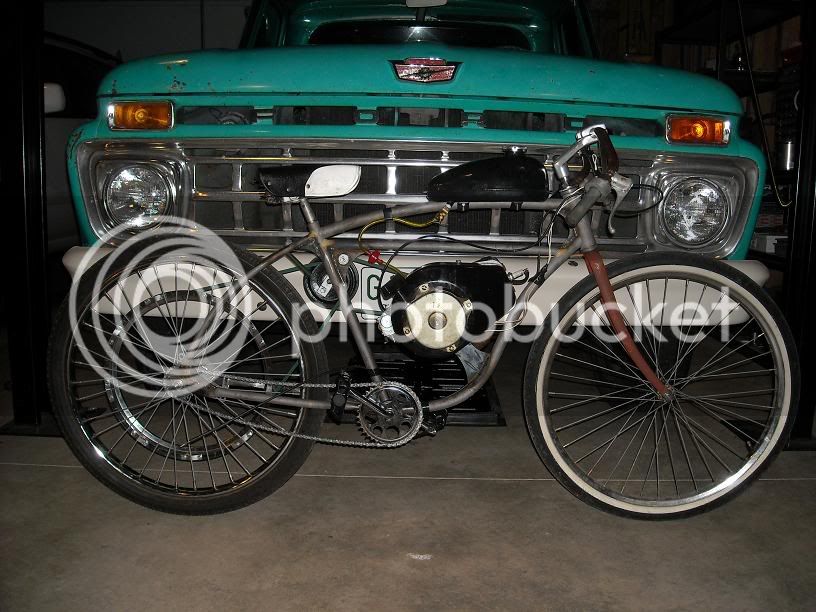
But to start this build out, here's the engine as it sits now. That's the carb in the plastic bag, it's a chainsaw style carb without a float so I can rotate it anyway I want to get it to fit in the frame.

And I can't wait to get started!

P1030140.jpg


P1030141.jpg
 
Just tore down the frame, and now I'm debating on whether it's worth sandblasting it and welding in some gussets to add some strength. I've heard horror stories of welds cracking under the vibrations from those chinese motors, and I think my big ol two stroke is going to be putting out a lot more vibrations than one of those. I'd rather leave the ratty paint job, but since it's for safety it'll probably get sandblasted and gusseted.

Did some more work on desiging a jackshaft/clutch yesterday, it's starting to look like it's going to be hard to find an old Whizzer one, so probably going to make it.

So next step, take off the last few bits of the lighting system, sandblast it and start making some gussetts!

P1030142.jpg
 
Well this is going a lot slower than planned, this summer I got a job as a Wildland Fire Fighter so I work seven days a week and go on periodic weeklong dispatches across the state, so I get to work on this about one hour a night if I'm lucky. So far I'm doing fab work on the frame, along with straightening it again. I'll let the photos do the talking (and they aren't too impressive, so far I've mostly done little detail stuff), today I just started clearancing the frame for the rear wheel drive sheave. Slow and steady, this project will be done by the end of summer!

DSCN0288.jpg


DSCN0289.jpg
 
I've got an old Whizzer clutch assembly I'm going to use, and my dad offered up the original parking brake lever from his '35 ford if I can think of a way to turn it and the Whizzer stuff into a suicide clutch like the one on the bike you posted.
 
Been slowly working on this build, a little at a time, but it'll get done eventually! Here's where I'm at so far, still a lot left to do, but it's starting to take shape. Right now I'm finishing getting the clutch in, and then moving on to mounting the engine.

DSCN0328.jpg


DSCN0329.jpg


DSCN0331.jpg
 
Bench tested the motor yesterday. It has WAY more power than I expected! This bike isn't going to be no stinkin' put put Whizzer!
 
hotfoot said:
Bench tested the motor yesterday. It has WAY more power than I expected! This bike isn't going to be no stinkin' put put Whizzer!

haha nice, like you said I hope the frame dosent crack :D
 
A word of caution and a suggestion, that engine will vibrate your fillings out and unless you mount it securely at minimum two points (ideal would be three points in a triangle if possible) the vibrations will inevitably tear the mounts from the frame. The original bicycle frame was never intended to handle the rotational and twisting forces the engine will produce. I built a few of these bikes with McCargi stretch frames just like on the King Motors web page. Everyone of them suffered catastrophic frame failure at the mount points and one even had the engine jump out of the frame while going down a hill at 38mph in Colorado. Another, and I believe better, method of mounting a two-stroke or four-stroke engine is to isolation mount with rubber or urethane bushings. That way your rubber or urethane dampeners soak up the vibration and rotational forces. If done right the frame will never crack and the ride becomes pleasant rather than numbing!

Sorry I don't have any pictures of what I've done so far but here's a drawing I whipped up. If you design a captured mount that utilizes the plate design you can get inexpensive skateboard truck bushing (packaged in pairs and you need 4 of them) that come with upper and lower bushings and washers. You will need to use lock nuts and studs on the plate mount so you can adjust the compression of the bushings. Also skateboard truck bushings come in various stiffness' choose the hardest, they will last longer. The upper engine mount uses a single split urethane golf kart leaf spring bushing which are also quite cheap and easy to find.
f0rl7n.jpg


The solid steel mount at the frame needs to be spread out to help give it more strength and to distribute any vibrations that make it through the dampeners. I wouldn't bother using plate any larger than twice the wall thickness of the tubing your welding it to. Anything more is simply over kill and a waste of money. Most bicycles are made from .049-.065 wall tubing and the heat required to get a good bond of .120" thick (1/8th") plate to the .065 tubing can weaken the tubing to a failure point. I use 14G (.083" thick) plate for all the mounting tabs and brackets on my frames. You'd be surprised how strong 14G material really is, I bet you didn't know but in most structural steel building the 20ft long cross pieces in the walls and ceilings are all made from 14G .083" thick steel.

Welding a large mount plate permanently to a frame might be the easiest way to attack this but if you study a motorcycle engine mount system and try to duplicate it somewhat the end result is cleaner and allows you the option to remove the engine easily with just a few bolts.

29pvh9u.jpg


In this configuration a mount can be modified or changed easily without radical cutting and re-welding which may weaken the frame even more.

Anyway I hope this helps. Later Travis
 
I almost forgot, two stroke snow blower engines are by design intended to be used in cold weather climate only IE "snow blowers". The cylinder head fin area is significantly reduced compared to say a chainsaw or lawn mower. So the easiest remedy to this is to set your carb jetting screws to a rich mixture which will help cool the engine. But while your riding it always pay attention to how hot she's running. You don't want a seizure after all your work cause it ran too hot. I can almost bet you'll never find parts to rebuild it either, and unless you know where 2 or 3 more of those engines are for parts, well...

The better, and significantly more difficult, way is to get some 1.5" wide X.187" thick (3/16") aluminum bar stock and fashion "fins" that can be welded to the existing head fins. I can't remember if anyone makes an epoxy like JB Weld that could take the heat but that's another option. When welding or bonding fins to the head start in the middle and work you way out to the edges.Trust me I know...

Later Travis
 
Thanks for the tips!

The motor is going to be mounted on two different spots, three if I can find another. The main mounting will be through the bottom, but there is also a mounting spot near the top that I will end up connecting to a bracket off the top of the frame. I'd like to find a third spot, but not sure at the moment. I am also definately using rubber bushings, as vibration is going to be killer on this build!

I really hope the frame holds up, I'm going to be beefing up most everything on it, especially the chainstays and seatstays as they seem to be the weakest. I'm also going to re-weld all of the factory welds, as I don't trust most of them. My dad is helping me out with the final welds, he's been building hot rods for years, so I'm pretty confident it will hold together once it's done.
 
Mock up, finishing up the clutch cable stop tomorrow and it's out for a test run.

Got a front drum brake in the mail, a gas tank to make in my head, and probably can't run that open header so it's going to get a nice muffler too.

DSCN0364.jpg


DSCN0365.jpg
 
IT WORKS!

Finished hookind up the clutch tonight and took it for it's first test run, and it went very well. Sadly as of right now I might have to keep the pull start on the engine instead of starting by dropping the clutch as the engine has a heck of a lot of compression. A couple small problems popped up, but nothing I can't fix. I think all my neighbors really enjoyed me tearing up and down the street at ten at night with the open header, as they were all out on their porches.

Now to: find new gaskets for carb, make gas tank, make exhaust, more frame bracing, build front wheel with drum brake...the list goes on, but it's getting shorter!
 
Back
Top