Orange bike rebuild

Rat Rod Bikes Bicycle Forum

Help Support Rat Rod Bikes Bicycle Forum:

This site may earn a commission from merchant affiliate links, including eBay, Amazon, and others.
Joined
Feb 9, 2008
Messages
6,112
Reaction score
645
Location
Pearland,Texas
Rating - 0%
0   0   0
If anybody is goofy enough to buy some wheels that only fit a couple bikes in the world , and you look around and you don't have one , then this is the way you fix it.
Start off with your beloved frame.....
orangebikerebuild001.jpg

orangebikerebuild002.jpg


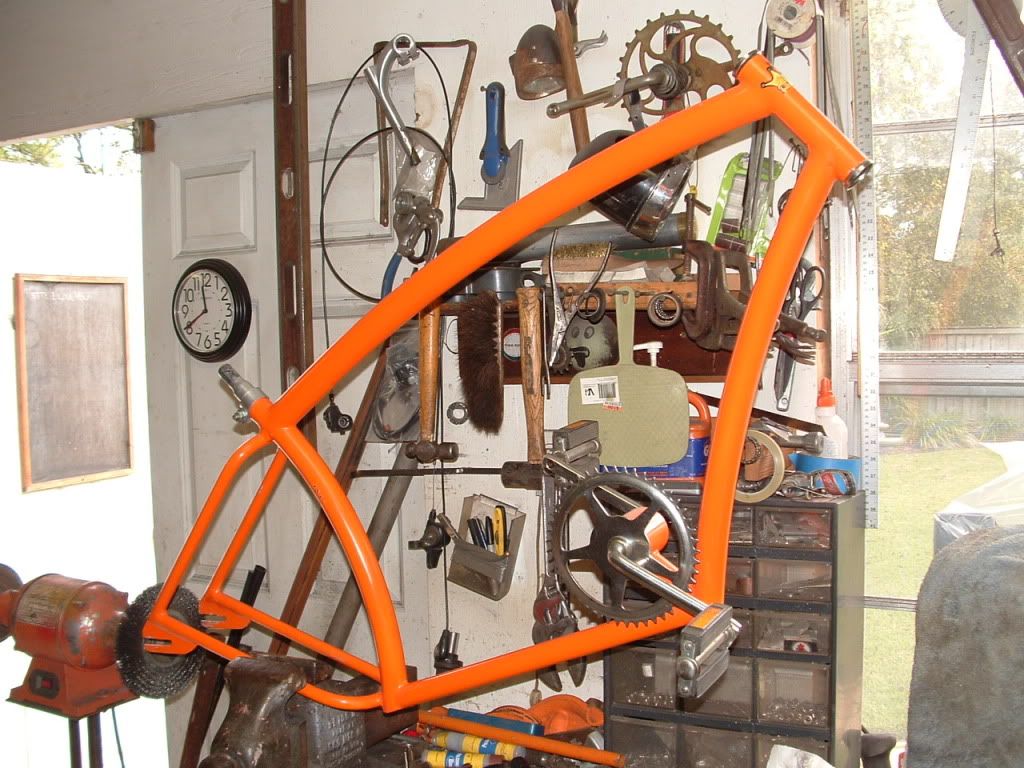
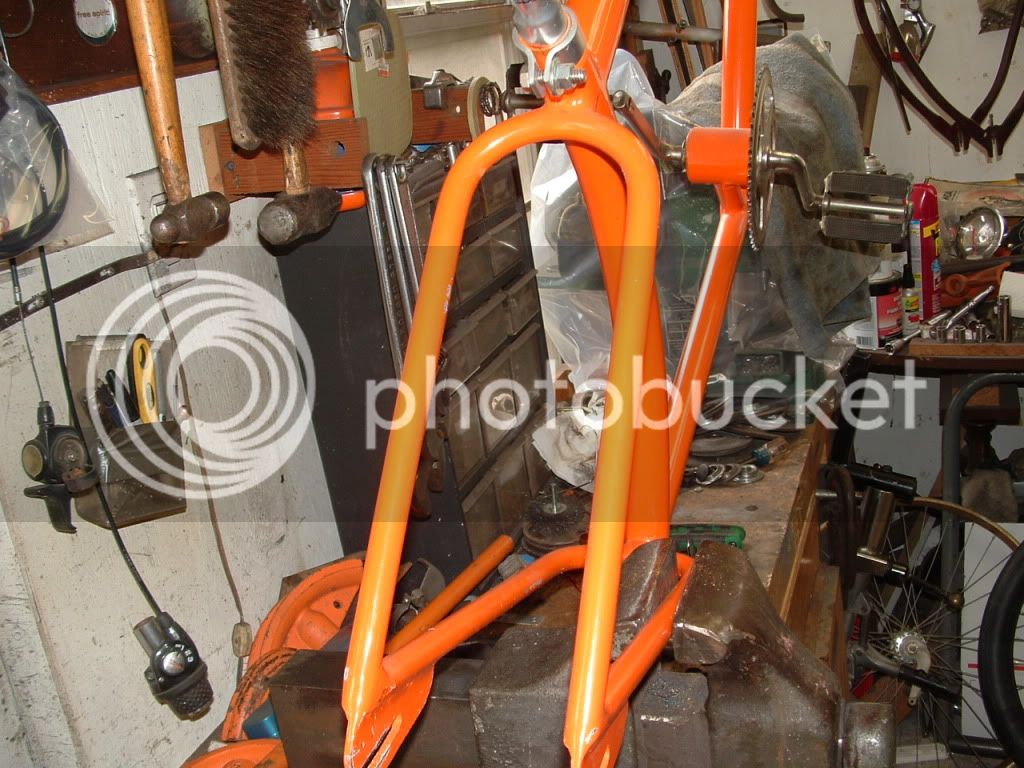
Then take the weapon of choice....In my case my handy dandy Porta Bandsaw, and cut off the rear triangle....hummm wonder if that is going to scratch the paint. :lol:

orangebikerebuild003.jpg

Here is how I build my stays. I use 5/8'' solid stock and bend it in my cheapo harbor freight bender. The size of the shoe doesn't matter on the solid rod. I used a 1'' one because it will form the steel the width I wanted.

orangebikerebuild005.jpg


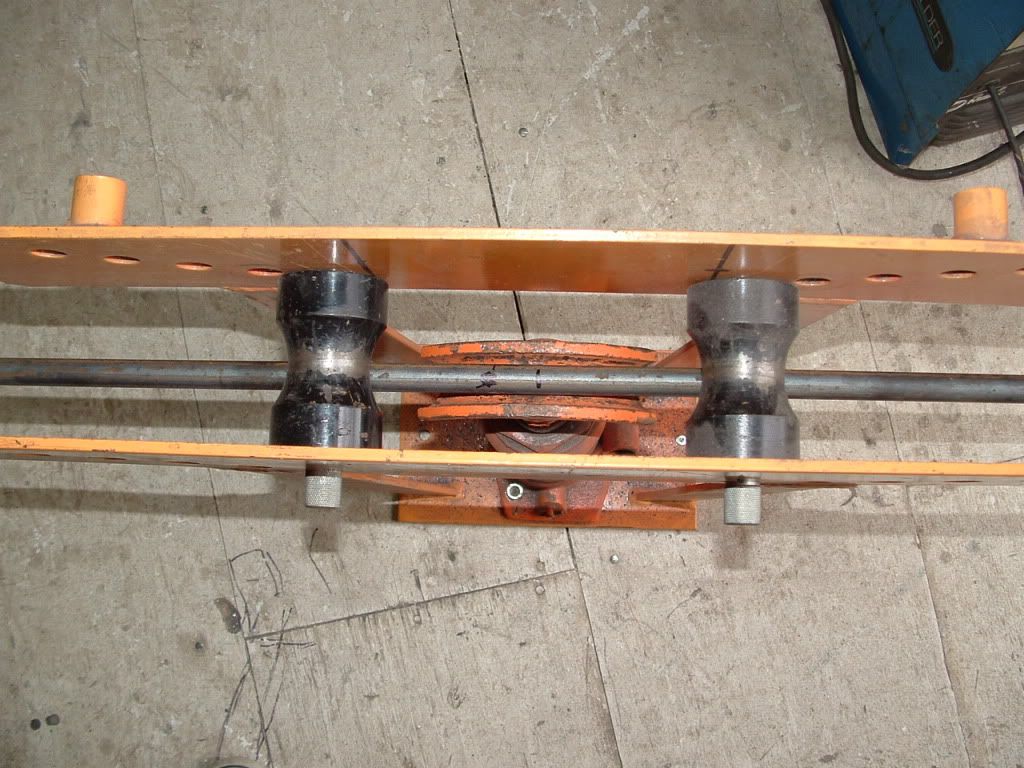
You bend it all you can and it still won't be enough.

orangebikerebuild006.jpg


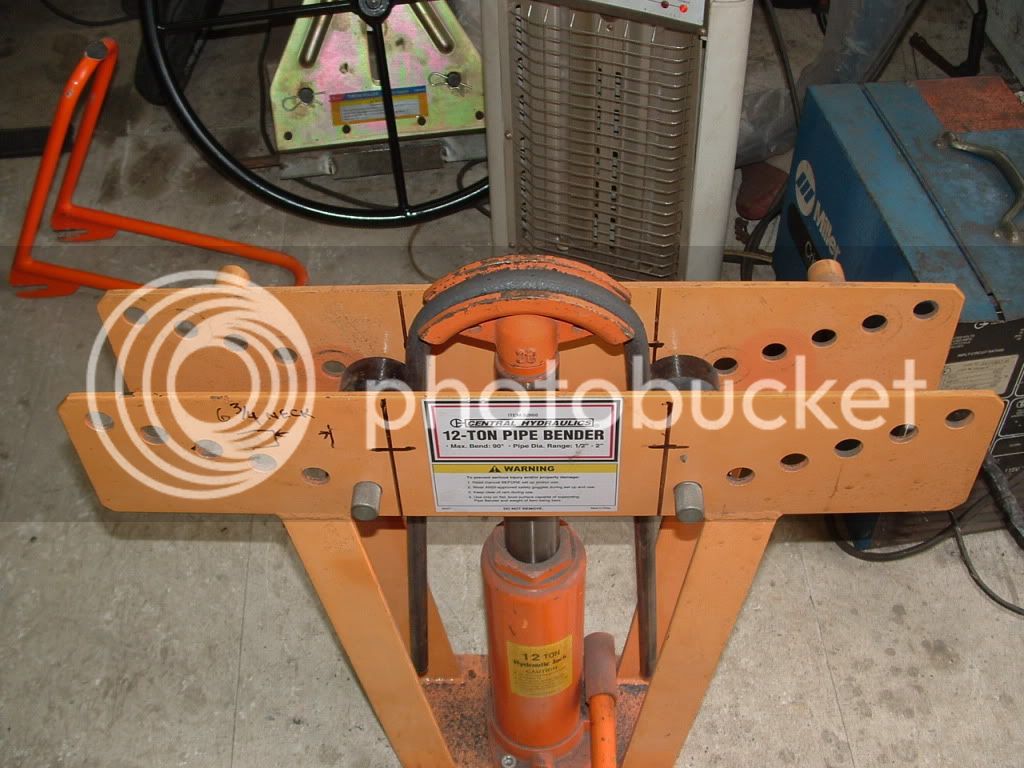
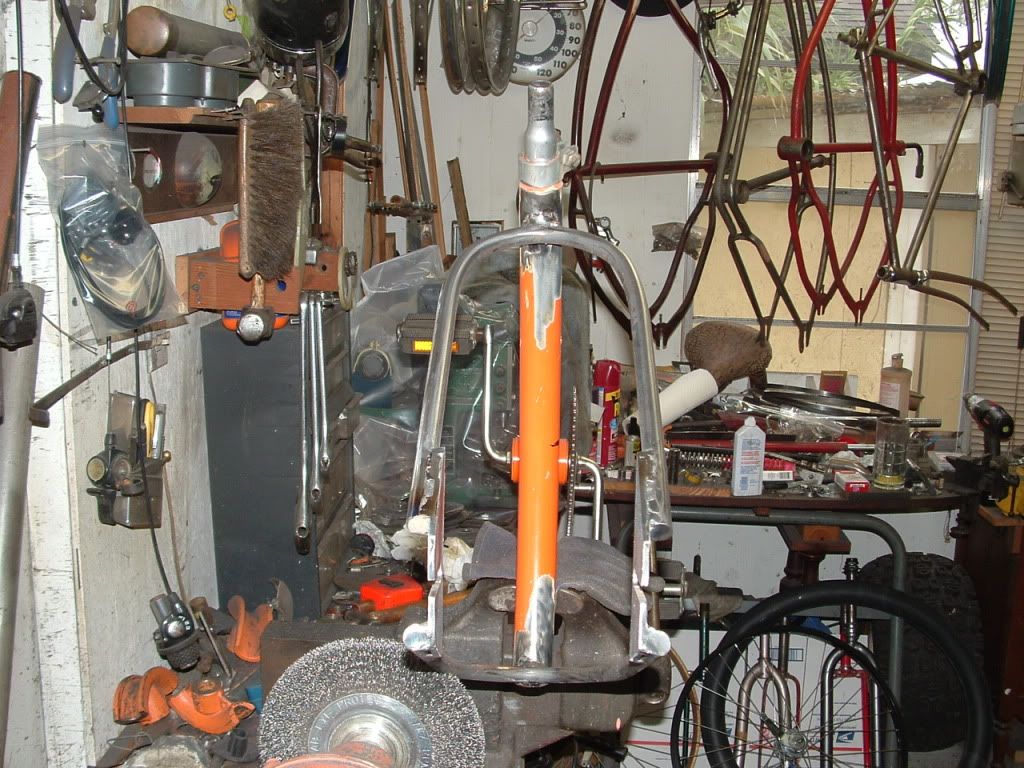
I take the shoe and leave it on my rod and stick it in my vice and bend it the rest of the way.

orangebikerebuild007.jpg

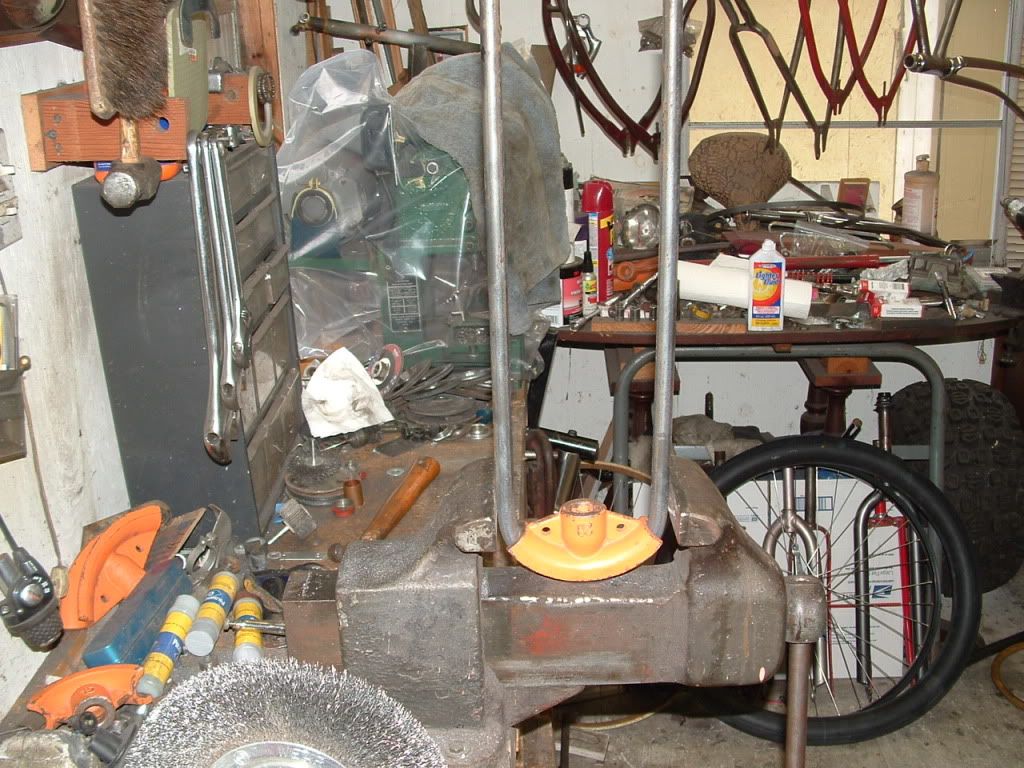
Now you can take a large hammer and kinda finesse them into the same shape. In other words lay them on your vice or something hard and beat the heck out of them. You will kinda feel like a blacksmith. This is both of them together.
orangebikerebuild008.jpg


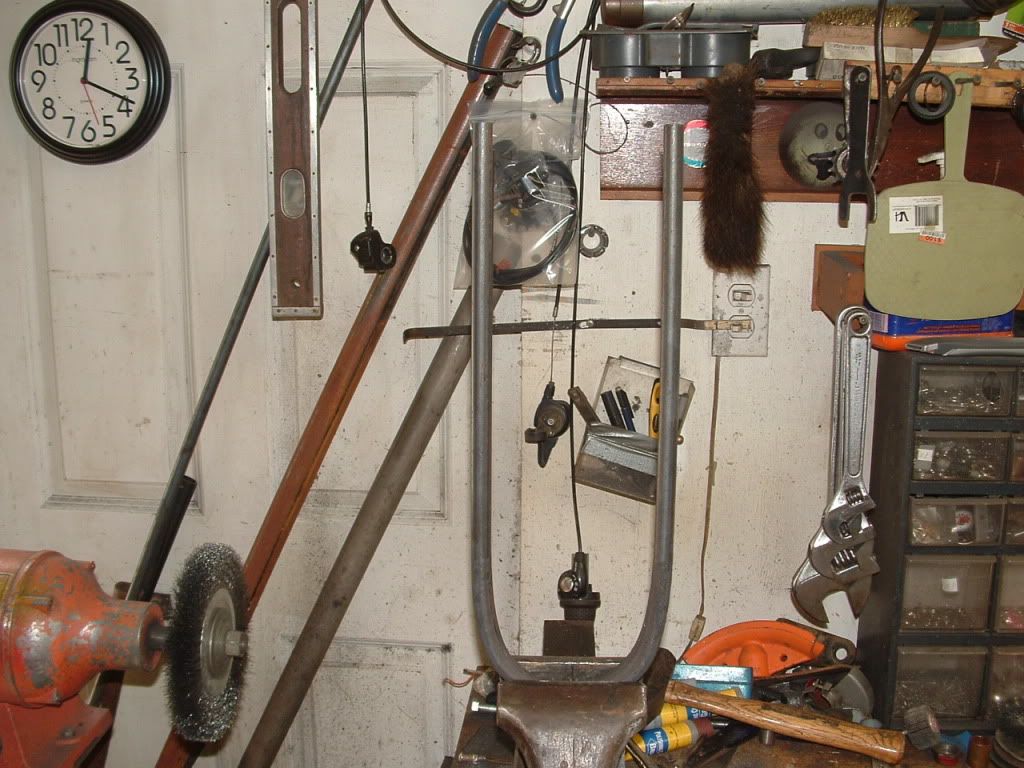
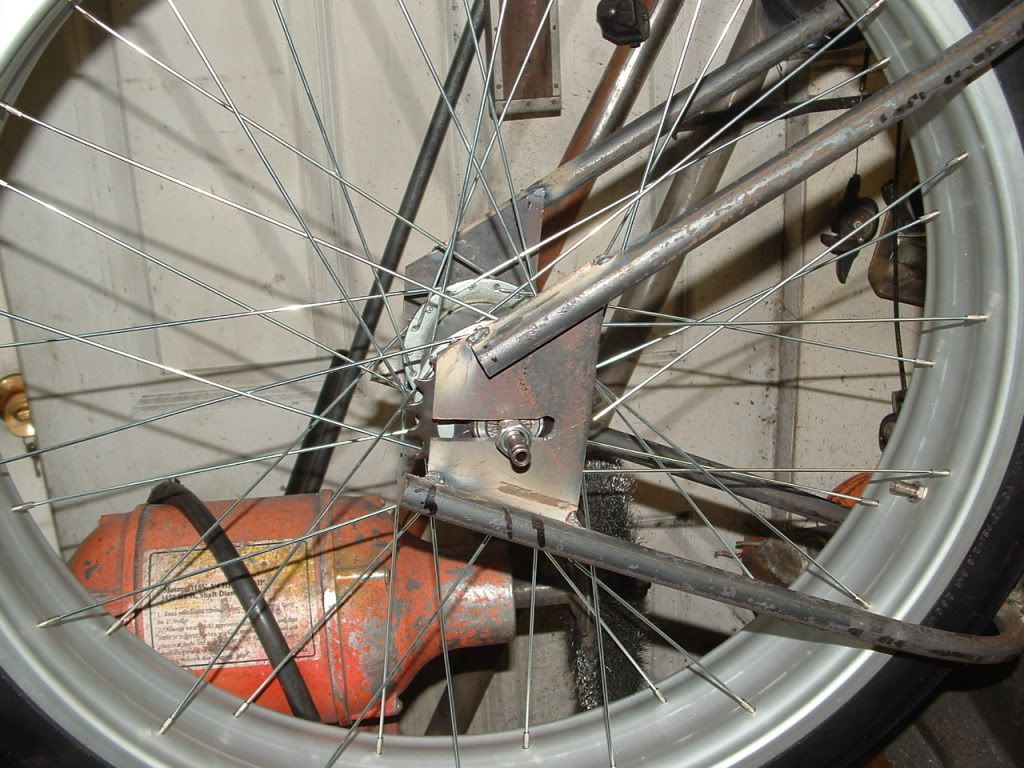
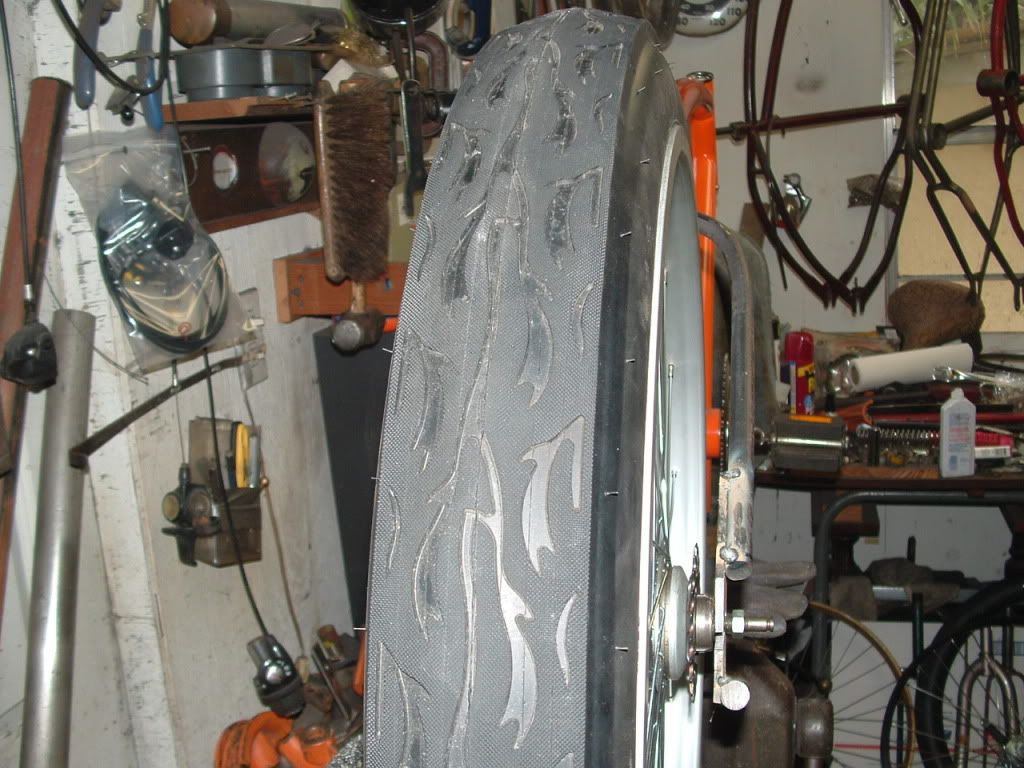
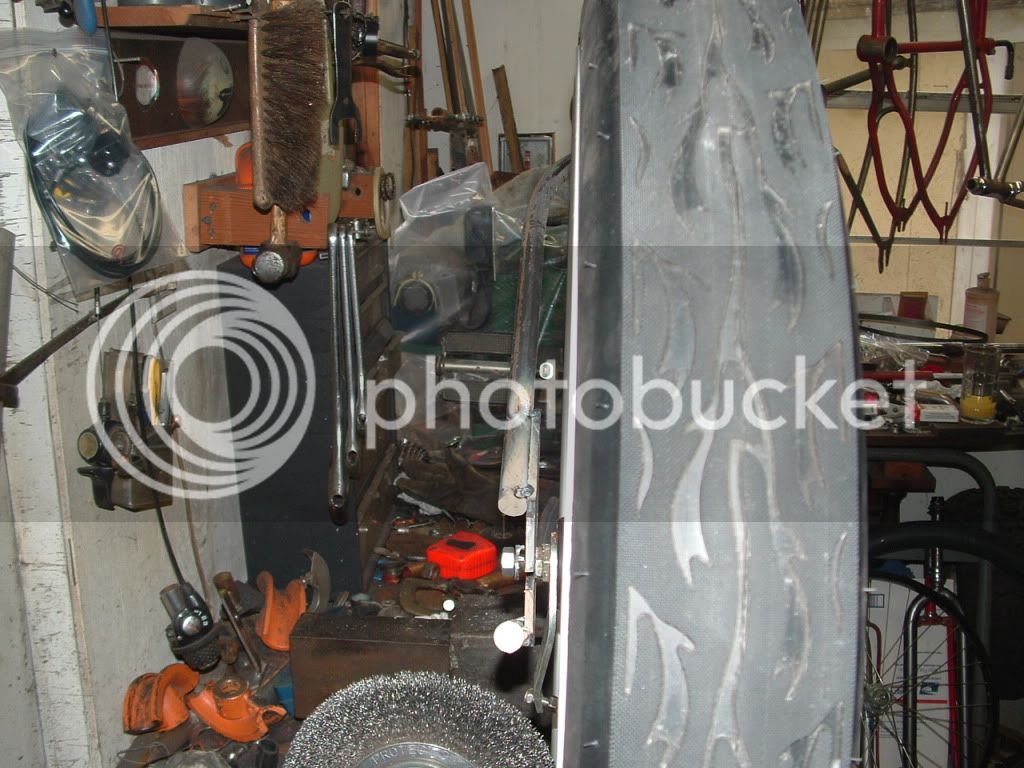
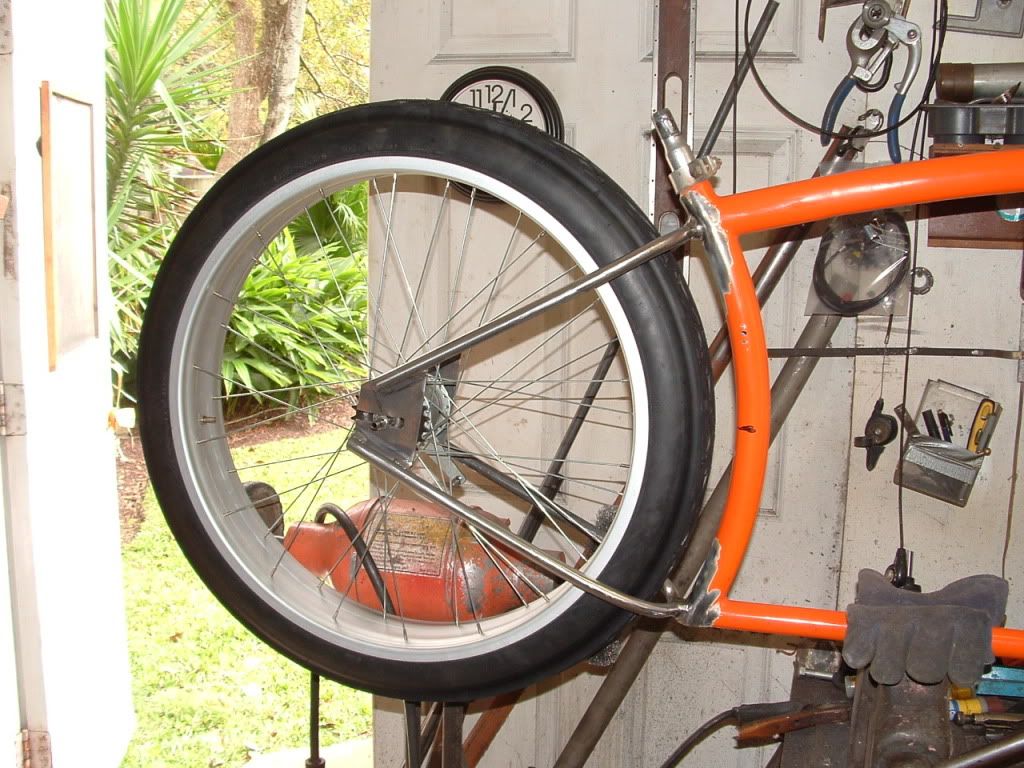
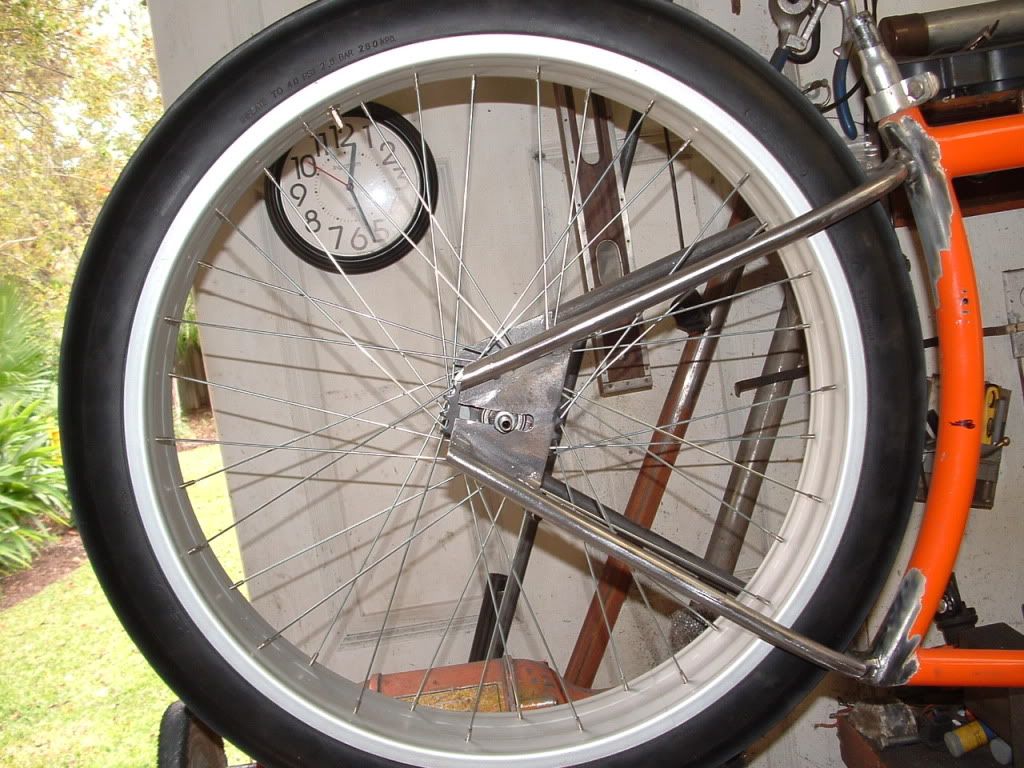
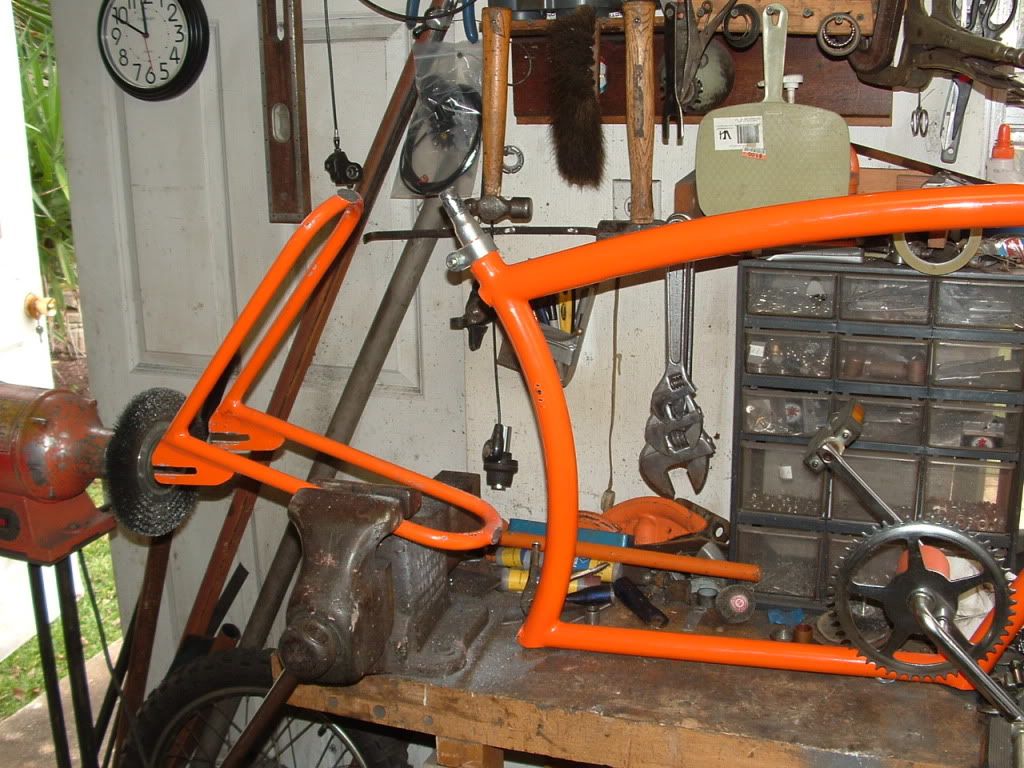
I tacked them on to the frame and started to figure out where my drop outs should be and what they will look like. If your like me when you tack the stays on then you decide they need some adjustment , you will break the tacks several times. You keep tacking and form this big booger weld. Not a biggie....grind it back down and weld it right when the location of the stays are right.
orangebikerebuild010.jpg

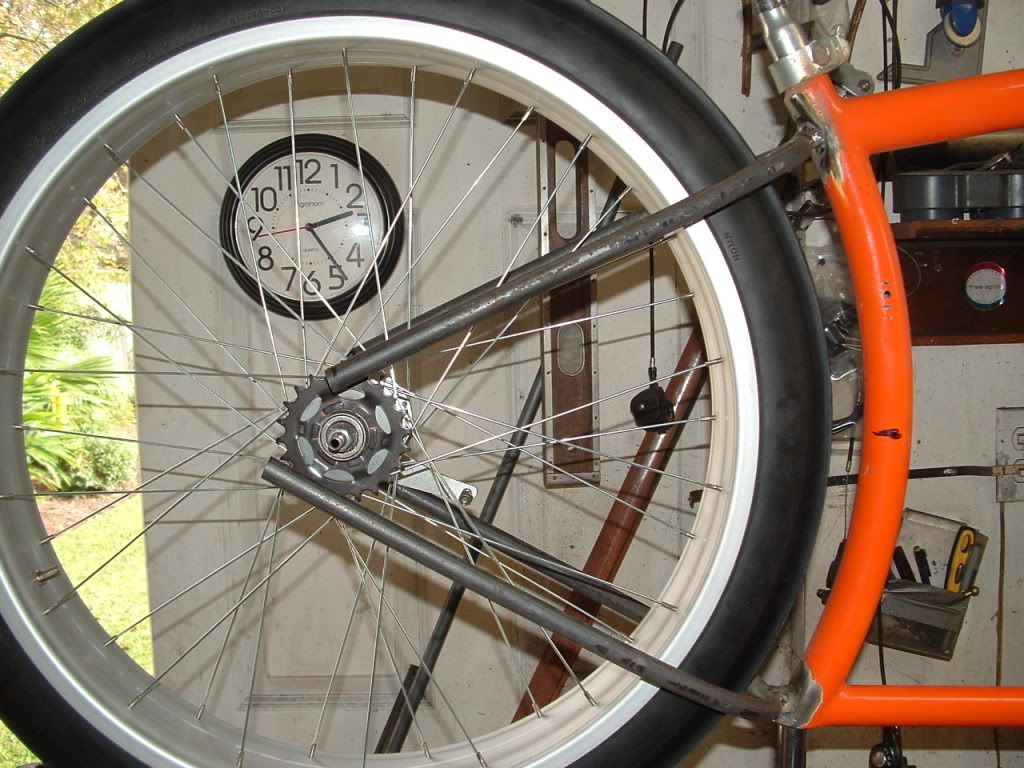
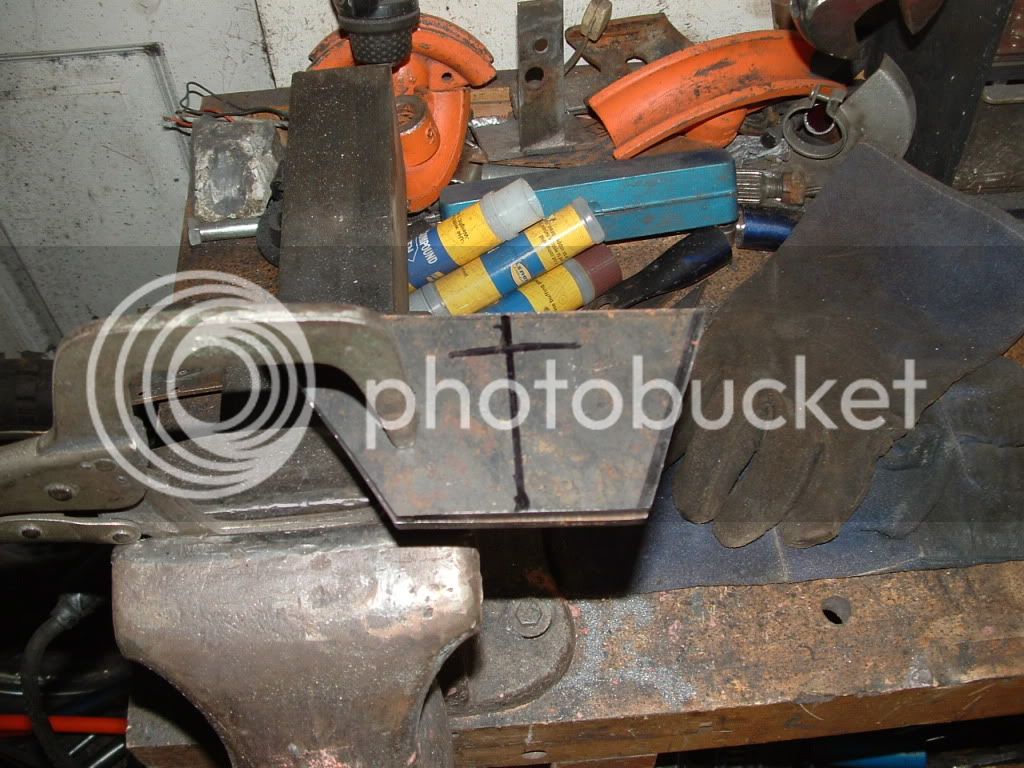
So now I'm working on the dropouts. Got them cut out ,but still have to put the slots in them.....more later
 
Thanks Marks. Glad yall are enjoying my redo. Its funny when you change one thing , there are 3 or 4 other things that need to be changed to make it work. Noticed my front sprocket is in too far now. Maybe flipping the sprocket over will solve it. If not I will have to find one that has more dish. Or build one. :shock:
 
I have to ask... Did you hesitate a little before cutting that beautiful frame? I know it will look good when you are done but still... Good job so far, looking forward to see the rest.

Edit: I just noticed the clock on the wall... we can see how long your progress took you. :D
 
I'm not sure what I like about my Uncle's instructions better...the photos or his commentary. :lol:

Just when you thought you'd seen Uncle Stretch do everything. :mrgreen:
 
BrunneCustoms said:
I have to ask... Did you hesitate a little before cutting that beautiful frame? I know it will look good when you are done but still... Good job so far, looking forward to see the rest.

Edit: I just noticed the clock on the wall... we can see how long your progress took you. :D

Naw I built it once I can build it again. It would be really silly of me to buy a bunch of big rims and tires and not use them. They are going on something if it has to be my chevy van.

Steve you have to keep it funny when you tear up a perfectly good bike and waste alot of money on silly parts, that should have been left at Cyclesus. It reminds me of trying to fix a fan belt falling off on that black and turquoise 48. I got new brackets , then decided to paint the motor, your dad said it would be easier to pull it to paint, and while it was out might as well check the bearings and have a valve job done. It ended up costing me $3000 to fix that belt. It did wind up with a cool cam though. :lol: :roll: :roll:
 
ive had that problem before too. where is the line between thurough and too thurough? if you already have it half done, silly not to just do something else while youre at it. so how do you know when to stop? my budget tells me when. :lol:
 
Still we have to get the economy moving again. My new tv will be here on the 2nd. :lol: :lol:
I like to think of this as the snowball effect , that when it starts there is no stopping it. :lol: Its just a little work on changing the frame. if I wasn't so covered up with bikes I would have just built something that these tires would have fit. I thought you just did this silly stuff when your young....guess not. My dad said one time that he had watched me for a lot of years and every time I bought a new truck , I bought big wheels and tires and changed them. He asked why I didn't just buy a truck that had them on it already. I never had an answer.
 
Uncle Stretch said:
Still we have to get the economy moving again. My new tv will be here on the 2nd. :lol: :lol:
I like to think of this as the snowball effect , that when it starts there is no stopping it. :lol: Its just a little work on changing the frame. if I wasn't so covered up with bikes I would have just built something that these tires would have fit. I thought you just did this silly stuff when your young....guess not. My dad said one time that he had watched me for a lot of years and every time I bought a new truck , I bought big wheels and tires and changed them. He asked why I didn't just buy a truck that had them on it already. I never had an answer.

It's simple... the wheels and tires are something you want on there. The truck was what you were looking for in a truck. It's easier to find a truck that you really like and add what you want later than it is to find a truck you like done up the way you like. :D I know, I'm a truck guy too.
Same with a bike. It's no fun just buying the bike already done. It's more fun to find one that's "close enough" and make it exactly what you want. Even if that means chopping it back up again later :p
 
i agree. sometimes the trip is more fun than the destination. some people spend lots of money remodeling a perfectly good house just to make it "thiers". same thing here. customizing and personalizing are really the same thing.
 
You need to draw you out some drop outs. I'm getting lazier all the time , so I have reverted to simple ones. Figure out where the slot goes and mark it. Then drill a hole the size of an axle at the end of your slot....then scribe two lines to the other end and cut them out. If you clamp both plates together and cut the slot together , then your drop outs will be the same.

morepics001.jpg


Once you get your drop outs tacked in ....stick a wheel in it . You will know really quick if everything is right ,and you won't have to cut a bunch of weld if you have to change something.

morepics002-1.jpg


Right about now you thinking ....Man 5/8'' solid rod on one side....3/16'' plate on the other...I can burn these babbies in with no chance of making any holes. You trot over to your 110 wire welder and turn the knob to 4 and then crank the wire speed wide open. You will weld for about a minute and then your welder will shut off.....oh man it broke. Not so you have just learned about the duty cycle. Now it will come on again and weld for a little bit more and shut off again. Its hot...leave it alone . Grab you grinder and sand down the welds while you wait. Then weld some more.

Here is a few pics of it with my wheel in it. Looks pretty good so far.

morepics003-1.jpg


morepics004-1.jpg

Got plenty of room now...Hummm wonder if they make a 6'' wide rim :lol: :lol: :lol:
morepics006.jpg
 
"Got plenty of room now...Hummm wonder if they make a 6'' wide rim"
:lol: :lol: :mrgreen: :lol: :lol: :mrgreen: :lol: :lol:
 
Ok after looking at my new dropout I was going to cut it down from the top bar down to the slot. It looks better with a small piece added to match the drop out

changed002.jpg


changed003.jpg
 
Its getting there Mark. I still have to build an offset rear sprocket , and a fork to take the wide wheel. Oh and then paint everything.
 
Markm said:
off set how much? I may have something...

If you laid one flat on a surface ,I need it from the back to the front a little more that 3/8'' offset. It has those three tabs for a nexus or any of them I guess.
 
Back
Top