- COMPETITIONS
- THE COMPETITION ARCHIVES
- THEME BUILD OFFS
- MUSCLE BIKE // BMX BIKE BUILD OFF 2020-21
- MBBOBUILD JOURNALS - 2020-21
You are using an out of date browser. It may not display this or other websites correctly.
You should upgrade or use an alternative browser.
You should upgrade or use an alternative browser.
POISON APPLE: '79 Schwinn Fair Lady Trike
- Thread starter Bike from the Dead
- Start date


Help Support Rat Rod Bikes Bicycle Forum:
This site may earn a commission from merchant affiliate
links, including eBay, Amazon, and others.

Yeah that springer looks normal.
Sent from my iPhone using Tapatalk
Sent from my iPhone using Tapatalk
Ok, I got 5 different front 24" wheels in exchange for a couple Schwinn s-7 wheels earlier today. Some have mostly good spokes, others have some good and some bad. I figure that I could make 2 good wheels out of what I've got now. As for the rear wheel, I'm either going to need to find a replacement, or just replace the spokes. I'll figure it out soon enough.
Okay, I've been thinking more about my budget and the final "good enough" look for this trike. As much as I love the stance from flipping the springer fork steerer tube upside-down, I'd have to spend even more money to get the trike rideable like this, as I'd need to spend an additional $50-$80 on a taller set of handlebars, and I'd need to have a piece fabricated to cover the top fork bearings as the steerer tube was never designed to be upside-down.
Plus, from a designer's perspective, the seat and handlebars will both stick out like a sore thumb, standing nearly twice the height of the body of the trike, and nearly vertical, for that matter. Ultimately, I'd spend at least $100-$130, give or take, to have less-than-good-enough results, and that's without color-matching the paint for the wood tank and getting materials for the rear box.

Here's where I think the happy balance of budget and aesthetics lies.

Yeah, the stance looks goofy compared to the previous picture, but I think it's the best possible "goofy" given my budget. The seat, high as it is, doesn't look too out of place, especially paired with the handlebars where they're positioned. If I'm just going for the bare minimum, all I need to make this version functional is to get the wheels sorted out, and get a new chain. That means I could make this a functional rider for about $40-$50, since I don't need to get new handlebars and fabricate anything else. Plus, I could spend the extra money it would cost to make the other version to color-match some paint for the tank, make the rear box, and add some graphics to the tank and chain guard. All-in-all, I can have a good-looking first version of this trike to ride around on while I save up to build this trike the way I really want.
I know it's not much of an update, but I figured I'd share some of my thoughts about the direction of this trike as they come to me. I'm still going to try and illustrate the final "all-out" version of this trike sometime this week, but for now, I'm shooting for "good enough."
Plus, from a designer's perspective, the seat and handlebars will both stick out like a sore thumb, standing nearly twice the height of the body of the trike, and nearly vertical, for that matter. Ultimately, I'd spend at least $100-$130, give or take, to have less-than-good-enough results, and that's without color-matching the paint for the wood tank and getting materials for the rear box.
Here's where I think the happy balance of budget and aesthetics lies.
Yeah, the stance looks goofy compared to the previous picture, but I think it's the best possible "goofy" given my budget. The seat, high as it is, doesn't look too out of place, especially paired with the handlebars where they're positioned. If I'm just going for the bare minimum, all I need to make this version functional is to get the wheels sorted out, and get a new chain. That means I could make this a functional rider for about $40-$50, since I don't need to get new handlebars and fabricate anything else. Plus, I could spend the extra money it would cost to make the other version to color-match some paint for the tank, make the rear box, and add some graphics to the tank and chain guard. All-in-all, I can have a good-looking first version of this trike to ride around on while I save up to build this trike the way I really want.
I know it's not much of an update, but I figured I'd share some of my thoughts about the direction of this trike as they come to me. I'm still going to try and illustrate the final "all-out" version of this trike sometime this week, but for now, I'm shooting for "good enough."
You couldn't put the stem in the bottom of the steerer tube with it flipped?
No, unfortunately. The bolt at the bottom of the steerer tube goes right through the middle of that area.You couldn't put the stem in the bottom of the steerer tube with it flipped?
Had a rather hectic week last week, but I was finally able to make some progress this week. I revisited my digital mockup on Monday, and between then and today, I made some revisions to my previous design. I probably won't have rear fenders on the actual trike until after I've finished everything else, but I really want those fenders in the final design.


The first big change to my design was how I'd powder coat the frame. I remembered @Rat Pilot's StRATo Flyer from last year's RRBBO had this awesome "hidden" seat tube that helped highlight the unique shape of the frame, and I wanted to try it out on my trike.

By making the seat tube satin black, it'll help highlight this "double appleseed" shape the tank helps to create.

The next big change was figuring out the decals. The chain guard was where I really got the ball rolling. I got the idea for this stripe from a couple sources: the roof stripes on a '71/'72 Plymouth Roadrunner, The side stripes on Tony Angelo's Fishtail Cuda, and MUTT, a car from the Disney cartoon Motorcity.


I also skewed the font on my username so it matched the slant on the rear of the chain guard. I also added a little 3, for "3 wheels." The tank decals took the longest to figure out. I wanted to have as much of the green paint showing as possible, but still have a cool design in satin black. I ditched using my "3D" apple icon, and went for a one-color icon. I wanted it to look like a blend of the classic Dodge Super Bee design and the modern Dodge Hellcat and Viper designs.


I also did a quick mockup of where the bolts/screws that hold the tank together will go. I want to avoid putting decals over bolts or vice versa.

I like the idea of having stripes going down the length of the fenders, but I'm still figuring out what exact direction I'm going with that. I'll worry about that once I get around to making a pair of fenders.

All in all, I think I've found my final "good enough" design, and I'm itching to make it happen. I still have a few things to figure out, like the wheels and color-matching paint for the tank, but I'm confident that if I can't get the trike at least functional by the March 15th deadline, I can still make a great deal of progress by then.
The first big change to my design was how I'd powder coat the frame. I remembered @Rat Pilot's StRATo Flyer from last year's RRBBO had this awesome "hidden" seat tube that helped highlight the unique shape of the frame, and I wanted to try it out on my trike.
By making the seat tube satin black, it'll help highlight this "double appleseed" shape the tank helps to create.
The next big change was figuring out the decals. The chain guard was where I really got the ball rolling. I got the idea for this stripe from a couple sources: the roof stripes on a '71/'72 Plymouth Roadrunner, The side stripes on Tony Angelo's Fishtail Cuda, and MUTT, a car from the Disney cartoon Motorcity.
I also skewed the font on my username so it matched the slant on the rear of the chain guard. I also added a little 3, for "3 wheels." The tank decals took the longest to figure out. I wanted to have as much of the green paint showing as possible, but still have a cool design in satin black. I ditched using my "3D" apple icon, and went for a one-color icon. I wanted it to look like a blend of the classic Dodge Super Bee design and the modern Dodge Hellcat and Viper designs.
I also did a quick mockup of where the bolts/screws that hold the tank together will go. I want to avoid putting decals over bolts or vice versa.
I like the idea of having stripes going down the length of the fenders, but I'm still figuring out what exact direction I'm going with that. I'll worry about that once I get around to making a pair of fenders.
All in all, I think I've found my final "good enough" design, and I'm itching to make it happen. I still have a few things to figure out, like the wheels and color-matching paint for the tank, but I'm confident that if I can't get the trike at least functional by the March 15th deadline, I can still make a great deal of progress by then.
Made some good progress this weekend! I began the teardown of all the 24 inch wheels I got for this trike on Friday, and as of now, I've only got one wheel left to disassemble! Here are all the wheels I had planned to part out to make 3 good wheels. Note how I already removed one spoke from the rear coaster brake wheel in the first picture.


When I found out that they don't make spike nuts in the thread size I need for all my wheels, I just decided to forgo matching the 2 front wheel hubs in favor of using the quick-release hub from The Trashliner Trike's original front wheel. This'll go on the front front wheel, so transporting this trike and removing the front wheel from the springer fork will be that much easier.


Extracting the hub turned out to be much easier than removing the tire and tube from the rim. I have now found that I hate steel bead tires for this exact reason: they're so hard to remove, you are almost guaranteed to mess up the tube, tire and/or wheel in the process.


First night's progress: While removing the tire from the first wheel was a pain, removing the spokes from that wheel and 2 others proved to be oddly satisfying. I just shot some PB Blaster on the spoke nipples, let it soak for a bit, and all but 3 spokes on the blue Schwinn wheel came off without any trouble. I shot the last 3 stubborn spokes with more PB Blaster, plus the rest of the wheels I intended to take apart, and let everything sit and soak overnight. I cracked the garage door a bit to air out some of the fumes. What I should have done was just leave the whole dang garage door open, because PB Blaster smells as powerful as its rust-penetrating capabilities!

Something tells me that the stronger PB Blaster smells, the harder it's working, because I decided to try taking apart the worst wheel next.

Yeah, that wheel. I had already succeeded in removing one spoke without snapping the threads earlier, so I figured that I'd see just how many spokes I could remove without breaking the threads. First though, I had to take apart the coaster brake. These next few photos are here mostly for reference when I put this back together, just in case.


Okay, to everybody who told me that the spokes on that wheel were shot, toast, broken or bound to break when I try to remove them, I just want to say:

PB BLASTER FOR THE WIN!!!
Seriously, this stuff is magic in a can! I got every spoke to bust loose from those cruddy spoke nipples! Granted, some of those spokes will most likely have to be replaced, but most of them look like all they need is some Evaporust and that's it! The spoke nipples, on the other hand, are all toast. Luckily, I think I have plenty of good replacements to solve that issue.
Something else happened yesterday. I was browsing Craigslist again, and saw a couple free kids' bikes up for grabs nearby. I picked up this 20 inch Huffy, mostly because it has a black coaster brake hub, which don't have enough of. Unfortunately, it's a 28-spoke hub. I really need a 36-spoke hub. Still, those 20 inch wheels might come in handy later. I'd also try using the handlebars, but there's no way to separate them from the stem, at least from what I can tell.

Today's progress so far: 9 out of 10 wheels have been completely disassembled. I started on the 10th earlier, but it's even more stubborn than those blue Schwinn wheels. I'm letting it soak in more PB Blaster before I start on it again.

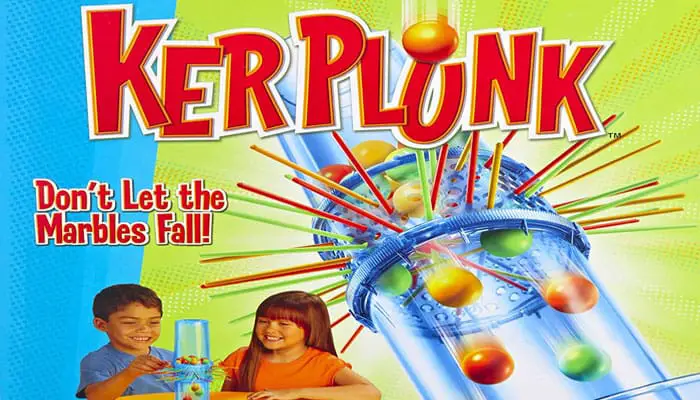
I'm genuinely surprised just how much I enjoyed taking apart these wheels. It reminded me of one of my favorite childhood games, Ker-Plunk, but with wheel spokes and hubs!
That's not the best part, though. Since I've got these wheels almost completely disassembled, and Dad's schedule is open tomorrow, we're going to try and get everything sandblasted and powder coated tomorrow! I'm particularly excited to try out the new sandblaster nozzle, as the old one was absolutely wallered out! I remember having a lot of issues sandblasting my RRBBO15 entry last year because of that! (NOTE: The old nozzle and the new nozzle are both supposed to be the same size.)
.jpg")
I've got a bit left to do in order to get ready for tomorrow, so that's all for now.
By the way, what do you guys typically use to clean grease off bearings and coaster brake parts? I've used Simple Green before, but is there a better solution?
When I found out that they don't make spike nuts in the thread size I need for all my wheels, I just decided to forgo matching the 2 front wheel hubs in favor of using the quick-release hub from The Trashliner Trike's original front wheel. This'll go on the front front wheel, so transporting this trike and removing the front wheel from the springer fork will be that much easier.
Extracting the hub turned out to be much easier than removing the tire and tube from the rim. I have now found that I hate steel bead tires for this exact reason: they're so hard to remove, you are almost guaranteed to mess up the tube, tire and/or wheel in the process.
First night's progress: While removing the tire from the first wheel was a pain, removing the spokes from that wheel and 2 others proved to be oddly satisfying. I just shot some PB Blaster on the spoke nipples, let it soak for a bit, and all but 3 spokes on the blue Schwinn wheel came off without any trouble. I shot the last 3 stubborn spokes with more PB Blaster, plus the rest of the wheels I intended to take apart, and let everything sit and soak overnight. I cracked the garage door a bit to air out some of the fumes. What I should have done was just leave the whole dang garage door open, because PB Blaster smells as powerful as its rust-penetrating capabilities!
Something tells me that the stronger PB Blaster smells, the harder it's working, because I decided to try taking apart the worst wheel next.
Yeah, that wheel. I had already succeeded in removing one spoke without snapping the threads earlier, so I figured that I'd see just how many spokes I could remove without breaking the threads. First though, I had to take apart the coaster brake. These next few photos are here mostly for reference when I put this back together, just in case.
Okay, to everybody who told me that the spokes on that wheel were shot, toast, broken or bound to break when I try to remove them, I just want to say:
PB BLASTER FOR THE WIN!!!
Seriously, this stuff is magic in a can! I got every spoke to bust loose from those cruddy spoke nipples! Granted, some of those spokes will most likely have to be replaced, but most of them look like all they need is some Evaporust and that's it! The spoke nipples, on the other hand, are all toast. Luckily, I think I have plenty of good replacements to solve that issue.
Something else happened yesterday. I was browsing Craigslist again, and saw a couple free kids' bikes up for grabs nearby. I picked up this 20 inch Huffy, mostly because it has a black coaster brake hub, which don't have enough of. Unfortunately, it's a 28-spoke hub. I really need a 36-spoke hub. Still, those 20 inch wheels might come in handy later. I'd also try using the handlebars, but there's no way to separate them from the stem, at least from what I can tell.
Today's progress so far: 9 out of 10 wheels have been completely disassembled. I started on the 10th earlier, but it's even more stubborn than those blue Schwinn wheels. I'm letting it soak in more PB Blaster before I start on it again.
I'm genuinely surprised just how much I enjoyed taking apart these wheels. It reminded me of one of my favorite childhood games, Ker-Plunk, but with wheel spokes and hubs!
That's not the best part, though. Since I've got these wheels almost completely disassembled, and Dad's schedule is open tomorrow, we're going to try and get everything sandblasted and powder coated tomorrow! I'm particularly excited to try out the new sandblaster nozzle, as the old one was absolutely wallered out! I remember having a lot of issues sandblasting my RRBBO15 entry last year because of that! (NOTE: The old nozzle and the new nozzle are both supposed to be the same size.)
I've got a bit left to do in order to get ready for tomorrow, so that's all for now.
By the way, what do you guys typically use to clean grease off bearings and coaster brake parts? I've used Simple Green before, but is there a better solution?
WOOHOO! Last wheel's done!
MattiThundrrr
Rattus All Terrainus
Glad to see you've got your motivation back.
Thanks. Glad that I'm felling better about this project too. I know it's probably not going to be done by the 15th, heck, it might not even be functional, but I'm not stressing out about it. I'm just going at whatever pace I can, and as long as I'm happy with the end result, I don't care when it gets done. I'm just happy to be finally making some progress on it at last!Glad to see you've got your motivation back.
MattiThundrrr
Rattus All Terrainus
Yeah, sometimes it is tough, but you have to remember that ultimately it's about the build, not the Build Off.
Well, here we go again. I was all set up to sandblast my parts today, and I immediately ran into some problems. The sandblaster wasn't blasting any sand.
Strike one.
Dad thinks there's a clog in the nozzle, which had happened before. So, he busts out some pipe wrenches to try and remove the nozzle so it can be fixed. He can't get it to budge; it's on too tight. He tries harder, and the aluminum housing around the nozzle breaks into several pieces.


Strike two.
Dad suggests I take everything over to a shop where he sends stuff to get sandblasted, except they charge $100 per hour. I'm not about to pay someone $100-$300 to do something I could do myself at my Dad's shop, especially when money's as tight as it is for me right now. So, I'll have to wait until Dad can remove the busted nozzle and replace it before I can try again.
Strike three, I'm out of the game.
There is no way now that I'm going to get this trike at least powder coated and functionally assembled by March 15th now. However, as much as this sucks, this might be a blessing in disguise.
What I'm going to do now is focus on other parts of the build that don't require sandblasting/powder coating. I'm going to try Evaporust on all my chrome parts and wheel spokes, figure out the tank and storage box, decide how I'm going to add some fenders, design decals for the trike, and figure out any other small details while I'm waiting to sandblast everything else.
I'll keep the updates coming, just going to have to do everything in a slightly different order.
Strike one.
Dad thinks there's a clog in the nozzle, which had happened before. So, he busts out some pipe wrenches to try and remove the nozzle so it can be fixed. He can't get it to budge; it's on too tight. He tries harder, and the aluminum housing around the nozzle breaks into several pieces.
Strike two.
Dad suggests I take everything over to a shop where he sends stuff to get sandblasted, except they charge $100 per hour. I'm not about to pay someone $100-$300 to do something I could do myself at my Dad's shop, especially when money's as tight as it is for me right now. So, I'll have to wait until Dad can remove the busted nozzle and replace it before I can try again.
Strike three, I'm out of the game.
There is no way now that I'm going to get this trike at least powder coated and functionally assembled by March 15th now. However, as much as this sucks, this might be a blessing in disguise.
What I'm going to do now is focus on other parts of the build that don't require sandblasting/powder coating. I'm going to try Evaporust on all my chrome parts and wheel spokes, figure out the tank and storage box, decide how I'm going to add some fenders, design decals for the trike, and figure out any other small details while I'm waiting to sandblast everything else.
I'll keep the updates coming, just going to have to do everything in a slightly different order.
After the debacle with the sandblaster, I decided to switch gears and work on the tank next. I needed to mock up the trike again (seriously, how many times have I disassembled/reassembled this trike?) so I could figure out how much clearance I had with the springer fork. I used the 20 inch wheel up front since all my 24 inch wheels are disassembled.

I also found yesterday that I didn't have any wood with the right dimensions for the tank, and while Dad might have some scraps I can use, it looks like I'll possibly be shopping for materials today.
I also found yesterday that I didn't have any wood with the right dimensions for the tank, and while Dad might have some scraps I can use, it looks like I'll possibly be shopping for materials today.
Well, I had planned on continuing with my "good enough" design, but after Dad saw how I looked sitting on the seat with the trike mocked up as is, I'm not sure what I'm going to do now. He said, and I quote, that I "look like the witch from The Wizard of Oz on her bike, sitting up straight and stiff." He added that I looked all scrunched up sitting on the trike that way. He suggested just building it the way I really want, with the seat sitting between the rear tires, and the springer fork done up the way @Reallybigtim does his forks.

So, now I really don't know what I'm going to do. One option looks goofy, but fits my current budget, and the other option would look best, but I would have to let all the parts sit for however long while I gather the funds to build it. I could also use the funds to finish up my RRBBO15 entry, Dumpster Diamond, and probably have more than enough left over to finish up my other bikes. Or I could put that money towards something else.

Right now, I think I need to sketch up my ideas for the "best final" design for this trike, and go from there. I think I'll do some sketches for the finishing touches I want to add to Dumpster Diamond, too.
So, now I really don't know what I'm going to do. One option looks goofy, but fits my current budget, and the other option would look best, but I would have to let all the parts sit for however long while I gather the funds to build it. I could also use the funds to finish up my RRBBO15 entry, Dumpster Diamond, and probably have more than enough left over to finish up my other bikes. Or I could put that money towards something else.
Right now, I think I need to sketch up my ideas for the "best final" design for this trike, and go from there. I think I'll do some sketches for the finishing touches I want to add to Dumpster Diamond, too.
- Joined
- May 9, 2020
- Messages
- 1,026
- Reaction score
- 3,905
I think a banana seat and a leaned back seat post would be a nice touch and slide you back on the trike a bit. Looking good!After the debacle with the sandblaster, I decided to switch gears and work on the tank next. I needed to mock up the trike again (seriously, how many times have I disassembled/reassembled this trike?) so I could figure out how much clearance I had with the springer fork. I used the 20 inch wheel up front since all my 24 inch wheels are disassembled.
View attachment 152448
I also found yesterday that I didn't have any wood with the right dimensions for the tank, and while Dad might have some scraps I can use, it looks like I'll possibly be shopping for materials today.
- Joined
- Sep 2, 2020
- Messages
- 182
- Reaction score
- 462
I love those renderings and graphics. You’ve got a great vision for what you want. I say heck with the deadline & build the trike you want no matter how long it takes. I feel like I rushed my own builds and I know I’ll see every corner I cut until perpetuity!
I did mock it up with a banana seat a while back. I think it'd look alright with a banana seat, might even improve the seating position, but I can't say I like the sissy bar cutting through the box in the back. I might still consider it, though. Right now, the question is whether I'm going to build it up like my "good enough" render shows, or if I'm going to wait and build it up the way I ultimately want when I can afford it.I think a banana seat and a leaned back seat post would be a nice touch and slide you back on the trike a bit. Looking good!
Thanks! Yeah, the deadline's a pipe dream at this point. I like the idea of just building the trike the way I ultimately want instead of just settling for "good enough," but I really don't want to be sitting on a pile of parts indefinitely while I save up the funds. I know that letting a project sit until it can be done "right" may not bug most folks here, but nearly all my bikes have been piles of parts and half-baked ideas ever since I got into this hobby 3 years ago, with only one bike project ever being "finished." I like the idea of just getting this trike built with the parts I already bought so I can ride it around while I save up to redo it. Plus, it might help me figure out more ideas for how I'd want to do it up next time.I love those renderings and graphics. You’ve got a great vision for what you want. I say heck with the deadline & build the trike you want no matter how long it takes. I feel like I rushed my own builds and I know I’ll see every corner I cut until perpetuity!
I remember when I was building my 1950 MW/Hawthorne, Dumpster Diamond, for the RRBBO last year, I had a number of really big ideas for how I ultimately planned to build it, only to have to settle for a "good enough" design. Well, after having looked at that "good enough" design for about 6 months now, I've found that I really don't want to go as crazy with the final look as I had initially planned. I like how it looks right now, even more than I did months ago, and now all I really want to do to this bike is a few smaller enhancements and touchups to make it look finished. I'm thinking if I at least get Poison Apple done "good enough," it might help me figure out what I really want to do with it in the end.
I've looked back through this build thread a few times now, and the funniest thing about it to me is just how much of a roller coaster this whole project has been. I didn't know what I wanted to do with this Schwinn Fair Lady when I started, then I kept changing directions over and over again. I guess in the end, I don't really know what I ultimately want this trike to look like. I have some ideas, but I've had several ideas before, and not all of them stuck.
I'm used to projects going through multiple changes. I got a custom Lego train I'm currently rebuilding for the fifth time, and that's not even counting digital mockups. My own cartoon characters have been redesigned so many times in the past 20 years, they hardly even resemble their first designs. I guess that's part of being a creative individual; as I continue to improve and grow my skills, my designs continue to evolve and get refined further. I'm sure if I even built this trike into its "final" design, I'd probably want to change it again later.
Sorry if I went overkill on the reply, but I guess I just needed to see some of my thoughts on this trike project in front of me. I still don't know what the next step will be on this trike, but I guess that's the spice of it.
- Joined
- Sep 2, 2020
- Messages
- 182
- Reaction score
- 462
I totally get that. The creative mind is never done, always learning, adapting and evolving, but rarely satisfied. When they are, the results are the best. I have a ten year old guitar project on another site...obstacles happened, new skills gained and ideas changed...but for an idea or thing I’m emotionally invested in, I’d rather think something through and plan for ten years and do it right once rather than stray from my vision for the sake of convenience.
Your tank design is solid option for the fair lady or anyone wanting to build a woody bike. You could sandwich different woods...ad cutouts etc...and there are tons of step throughs. You definitely have the design chops. Prototype one & sell plans to fund the bike!
Your tank design is solid option for the fair lady or anyone wanting to build a woody bike. You could sandwich different woods...ad cutouts etc...and there are tons of step throughs. You definitely have the design chops. Prototype one & sell plans to fund the bike!
Thanks. I totally get planning ahead on a project you intend to put a lot of investment into before you begin to work on it. That's why I sketch out my ideas and trace photos of what parts I have in Photoshop. I also do the same thing in Lego Digital Designer for my custom Lego projects; bricks are expensive! For me, personally, I just find that sometimes I don't know how something will look until I can see it in 3 dimensions. I can put all my ideas down on paper, and that helps a lot, but sometimes what looks good on paper doesn't look good in practice.I totally get that. The creative mind is never done, always learning, adapting and evolving, but rarely satisfied. When they are, the results are the best. I have a ten year old guitar project on another site...obstacles happened, new skills gained and ideas changed...but for an idea or thing I’m emotionally invested in, I’d rather think something through and plan for ten years and do it right once rather than stray from my vision for the sake of convenience.
Your tank design is solid option for the fair lady or anyone wanting to build a woody bike. You could sandwich different woods...ad cutouts etc...and there are tons of step throughs. You definitely have the design chops. Prototype one & sell plans to fund the bike!
Thanks! Designing the tank for this frame has proved to be a challenge, and there are still a few ideas I have to figure out, but it is a ton of fun! I'd love to make custom tanks for other people's bikes. I'd just like to get a little more practice making tanks for my own bikes before I start making tanks for others; I'm still quite new to woodworking. I'm not sure how I'd sell plans for custom tanks, but I would love to try my hand at it!