lookin good buddy glad to see those pedals got put on something cool how i gotta vote for your bike 
You are using an out of date browser. It may not display this or other websites correctly.
You should upgrade or use an alternative browser.
You should upgrade or use an alternative browser.
20 or less
- Thread starter sensor
- Start date

Help Support Rat Rod Bikes Bicycle Forum:
This site may earn a commission from merchant affiliate
links, including eBay, Amazon, and others.
Looking good, and that idea to use wrench ends for the truss fork is great!
well..........batteries are dead now but i did get one good mock shot of what the frame will be(if i can ever find any 1" steel tubing in this town :x :x :x im almost ready to buy a goodwill bike just for the stinking tubing!) forks are done along with the trusses but i still need to make the hanger bracket (sorry hooch and all those that have photoshop.....all i have is paintshop from 98 :lol: ) thanks for the comments!
:lol: forgot the pic :lol:
here it is(with obligatory shoe shot......... :wink: )

:lol: forgot the pic :lol:
here it is(with obligatory shoe shot......... :wink: )

That's looking GOOD!..........I'm gonna have to take a couple of "foot" shots, next time!
ive made it a point to put shoes in all the pics of the kids build :roll: (thought maybe if you saw my shoes enough theyd grow on you :lol: )

$29.95
Crossroads Home Décor A Biker's Prayer, Gift for Motorcycle Riders, Inspirational Bike Picture Frame, 6451BW
Crossroads_Home_Decor

$19.99
Electra Glide Wall Decal 2ft Long Sport Harley Davidson Bike Motorcylce Sticker Man Cave Garage Boys Room Decor
FatCat Wall Graphics

$19.99
Old River Outdoors Bicycle/Motorcycle Chain Picture Frame 4" X 6" Photo - Faux Bike Chain
Old River Outdoors (USA Merchant)

$219.63
$242.17
Kulana Lakona Tide Adult Beach Cruiser Bike, 26-Inch Wheels, 7-Speed, Silver
Amazon.com
Those forks are AWSOME! Took a sec to register what you used. :lol: If you dont use that seat you could send it north! :wink: Cant wait to see her done!
L8 EM
L8 EM
I'm beginning to think your a brother from another mother! I have those same shoes!
well..........finally got everything structural welded up so its a roller now(and amazingly enough itll hold all 156#'s of me so thats a good sign :shock: )! got a donor frame for some tubing today and some bars that are currently awaiting the cuttoff wheel of death :mrgreen: soon itll be time to glaze everything up and start priming(think im gonna add a itty bitty tank to this one also)
btw..... wouldve put the shoes in the shot but i didnt want to take them off :wink:

btw..... wouldve put the shoes in the shot but i didnt want to take them off :wink:

That is a huge transformation! Looks fantastic!........Is that the donor bike I see "bleeding" in the background?
yup thats the donor lying back there............funny thing it was the male version of my wifes old bike :lol:
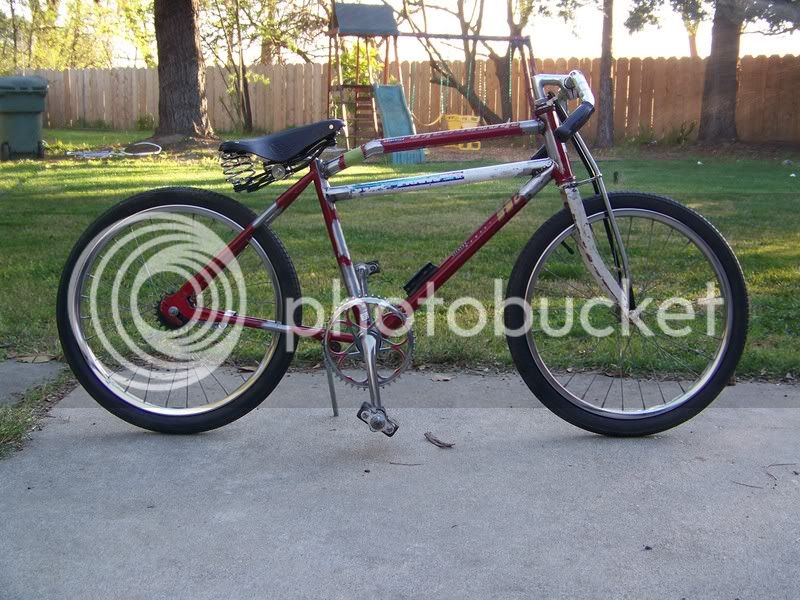
got my seat post made today and the saddle mounted....im not sure if im gonna cut the 2 top tubes off and redo them........forgot to bring some visegrips home from work and the back of the first bar took a dive when i went to weld it and i didnt notice till it was all solid....we'll see how long i can live with it like that(heres what i mean :x )

got my seat post made today and the saddle mounted....im not sure if im gonna cut the 2 top tubes off and redo them........forgot to bring some visegrips home from work and the back of the first bar took a dive when i went to weld it and i didnt notice till it was all solid....we'll see how long i can live with it like that(heres what i mean :x )

GOOD GRIEF. :shock: That's great.
A
Anonymous
Guest
nice!!!!
lookin good..
lookin good..
Looks good in the picture. I have a similar problem on my mini machine. The tube I welded in is slightly twisted in the top view and I didn't notice it until I had everything welded.
Bike looks great, what color(s) are you thinking of?
Bike looks great, what color(s) are you thinking of?
colors.....im not sure yet ill probably let my son pick so im sure itll be red :shock:
still gotta cut apart the bars and do some math to get them to 'shrink' but still keep the same over all dimensions.
i know alot of people have been wondering about laid back seat post so ill pull this one off and show yall how i went about making one thatd support me with just junk parts i had lying around.
thanks for the comments :mrgreen:
You still have time to "Tank" it!
Hey sensor, I thought you had put the top tube like that intentionally. It flows nicely into the rear section of the frame, and it also gives you a little room to level the seat out if you get tired of your butt sliding off back towards the rear tire :lol:
Looking good.
Rick
Looking good.
Rick
yeah i did put the bend in there intentionally(was going for a prewar camel back look) but it angles up in the front instead of being level until the bend :x
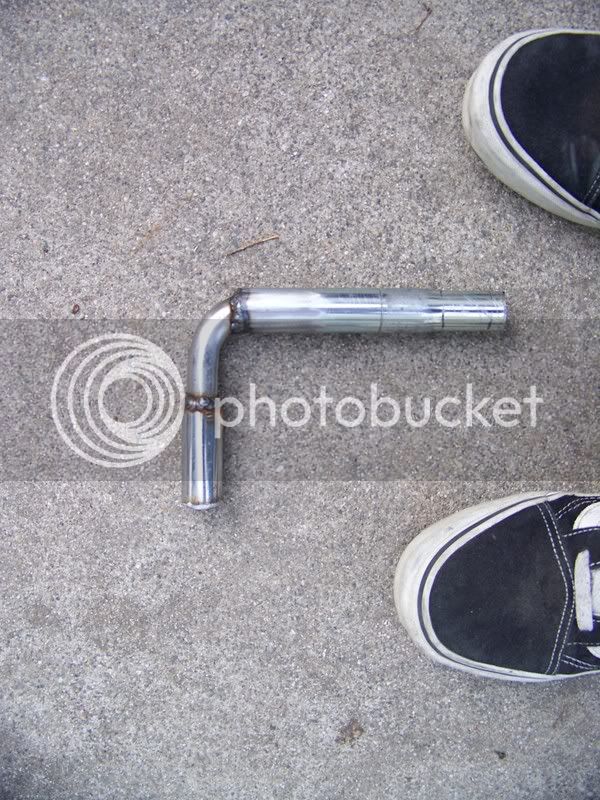
anyhow heres how to make a cheap laid back seat post.......
first take some cranks that you dont need.cut them at the tab for the chain ring,grind the threads down so the tube slides over(this is the discarded part)......

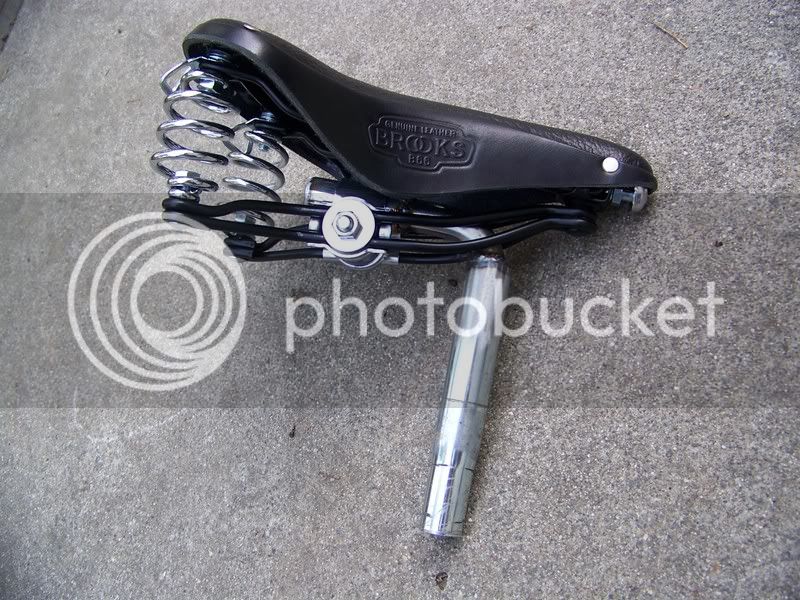
then cut a seat post that fits your frame(so it wont flop around and you can clamp it w/o crushing the seat tube)weld or glue it into place and do the same were the saddle mounts(you can make it as long as the cranks are or shorten it to fit your needs)........

then mount your saddle and low buck prewar seat post!!!

sorry the pics arent complete(took them after i made it)
hope this helps!
anyhow heres how to make a cheap laid back seat post.......
first take some cranks that you dont need.cut them at the tab for the chain ring,grind the threads down so the tube slides over(this is the discarded part)......

then cut a seat post that fits your frame(so it wont flop around and you can clamp it w/o crushing the seat tube)weld or glue it into place and do the same were the saddle mounts(you can make it as long as the cranks are or shorten it to fit your needs)........

then mount your saddle and low buck prewar seat post!!!

sorry the pics arent complete(took them after i made it)
hope this helps!
That's a great idea! I've been looking for a seat post for the 38 Monarch I did for my son, he wants the seat further back, Thanks!........Hey did you know that your feet aren't the same size! Must be a pain to buy shoes.


