Definitely like the black tires better on this than the white ones. Has a 'tougher' look to it now. If you had a really bright ( chrome, silver ) chain, I would paint the chain guard black so it would set off the chain even more. Like a backdrop.
- COMPETITIONS
- THE COMPETITION ARCHIVES
- RRBBO OFFICIAL COMPETITIONS
- BUILD OFF 17 (2022)
- Build Off 17 Class 1 Build Journals
You are using an out of date browser. It may not display this or other websites correctly.
You should upgrade or use an alternative browser.
You should upgrade or use an alternative browser.
Gooey Syrup
- Thread starter BartRidesEternal
- Start date


Help Support Rat Rod Bikes Bicycle Forum:
This site may earn a commission from merchant affiliate
links, including eBay, Amazon, and others.
They sure can headbutt! I did google the English word and came out at "Stone Marten" but could not believe that was the right translation, so I dismissed it.Those Strongarm coaster arms look cool.
I had to look up what a "steenmarter" was. In English they are called stone martens. And sure enough, the google image results showed multiple pics fo them chewing on engine components. Maybe you should train the baby goats to hunt them down and headbutt them.
View attachment 202244
Thanks for your confirmation!
I totally agree on the tougher look! It just fits a chopper bike.Definitely like the black tires better on this than the white ones. Has a 'tougher' look to it now. If you had a really bright ( chrome, silver ) chain, I would paint the chain guard black so it would set off the chain even more. Like a backdrop.
I was planning on a black chainguard! Did not realize a bright chain would really 'pop out'. Thank you!
So when are chrome "belts" available on the market?

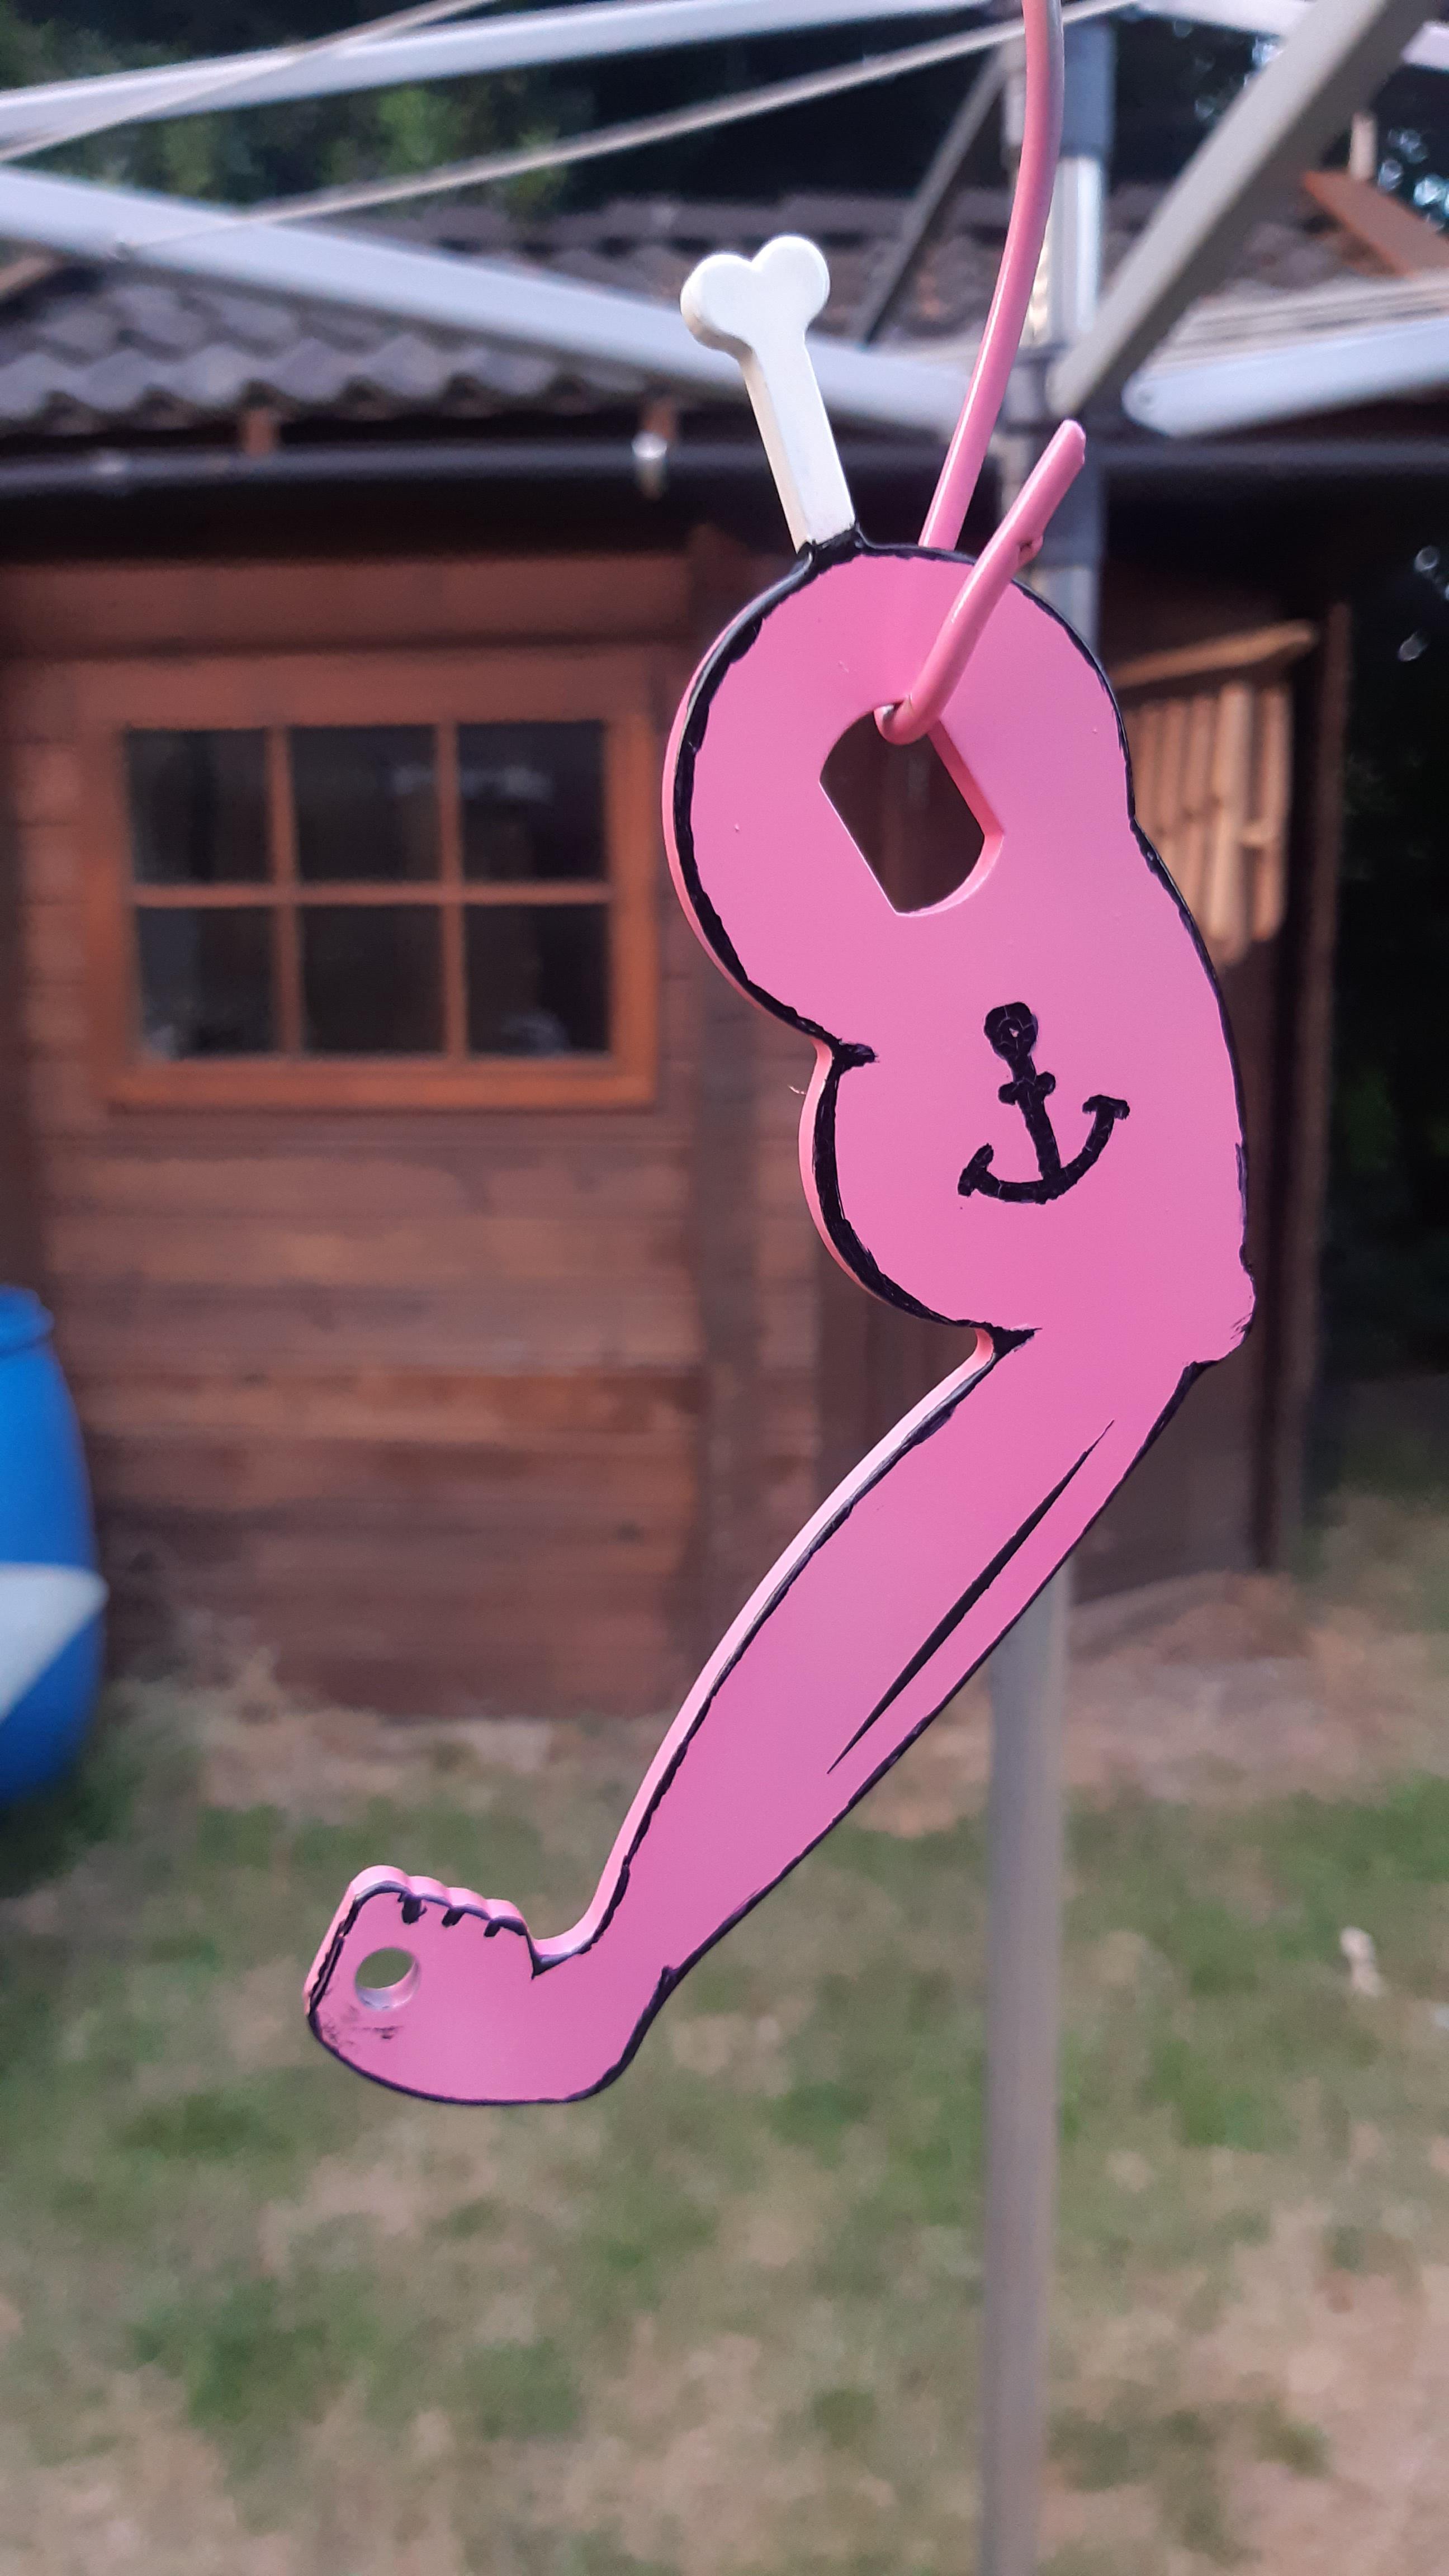
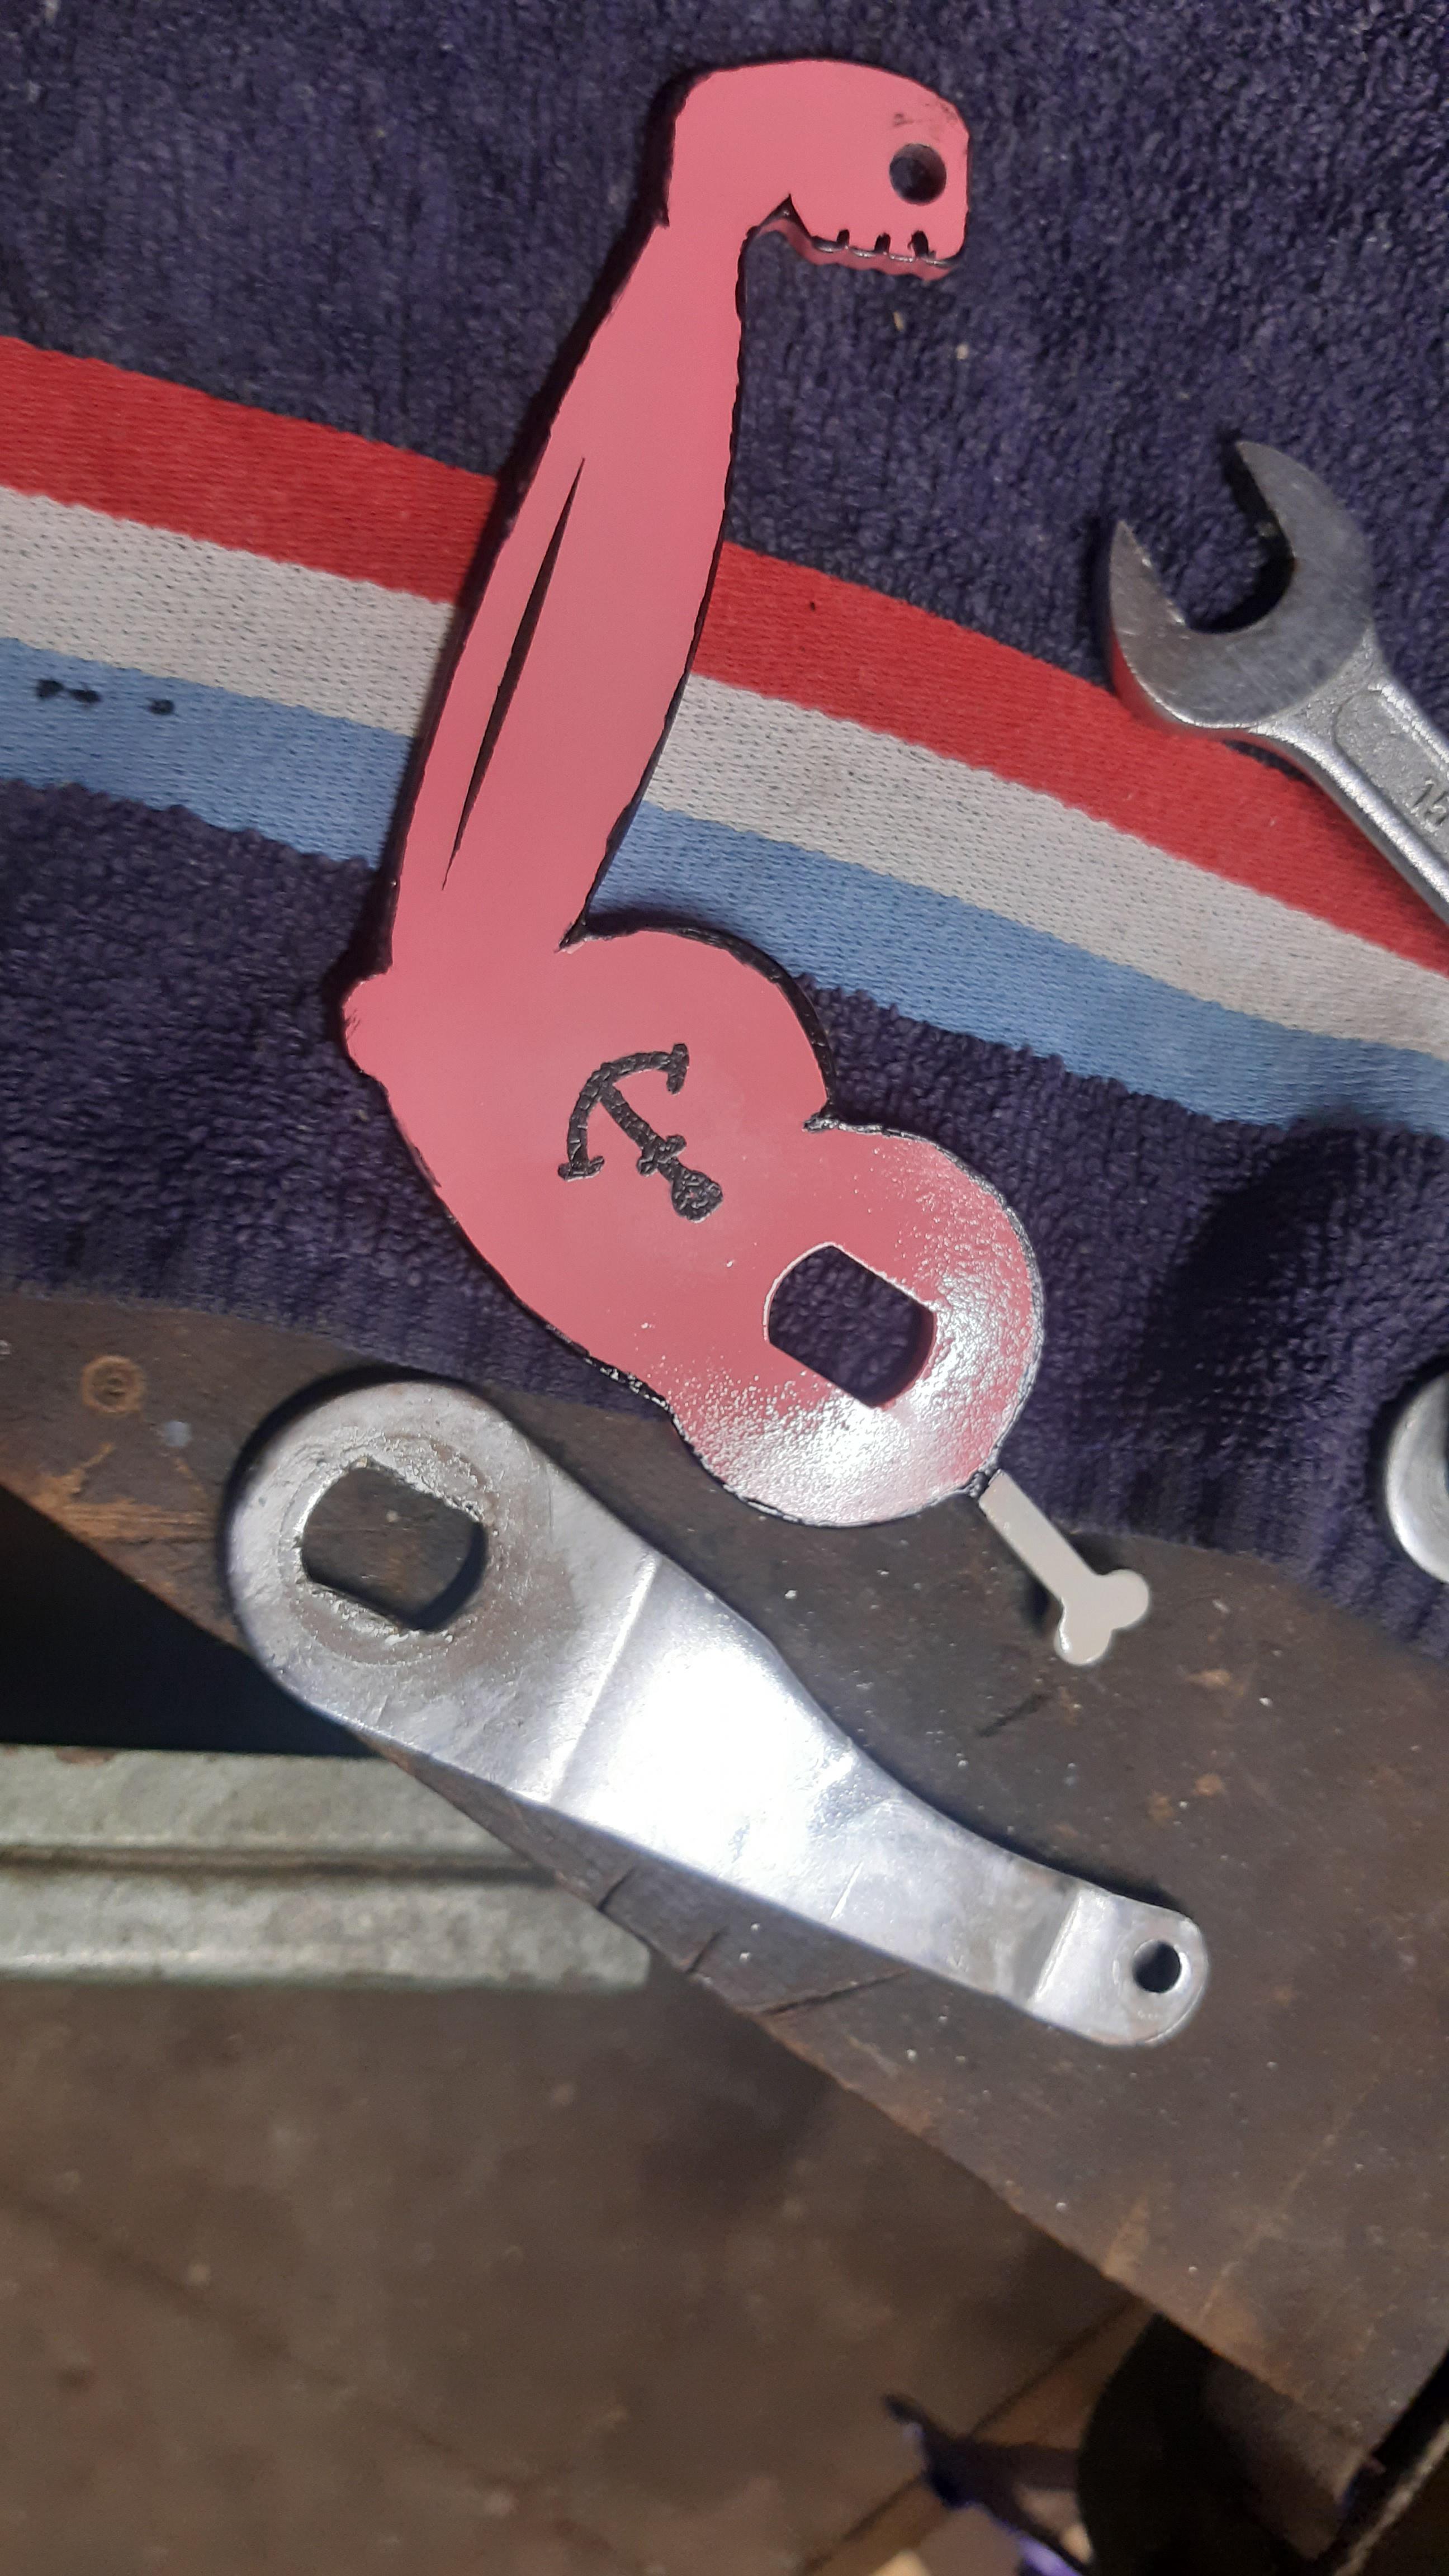
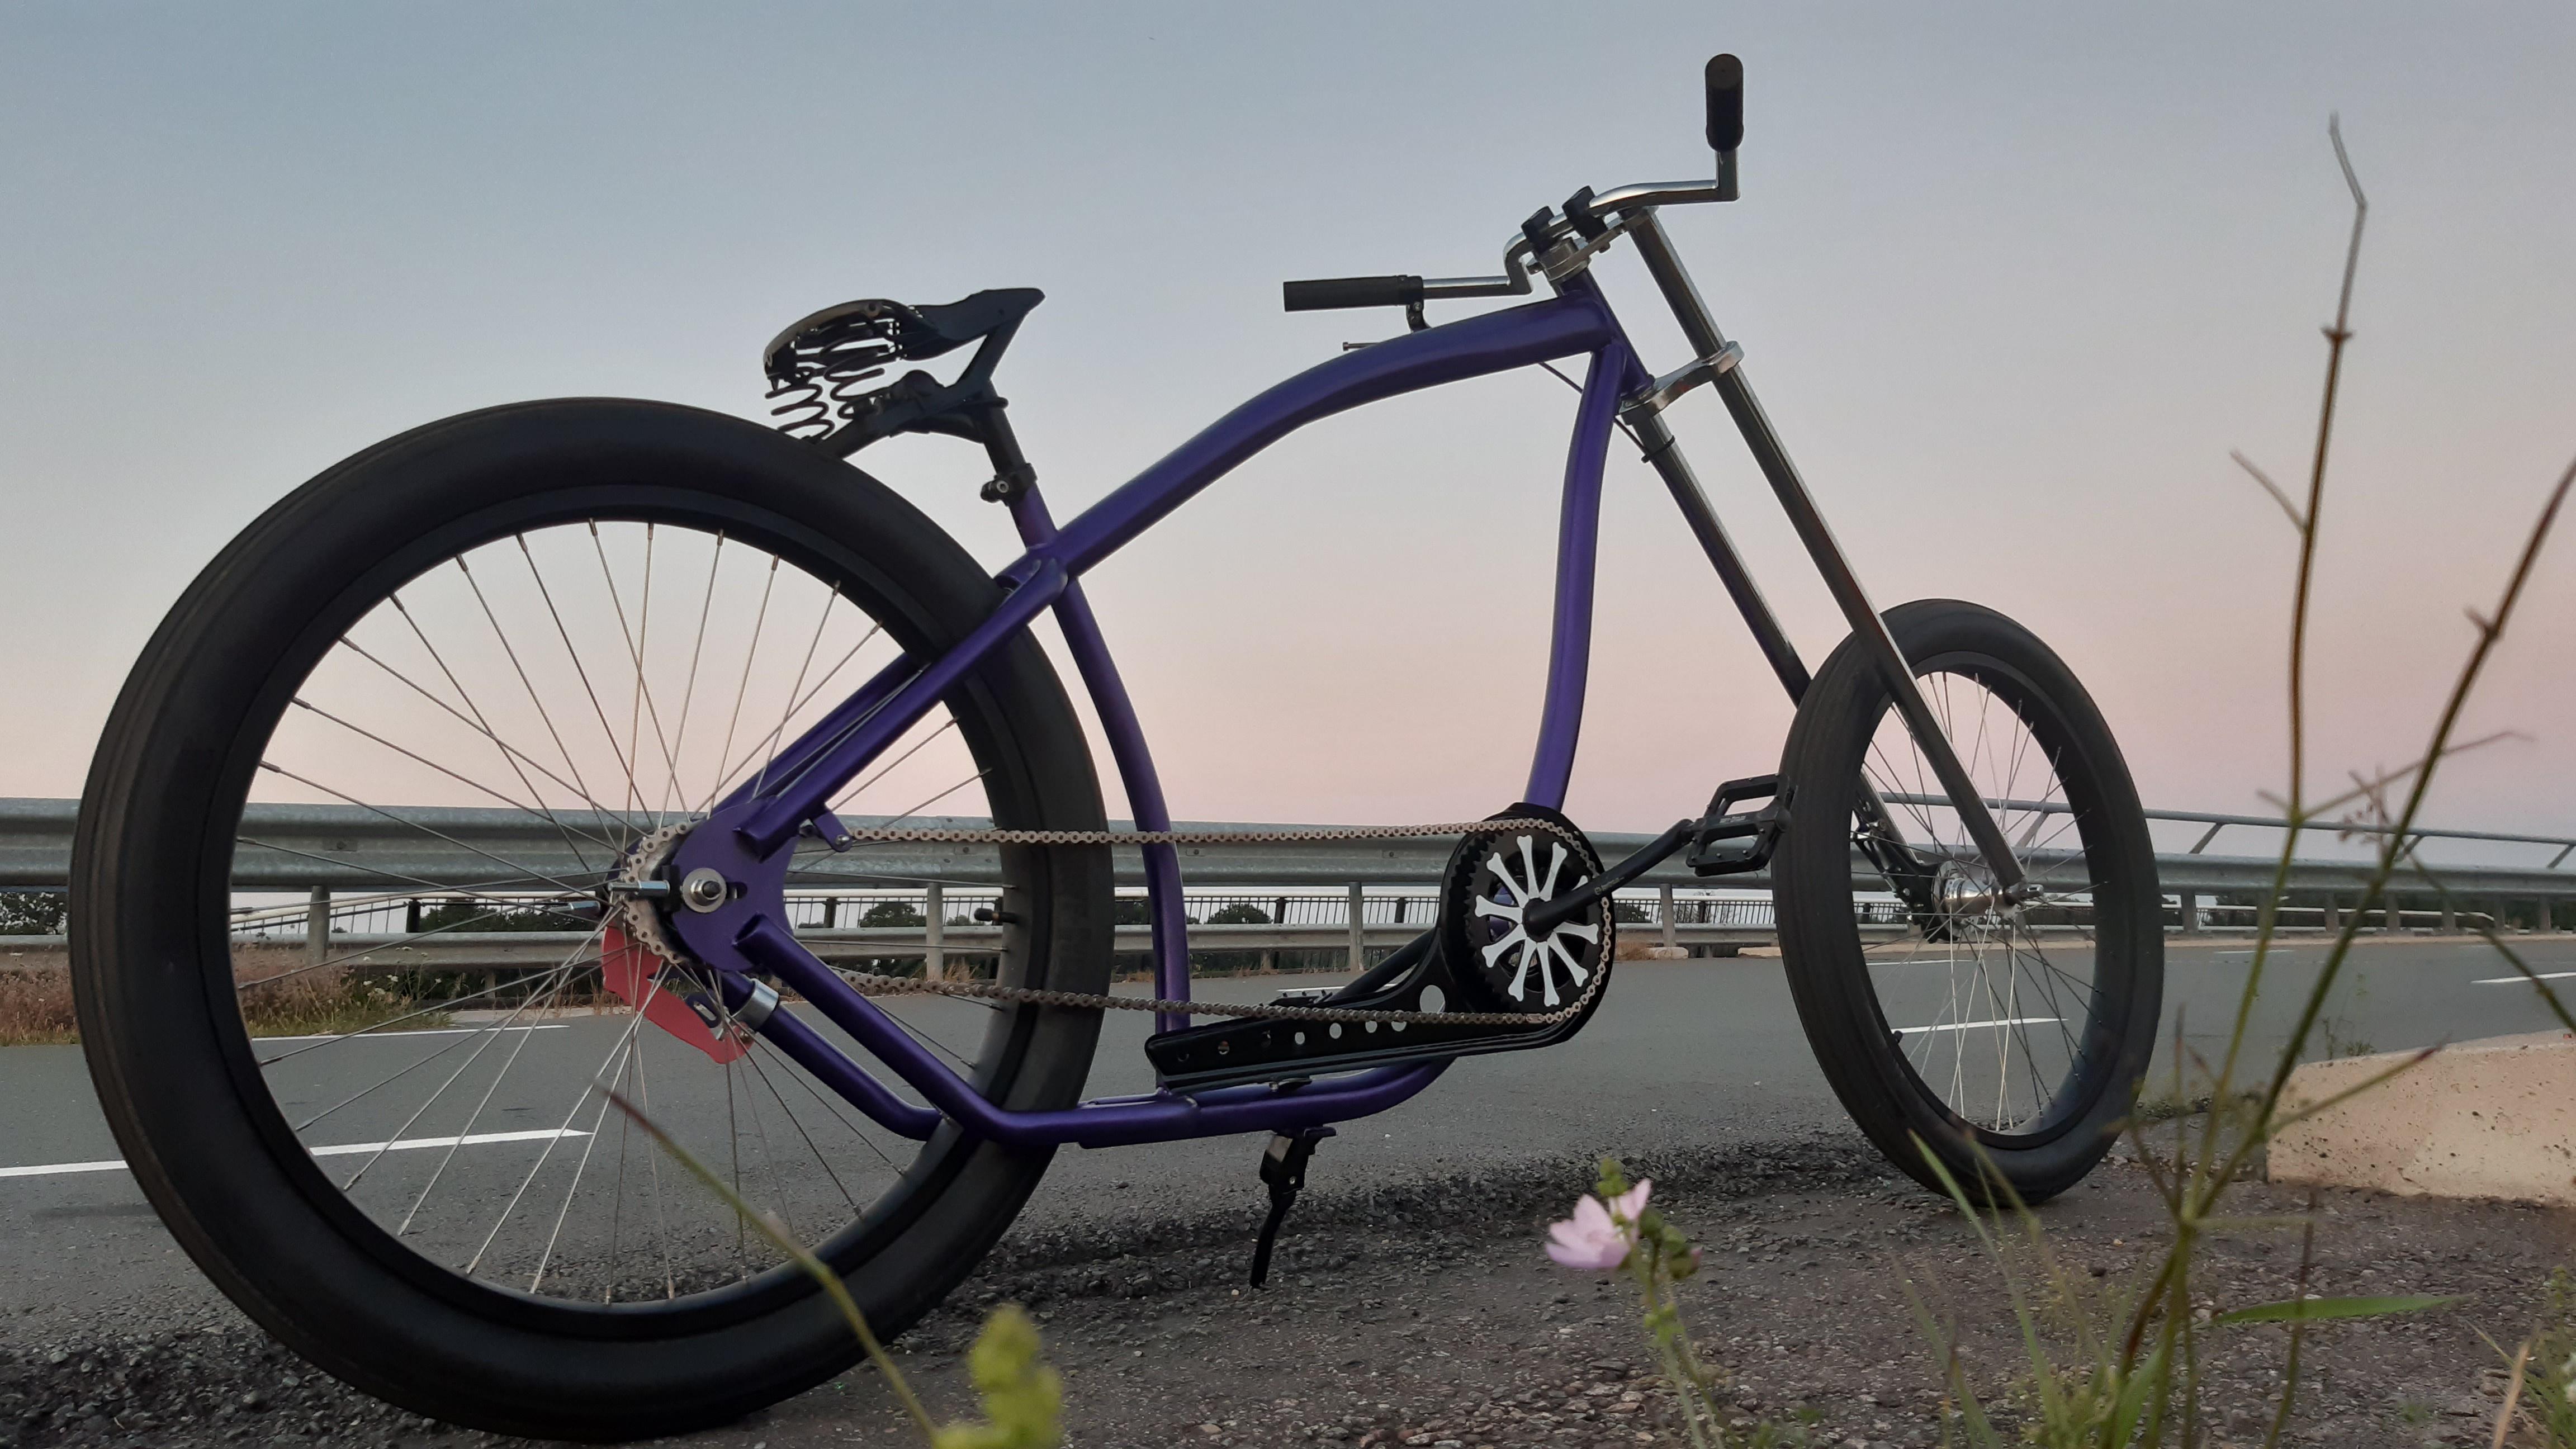
So the theme unfolds a bit more, bones and paint process/graphics are here. I think the pictures are self explanatory. The lines painting freehand was hard! So not perfect, but I'm very much ok with the result.
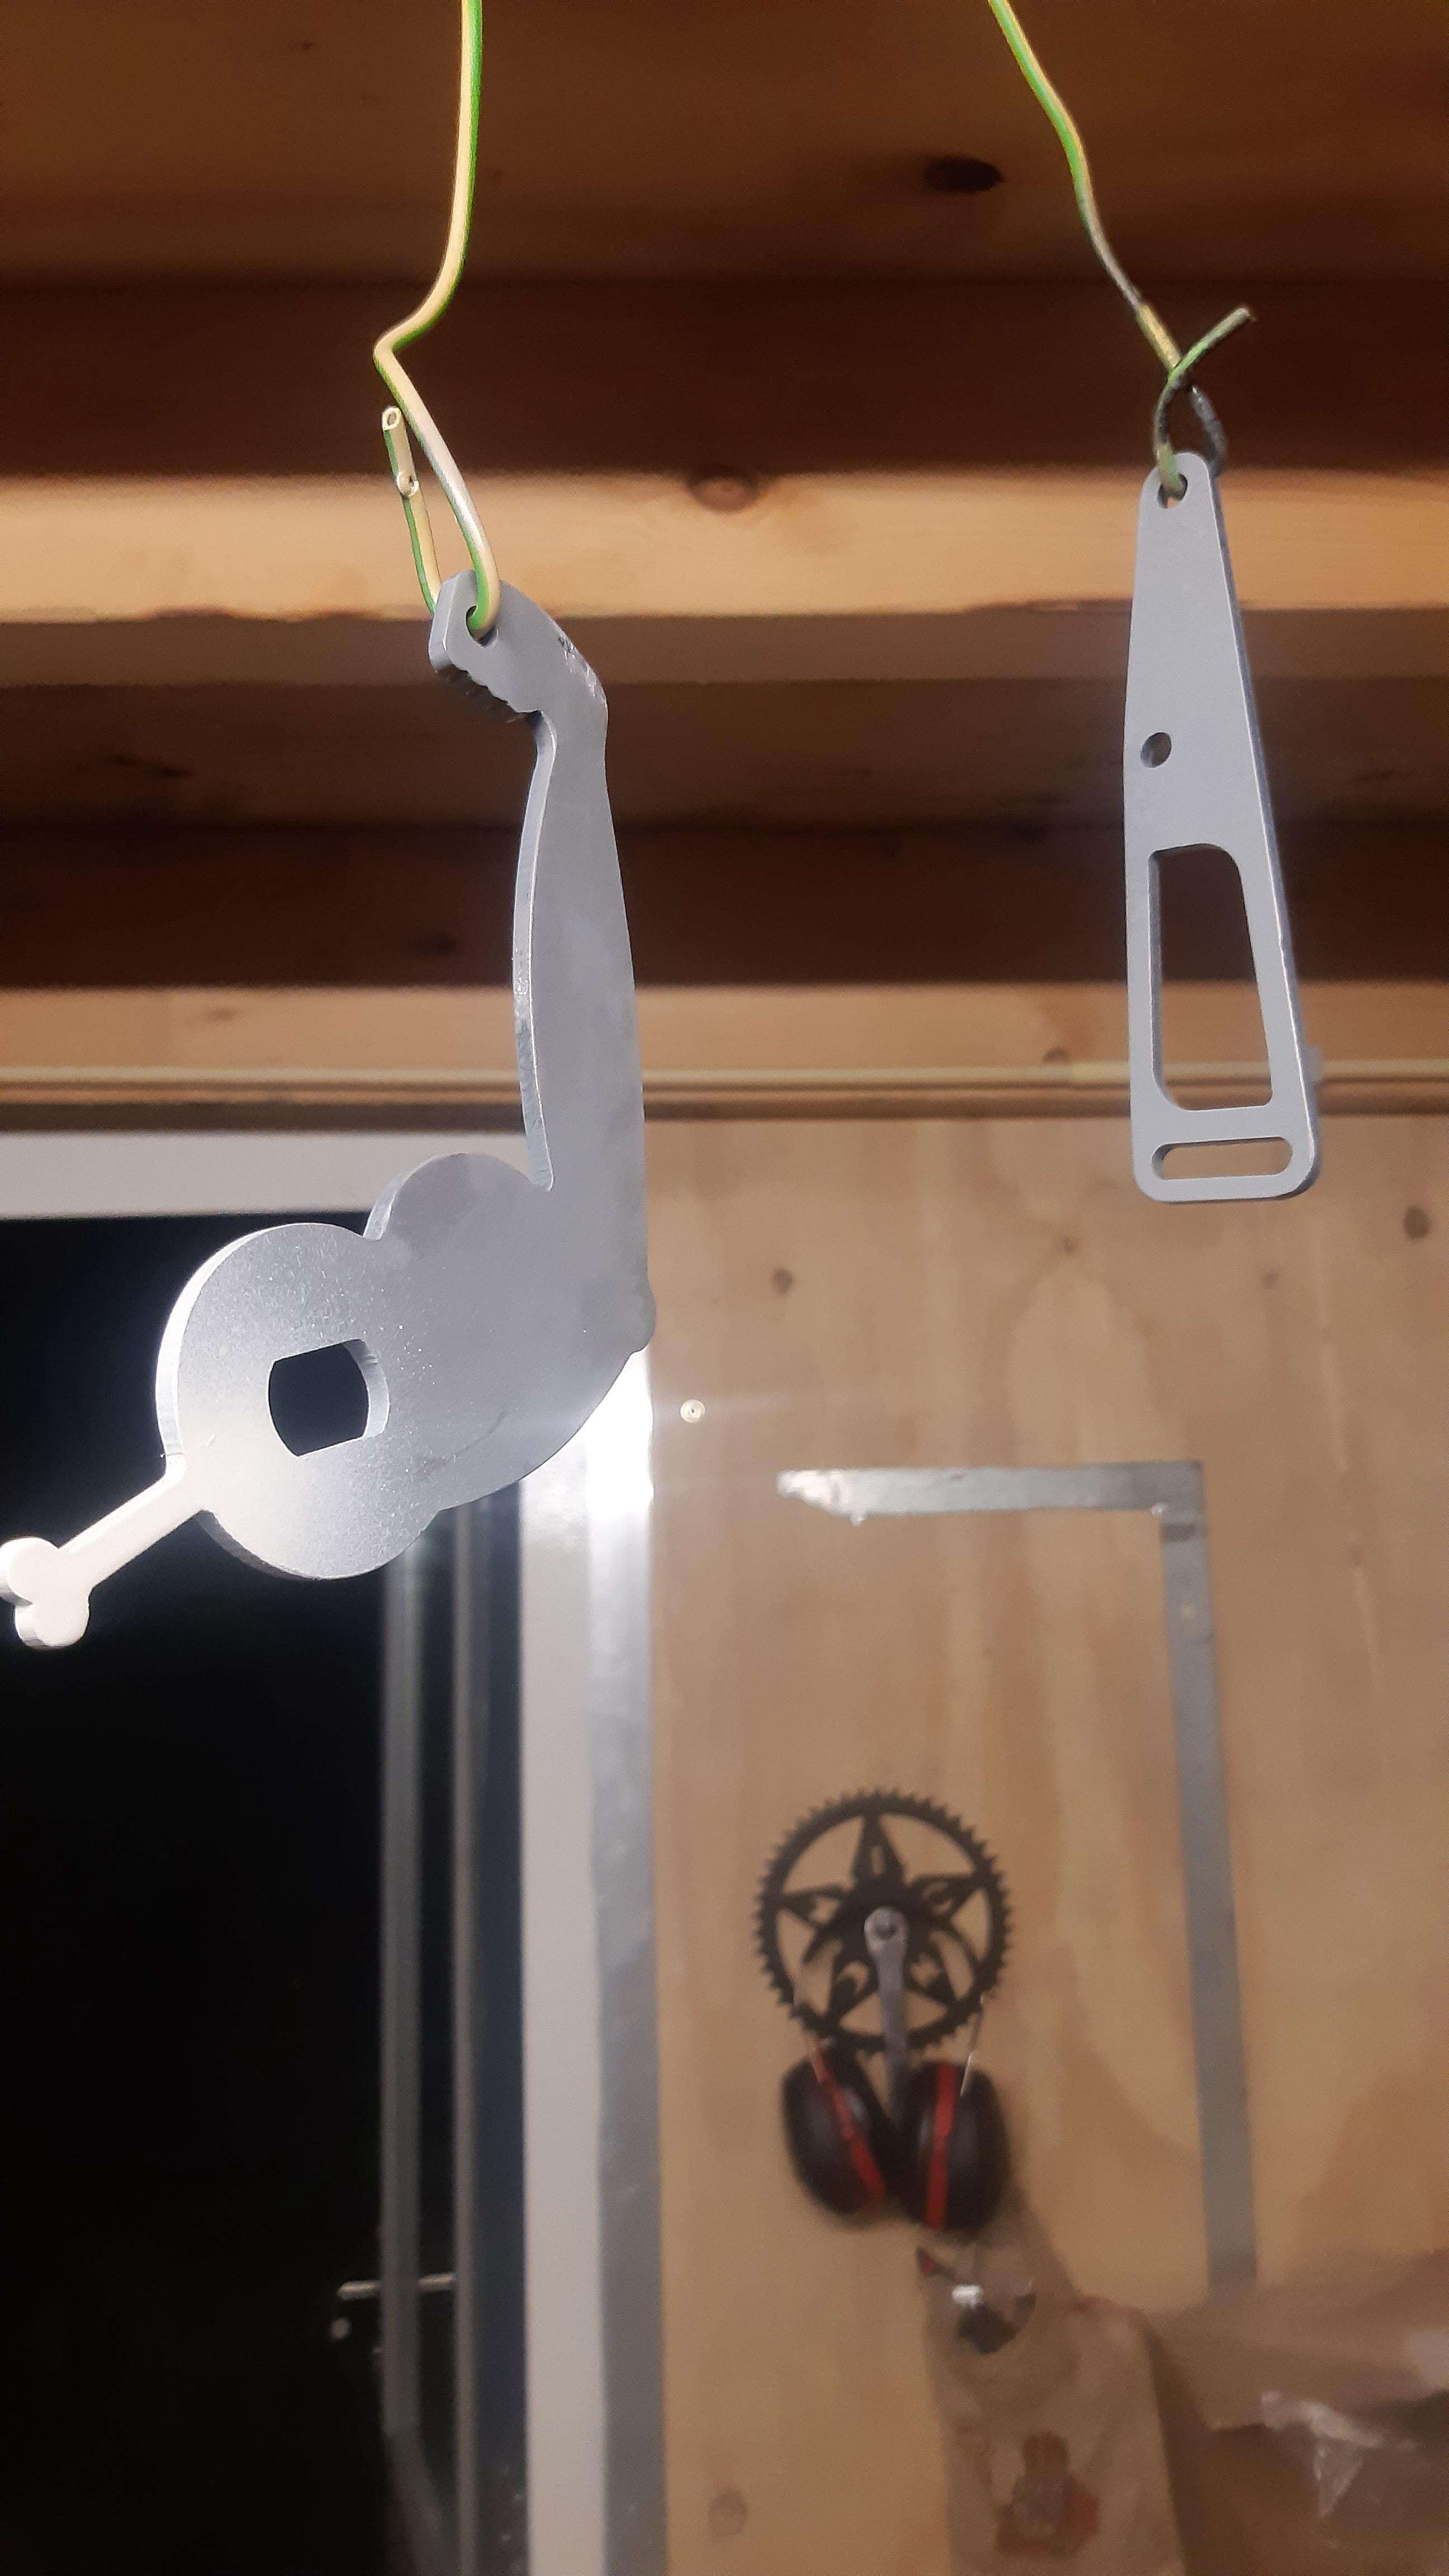
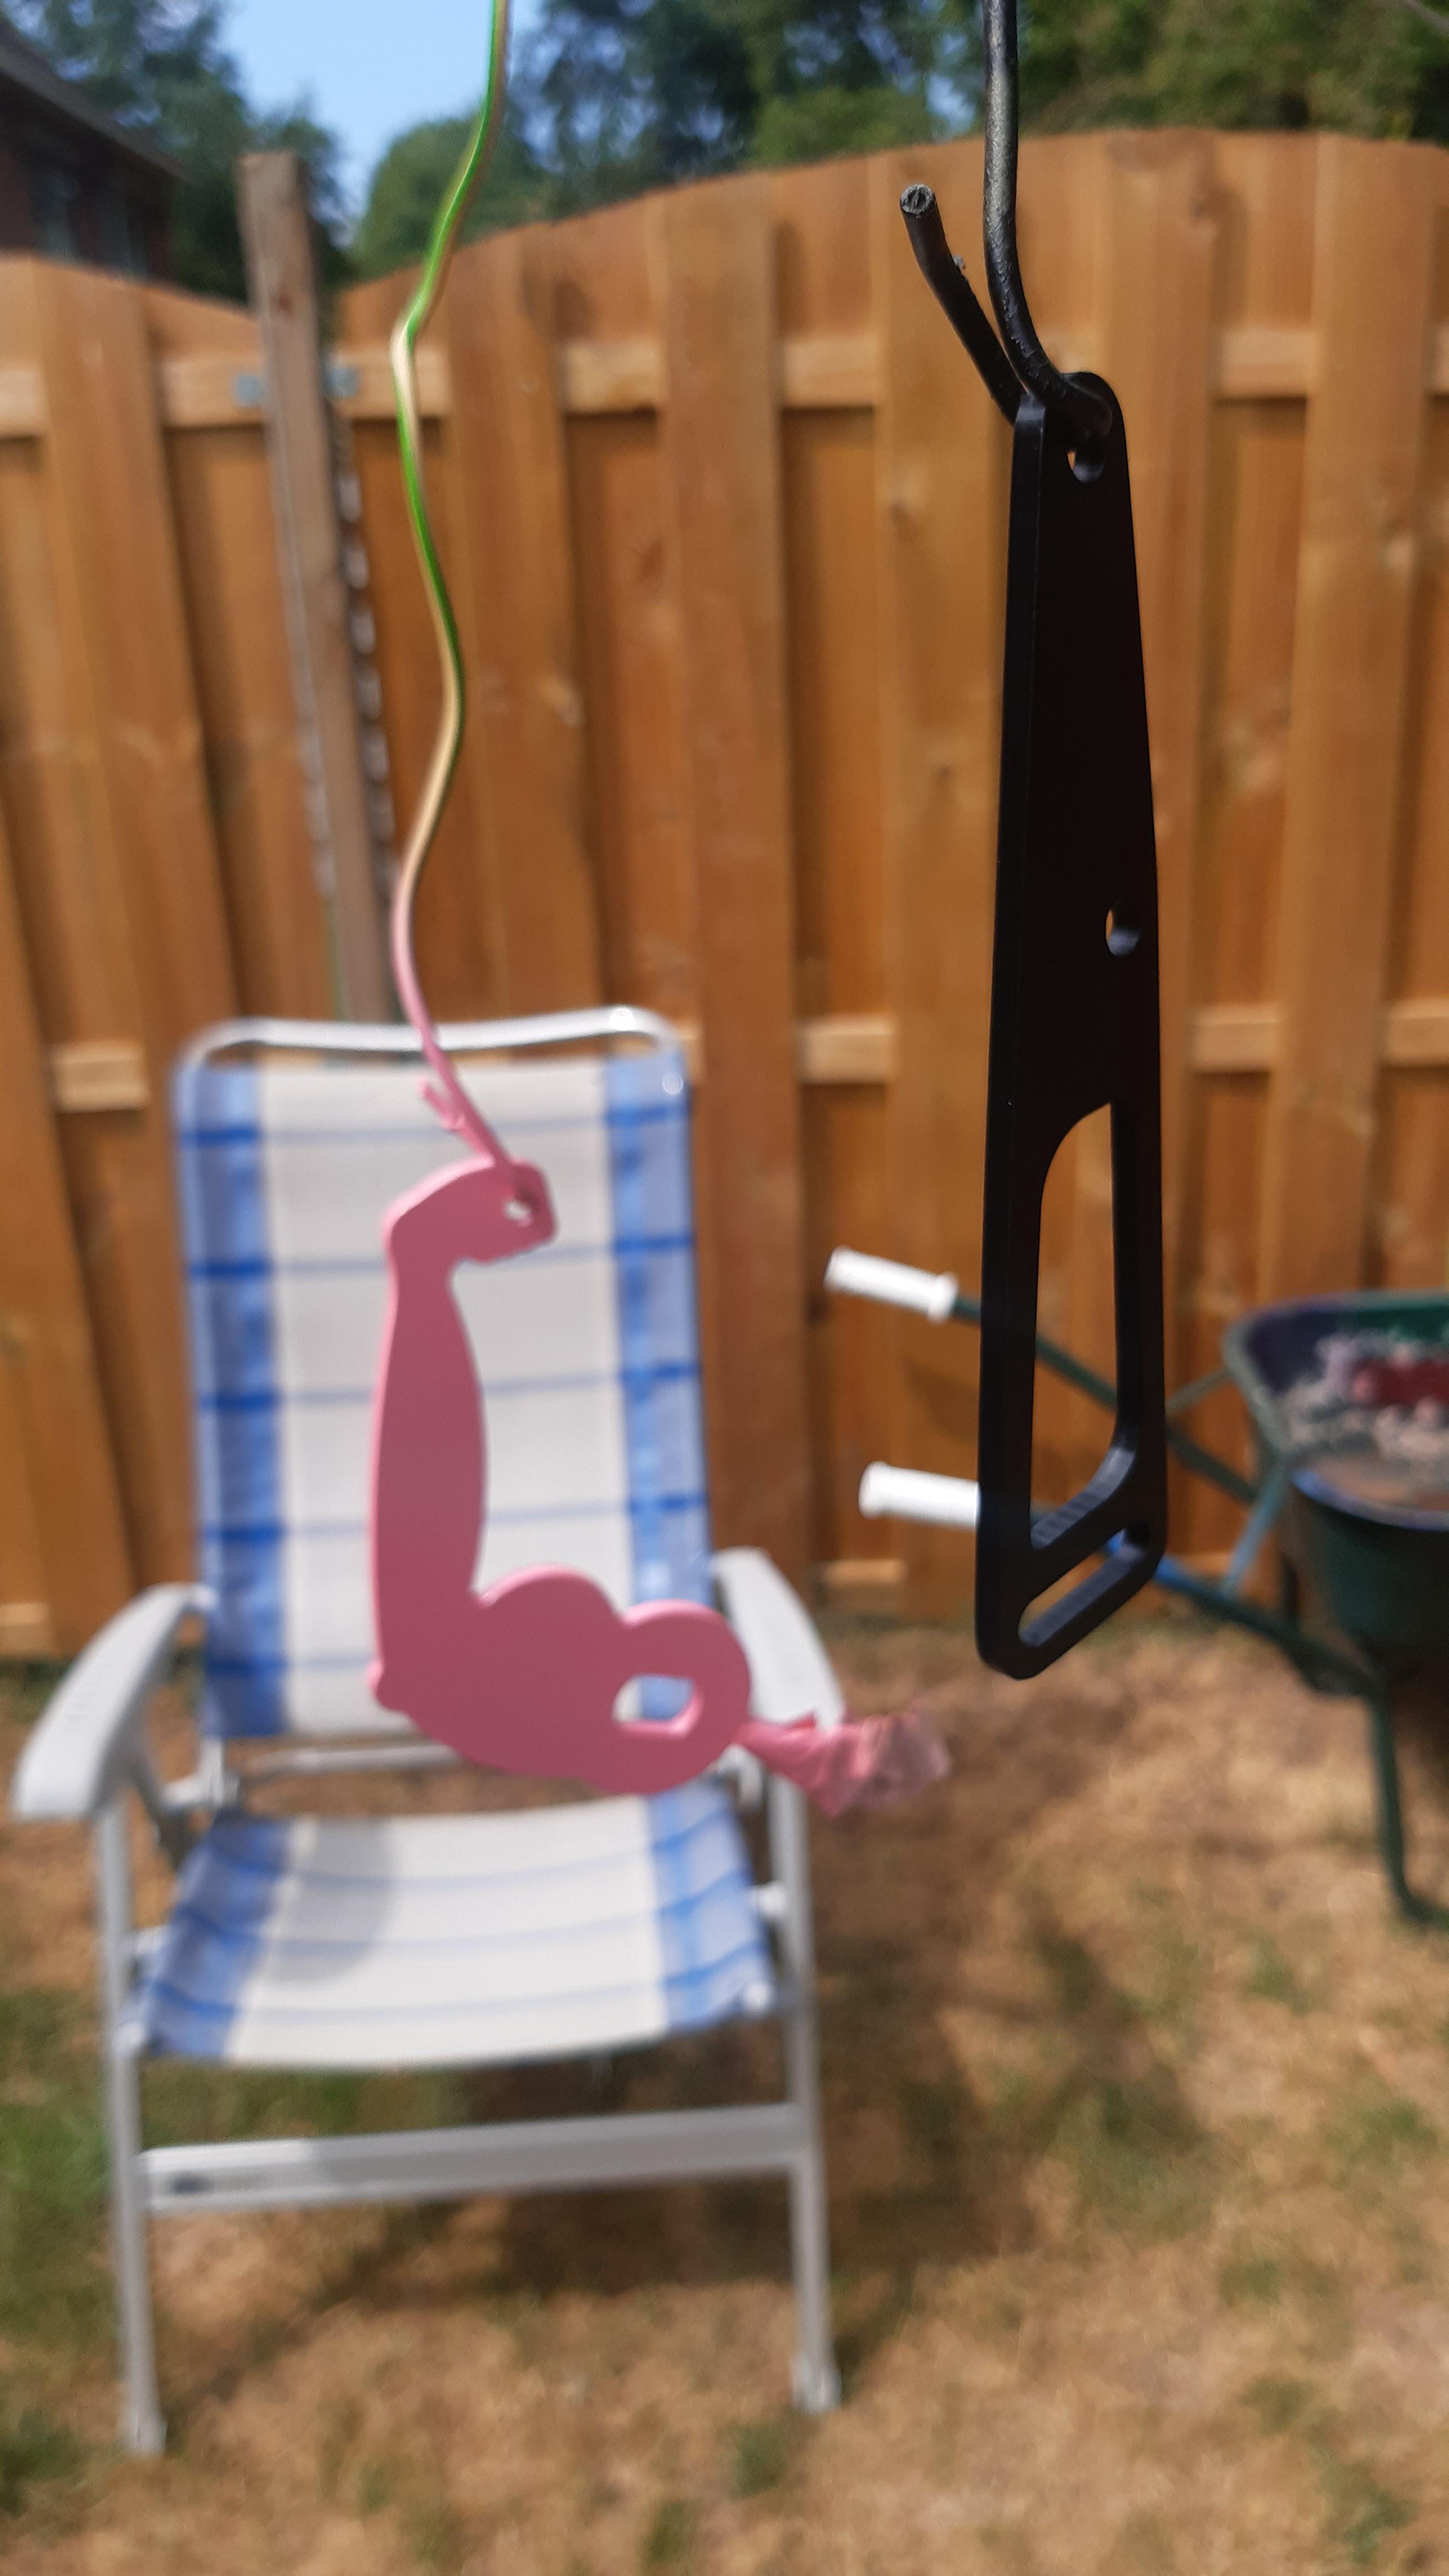
Comparison: old and new coasterbrake arm.
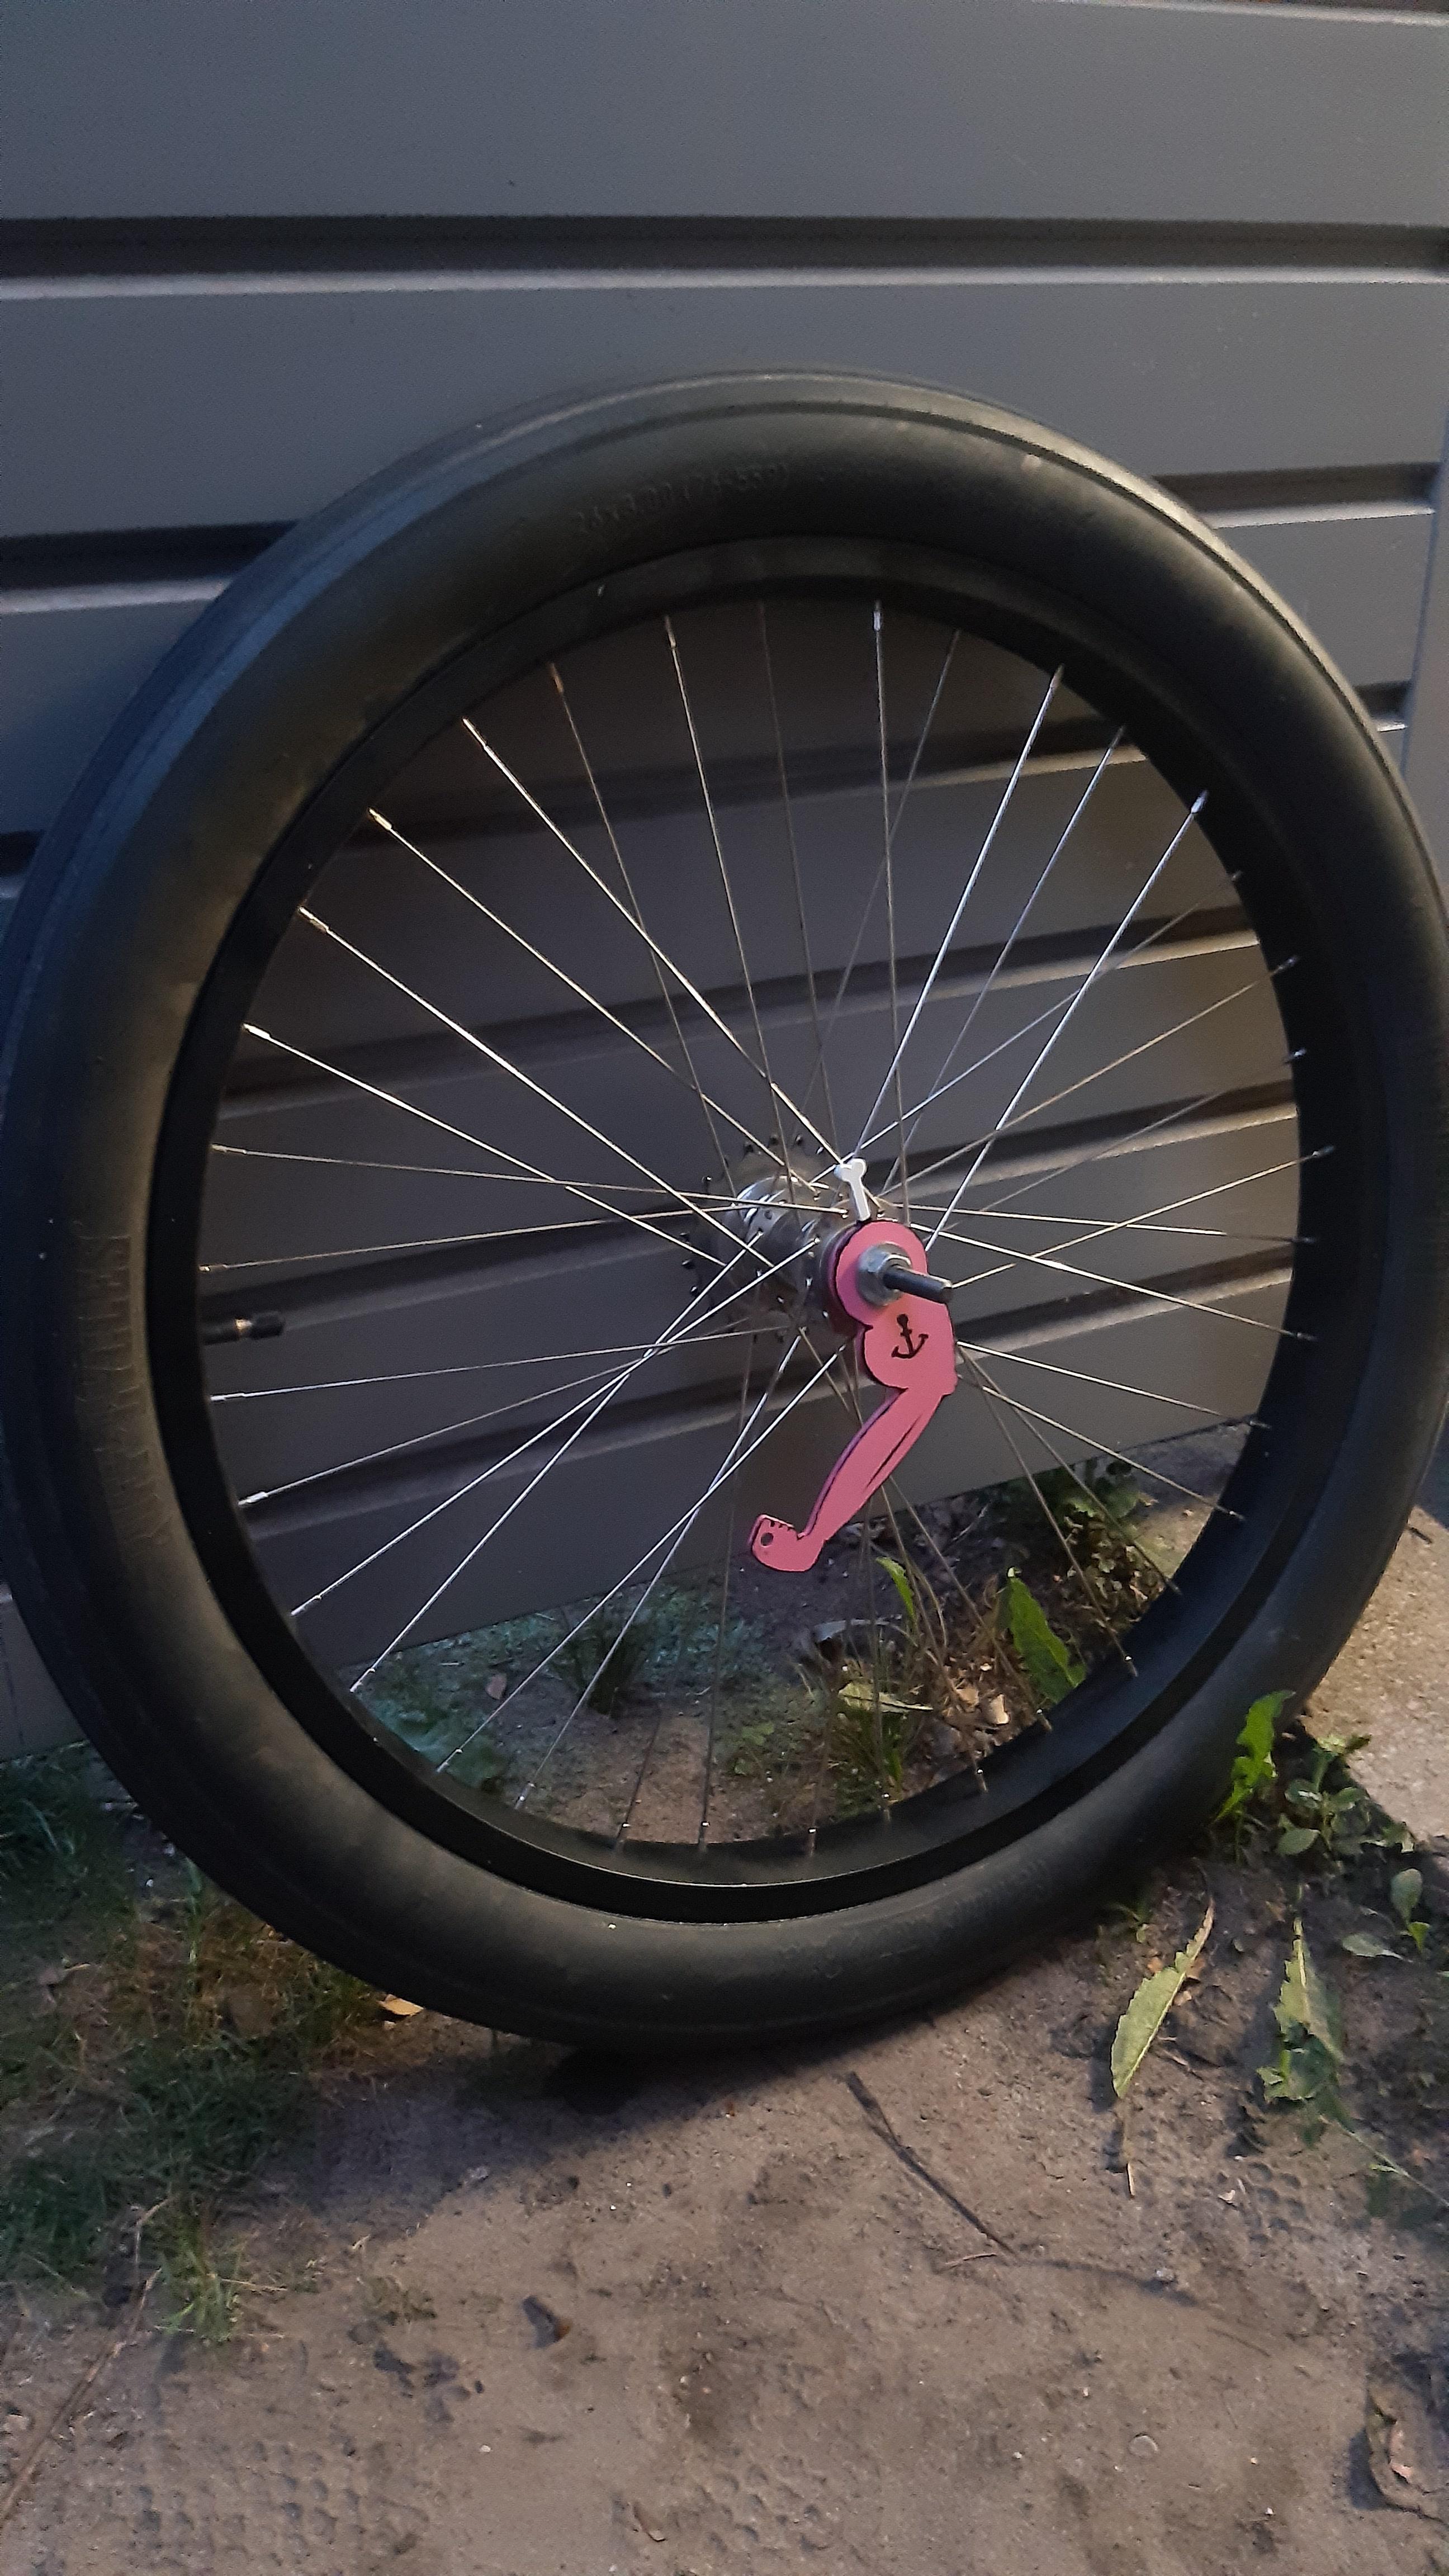
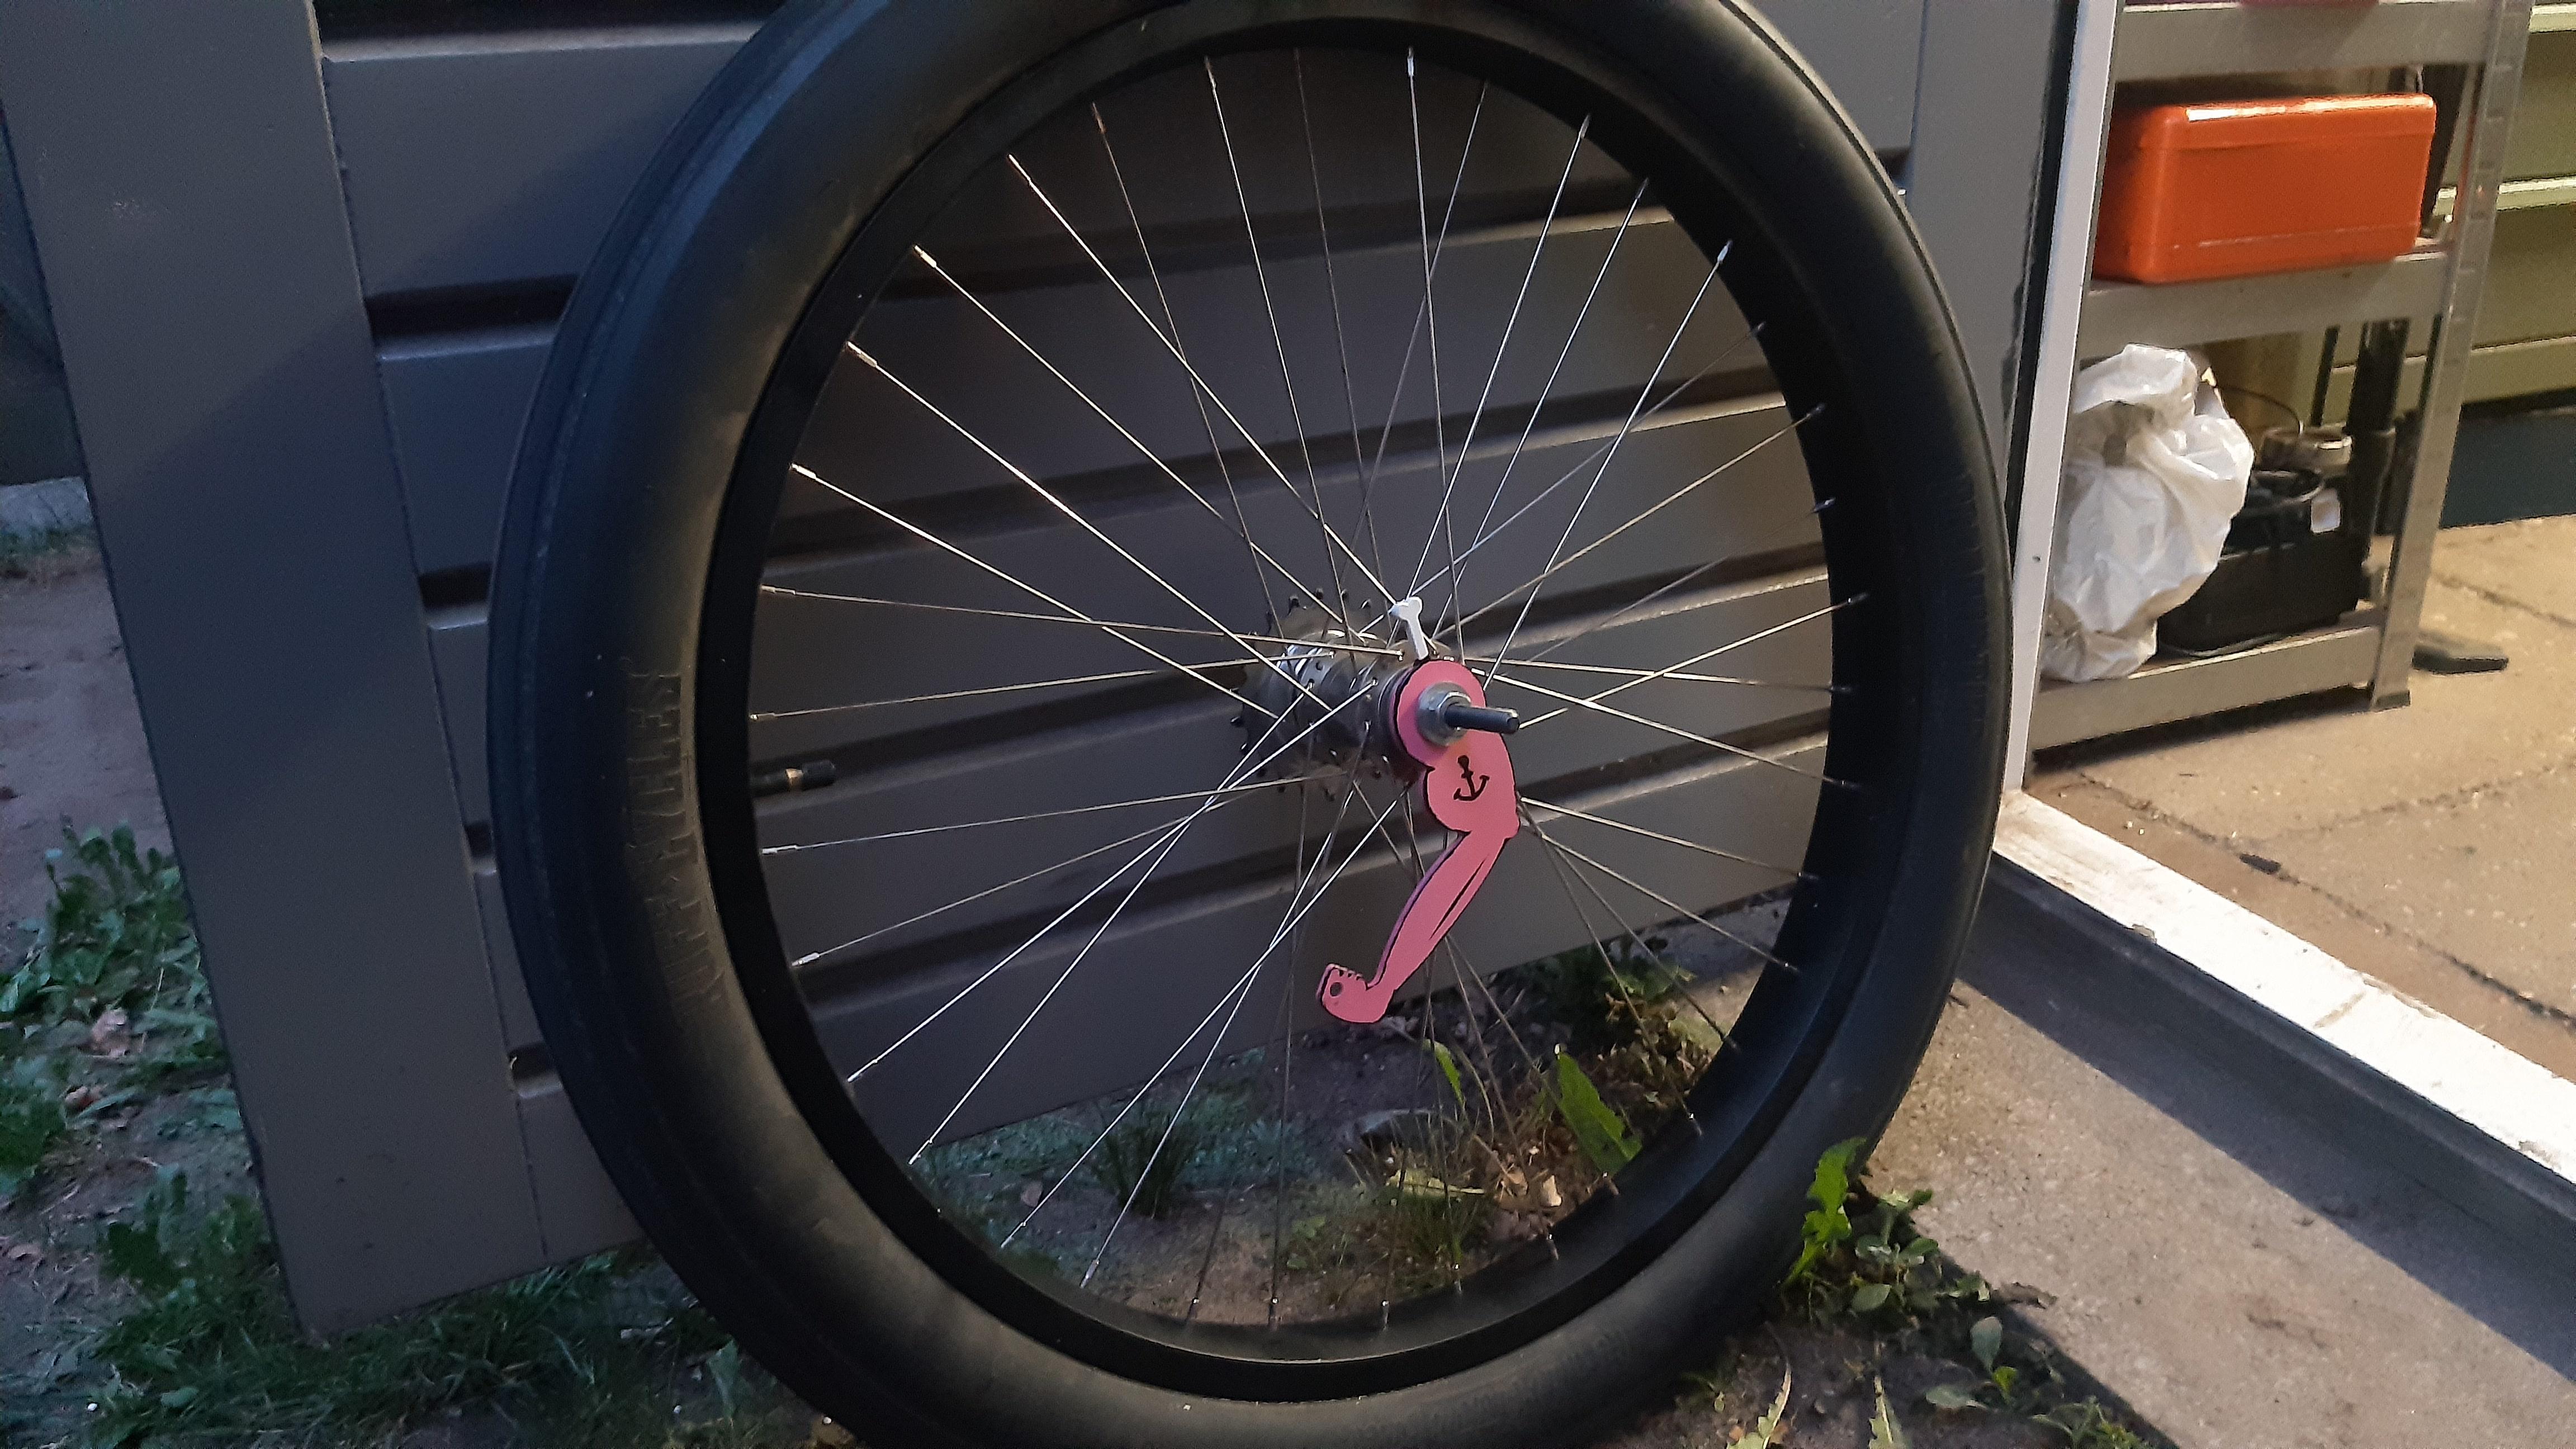
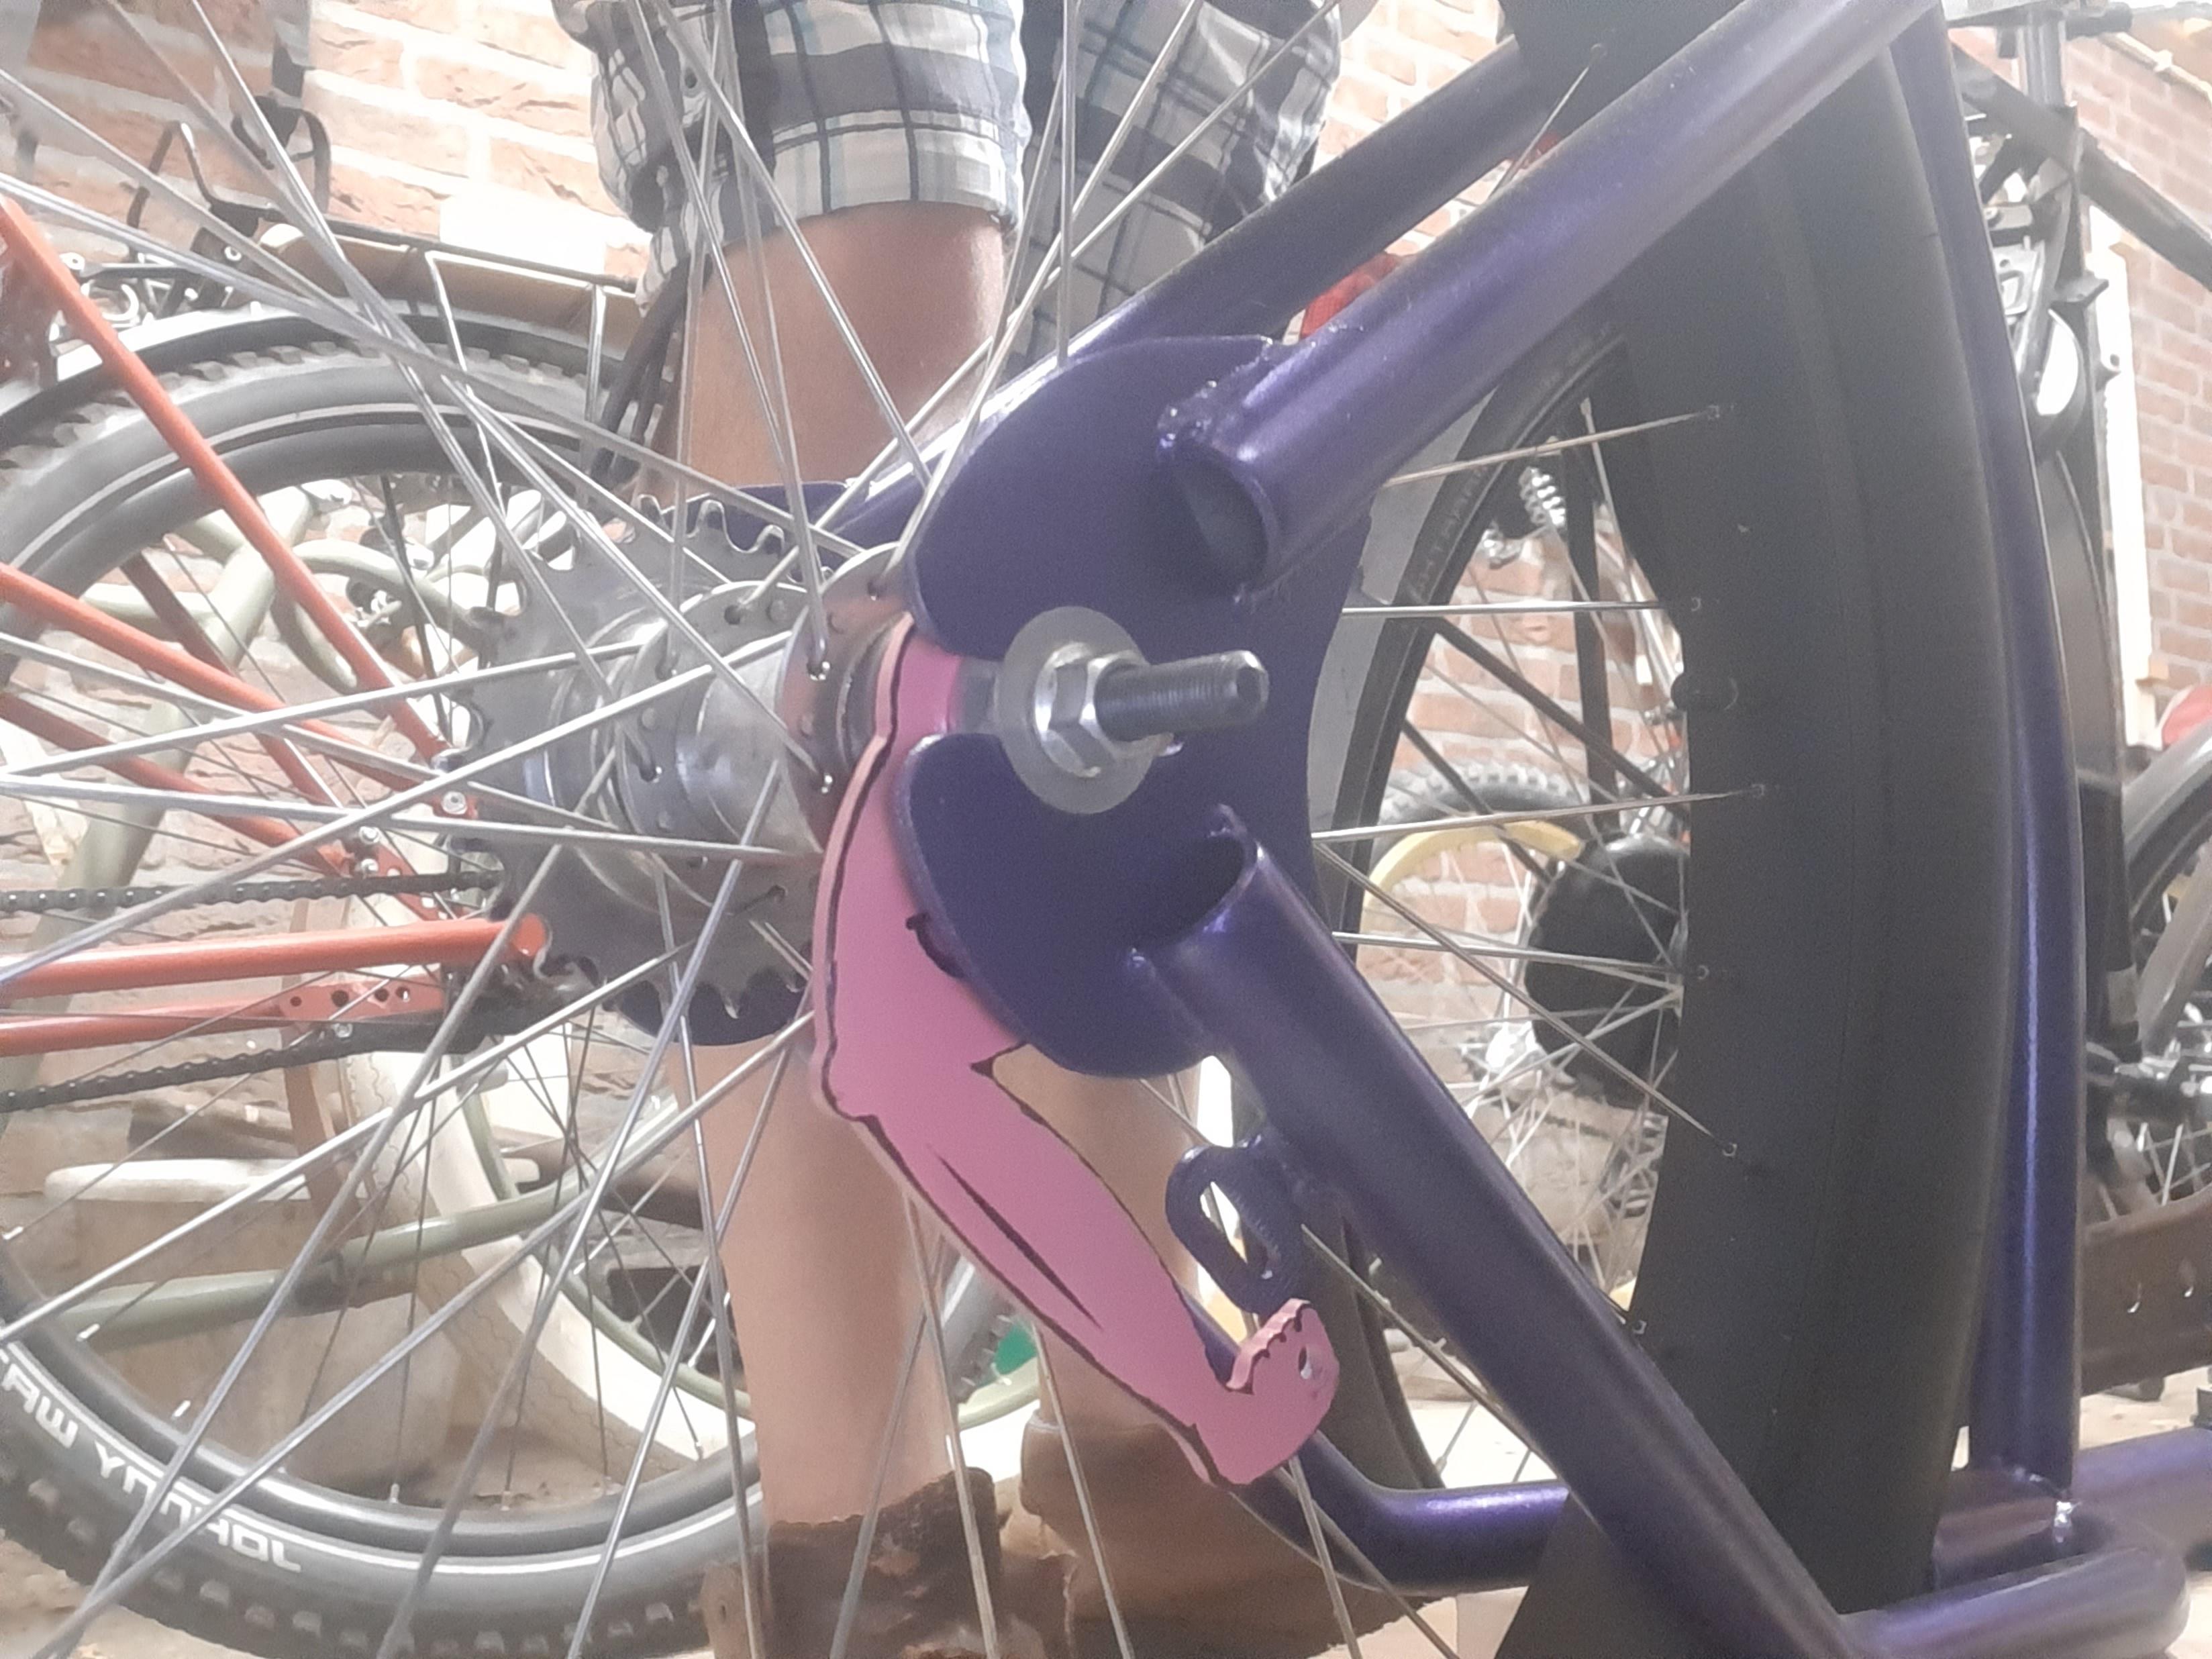
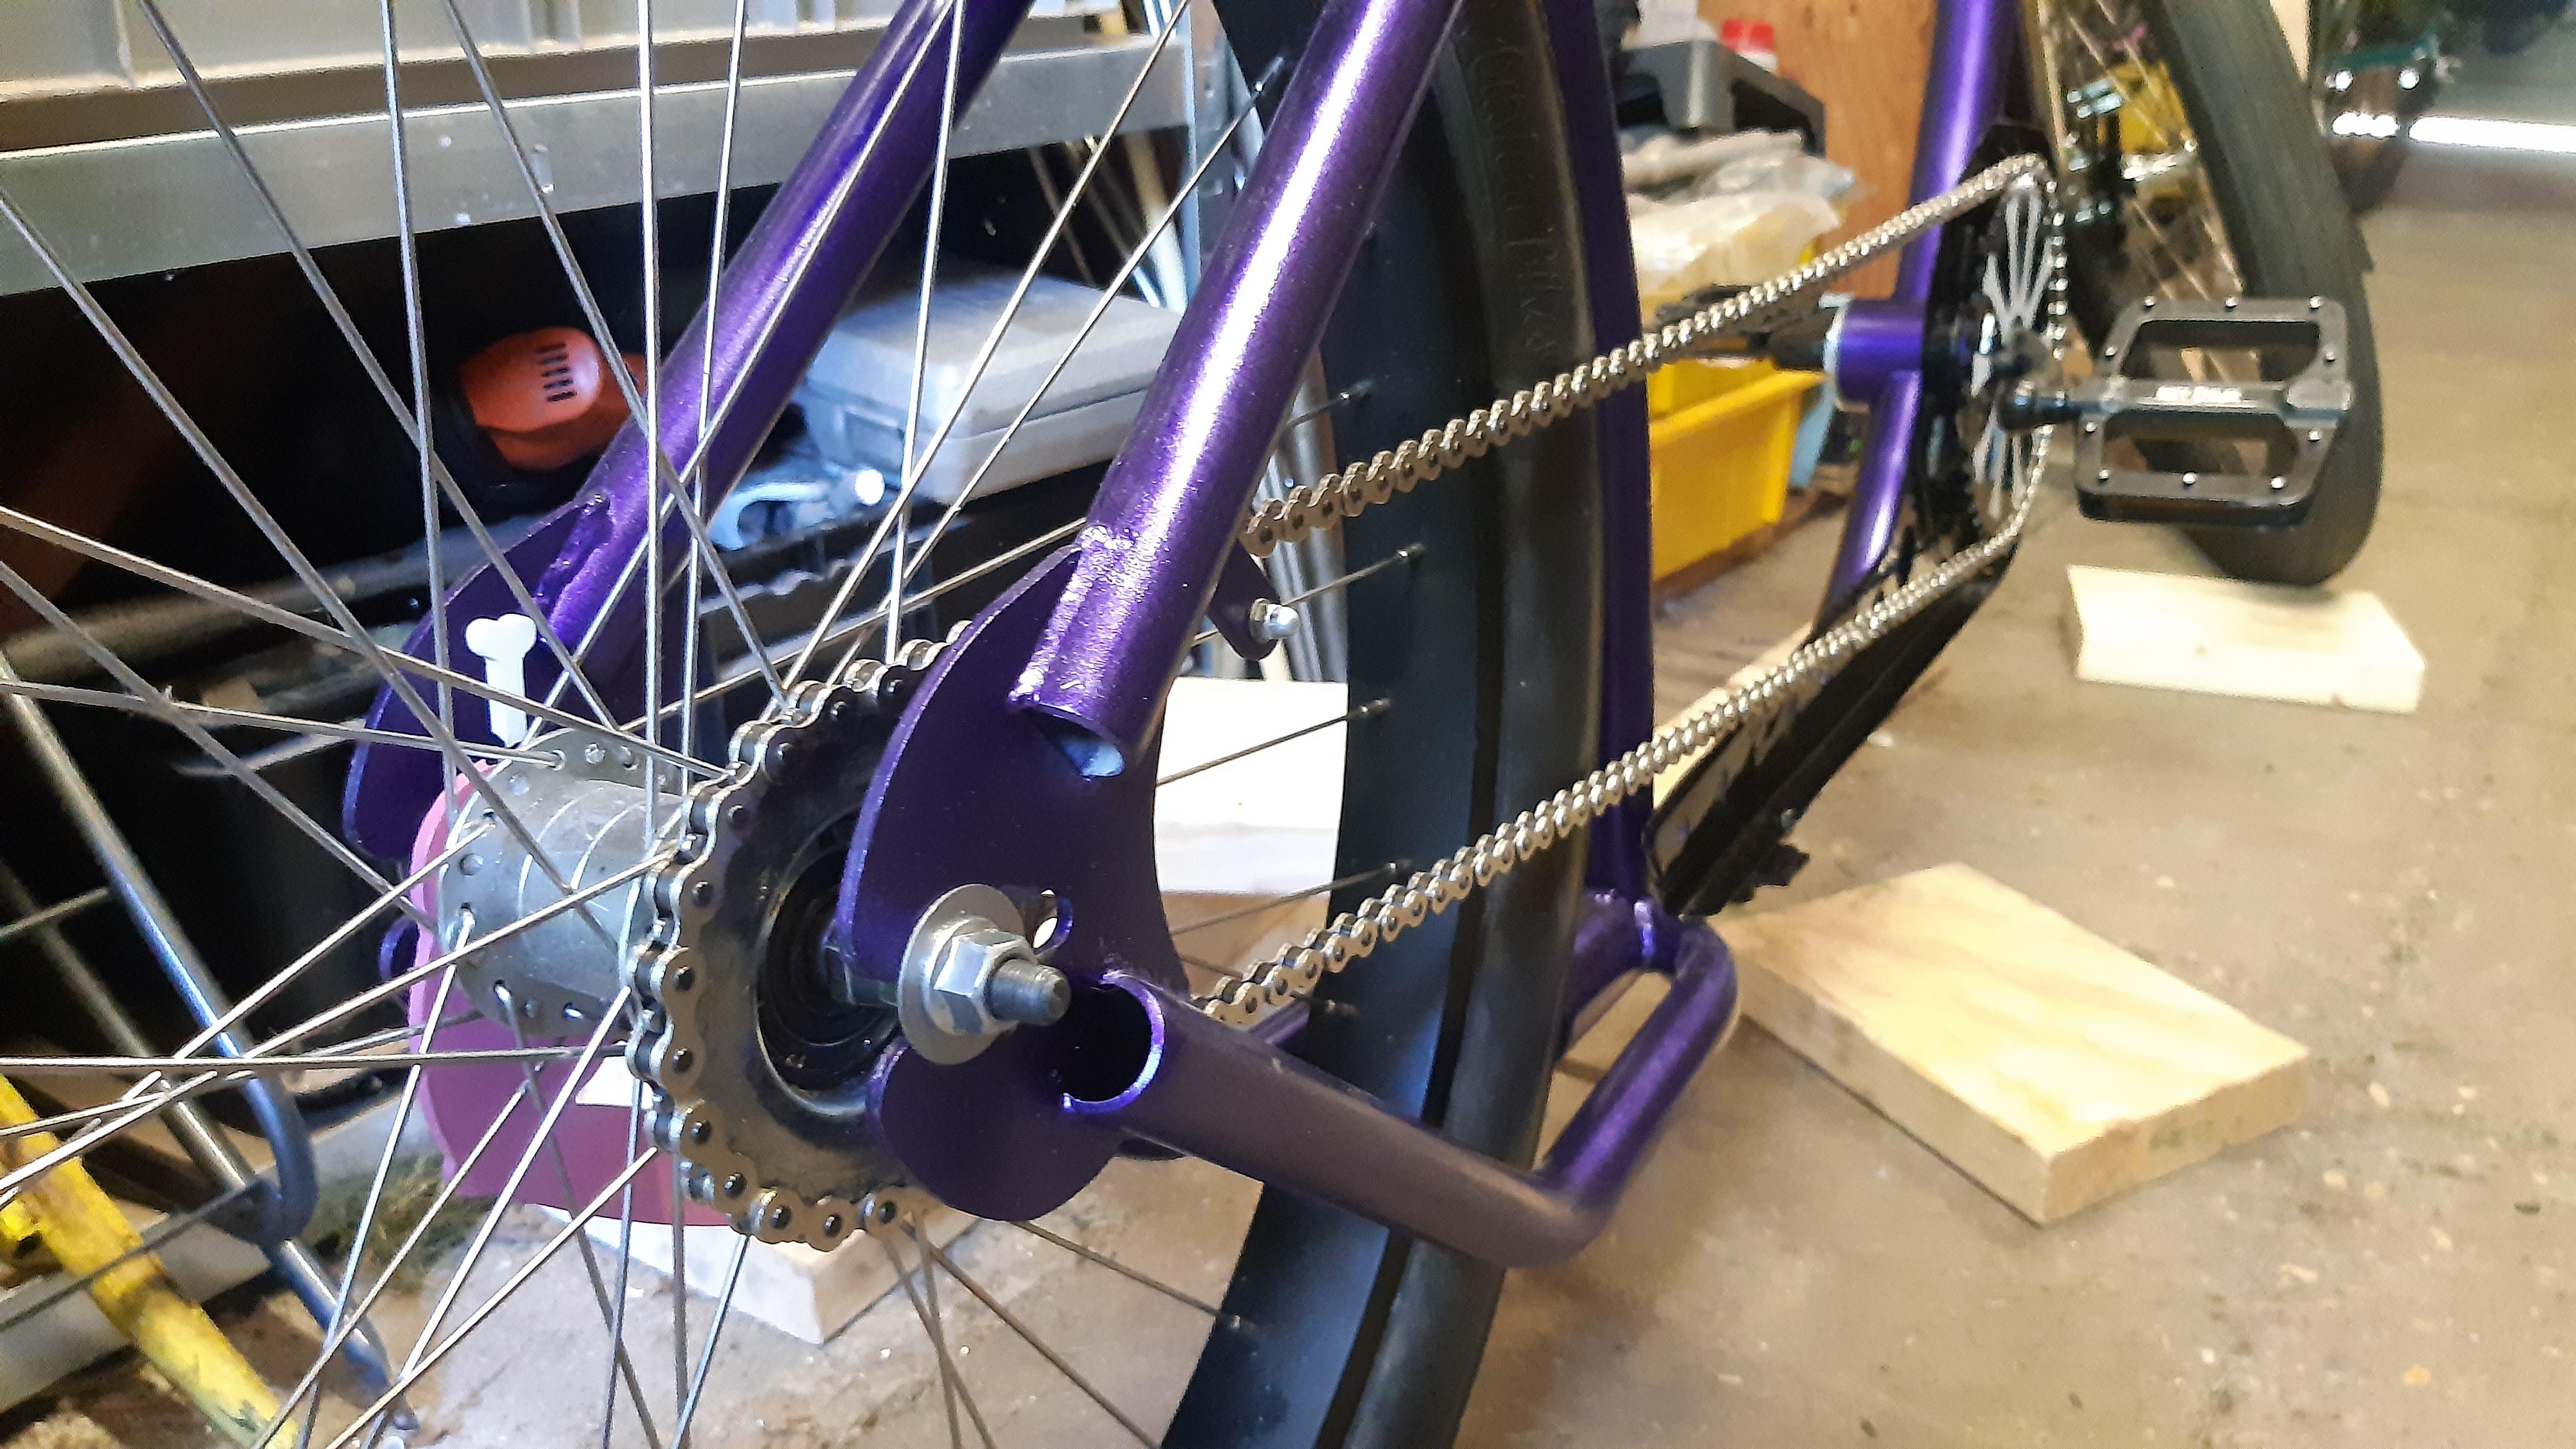
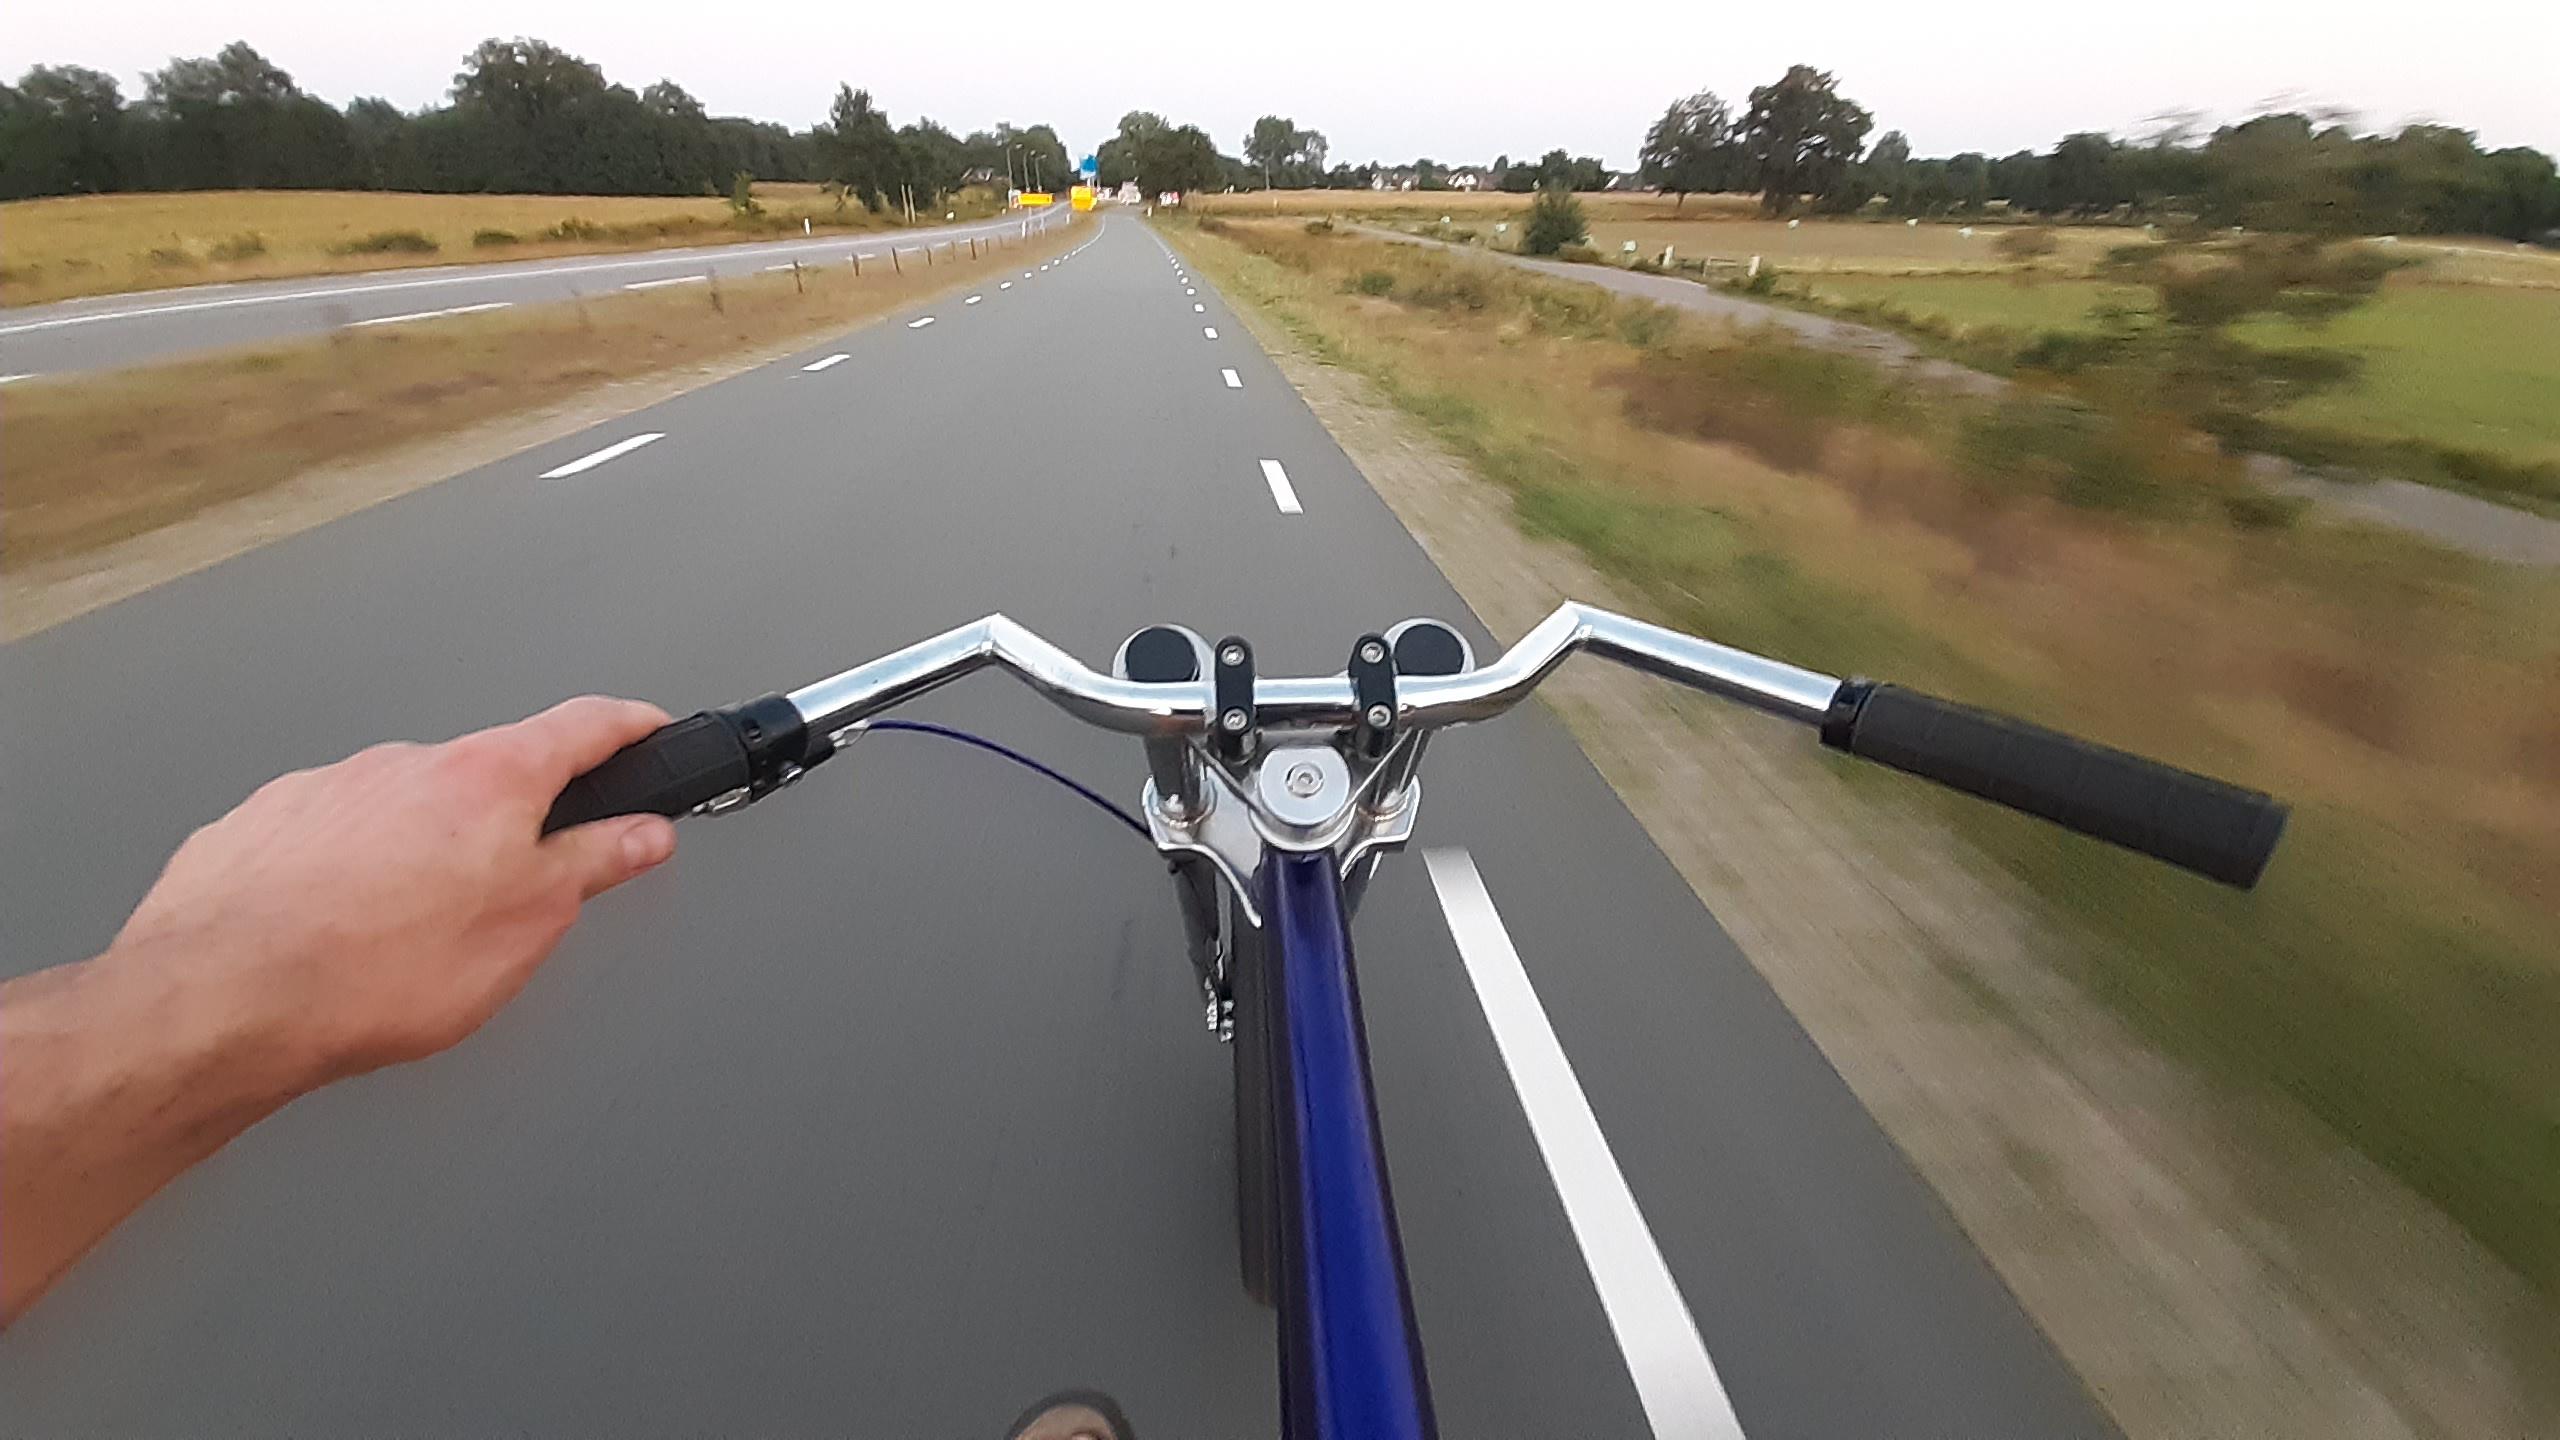
This picture is mirrored due to the selfie cam. Unfortunately you can't see the arm fully, but its still friggin' awesome!
I enjoy the idea on the coasterbrake arm and the anchor, this part being a part of the braking system.
[Edit] If anyone is interested in the model, I can share it by sending a stepfile of DXF.
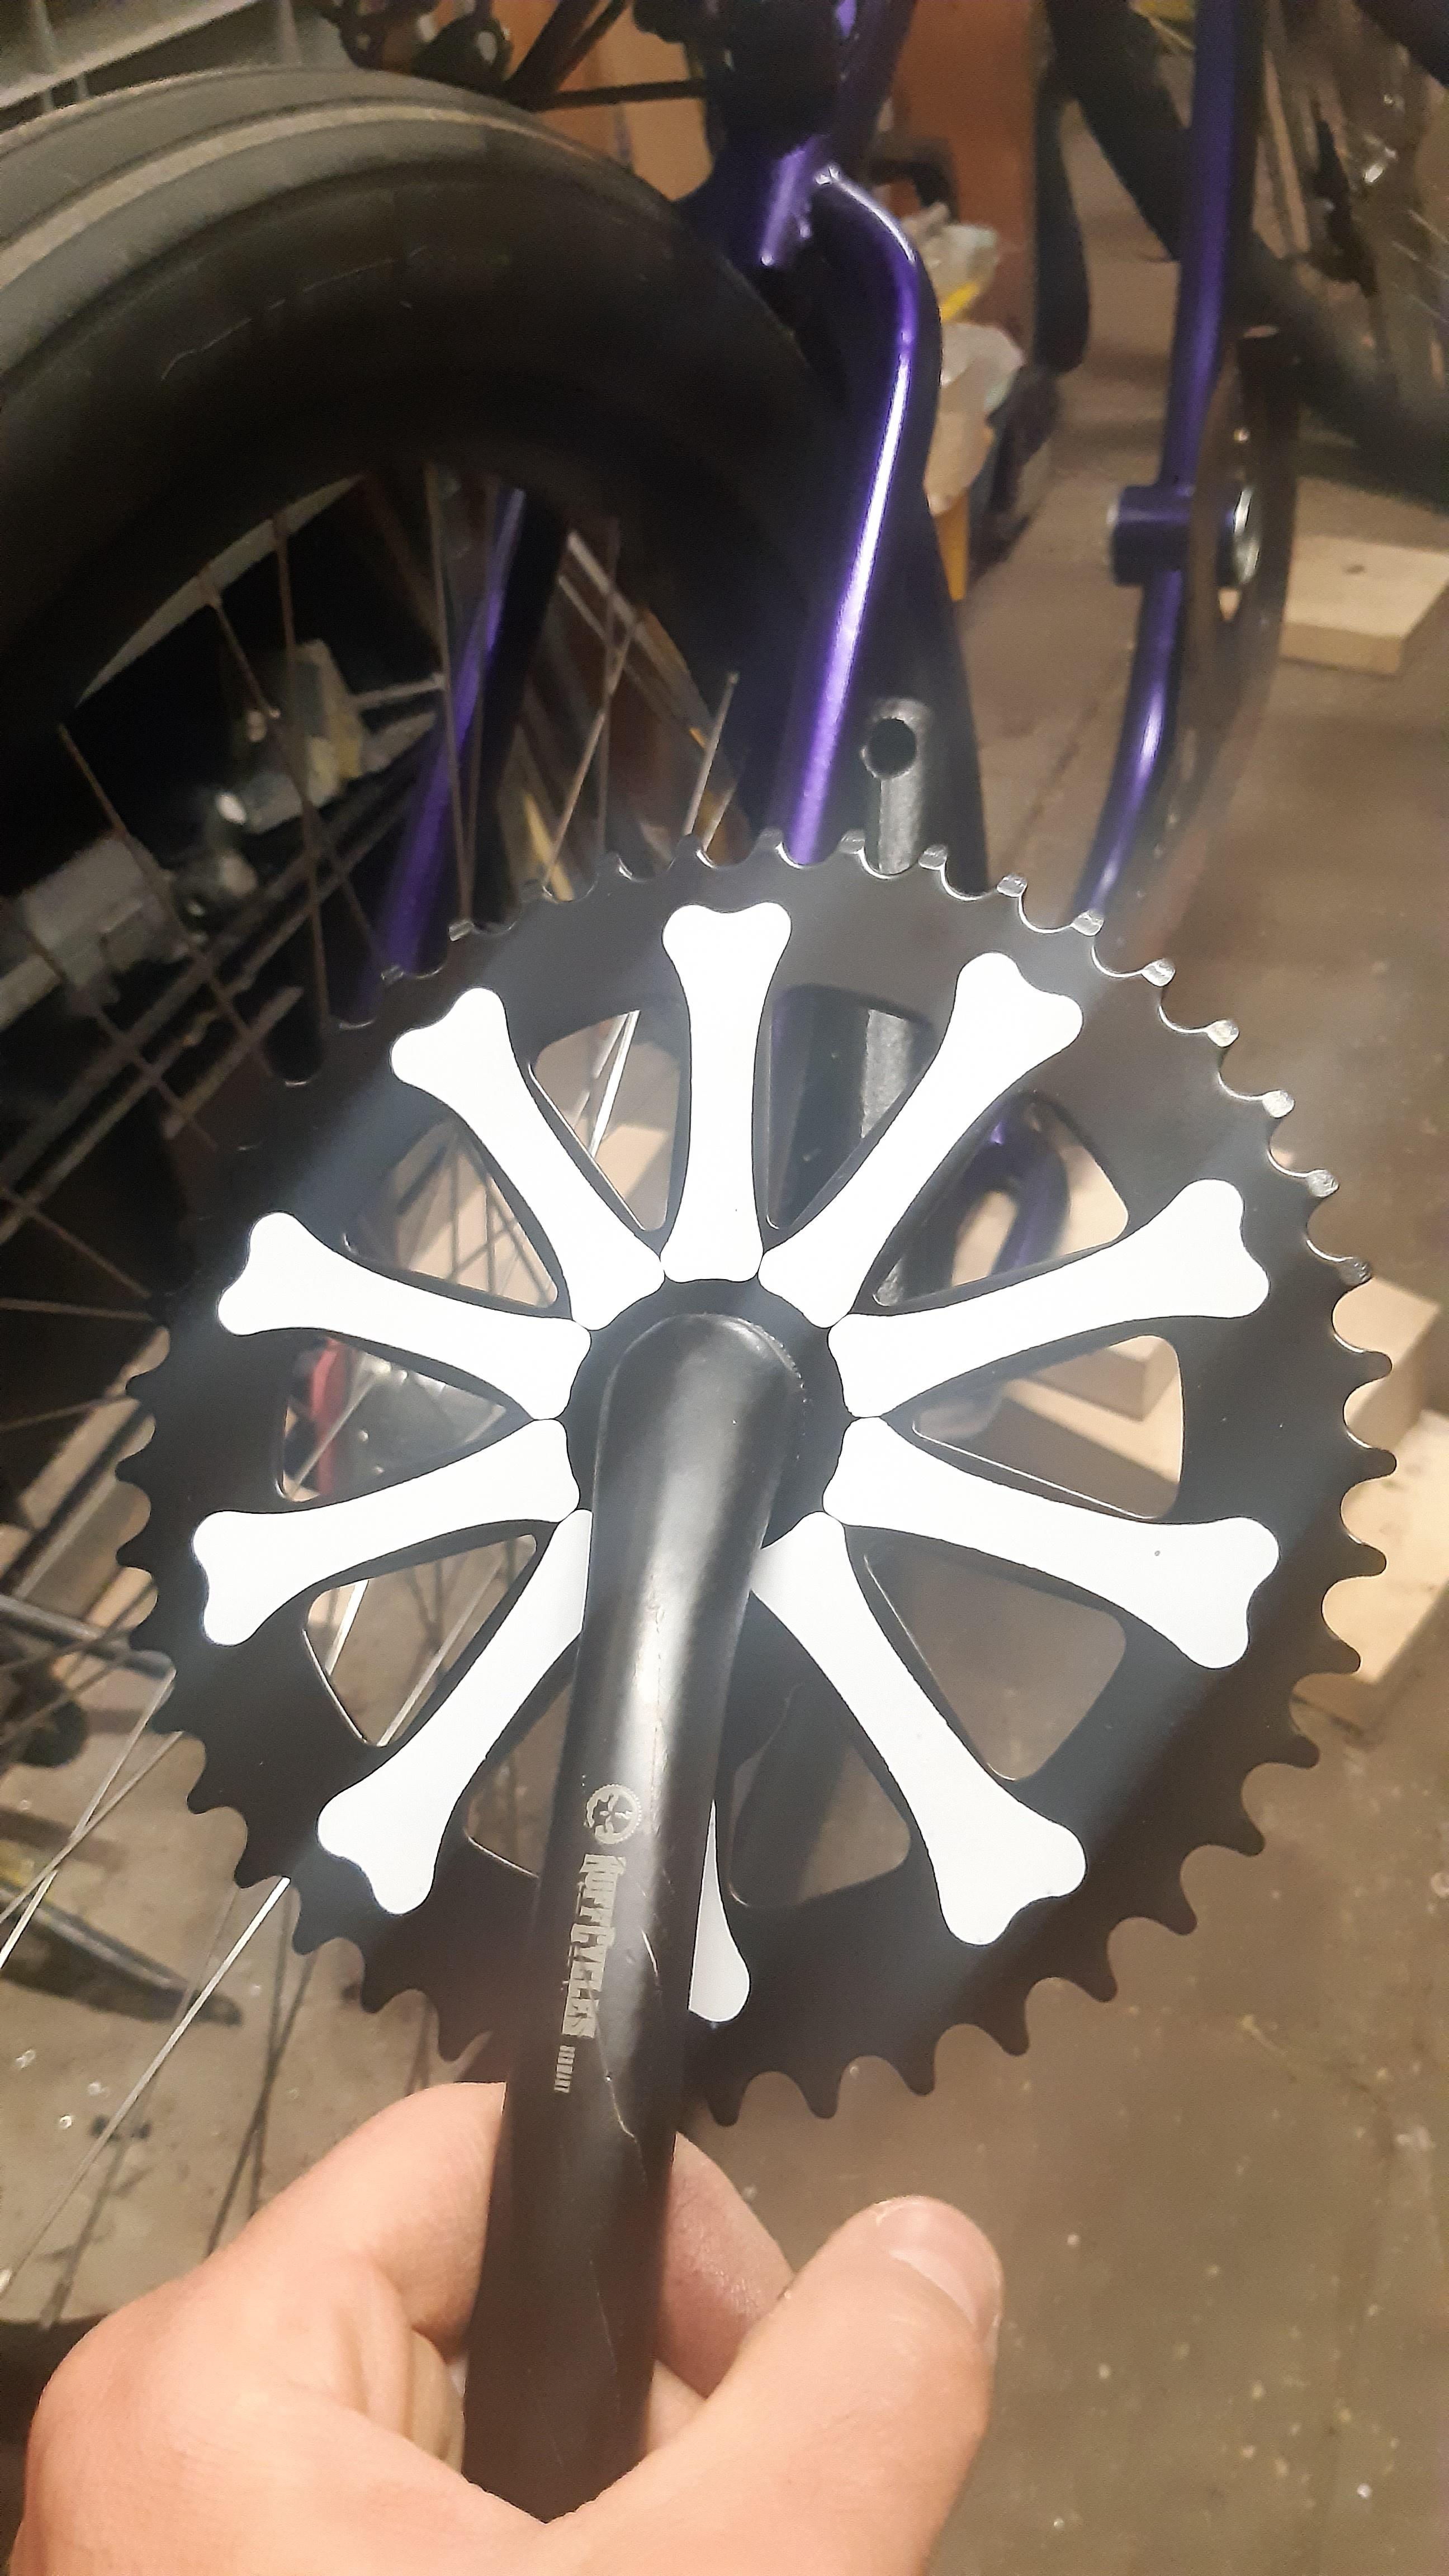
Chainwheel from classic cycle that fits the build.
My antique motorcycle style Porucho almost fully assembled. New bottom bracket bearings (Odyssey Dynatron absolutely smashed, see more details in the 'bike talk' section).
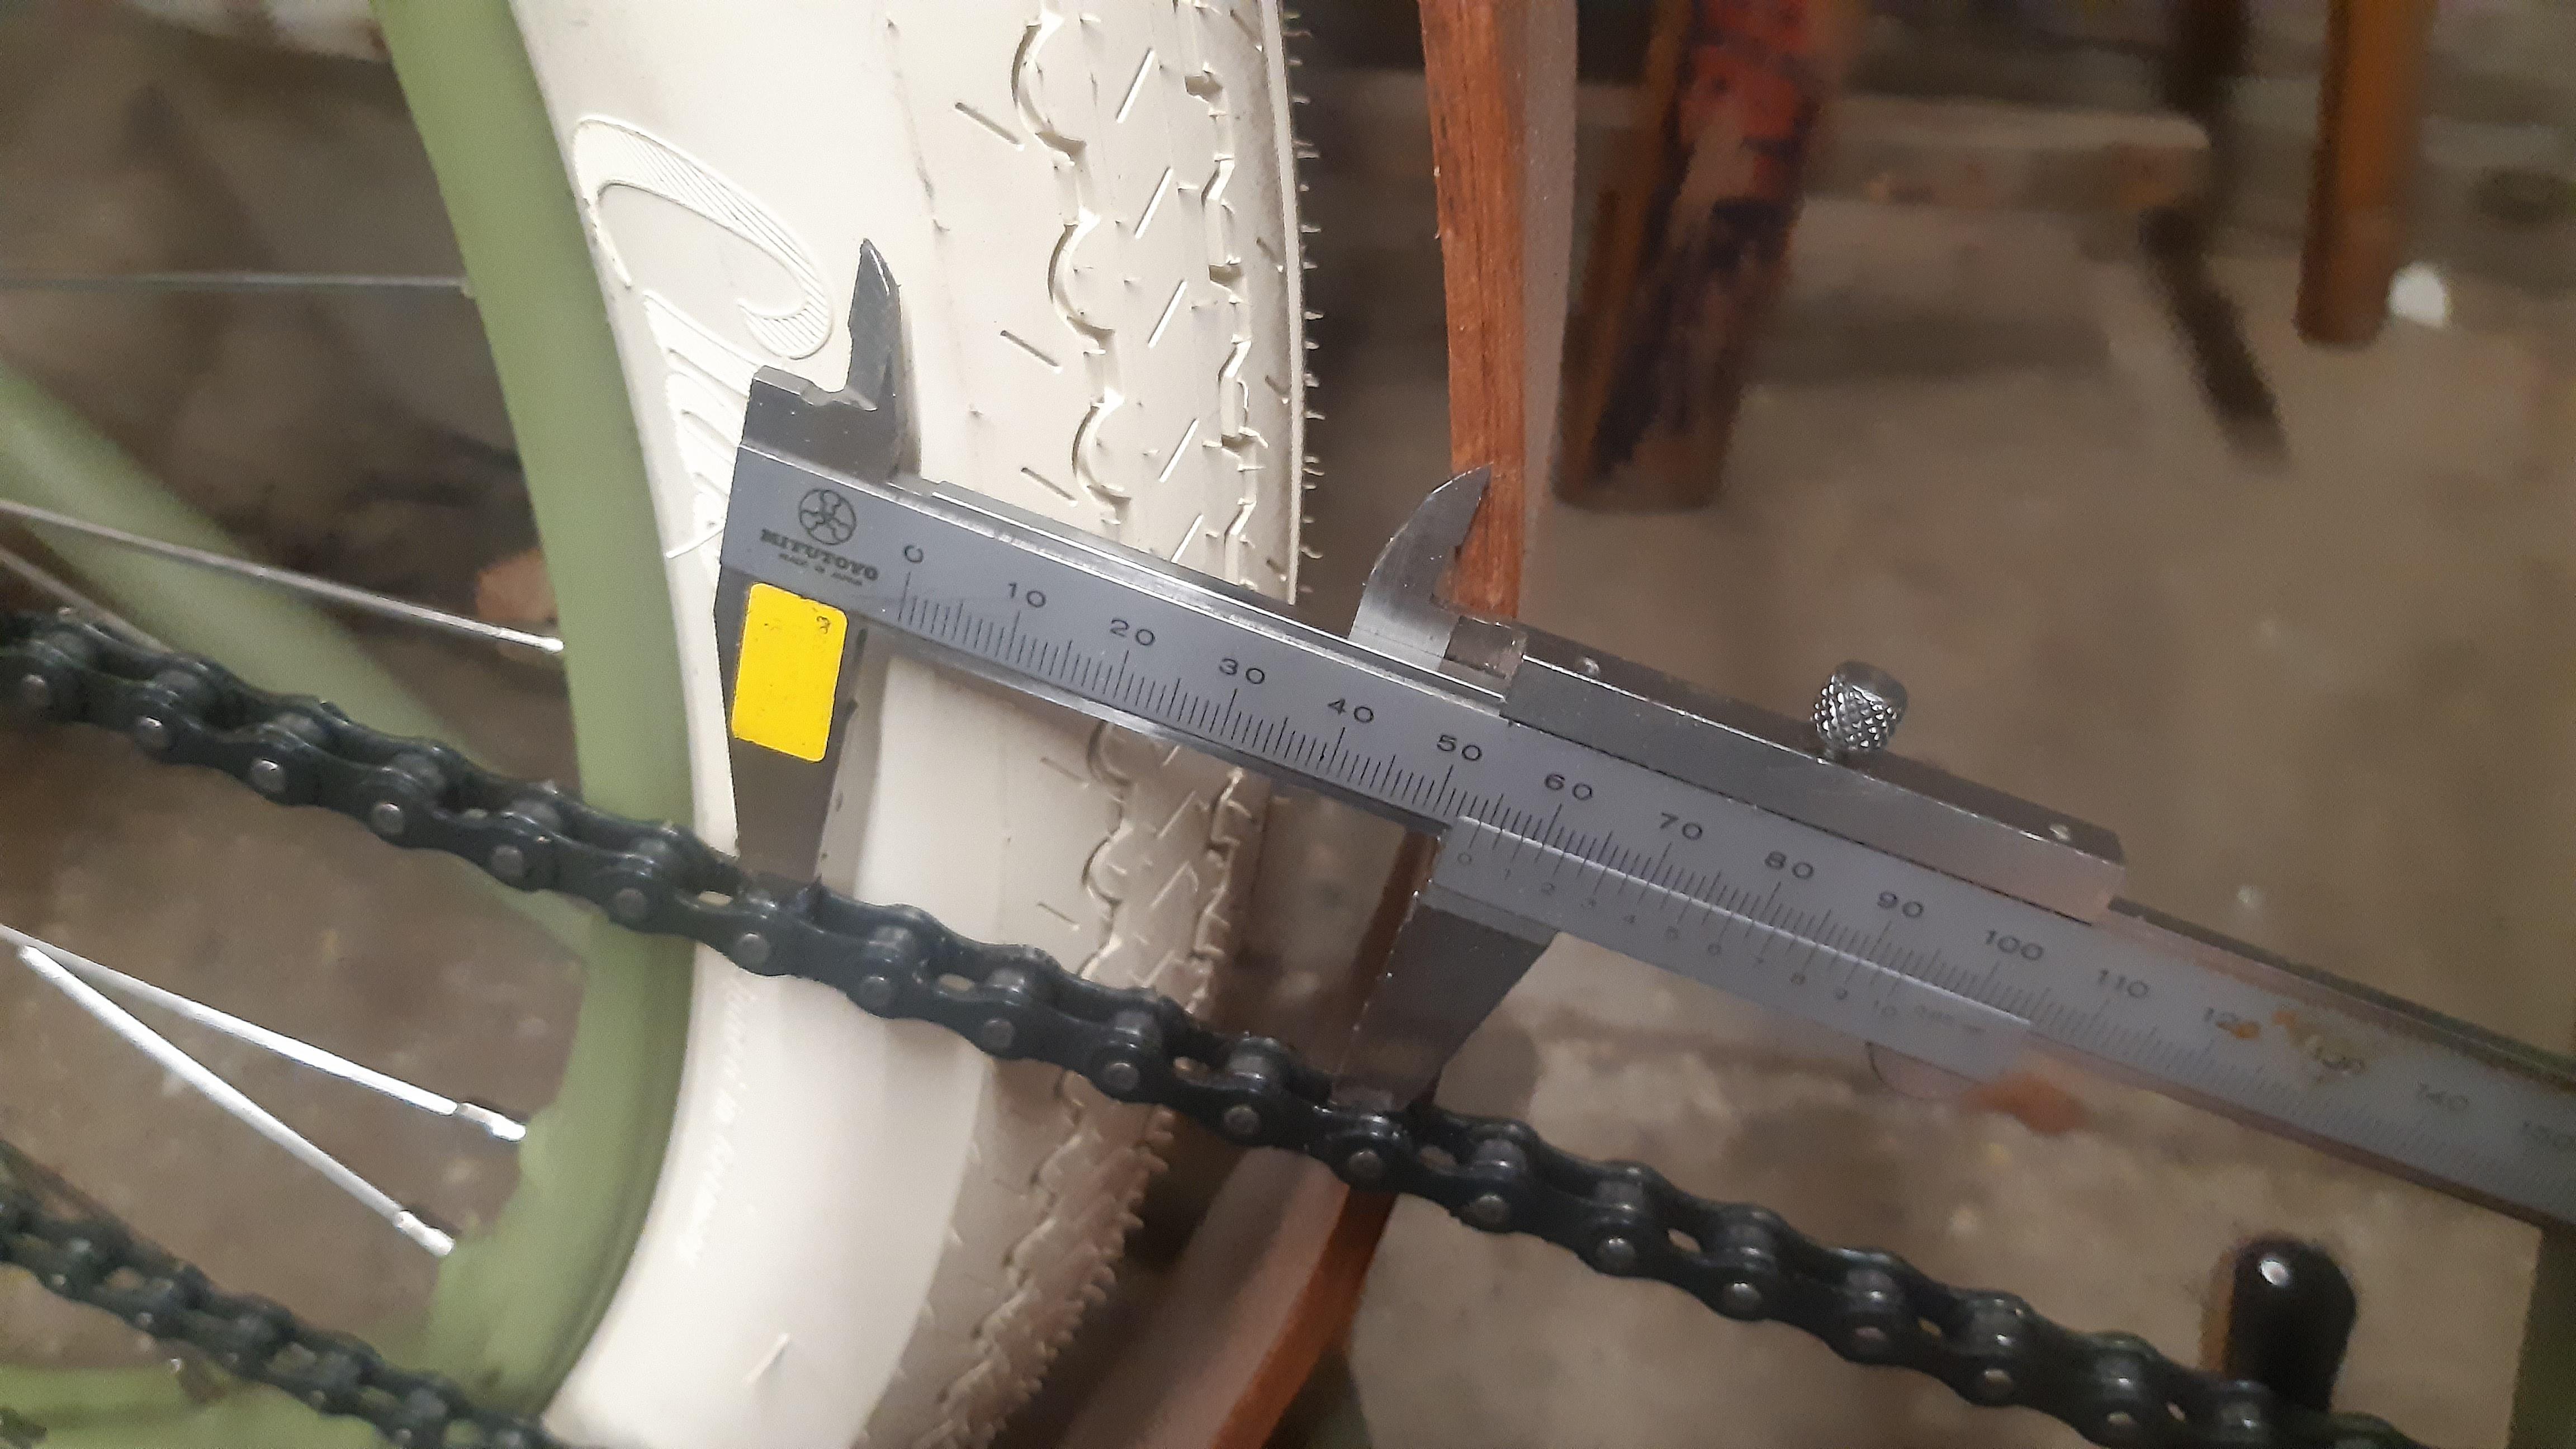
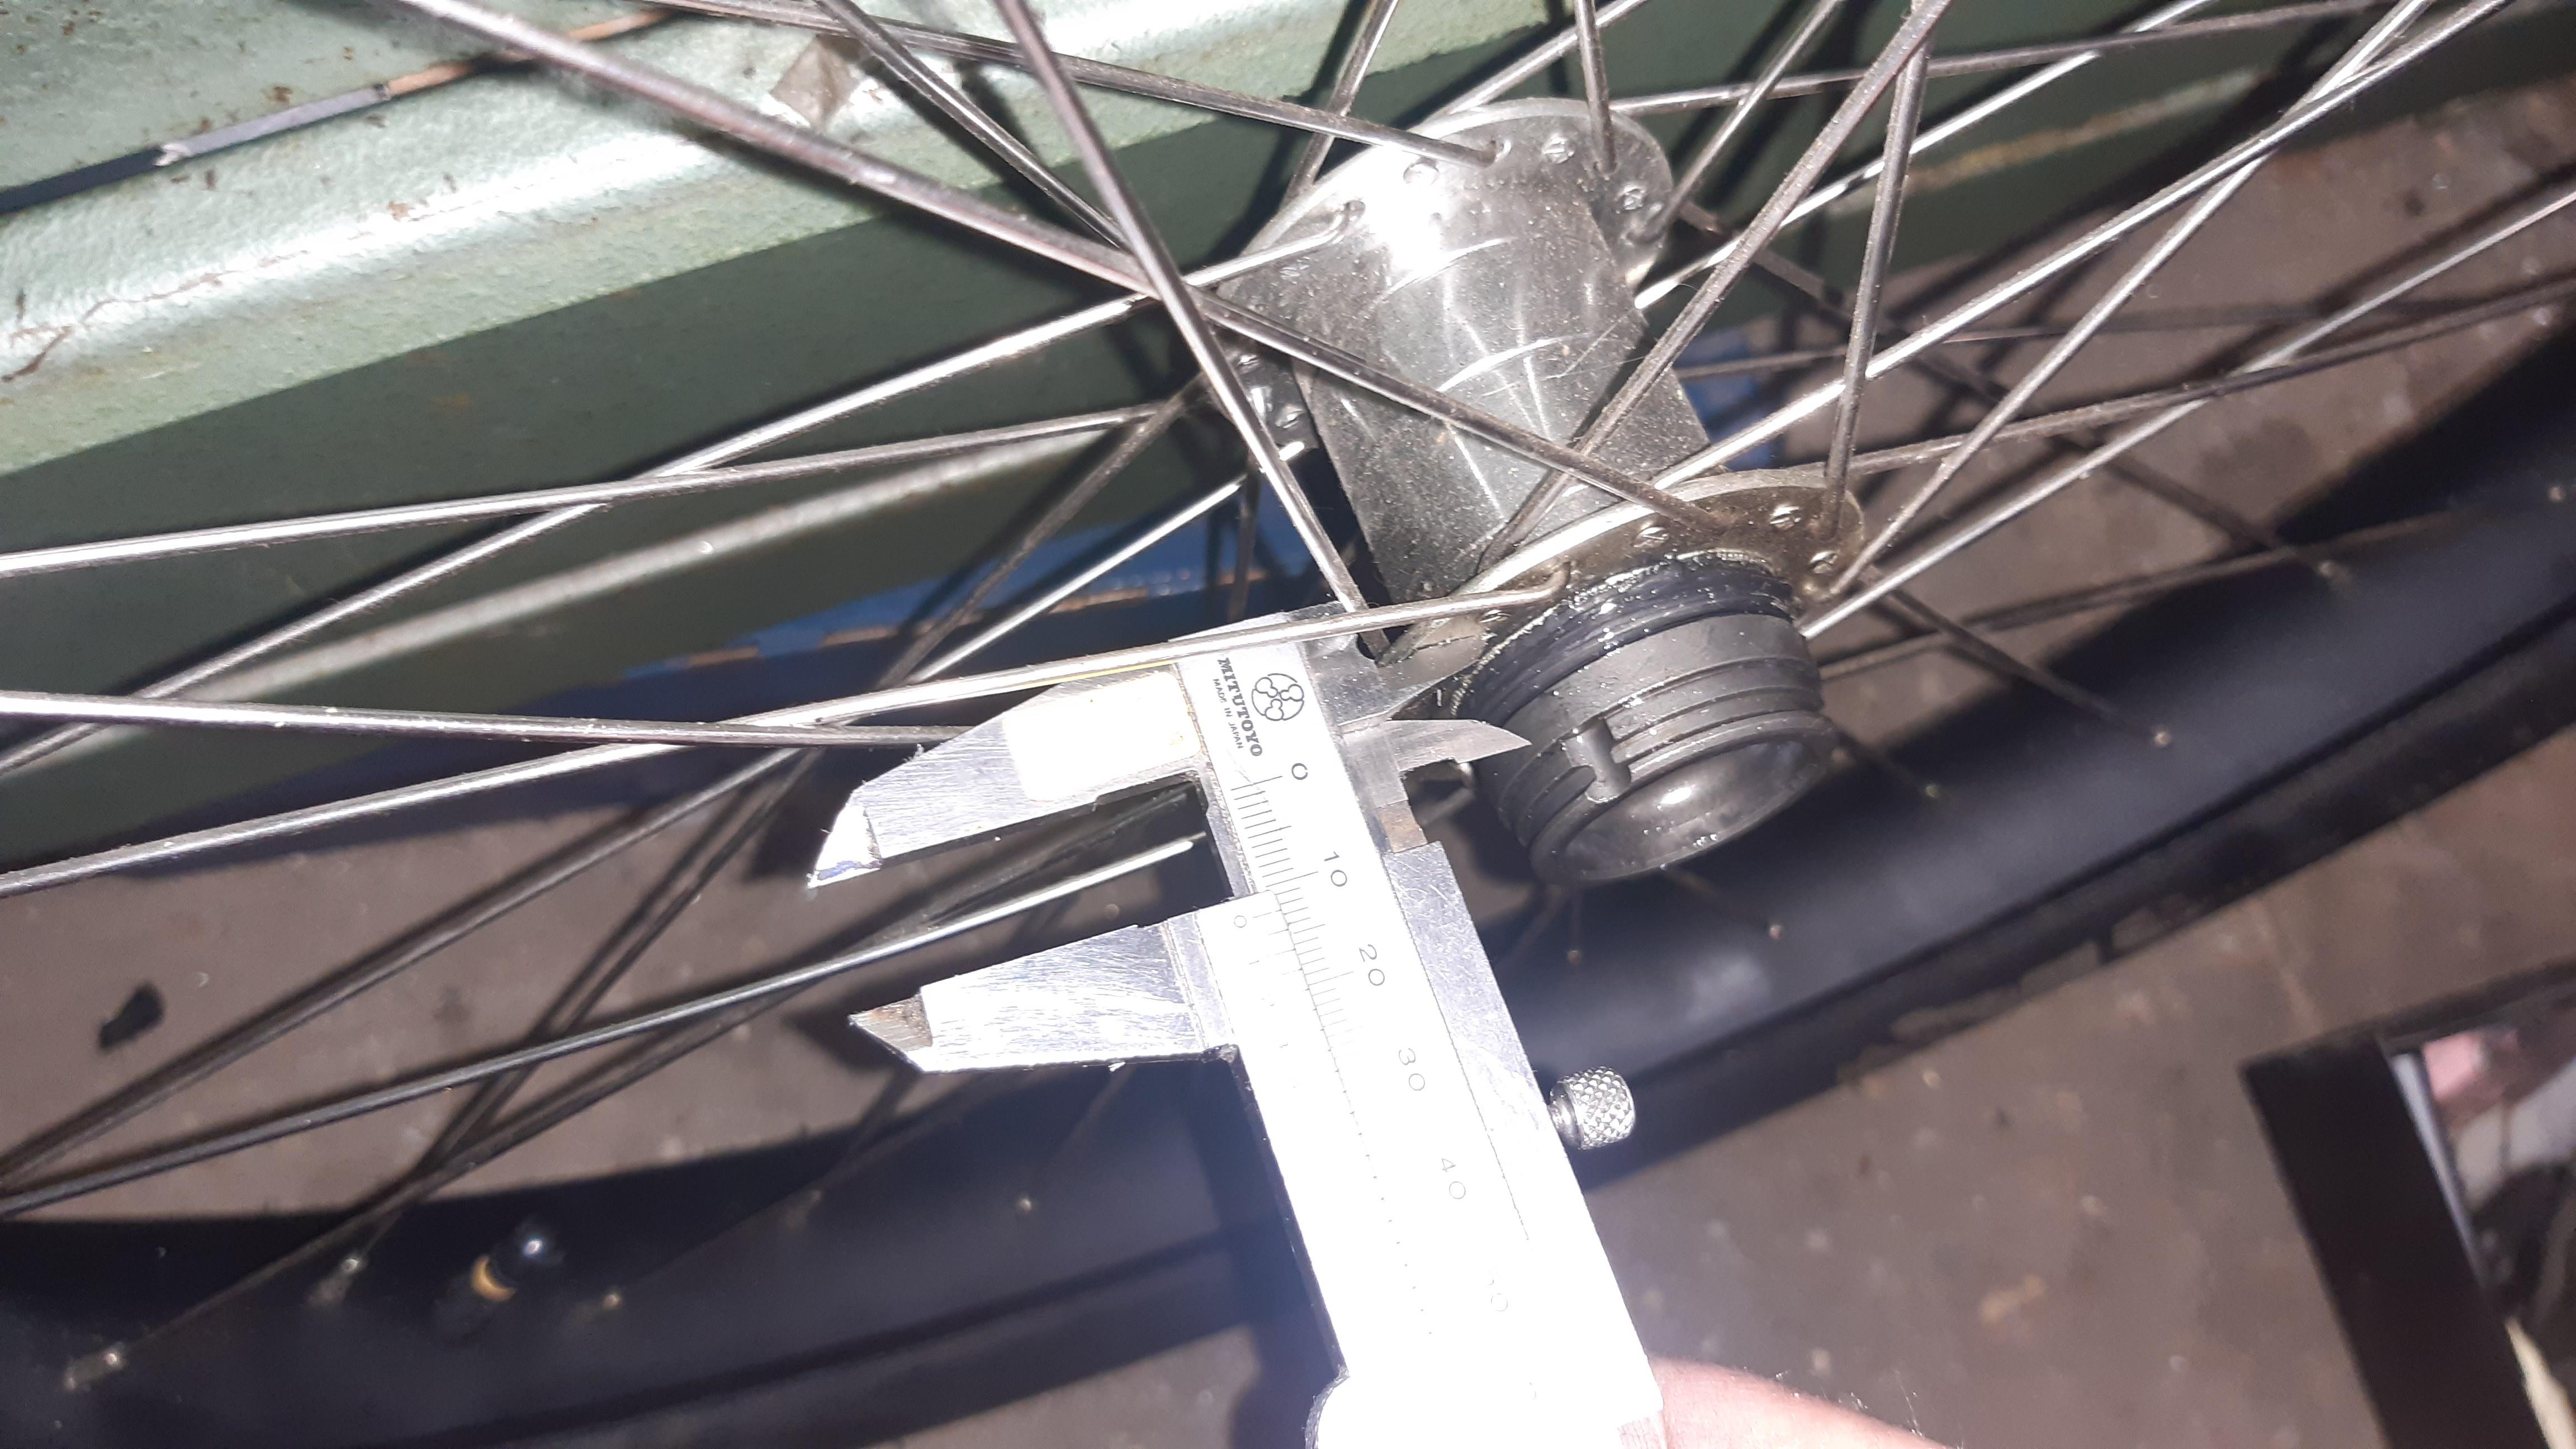
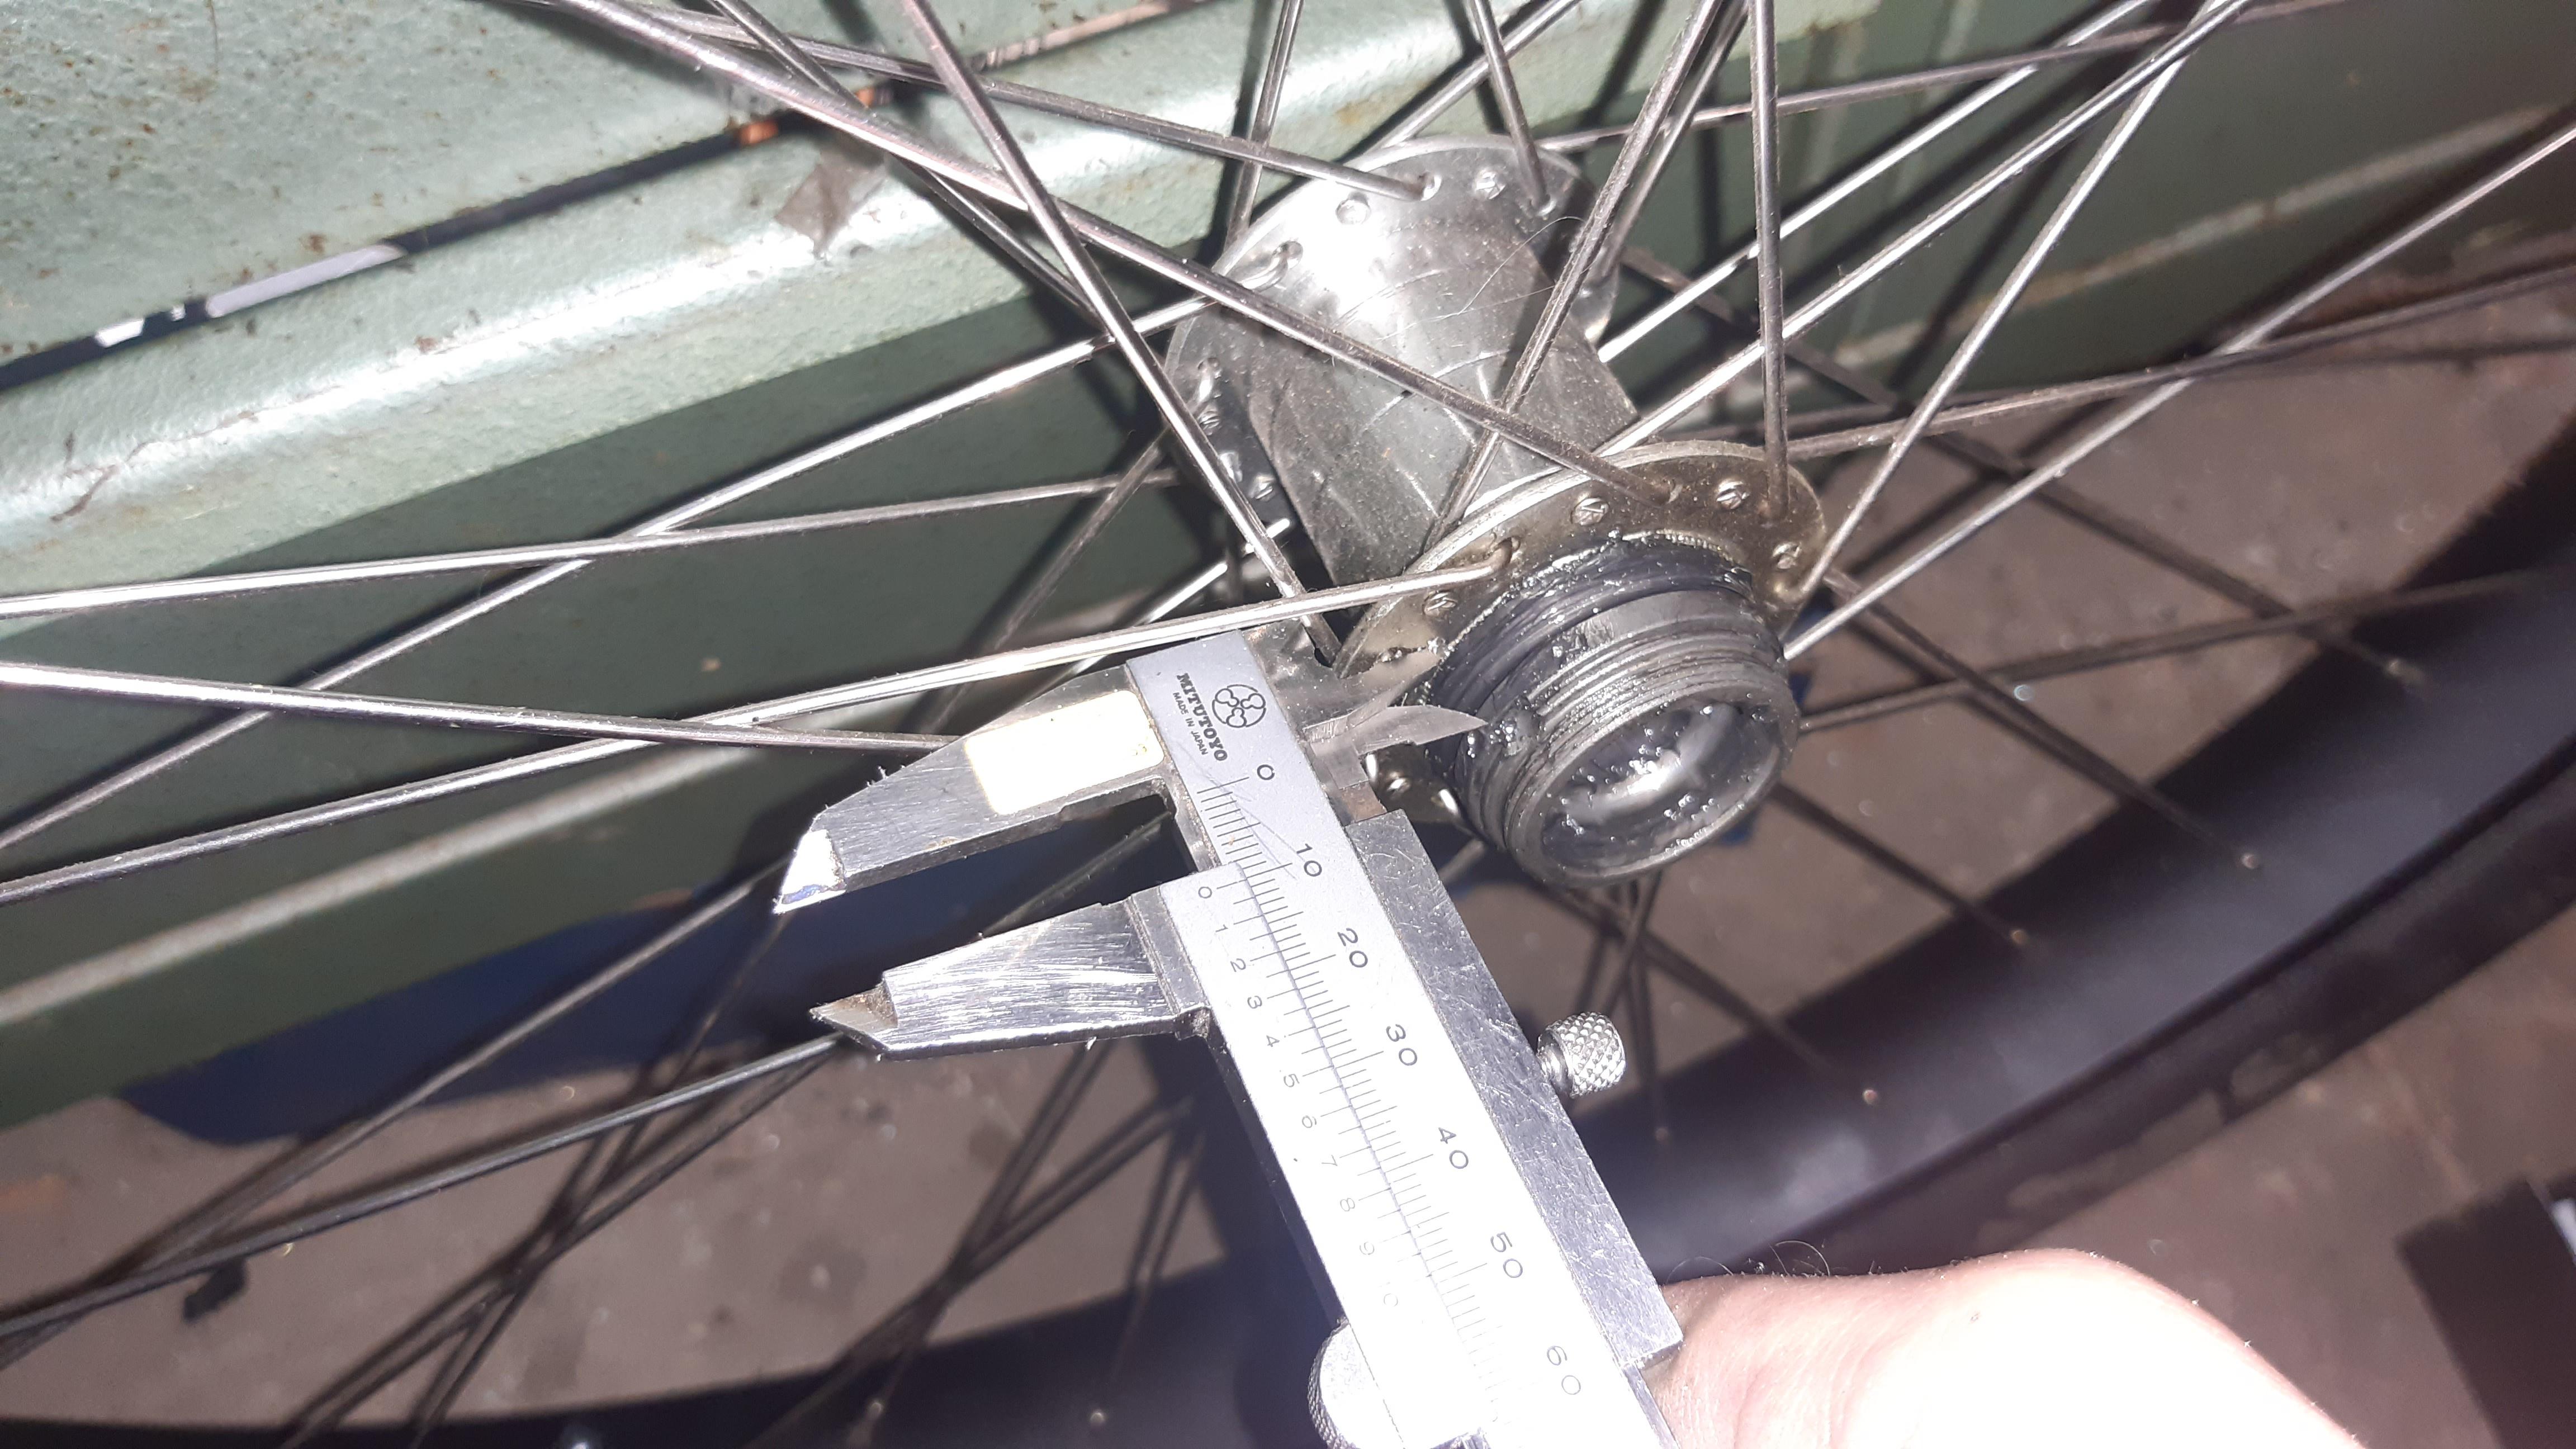
Measurements for a 'chain-tire' protective cap. I will fabricate something out of bronze or brass for that.
Thanks for reading/watching!
Last edited:
"The inner diameter of the front fork is 29mm, so maybe a bit too large for stem caps. 1 1/8" forks have and inner diameter of 25.4 generally."
In order to make it work on the Felt fork I had to buy 1 1/4" stem caps and star nuts instead of 1 1/8". I also had to use some short tubing cut from the Felt chopper bars that go into the fork tubing.
I love that coaster brake arm!
In order to make it work on the Felt fork I had to buy 1 1/4" stem caps and star nuts instead of 1 1/8". I also had to use some short tubing cut from the Felt chopper bars that go into the fork tubing.
I love that coaster brake arm!
Great work on the brake ARM. You could paint the anchor tattoo on the forearm section like Popeye.

MattiThundrrr
Rattus All Terrainus
"Strong to the finishGreat work on the brake ARM. You could paint the anchor tattoo on the forearm section like Popeye.
Cuz I eats my spinach!"
It's looking good, Bart. Really good

I thought about that, I like your creativity on mixed parts! And thanks!"The inner diameter of the front fork is 29mm, so maybe a bit too large for stem caps. 1 1/8" forks have and inner diameter of 25.4 generally."
In order to make it work on the Felt fork I had to buy 1 1/4" stem caps and star nuts instead of 1 1/8". I also had to use some short tubing cut from the Felt chopper bars that go into the fork tubing.
I love that coaster brake arm!
Great work on the brake ARM. You could paint the anchor tattoo on the forearm section like Popeye.
I was thinking to do that, but Popeye has huge forearms, and I decided to lasercut a big bicep before I thought of Popeye to be honest

That mentioned, I remember having regular fun with a friend of mine a few years back. My buddy works at a metal fabrication company and builds frames and parts for aftermarket motorcycles. He was active in motocross (Maico Twinshock and EML Jumbo! The EML Jumbo is a 1980's, 1000cc, 168hp on the rear wheel, sidecar motocross beast. There were some guys riding this without sidecar) but I digress... This profession gave him "Popeye" like forearms and hands like a vice grip.
Every time we got into a (fun) argument we ended up wrestling/fighting, but I knew he would win eventually with those vice grips that are called hands. There was only one way I could win and that was dirty and below my standard

We still have fun and goof around.
The coasterbrake arm is far-fetched on the theme/name of the build, but I just thought this was really cool and I am happy with this choice.
Thank you sir!"Strong to the finish
Cuz I eats my spinach!"
It's looking good, Bart. Really good
Hi guys, little time, but some updates:
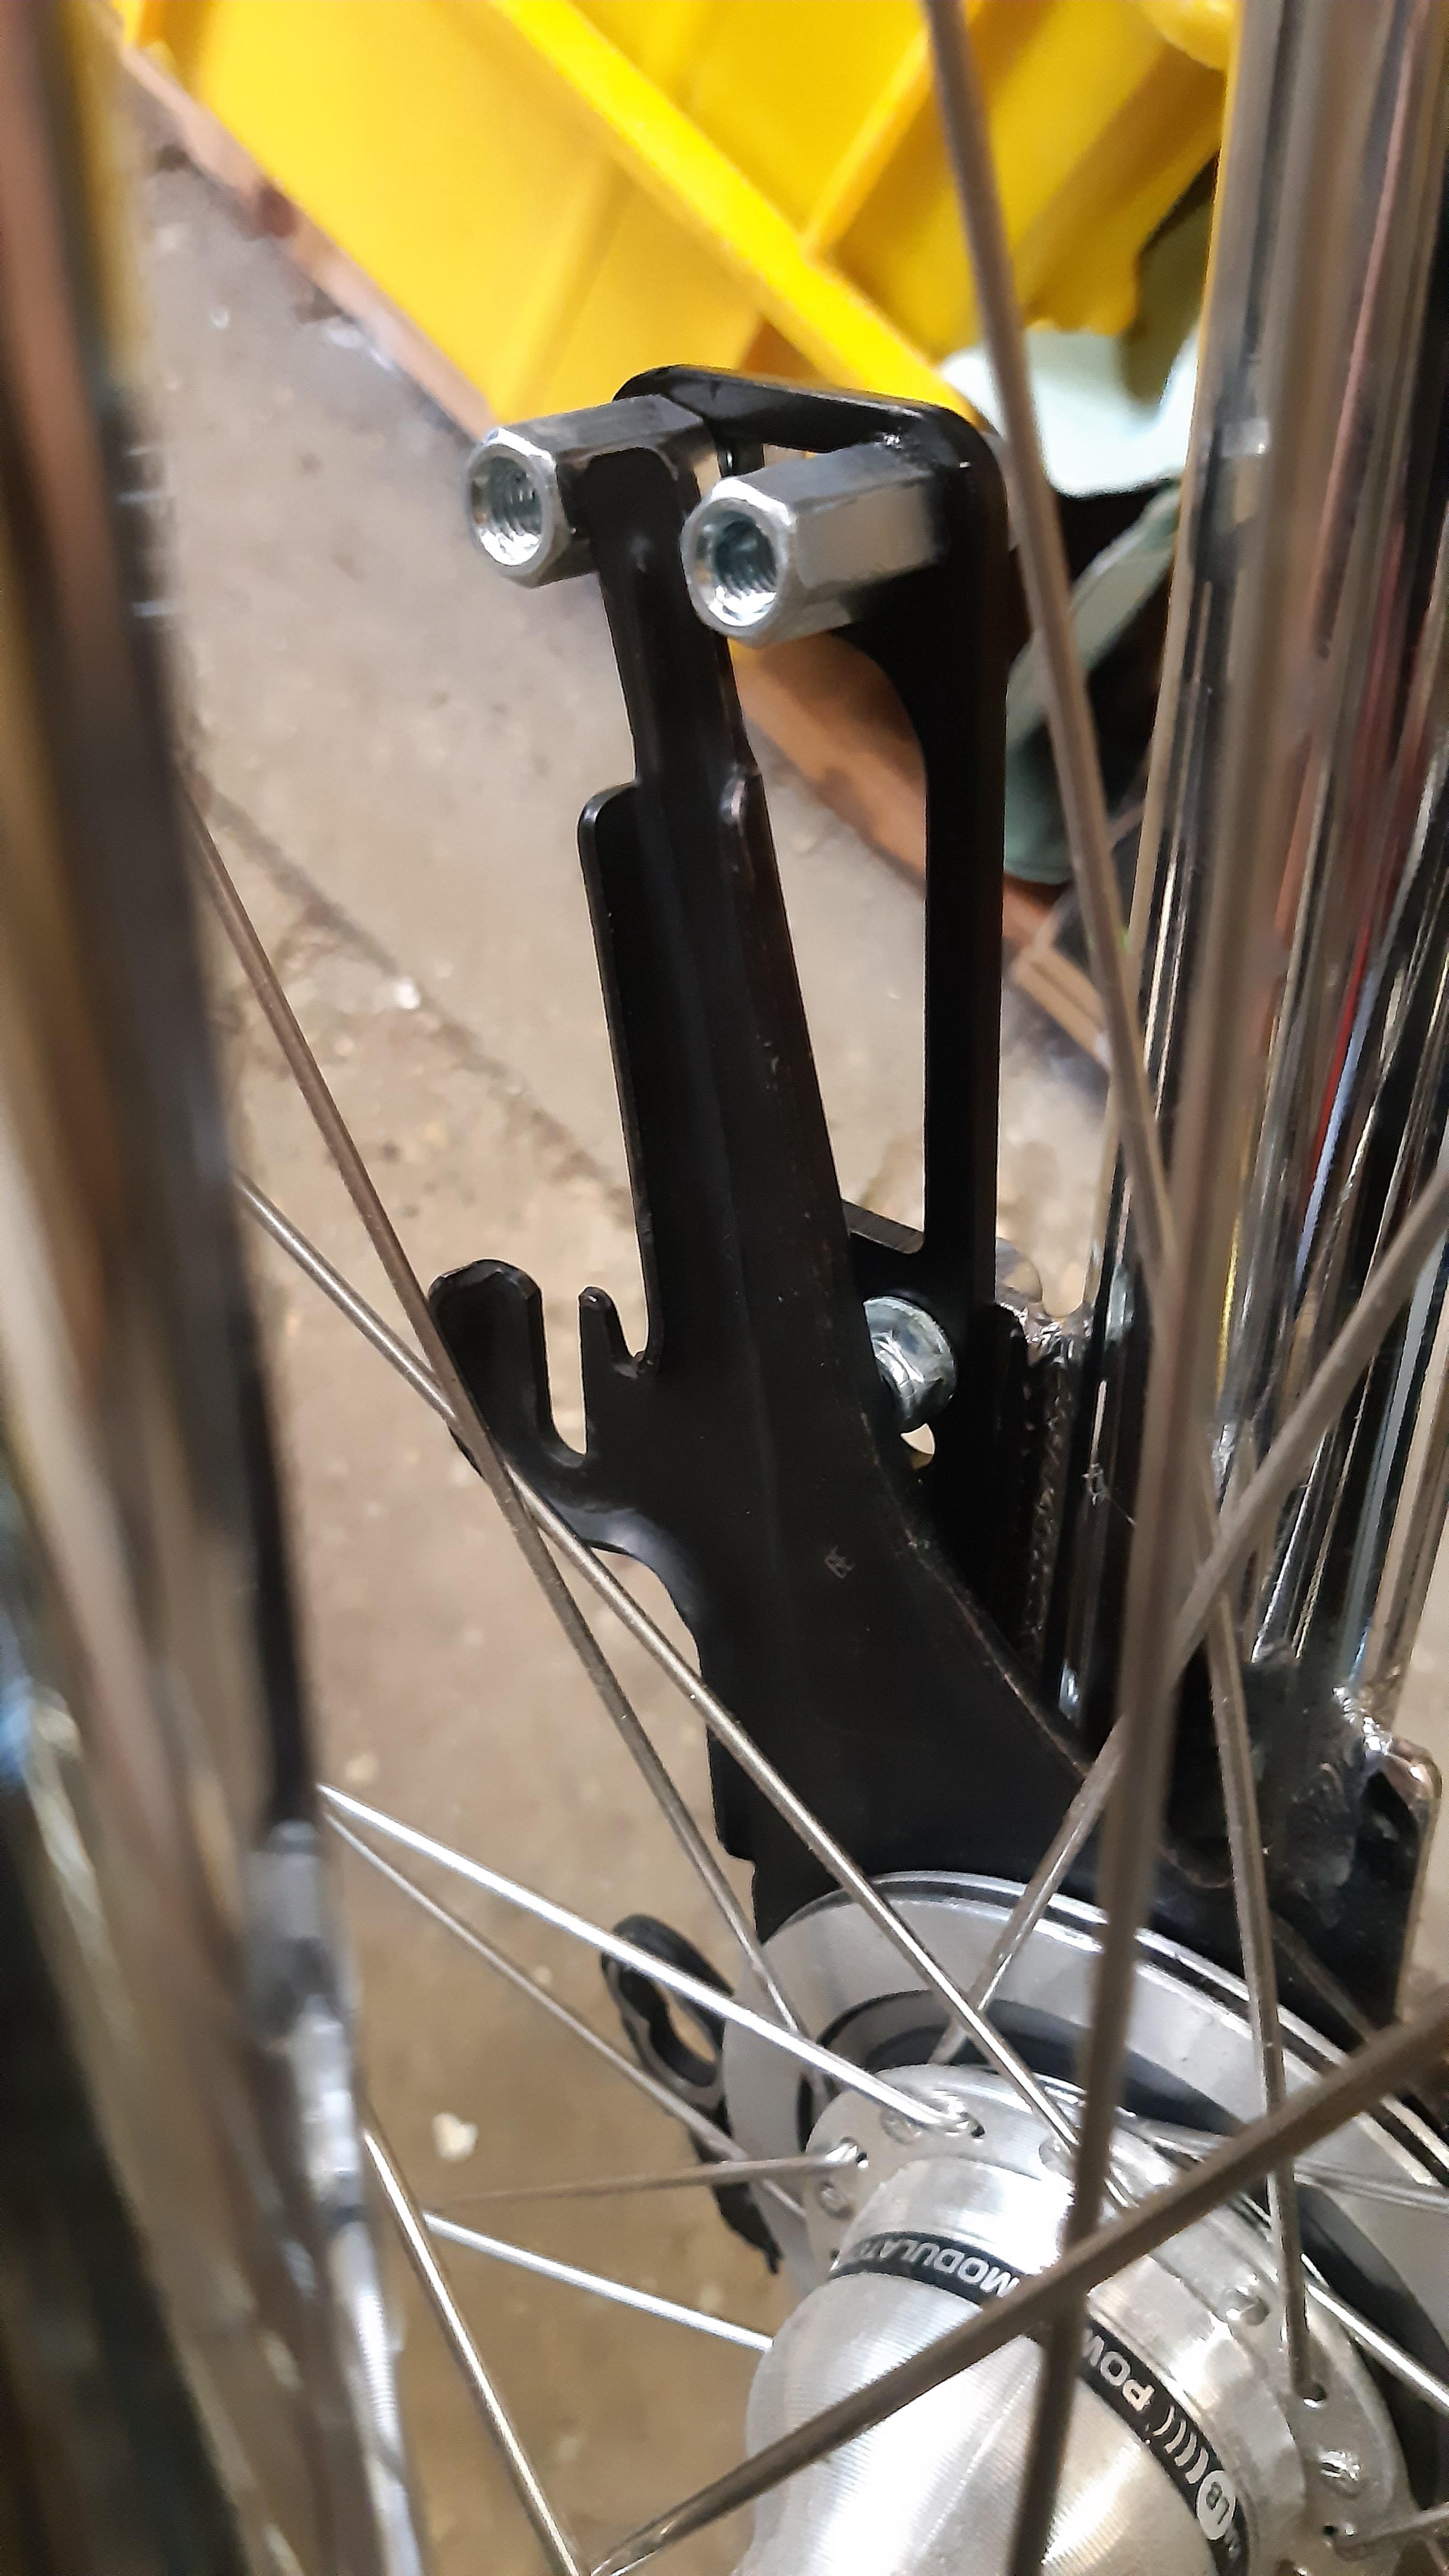
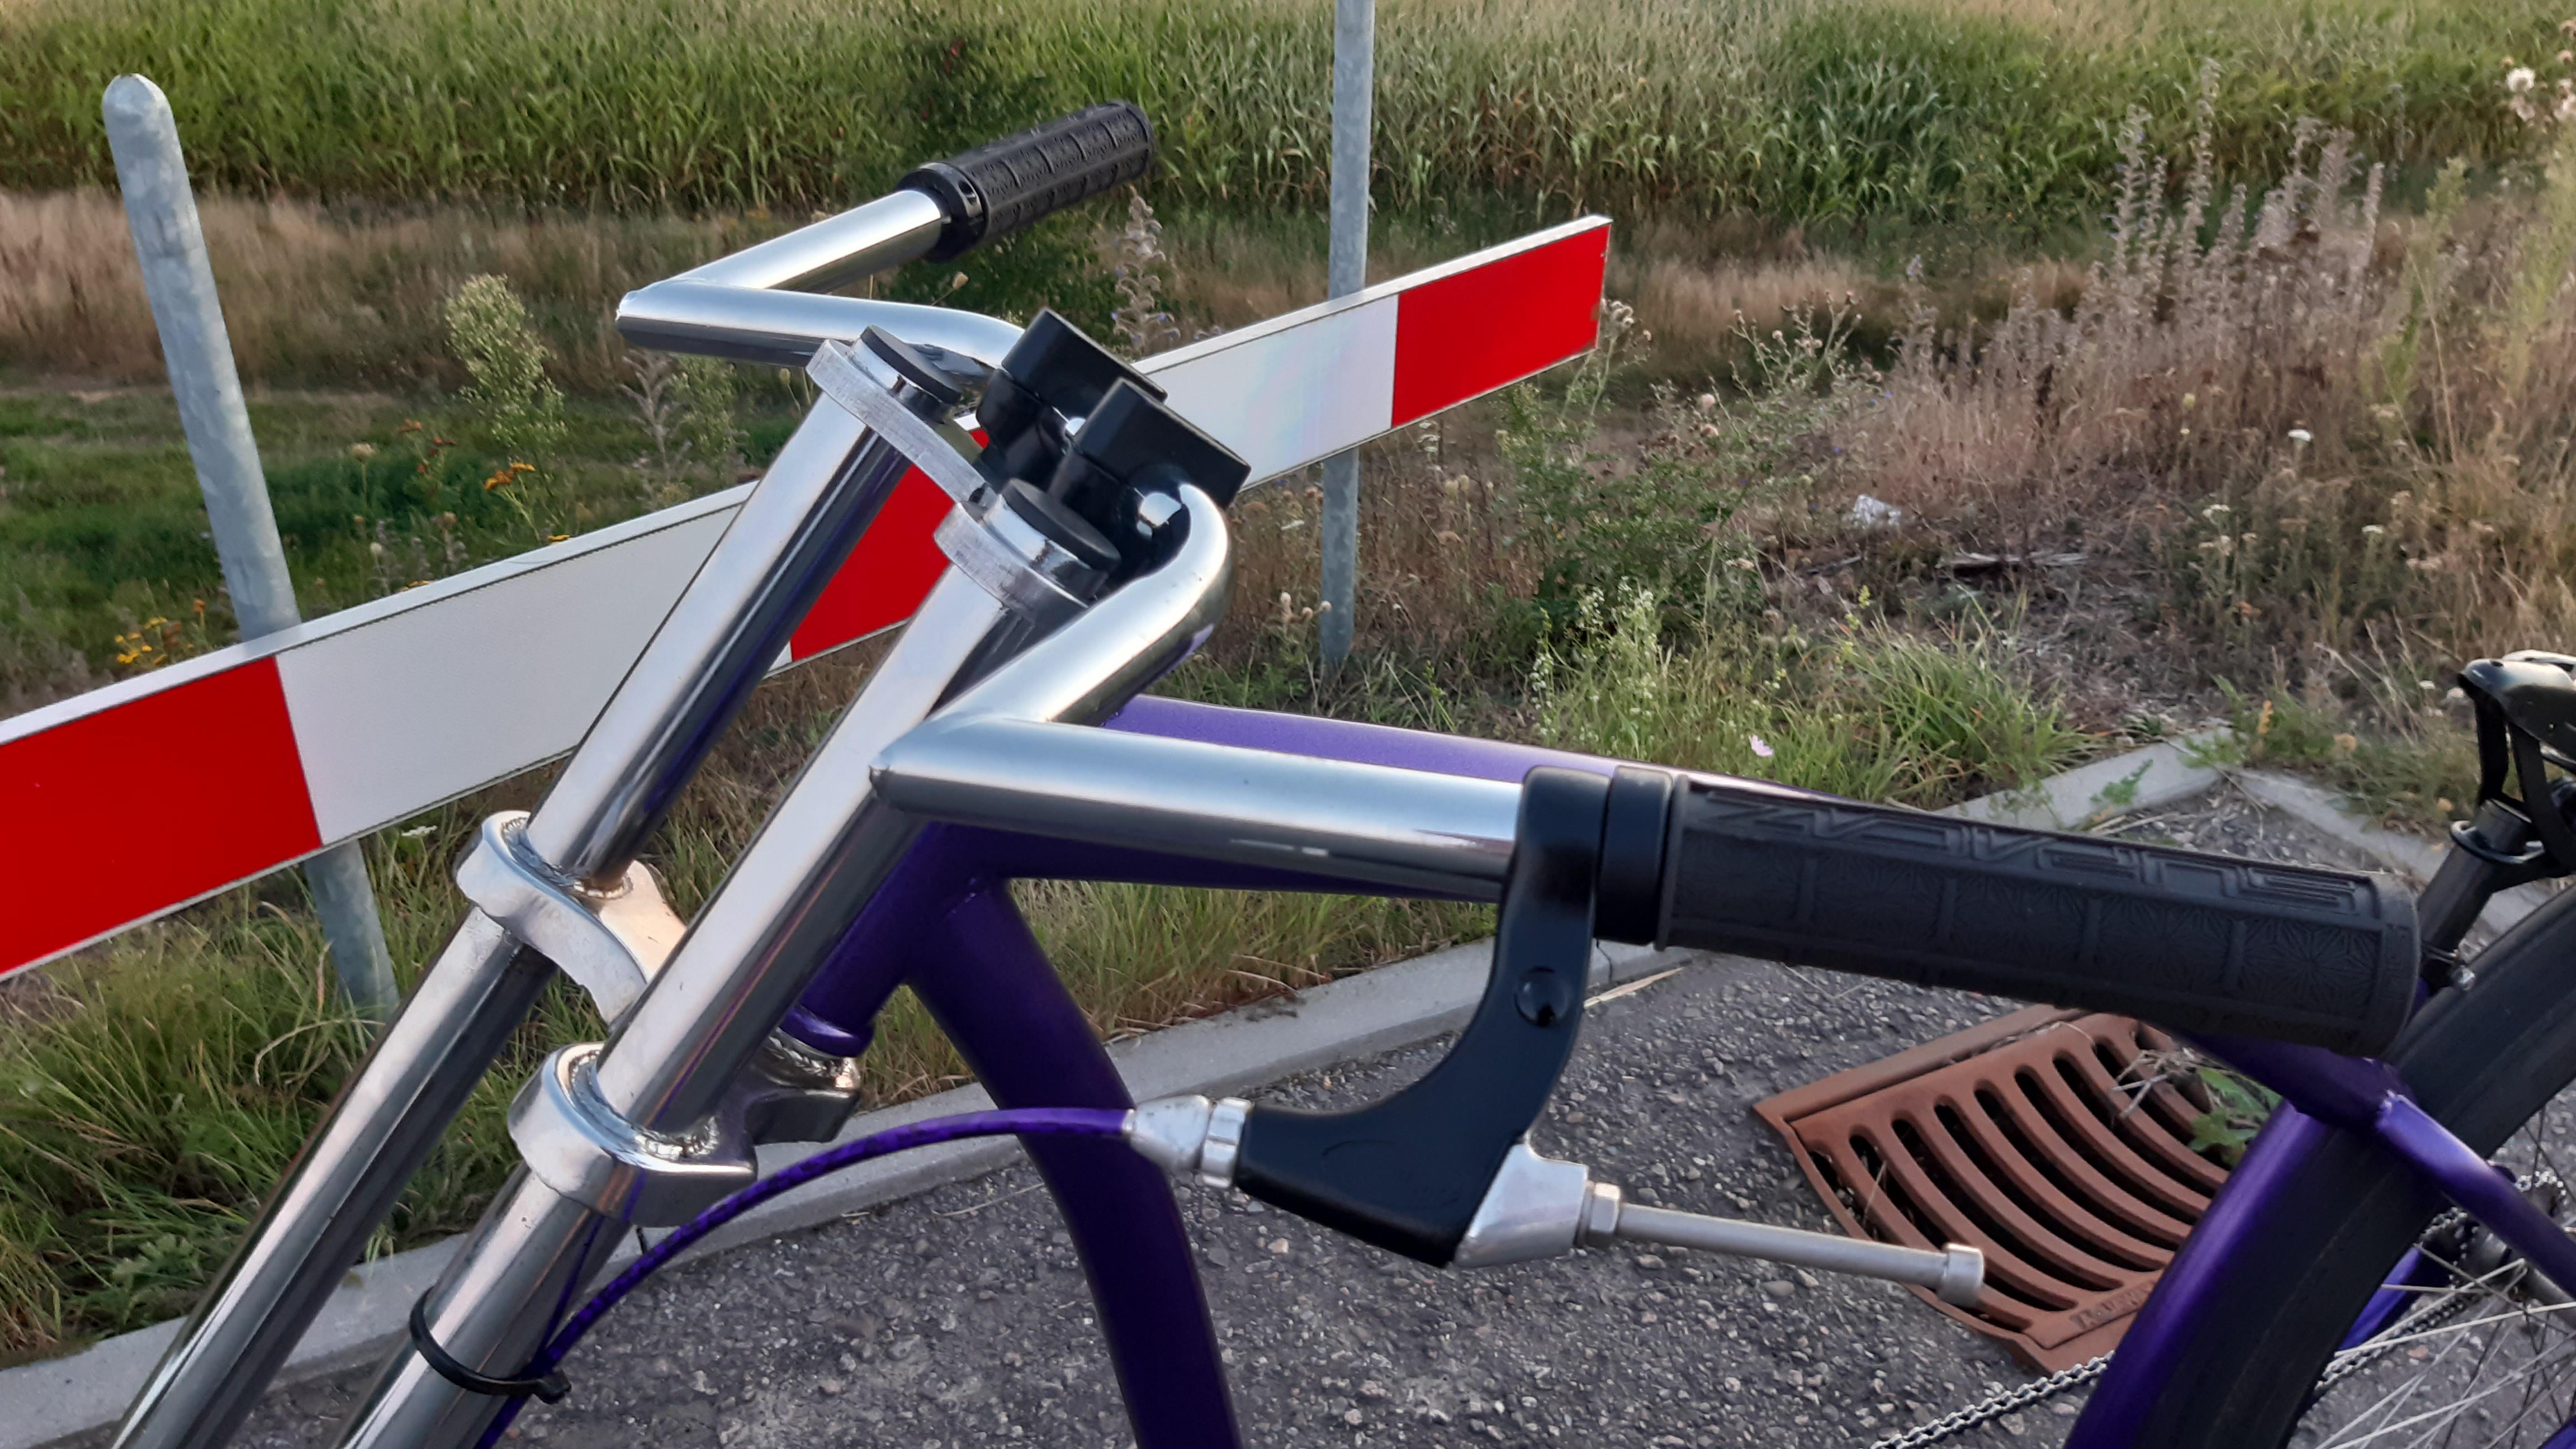
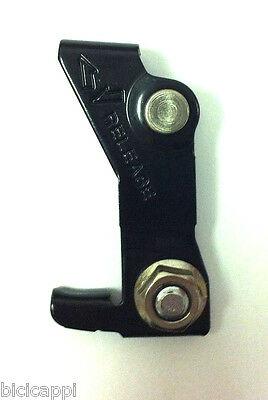
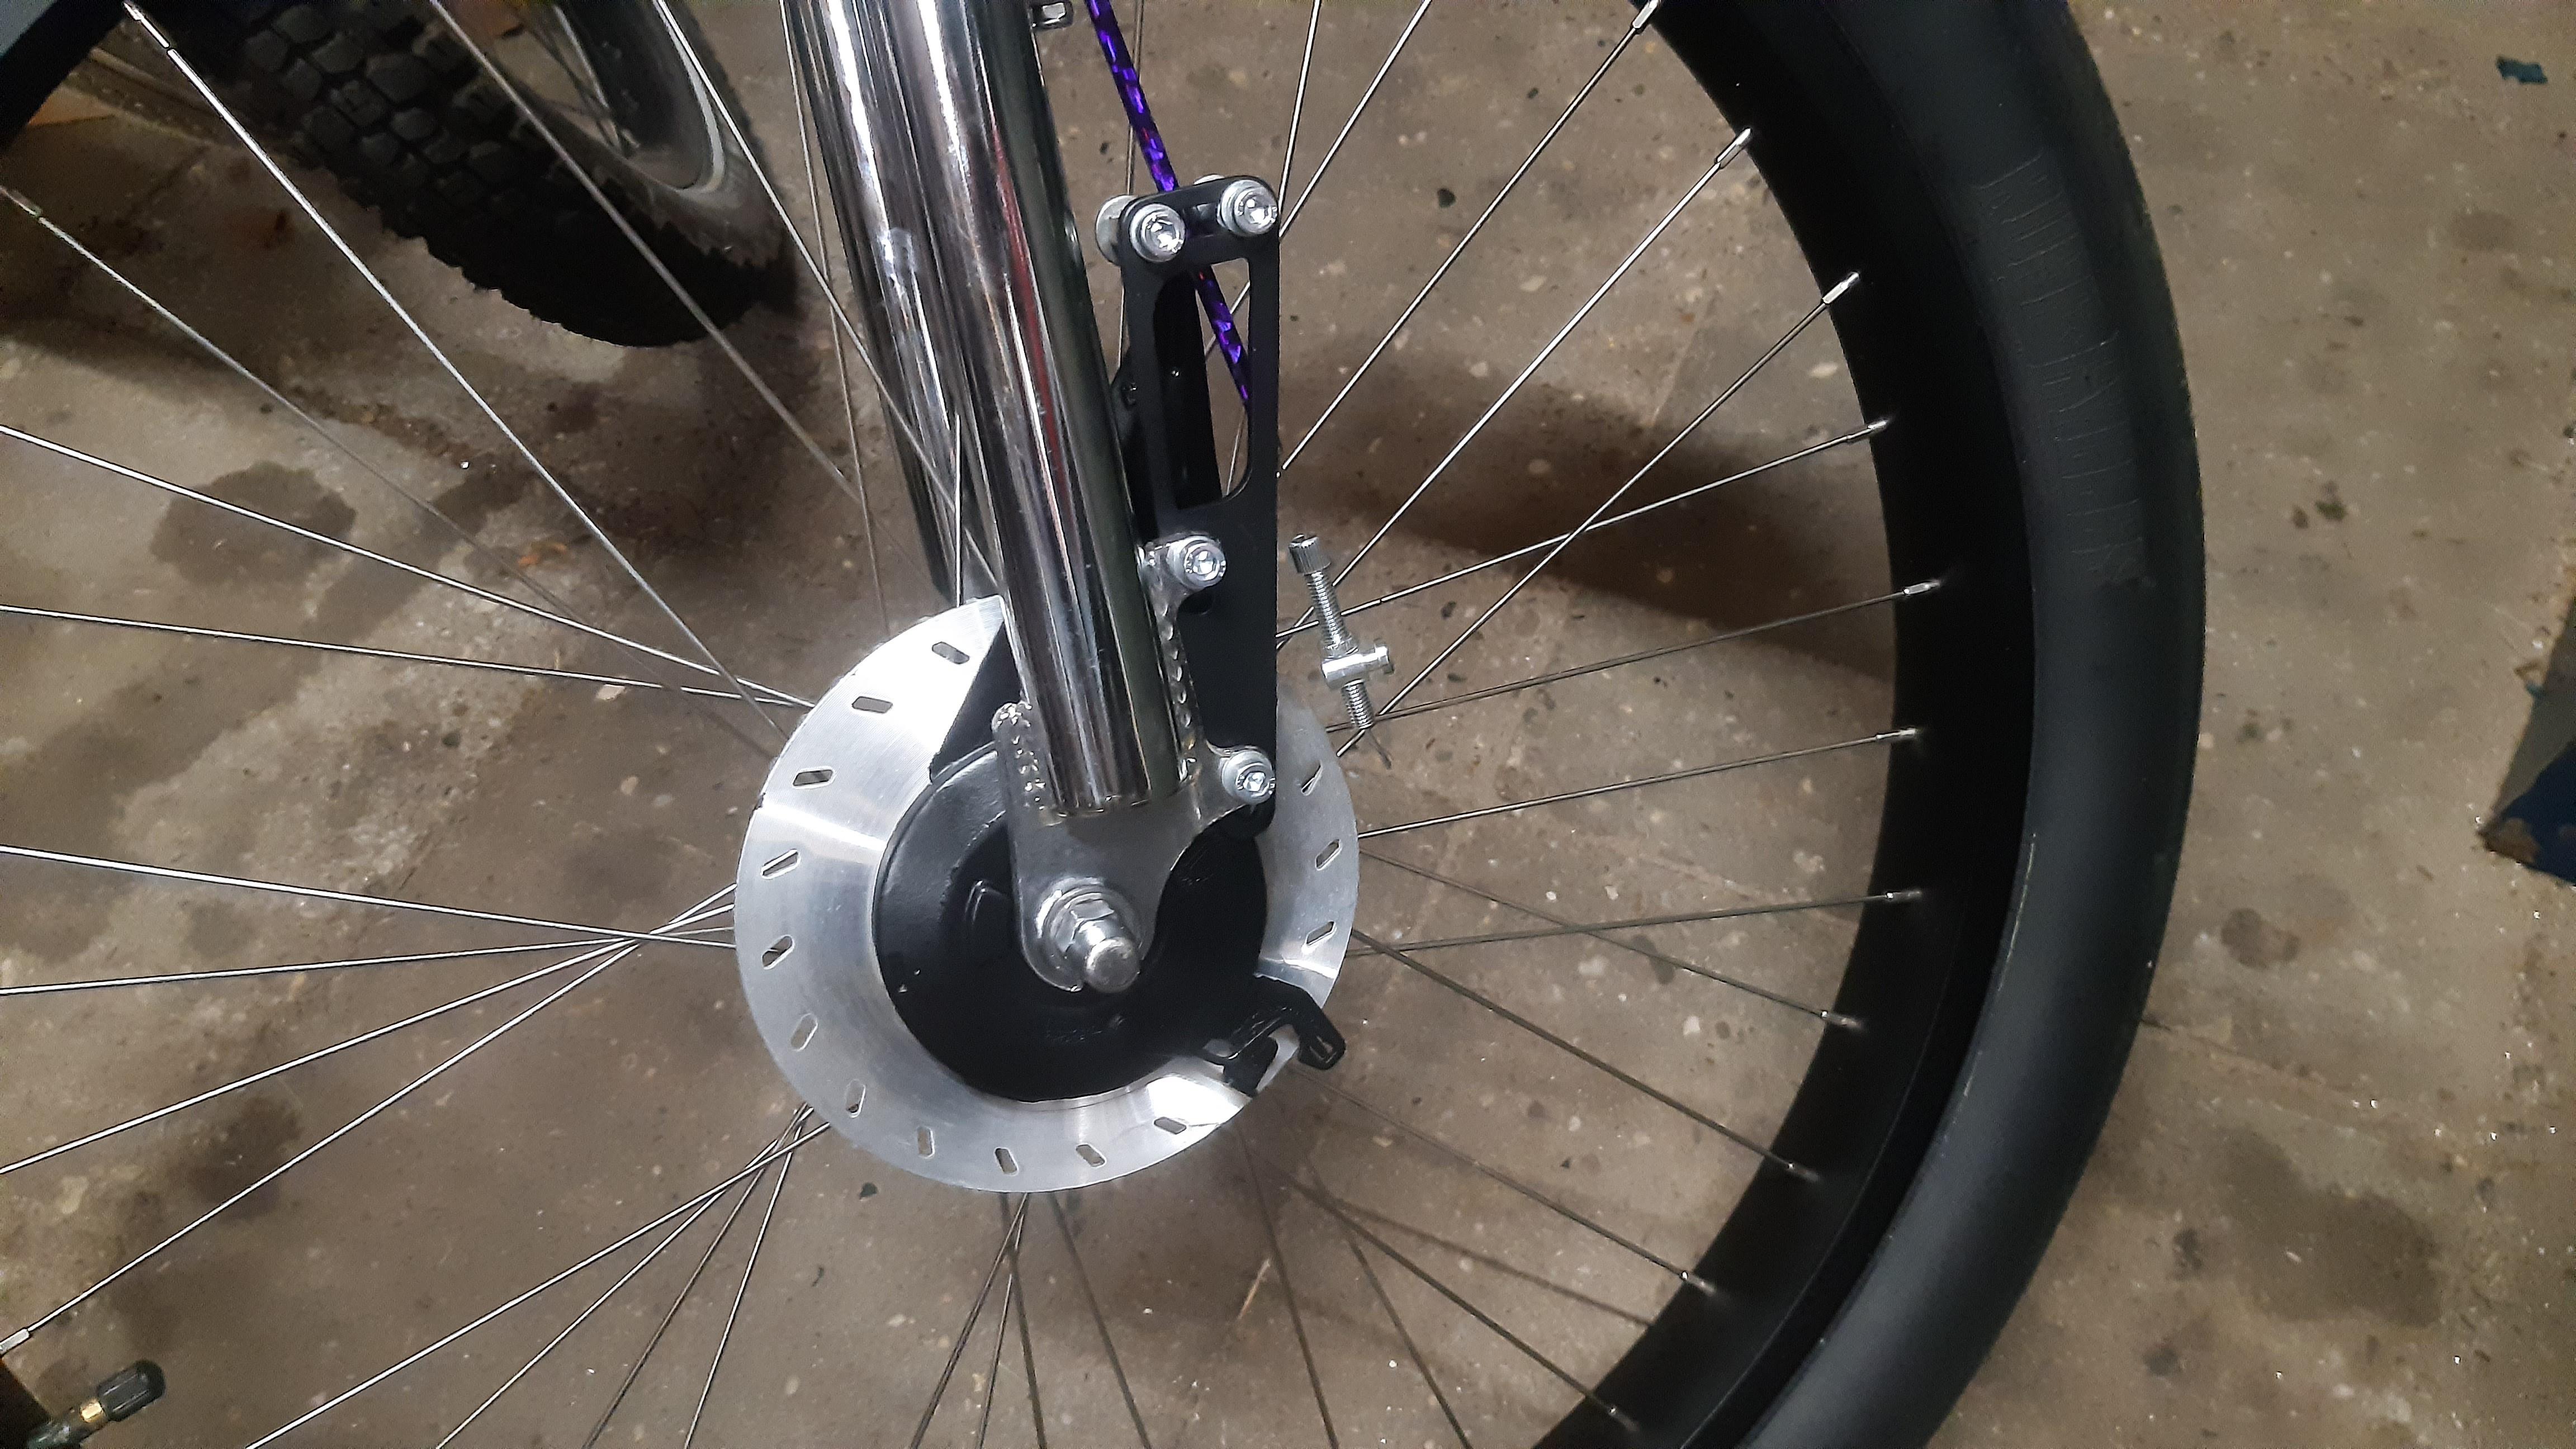
Front brake adapter as good as assembled. Some finishing details left.
Very happy with the 'clamping' idea: The front brake arm is placed against the front nut. Then the flat section from the rear nut is placed against that arm. Then turn the hex nut to remove play. I hate that in original 'drum brake forks', when you hold the front brake and move your bicycle a bit and you can feel the play in the arm.

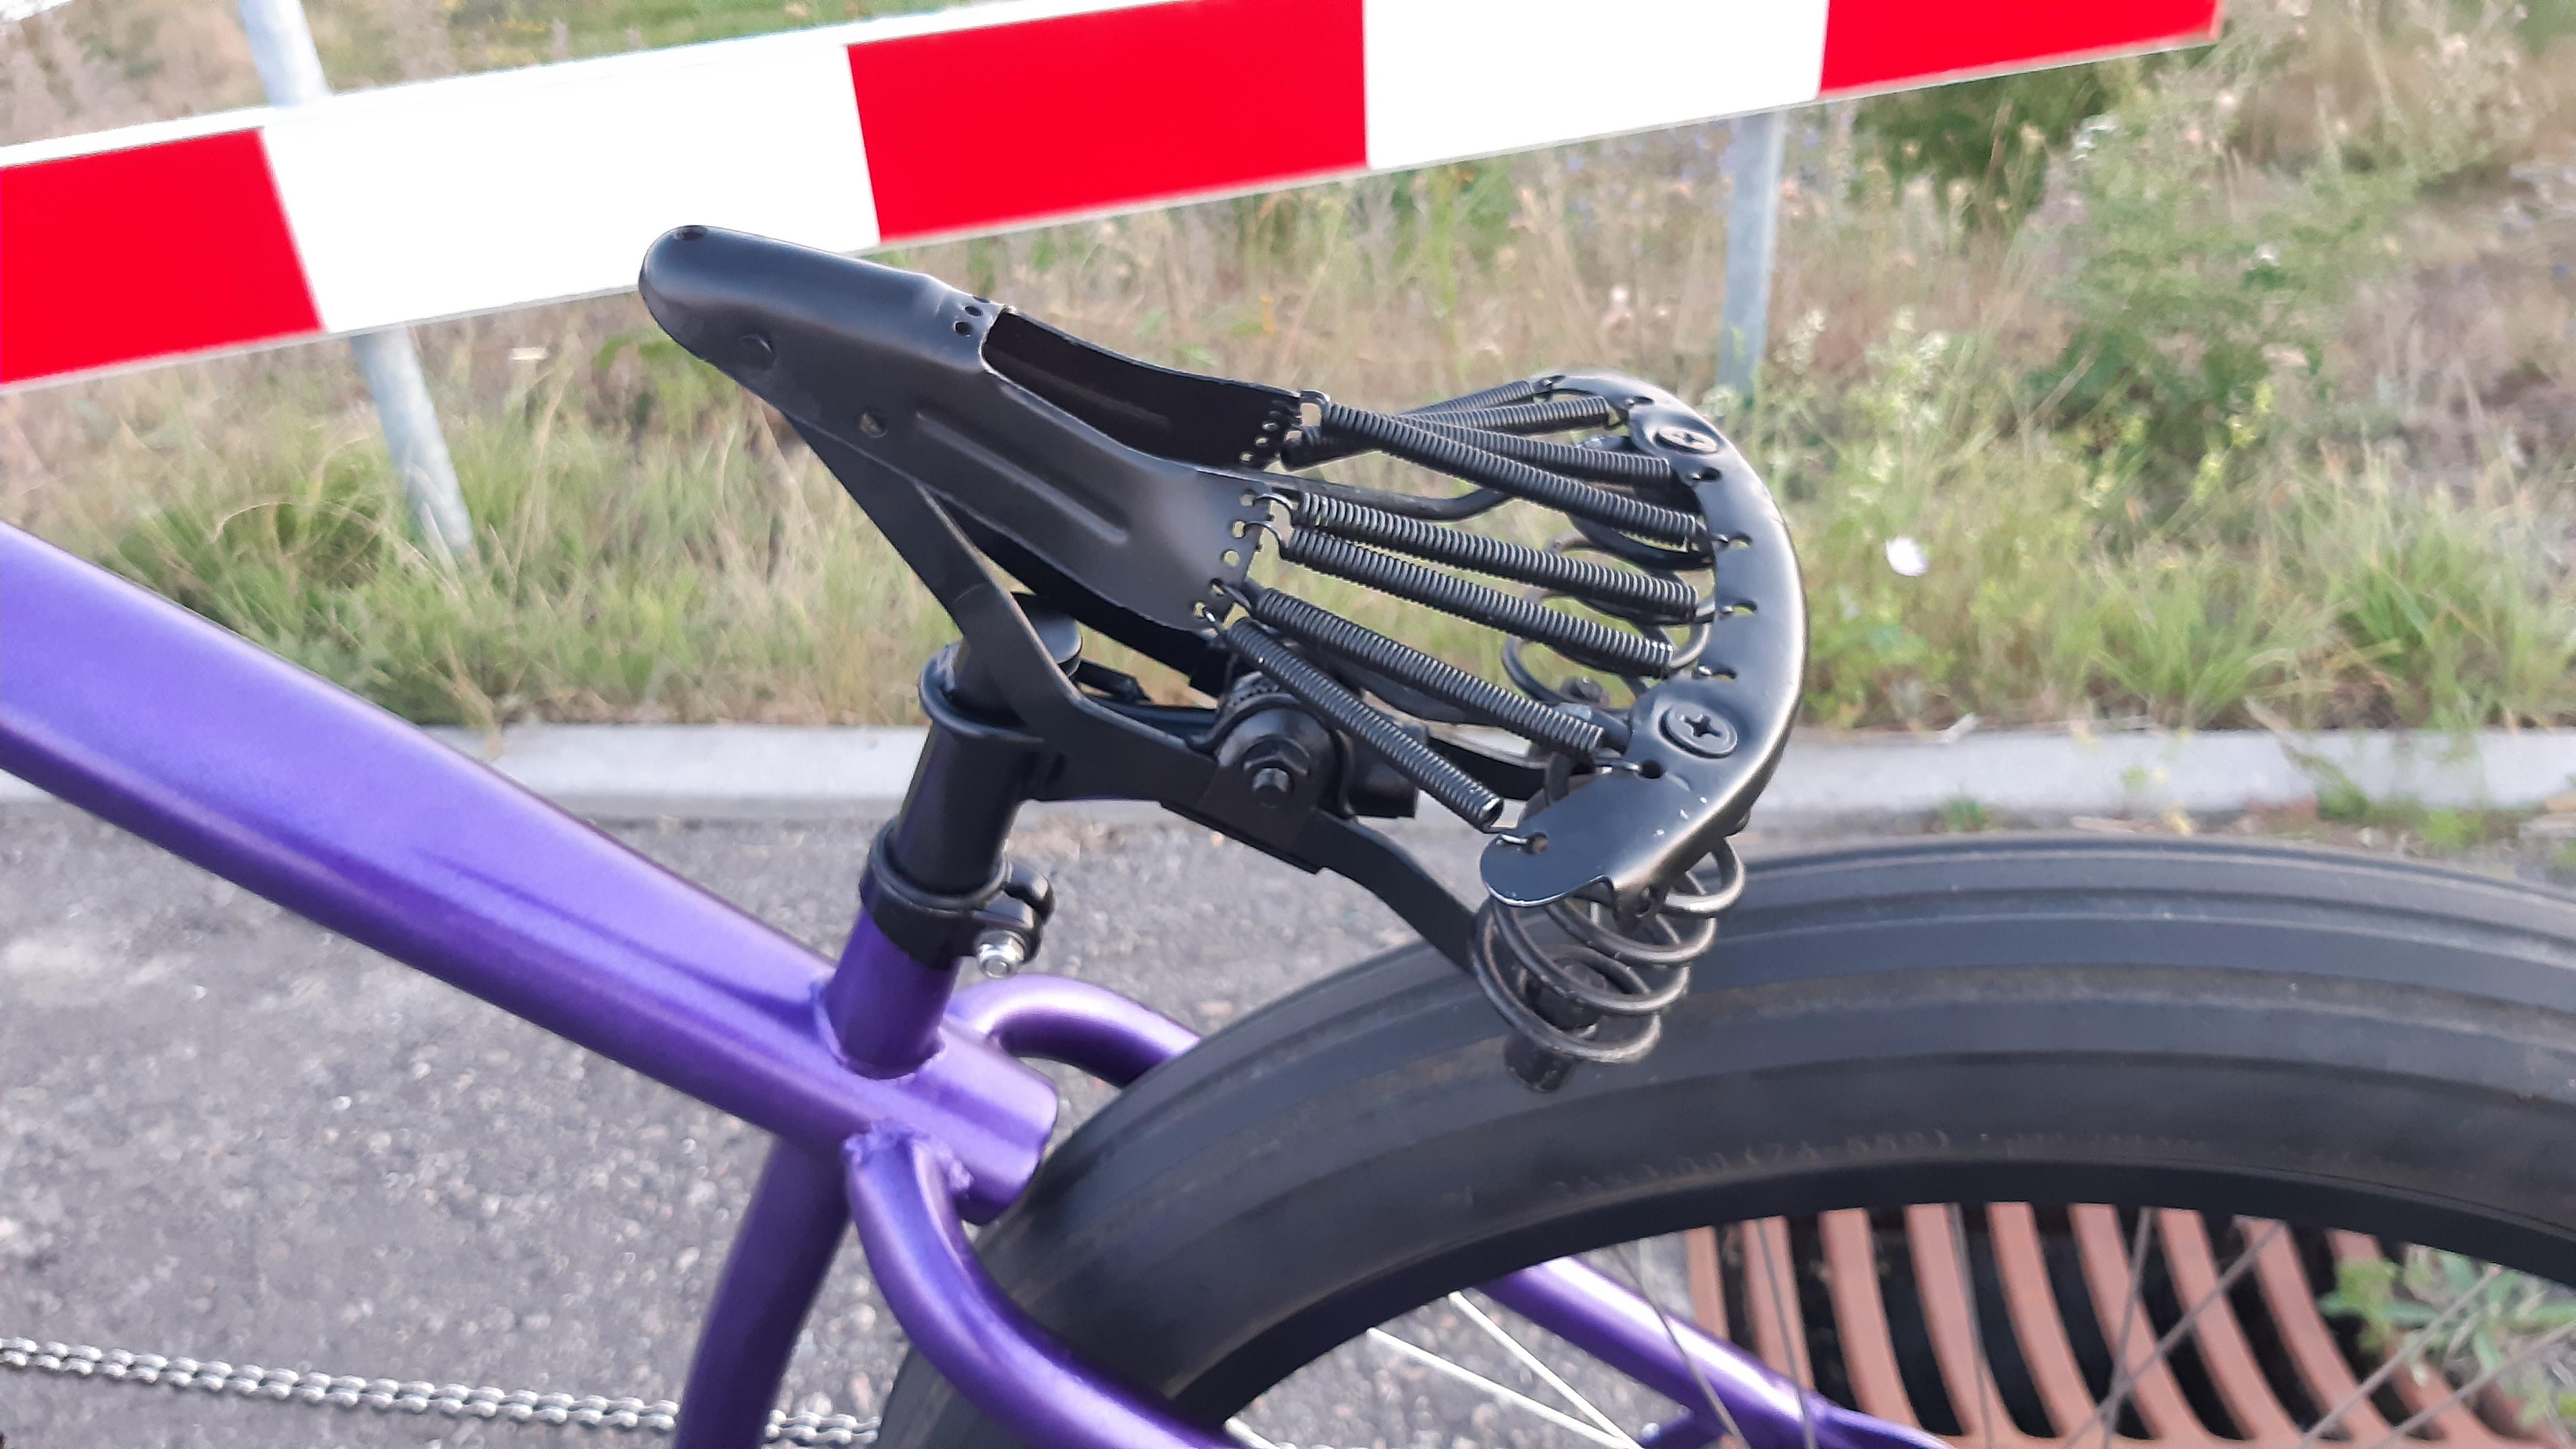
Seat assembled for a testride.
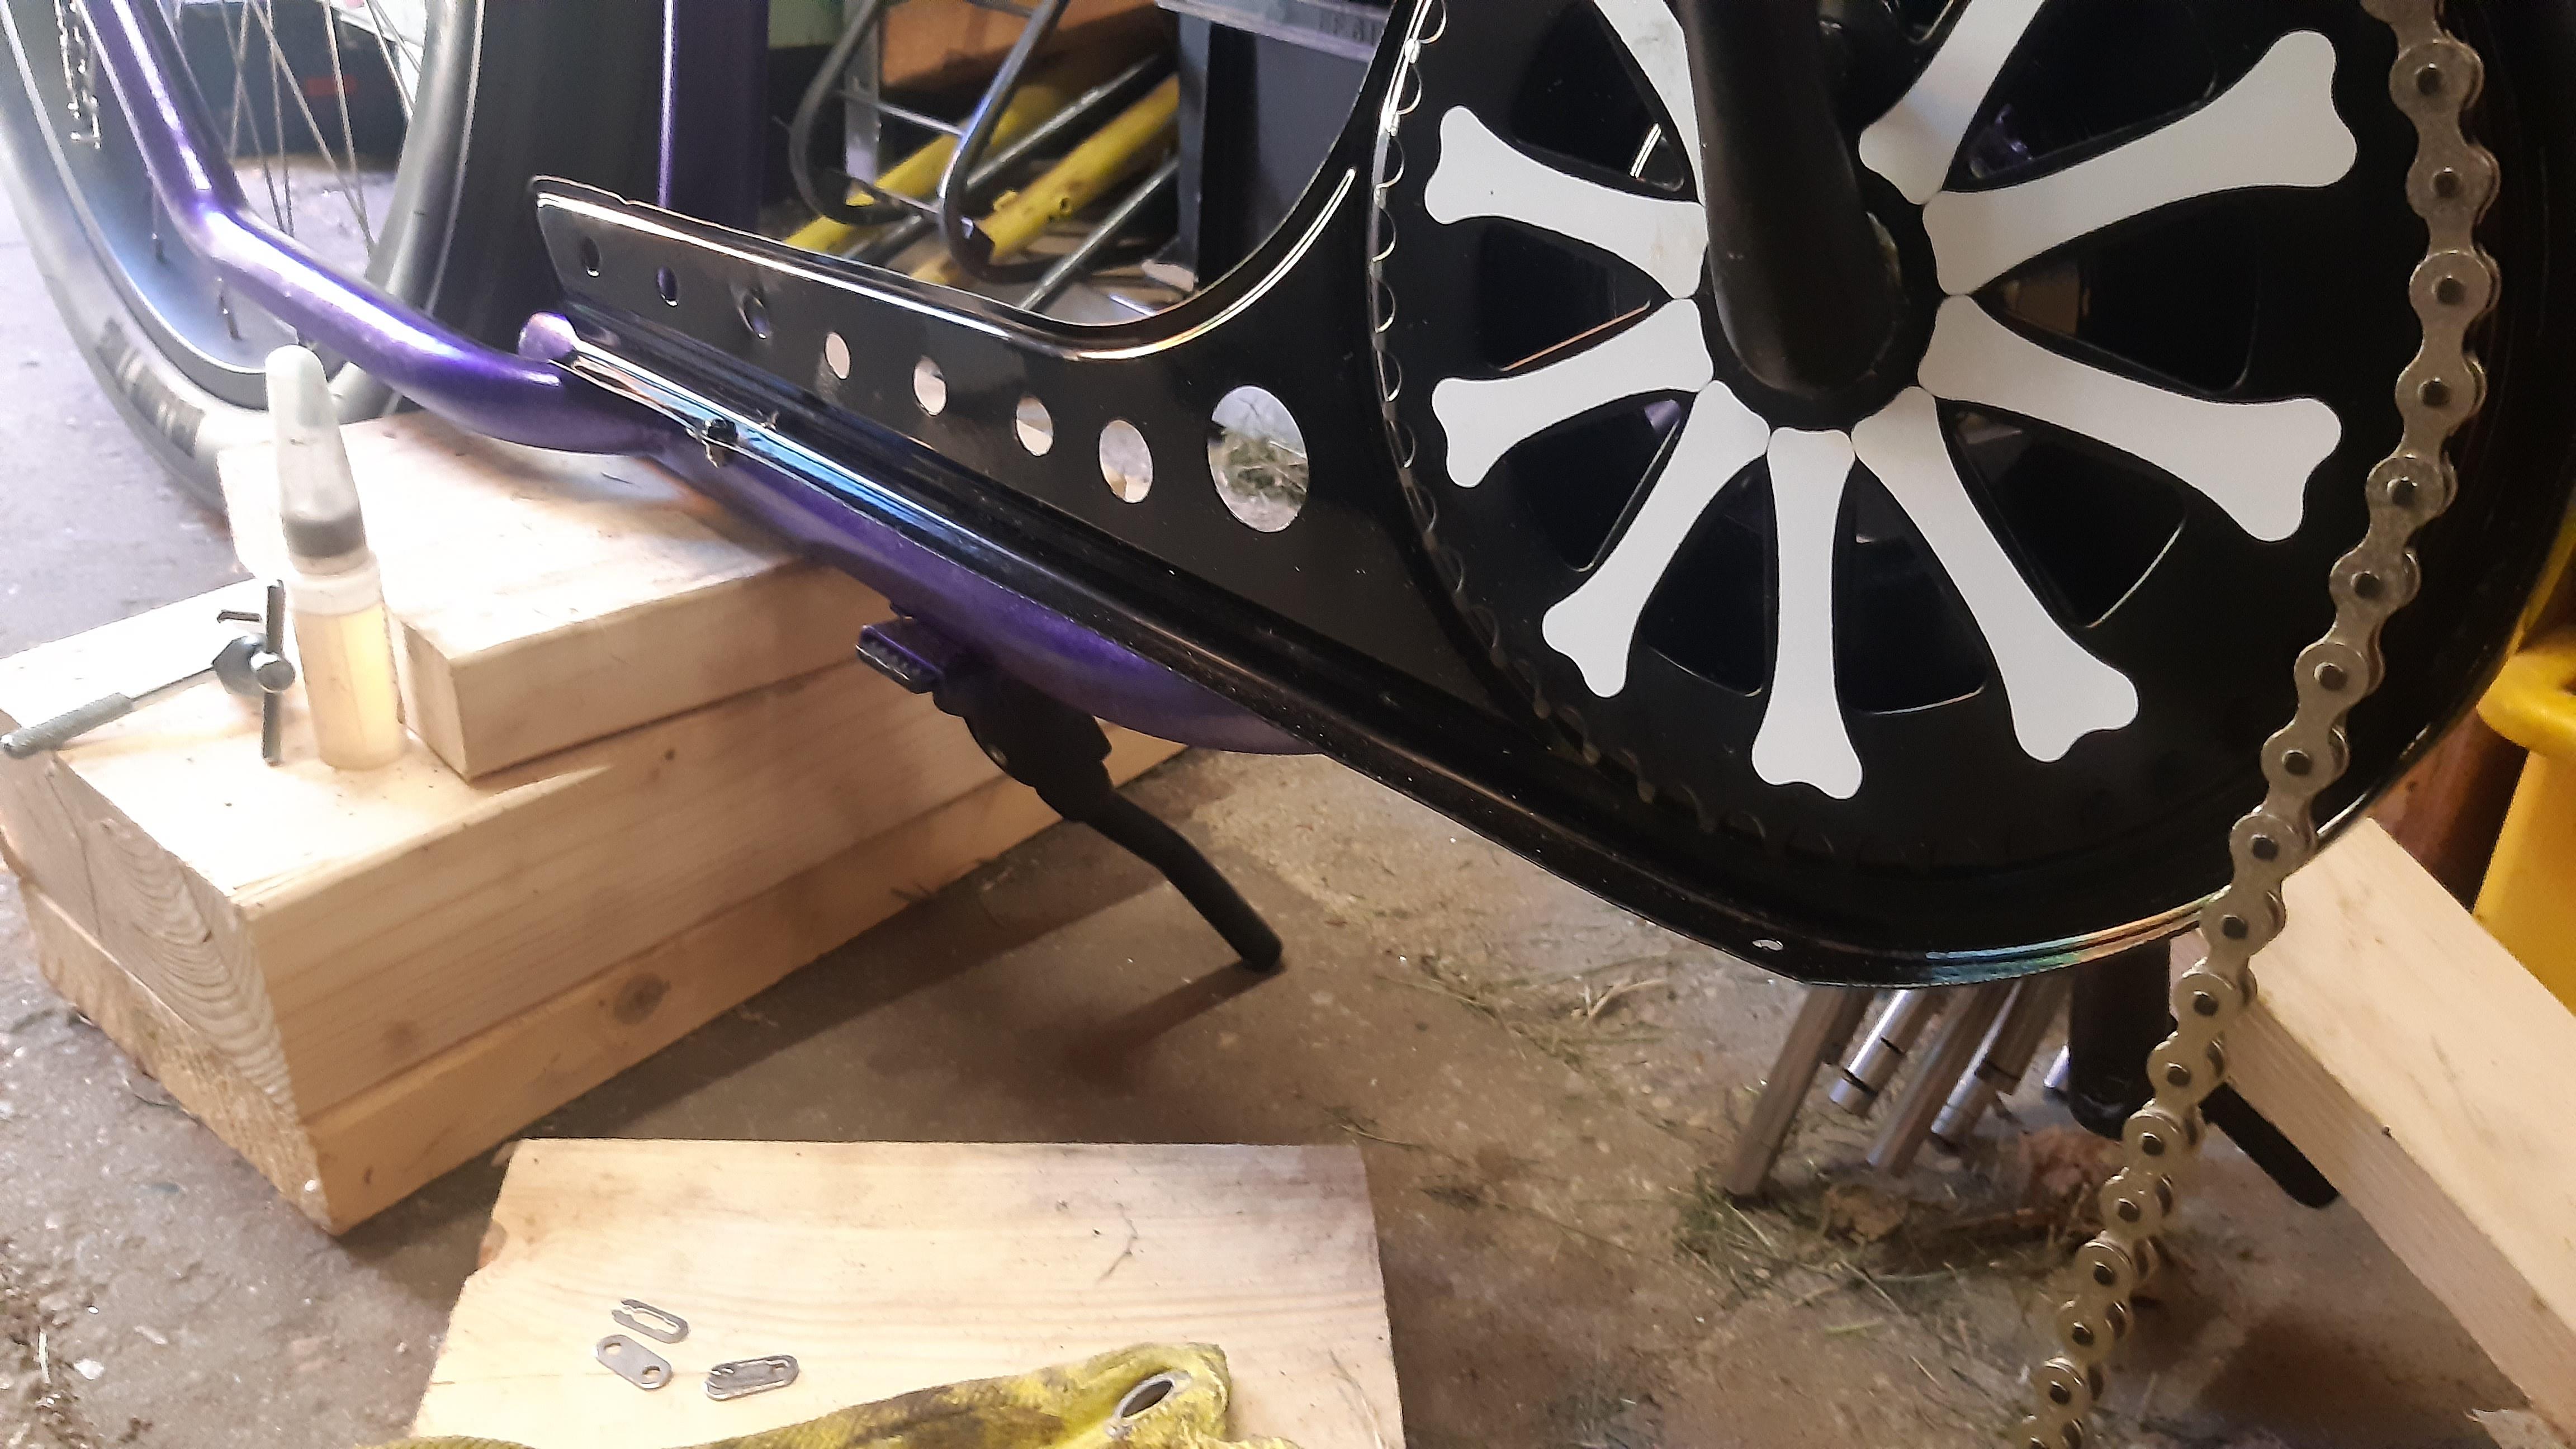
Sandblasted and painted chainguard. Here I am finishing chain assembly.
Long chain!
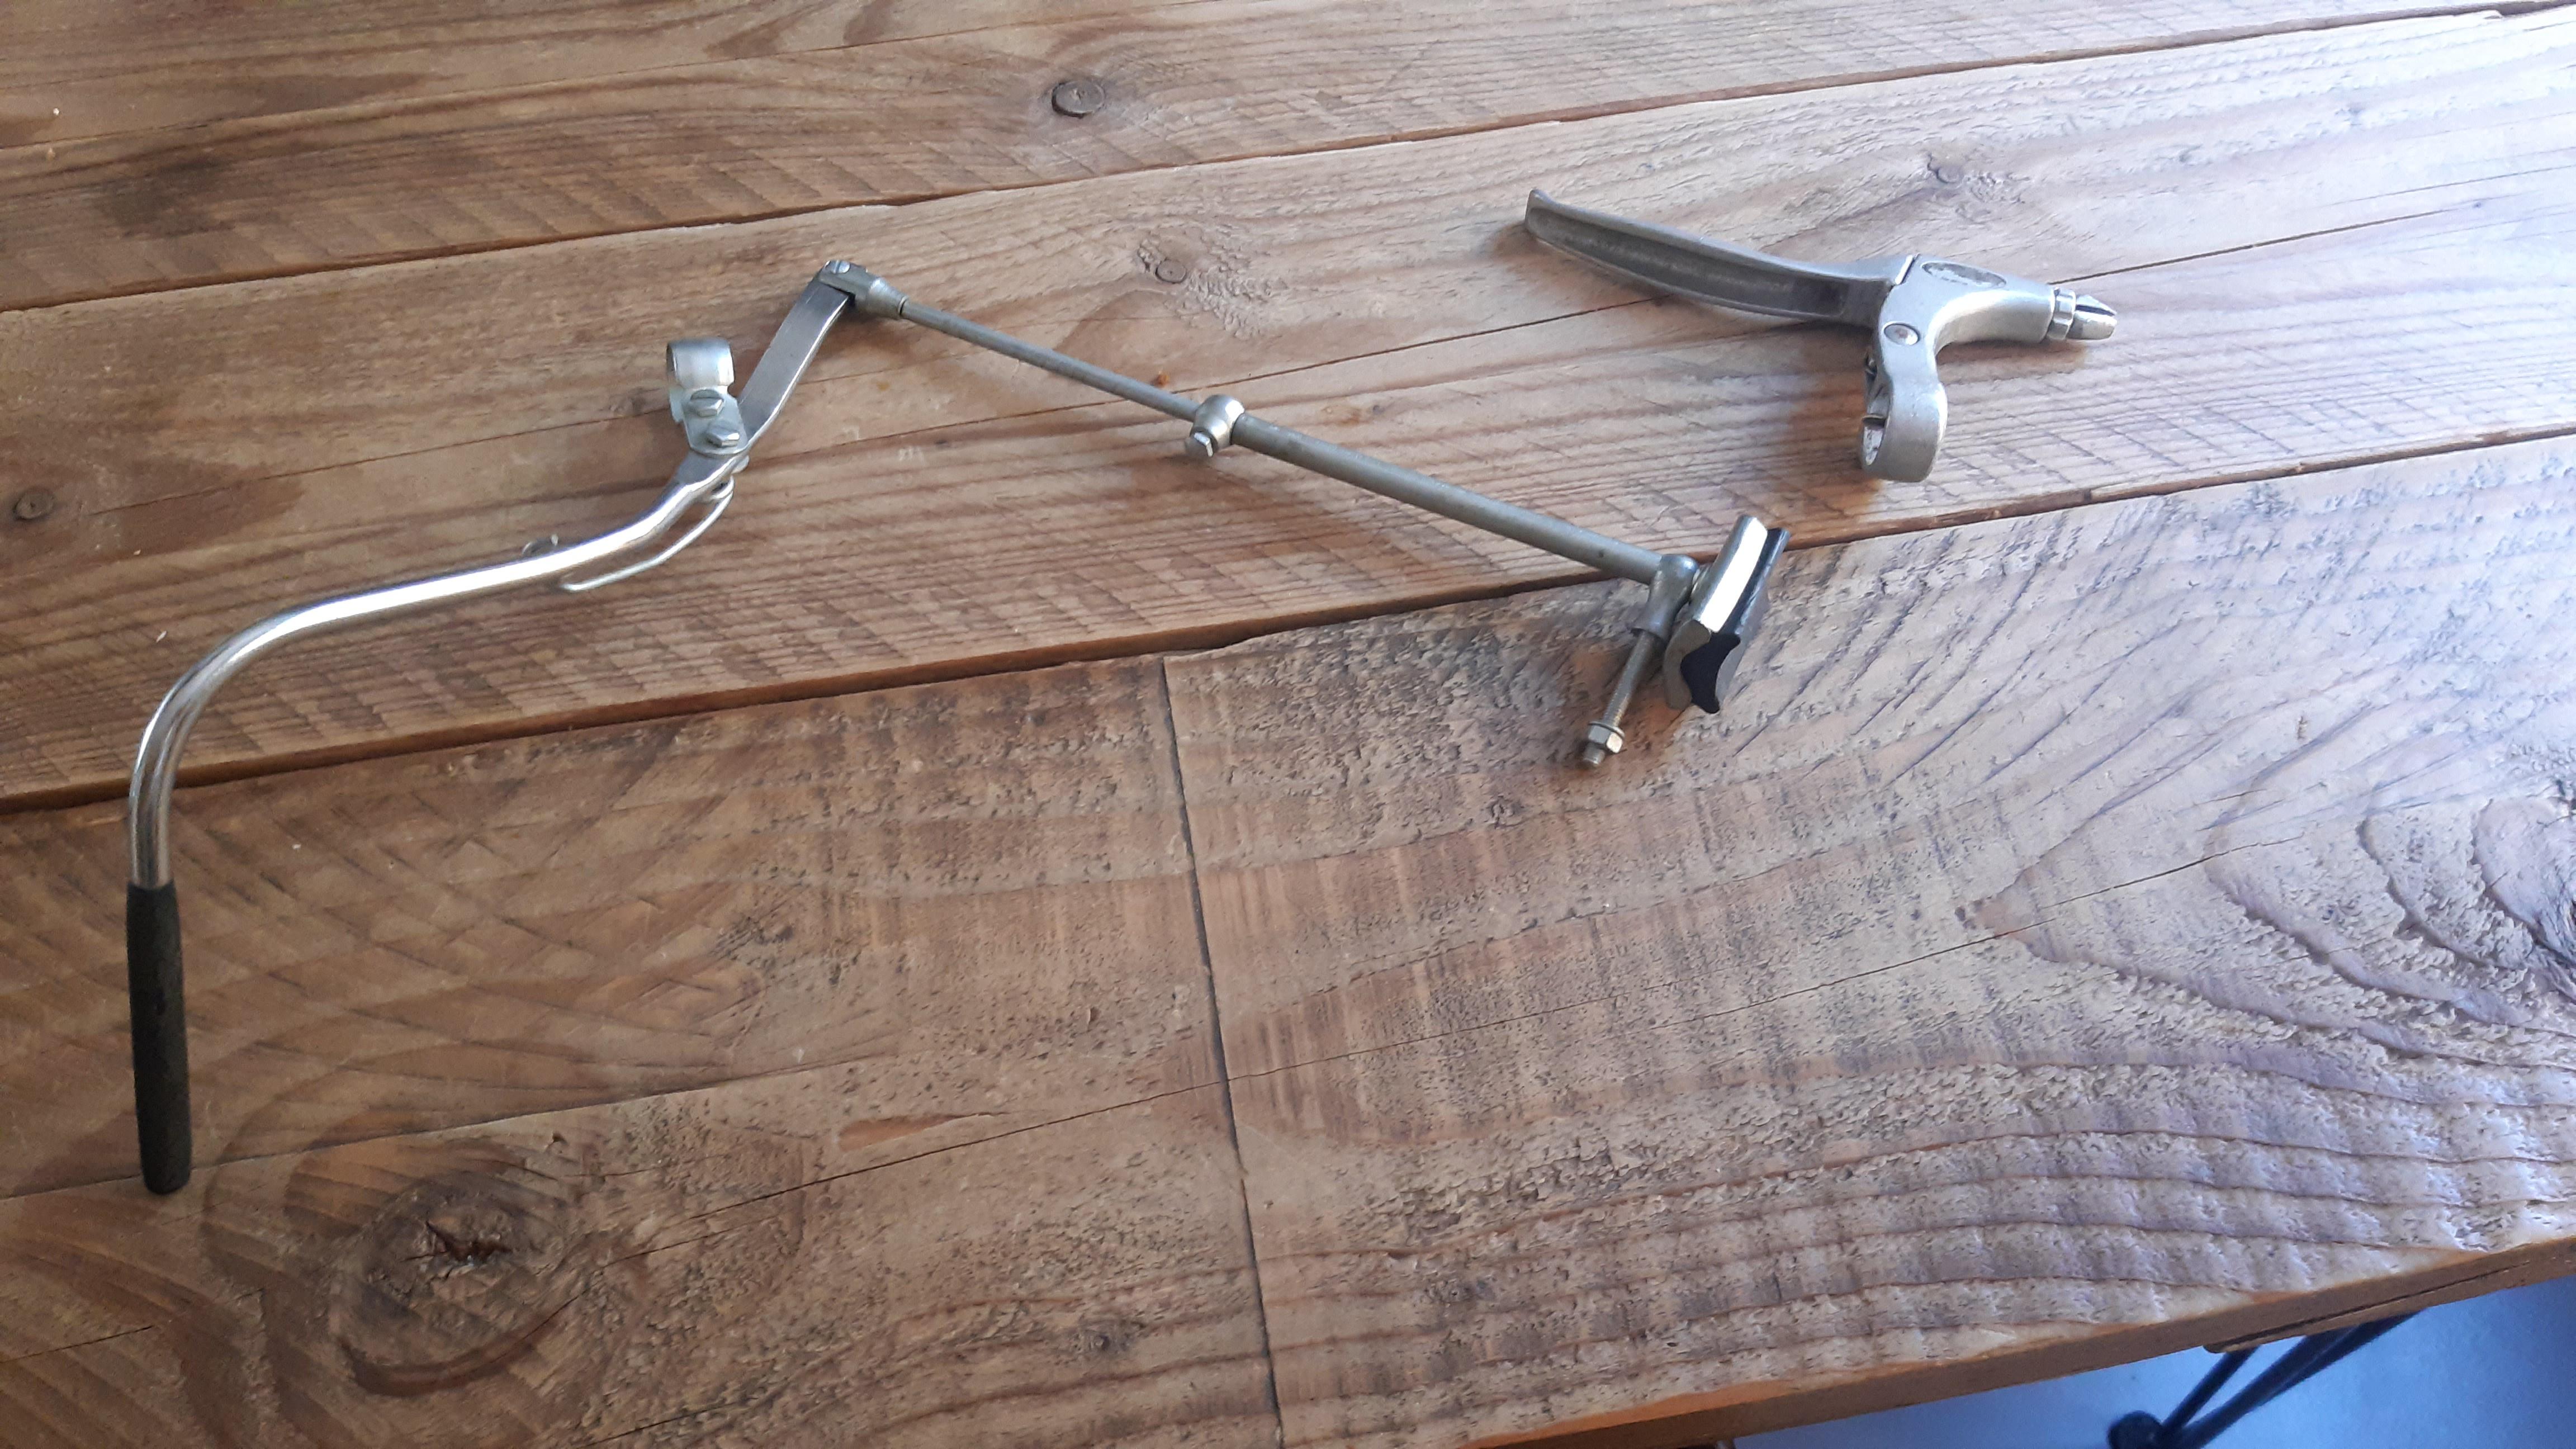
Brake lever came in! The guy also sold an antique stamp brake! Awesome find. The stamp brake is not for ze choppa.
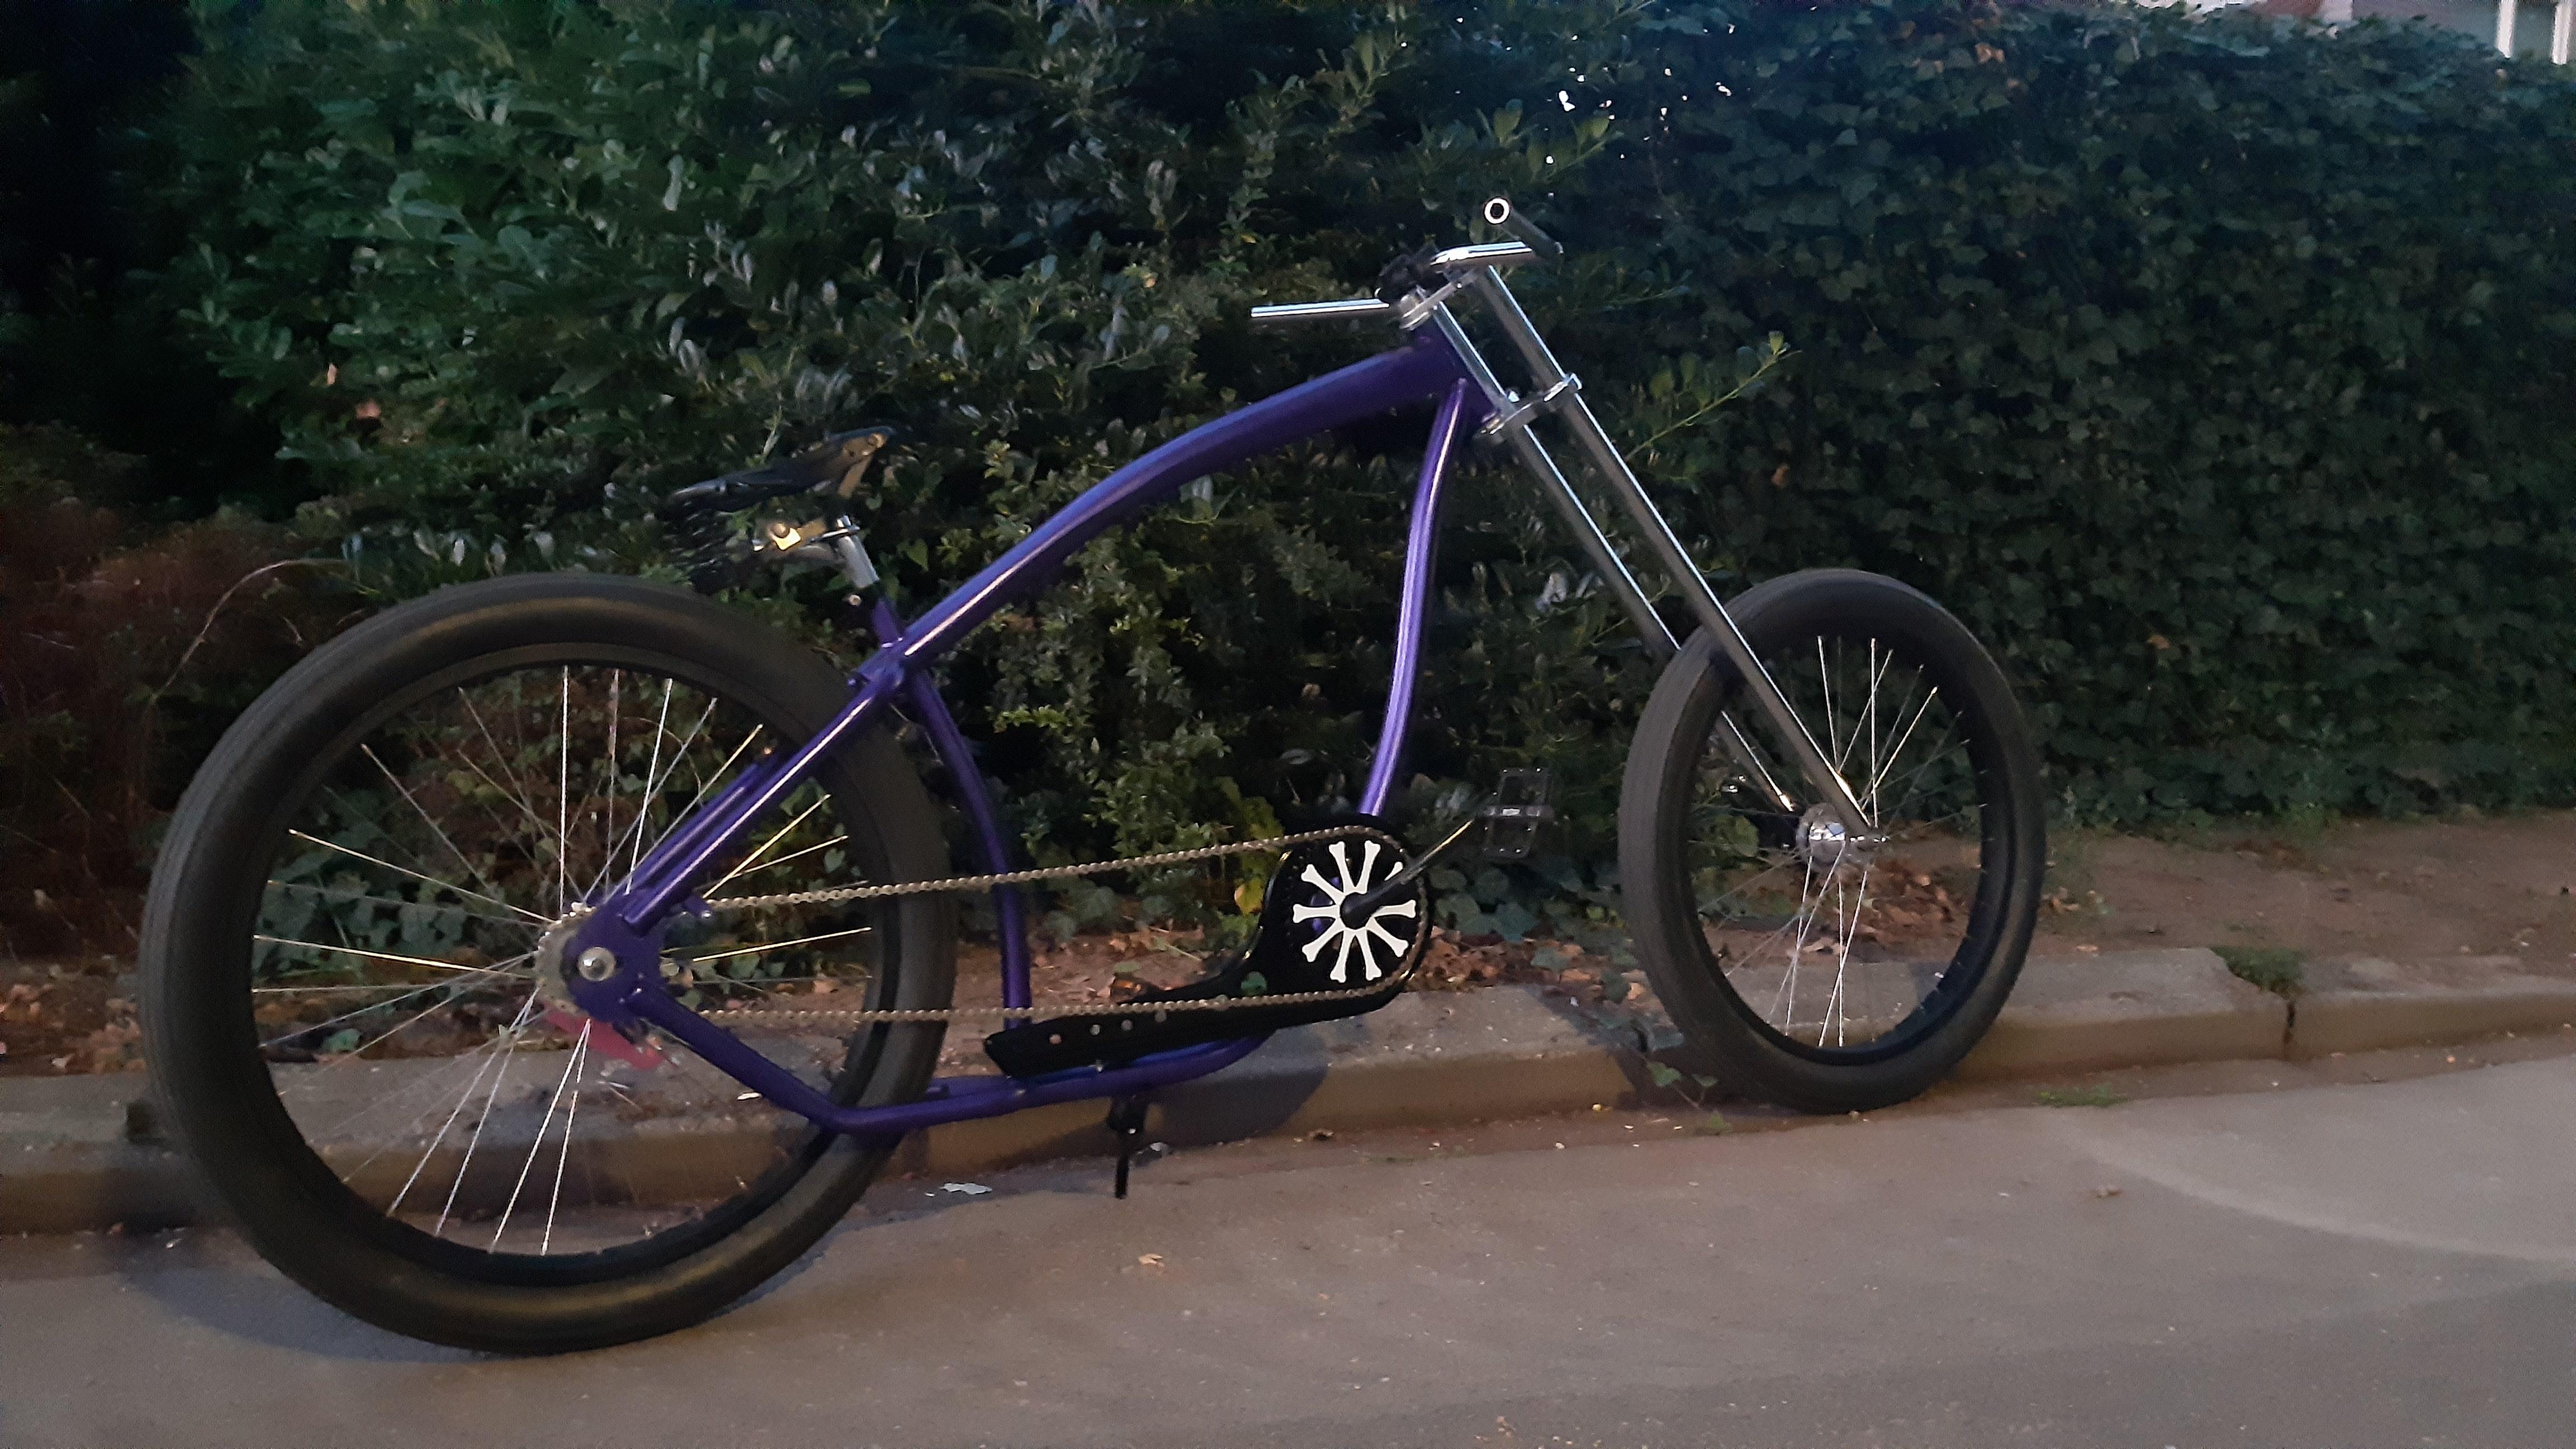
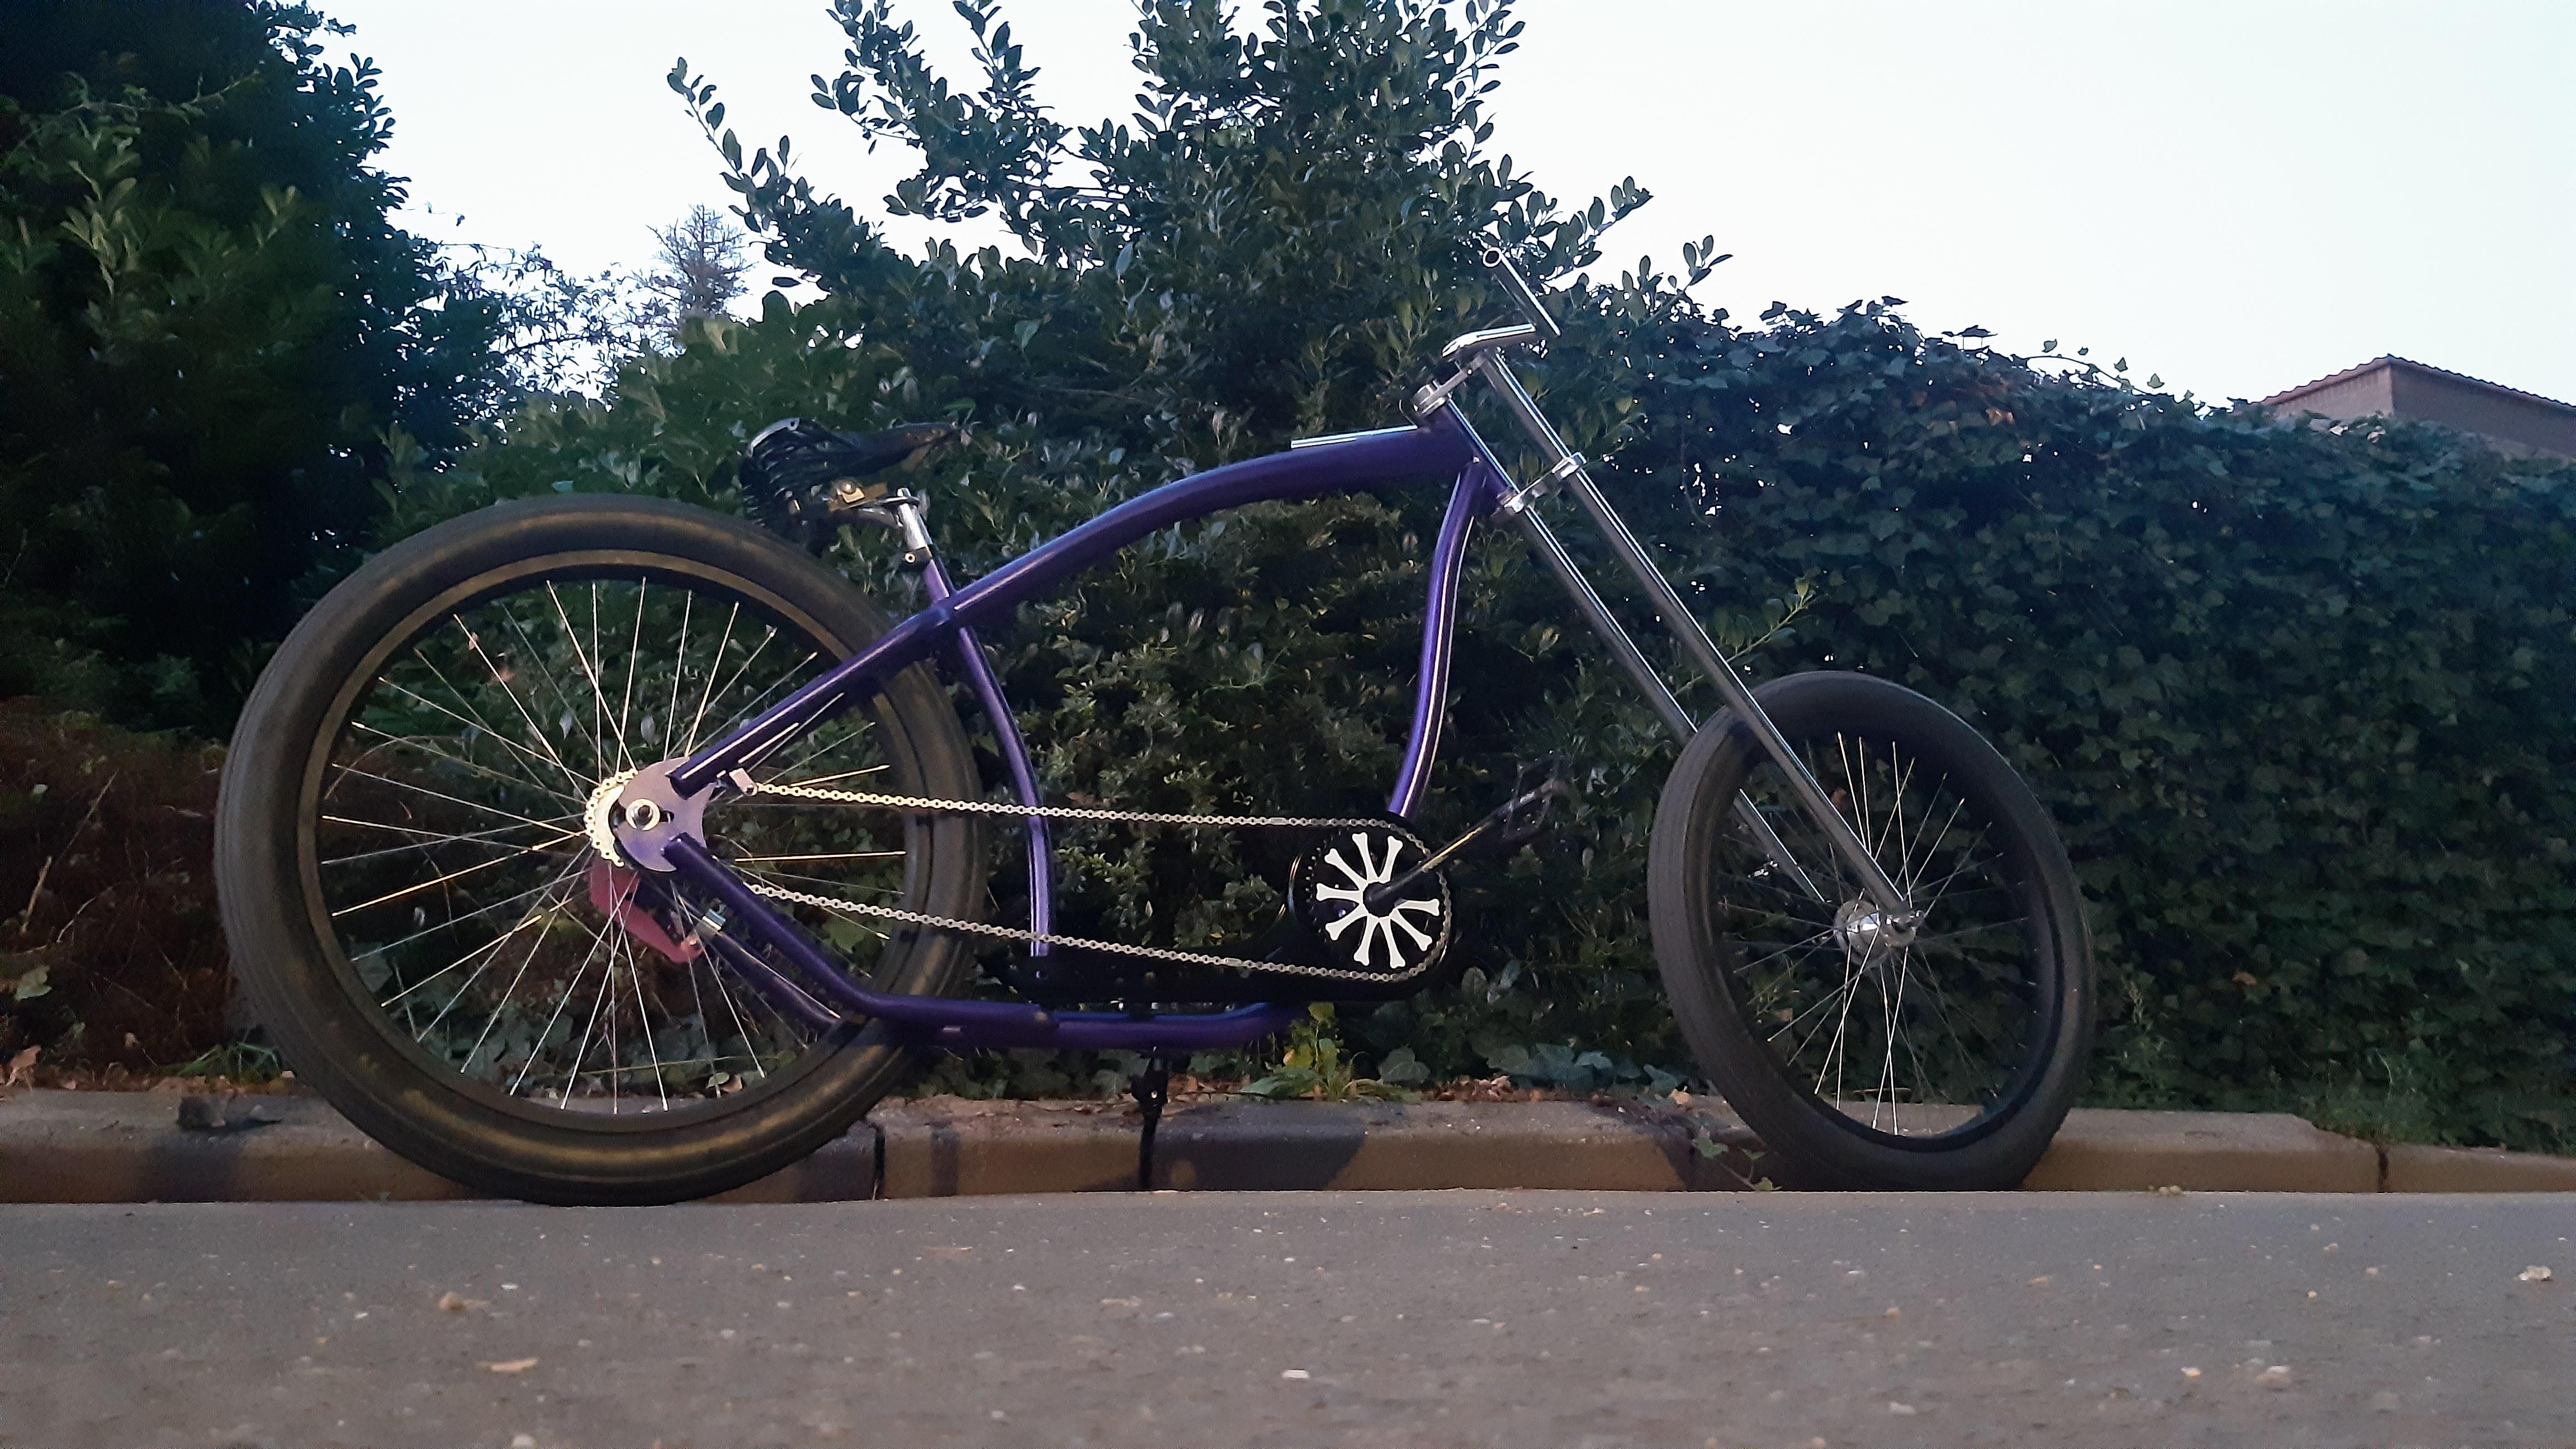
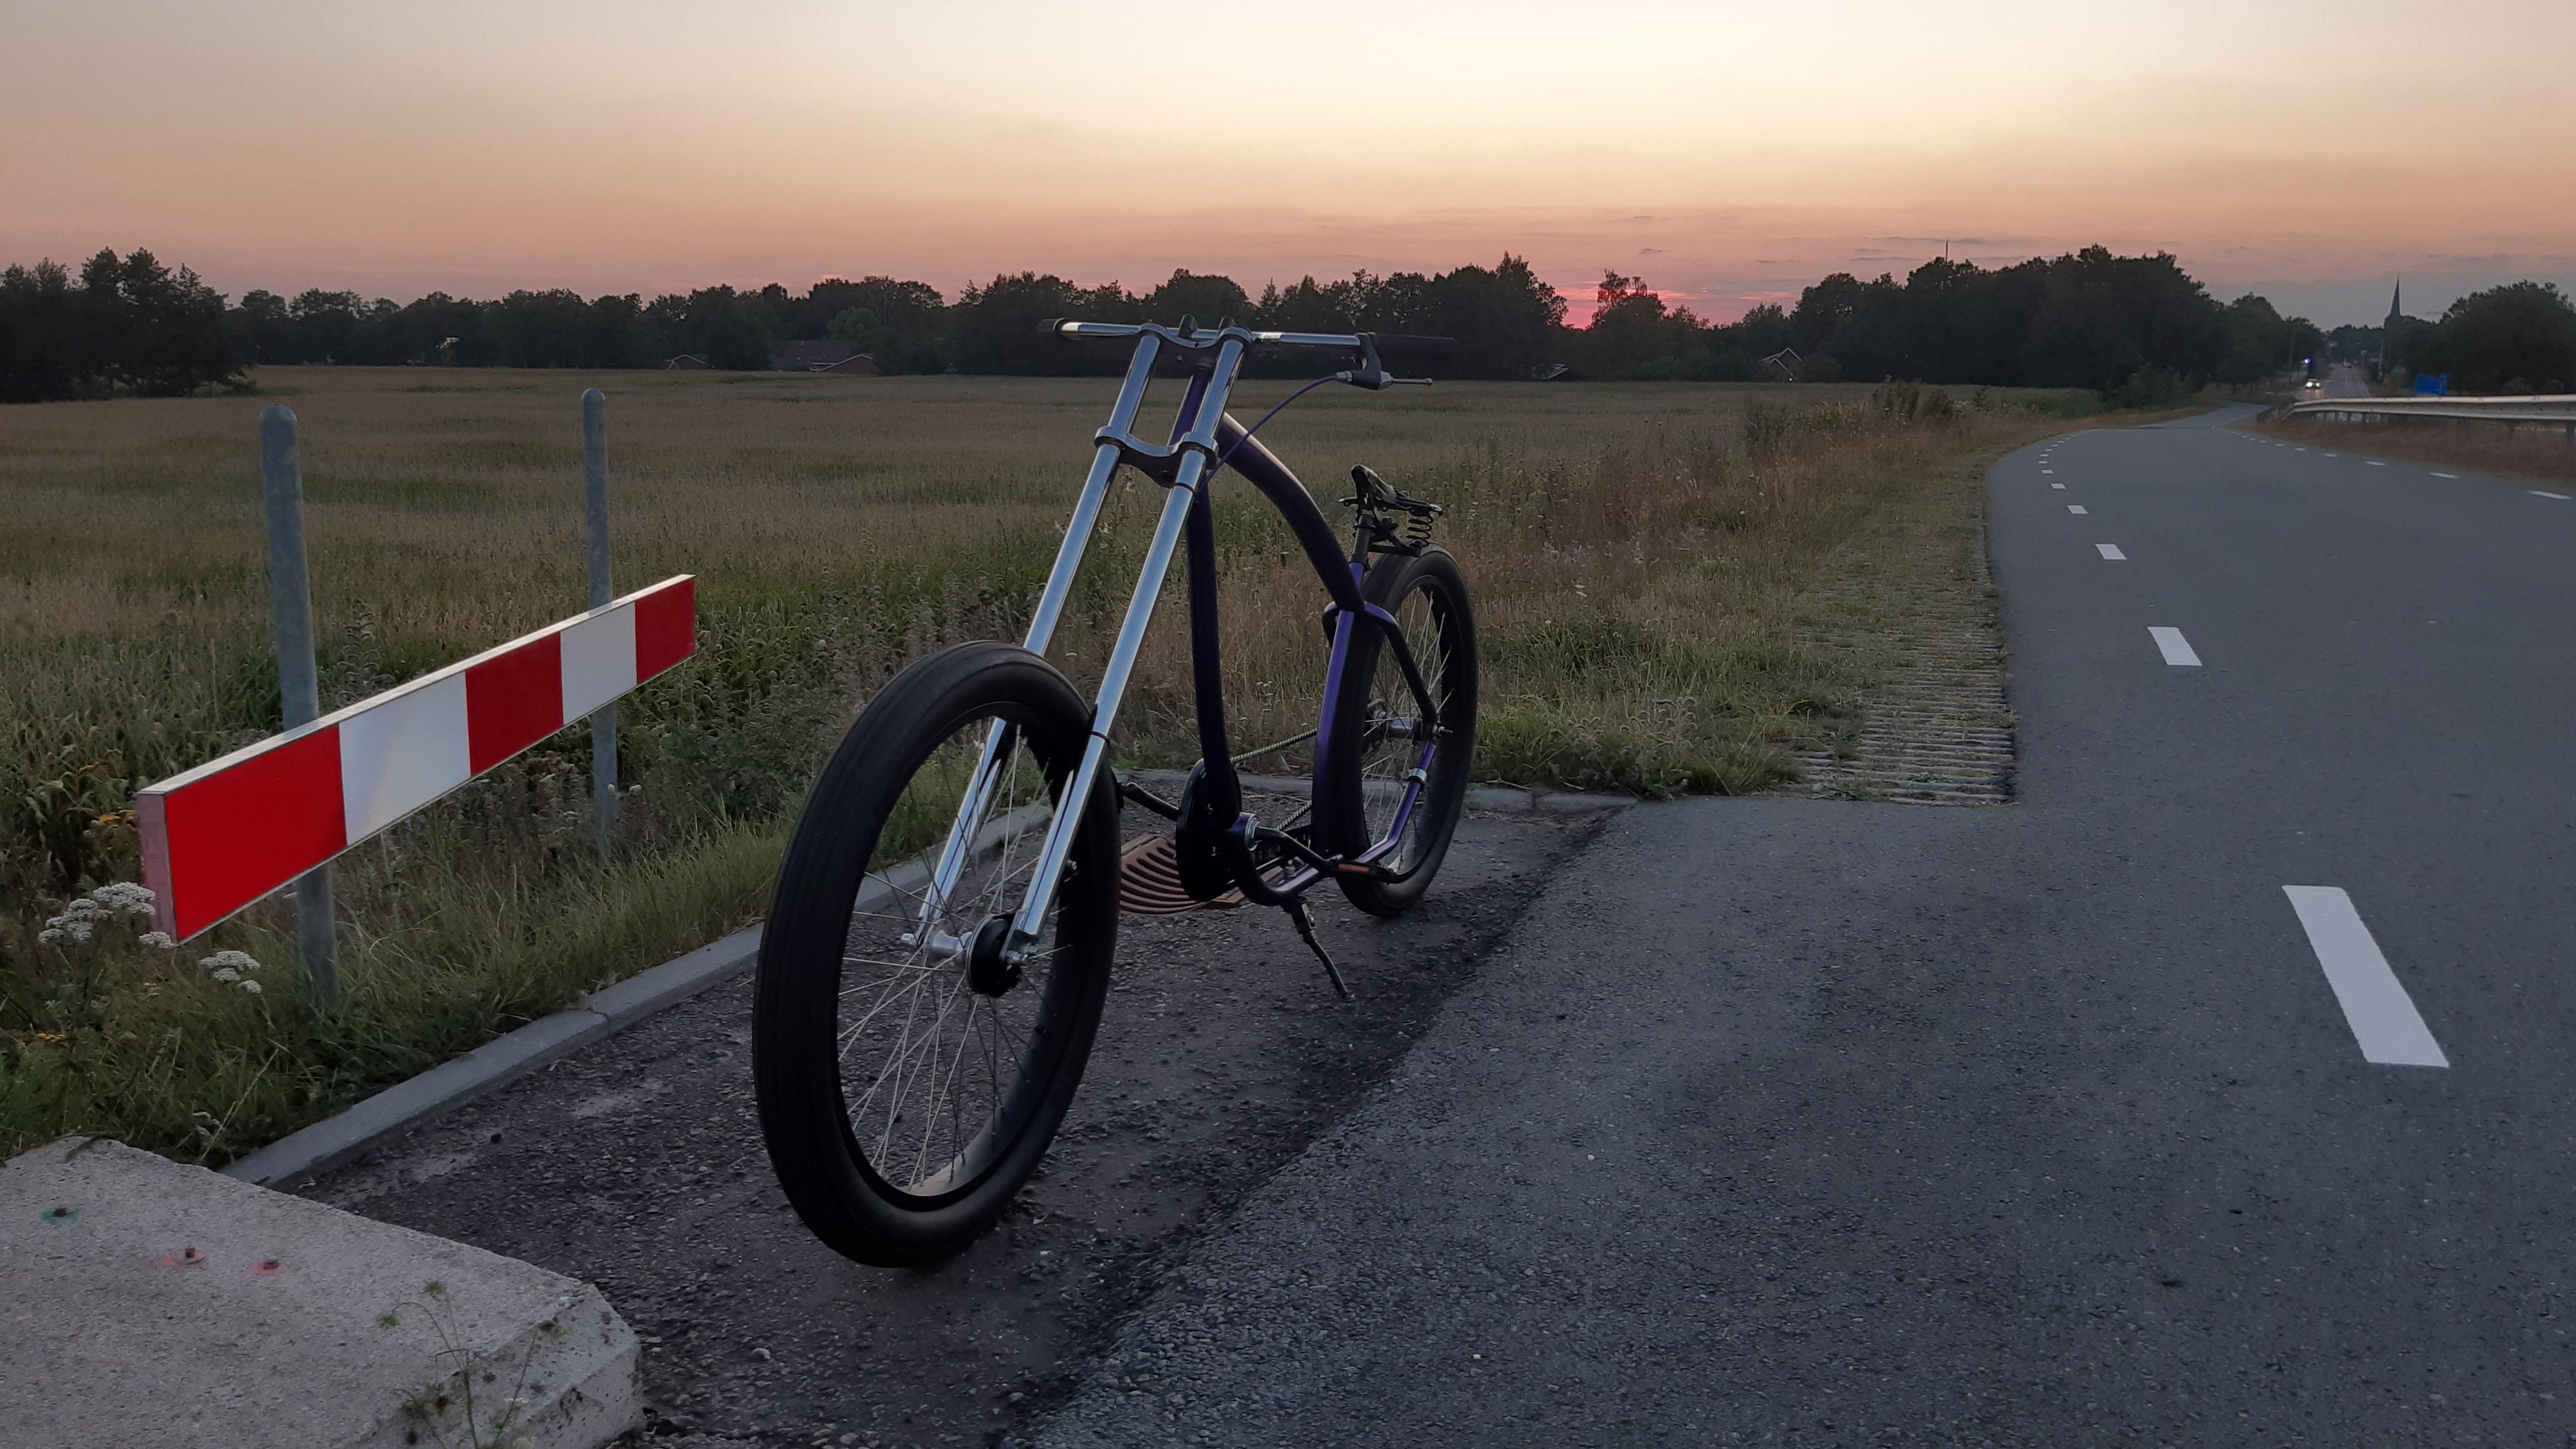
Testdrive right before dark!
This purple people eater rides smooth and wants to go fast! Love it!
44-22t gearing for those wandering.
Maybe we can arrange a 'chopper speedway' race? Makes me think of Dirtquake!
Front brake adapter as good as assembled. Some finishing details left.
Very happy with the 'clamping' idea: The front brake arm is placed against the front nut. Then the flat section from the rear nut is placed against that arm. Then turn the hex nut to remove play. I hate that in original 'drum brake forks', when you hold the front brake and move your bicycle a bit and you can feel the play in the arm.
Seat assembled for a testride.
Sandblasted and painted chainguard. Here I am finishing chain assembly.
Long chain!
Brake lever came in! The guy also sold an antique stamp brake! Awesome find. The stamp brake is not for ze choppa.
Testdrive right before dark!
This purple people eater rides smooth and wants to go fast! Love it!
44-22t gearing for those wandering.
Maybe we can arrange a 'chopper speedway' race? Makes me think of Dirtquake!
Last edited:
Diggin' da choppa BRE! I like the 'flipped' chain guard. Can you raise up the back end of it so it sits parallel to the bottom run of the chain? I think that would finish it off nicely!
RaT oN~!
RaT oN~!
It's all coming together so well!
Love the peek of the coaster brake ARM in the wheel.
I've always wanted to try and incorporate some rod brake parts into a build someday. I have a couple of old scrap Raleighs that I could pull the parts from.
Love the peek of the coaster brake ARM in the wheel.
I've always wanted to try and incorporate some rod brake parts into a build someday. I have a couple of old scrap Raleighs that I could pull the parts from.
Thanks OJ, I agreed with you at first sight. But then it would not be aligned with the frame. But I will check that and take a picture. Is your view changed after seeing the pictures below?Diggin' da choppa BRE! I like the 'flipped' chain guard. Can you raise up the back end of it so it sits parallel to the bottom run of the chain? I think that would finish it off nicely!
RaT oN~!
I love the simplicity of the rod brakes. And it quite simple to replace, even when tire and rubber patch are worn out.It's all coming together so well!
Love the peek of the coaster brake ARM in the wheel.
I've always wanted to try and incorporate some rod brake parts into a build someday. I have a couple of old scrap Raleighs that I could pull the parts from.
Thank you Kingfish!
I sprayed some more parts black, amongst them is het seat and seat post. and made a front brake lever with a screw for fun, its a bit cleaner now.
Assembled some grips too. Maybe add paracord later...
I did a testride no2 and really like the bike!
The front rollerbrake does practically nothing. I checked the cabling and attachments to check if I made a mistake, but could not find any.
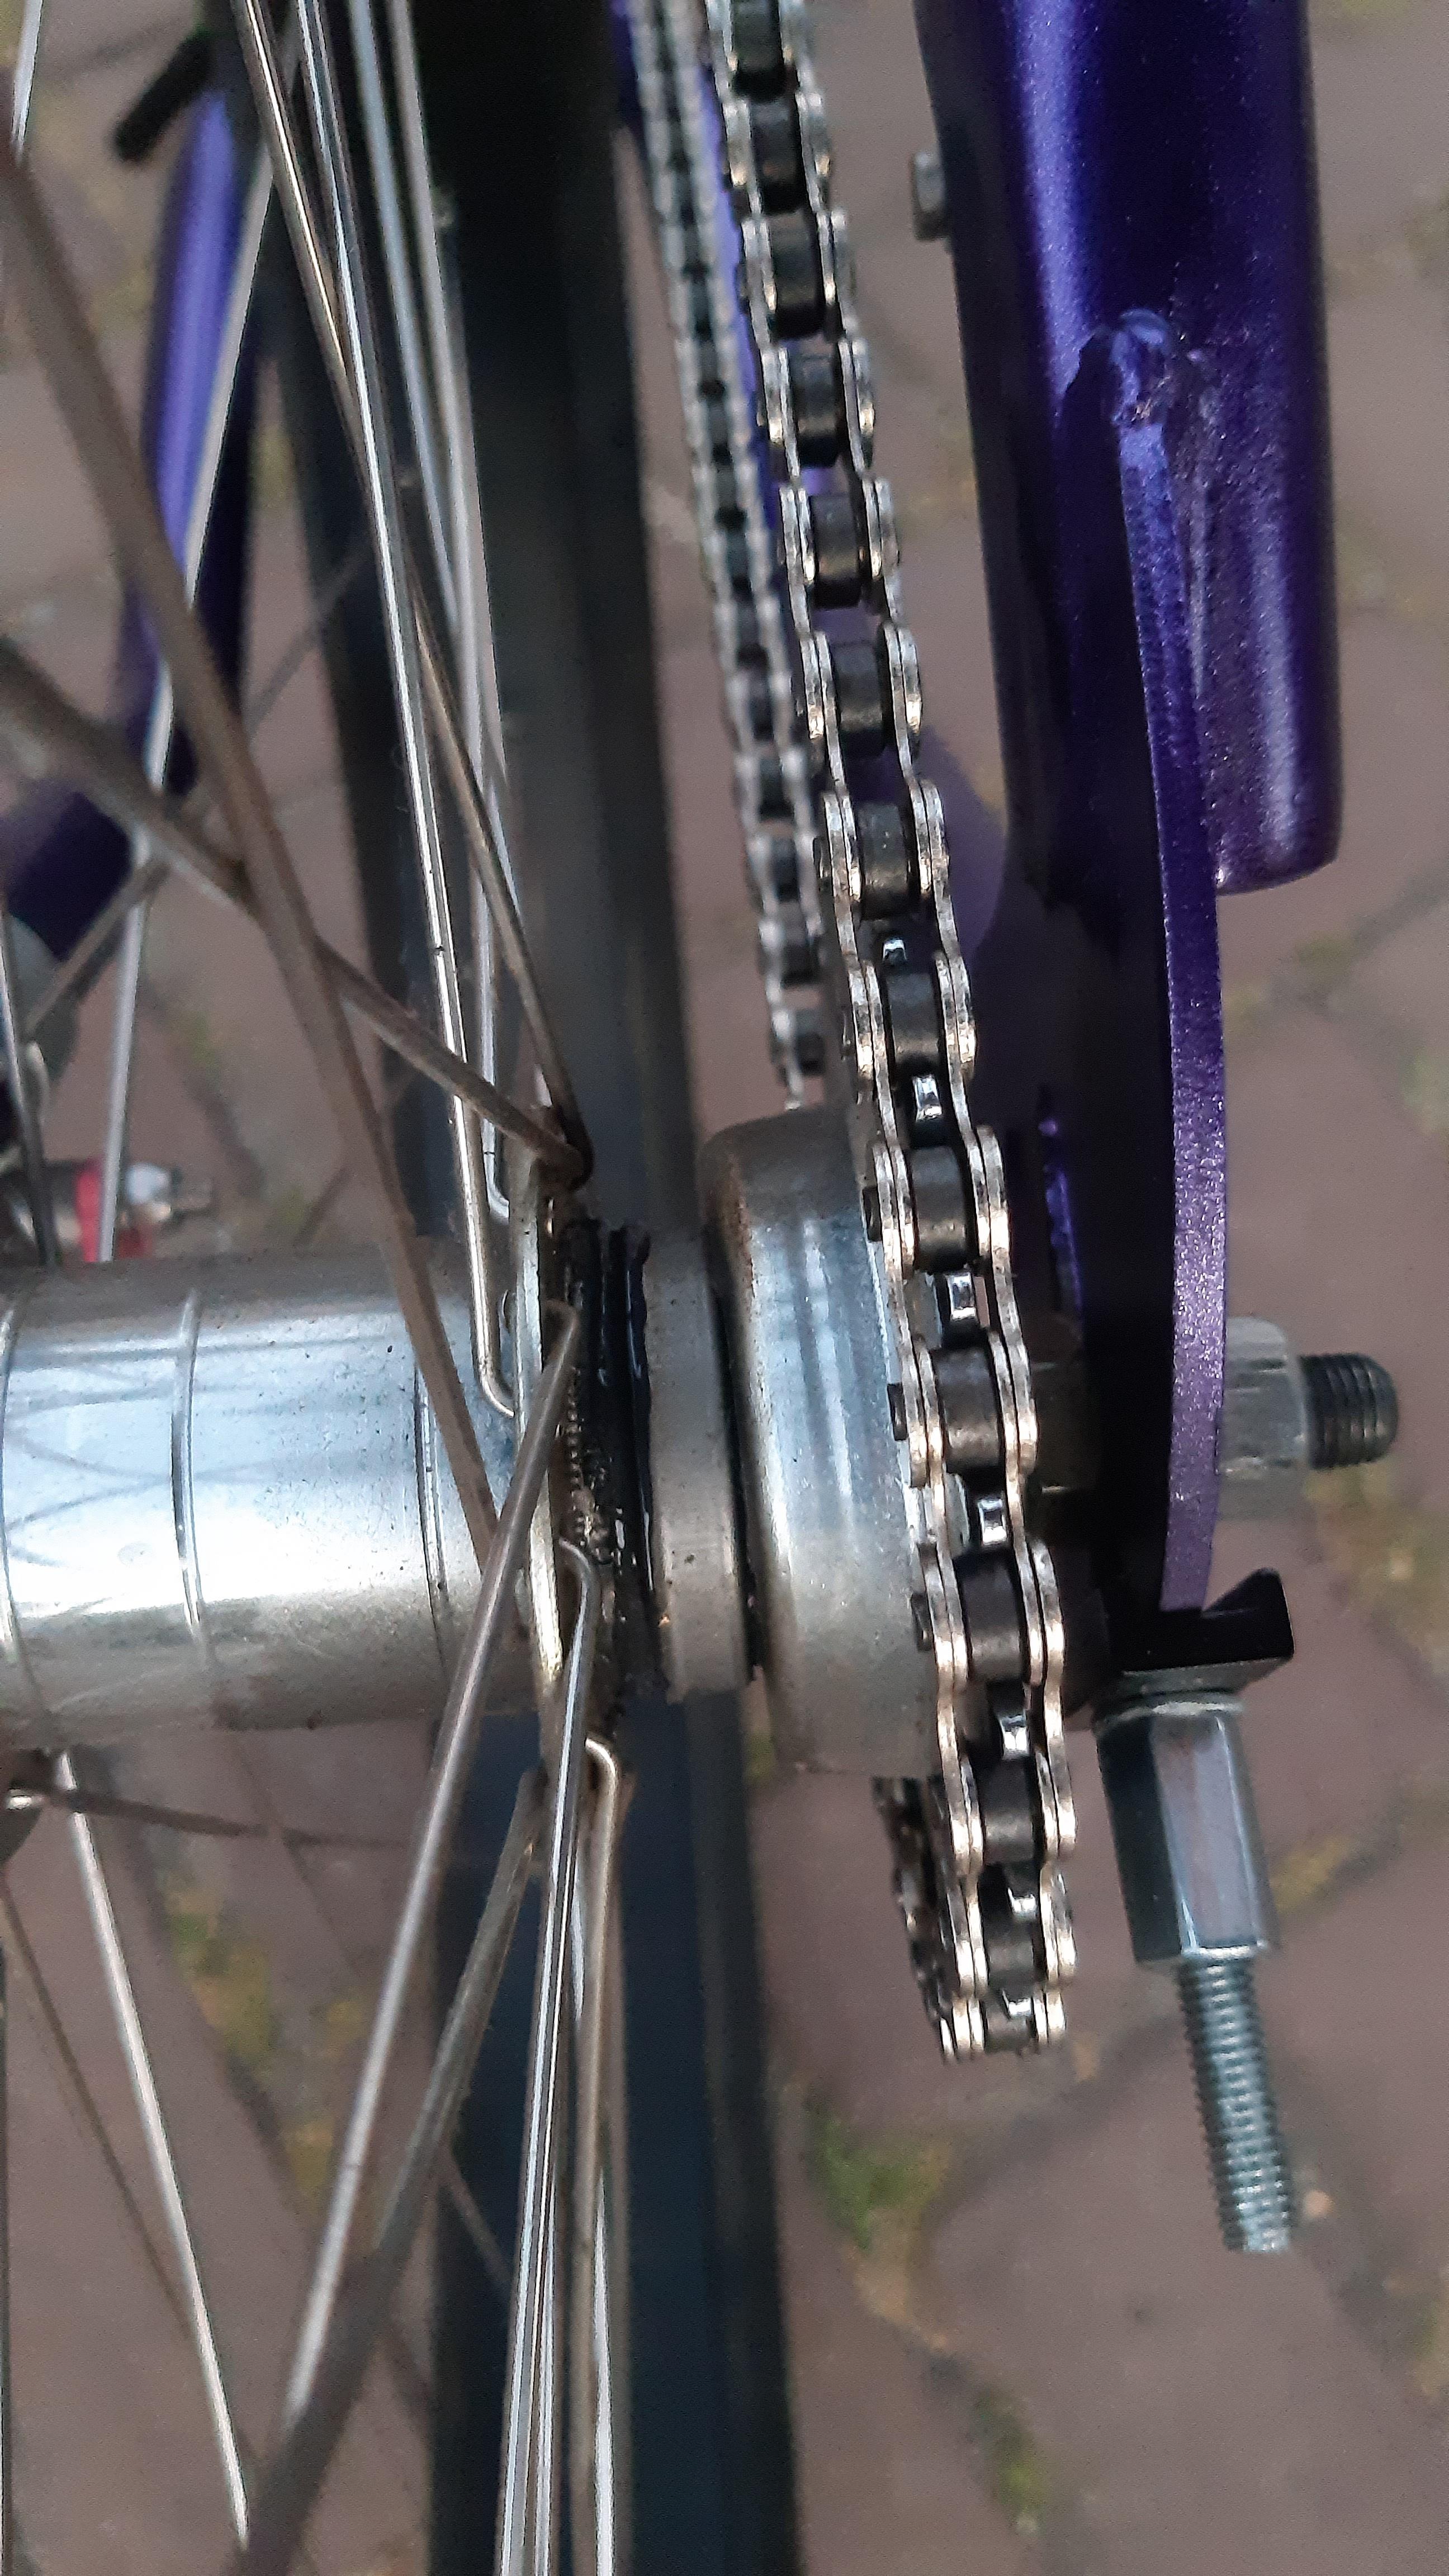
And accelerating hard destroyed the rear (threaded) cog. I thought @kingfish254 also had a rear cog removed on a testrun
 I have a spare driver, but hoped not to change that part... maybe I will just weld it, IF the thread is damaged.
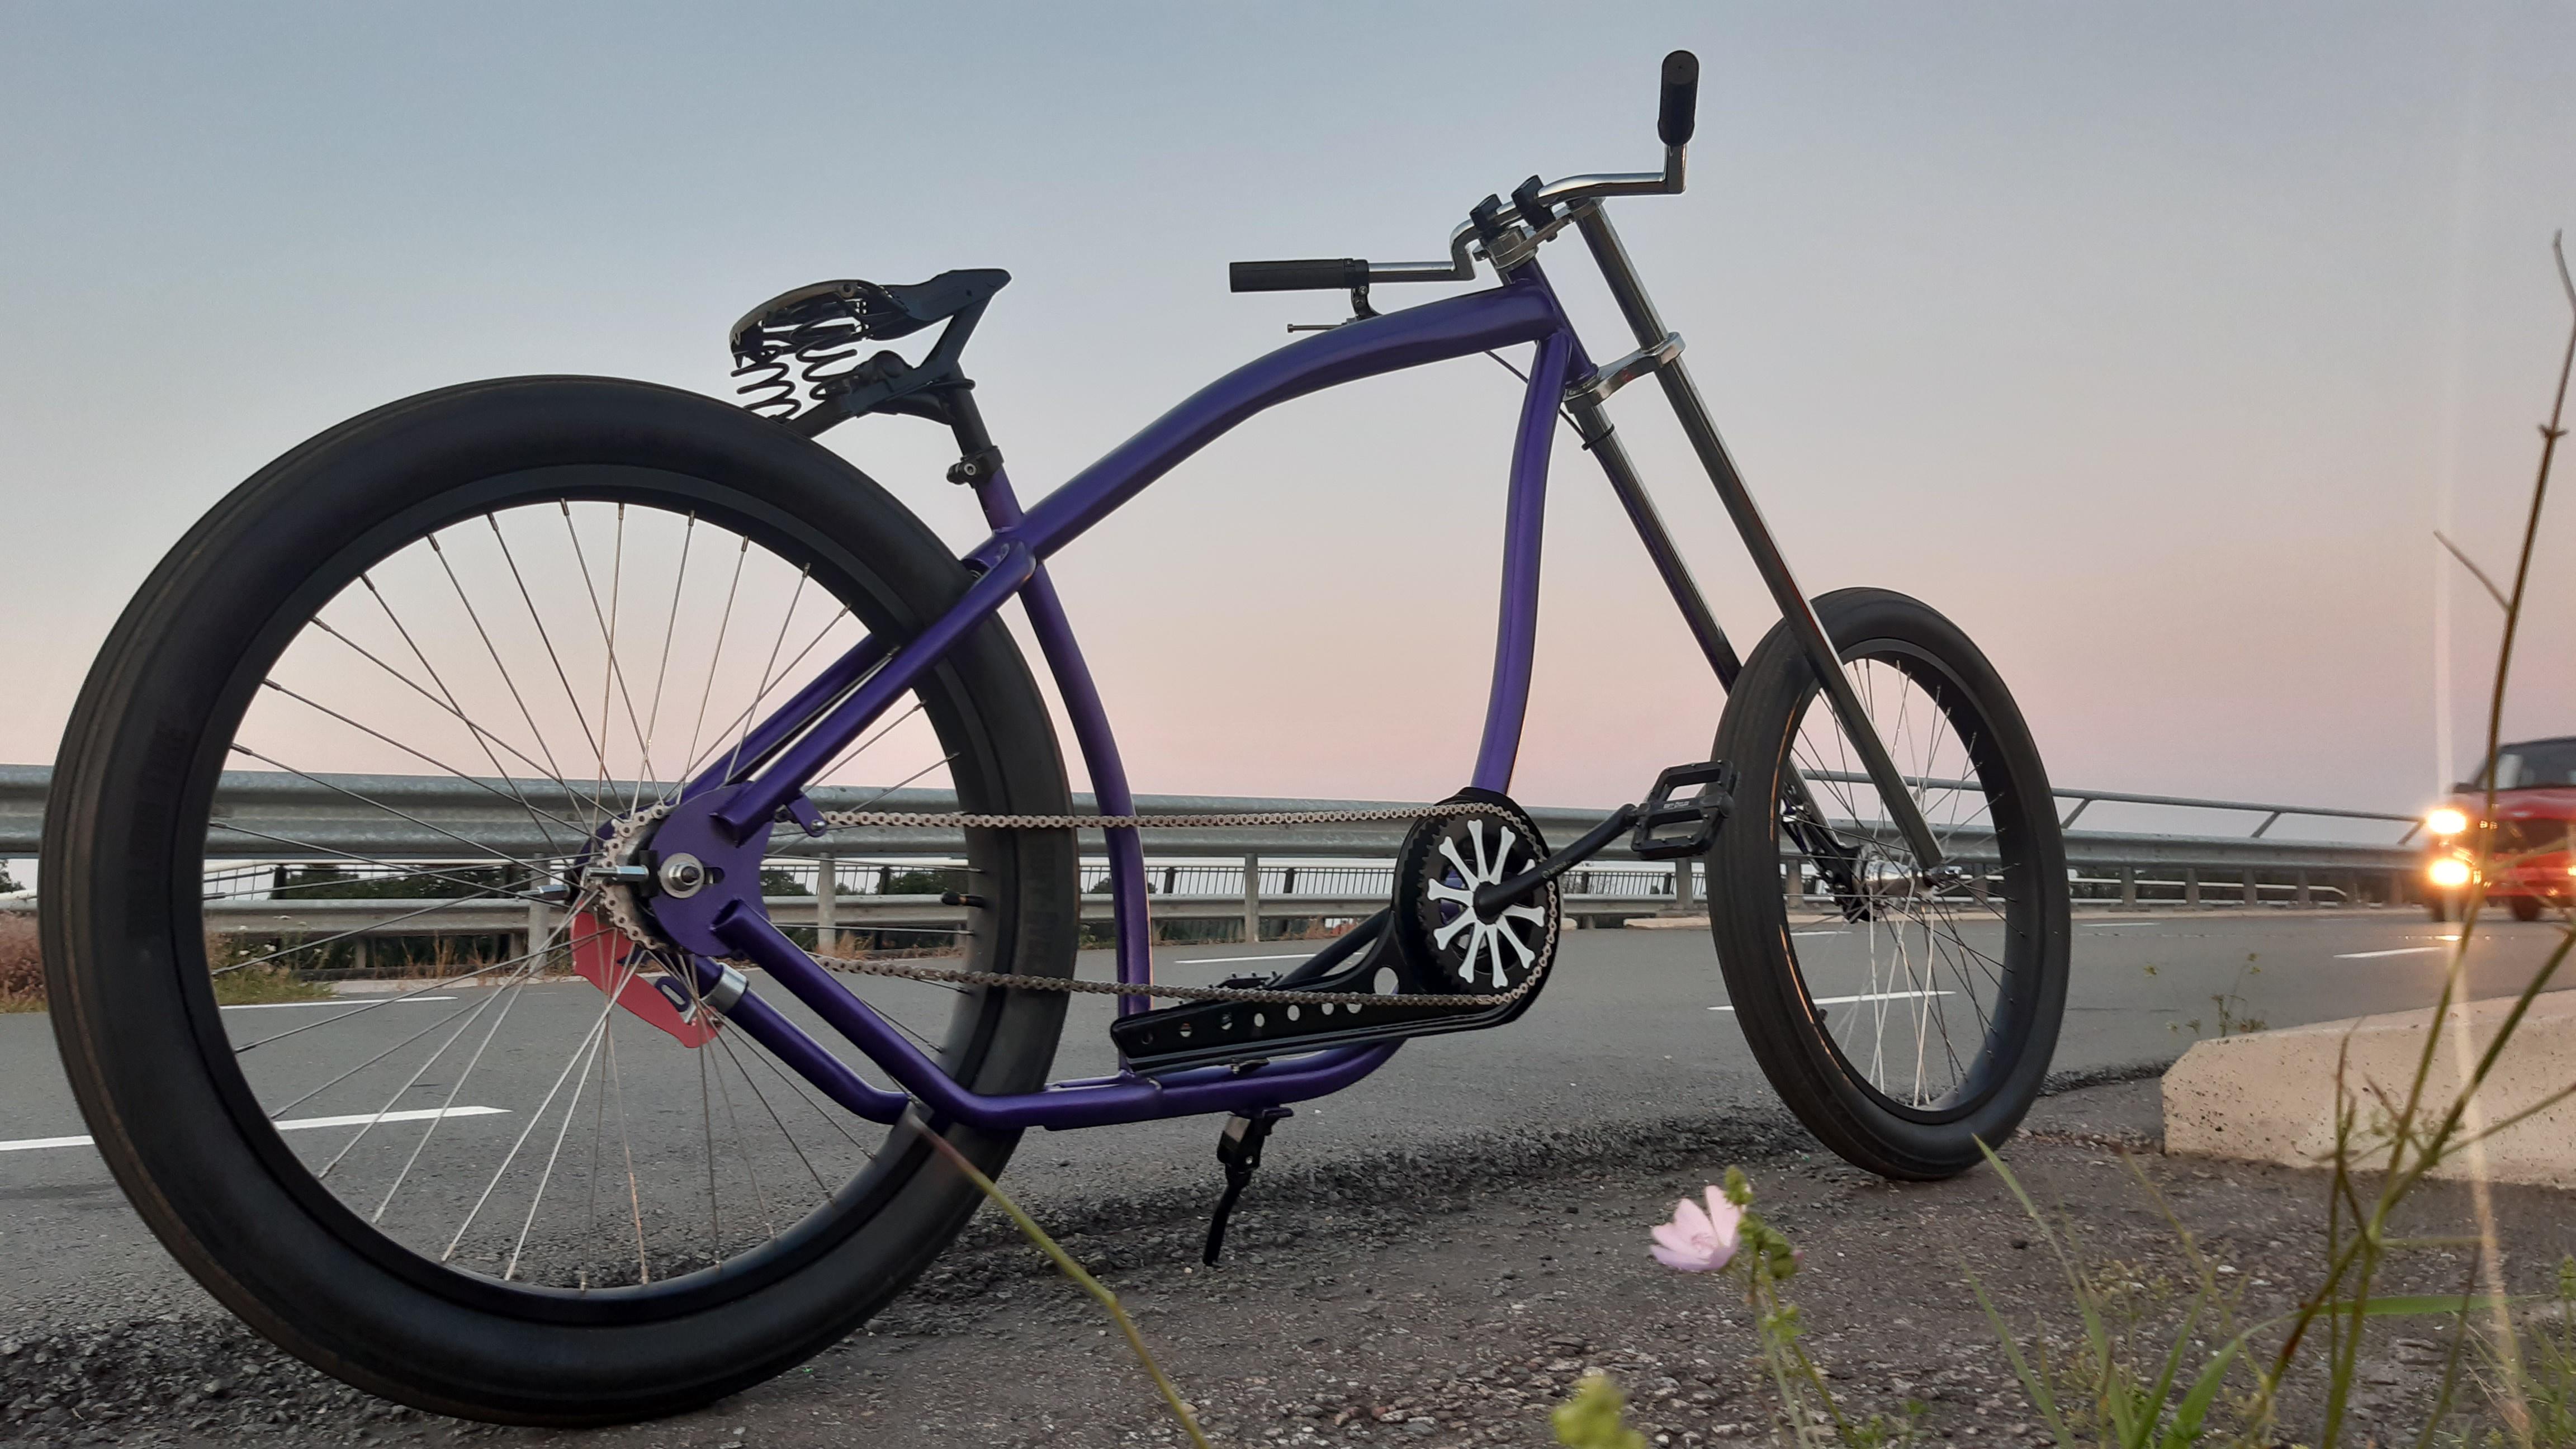

Last edited:
My opinion hasn't changed. The chainguard , laying on the frame like it is, still detracts from the overall look; in my opinion.
But it's not MY bike.
The chainguard , laying on the frame like it is, still detracts from the overall look; in my opinion.But it's not MY bike.
I think your chain is too tight and it might be the reason why you have problems with the rear cog.
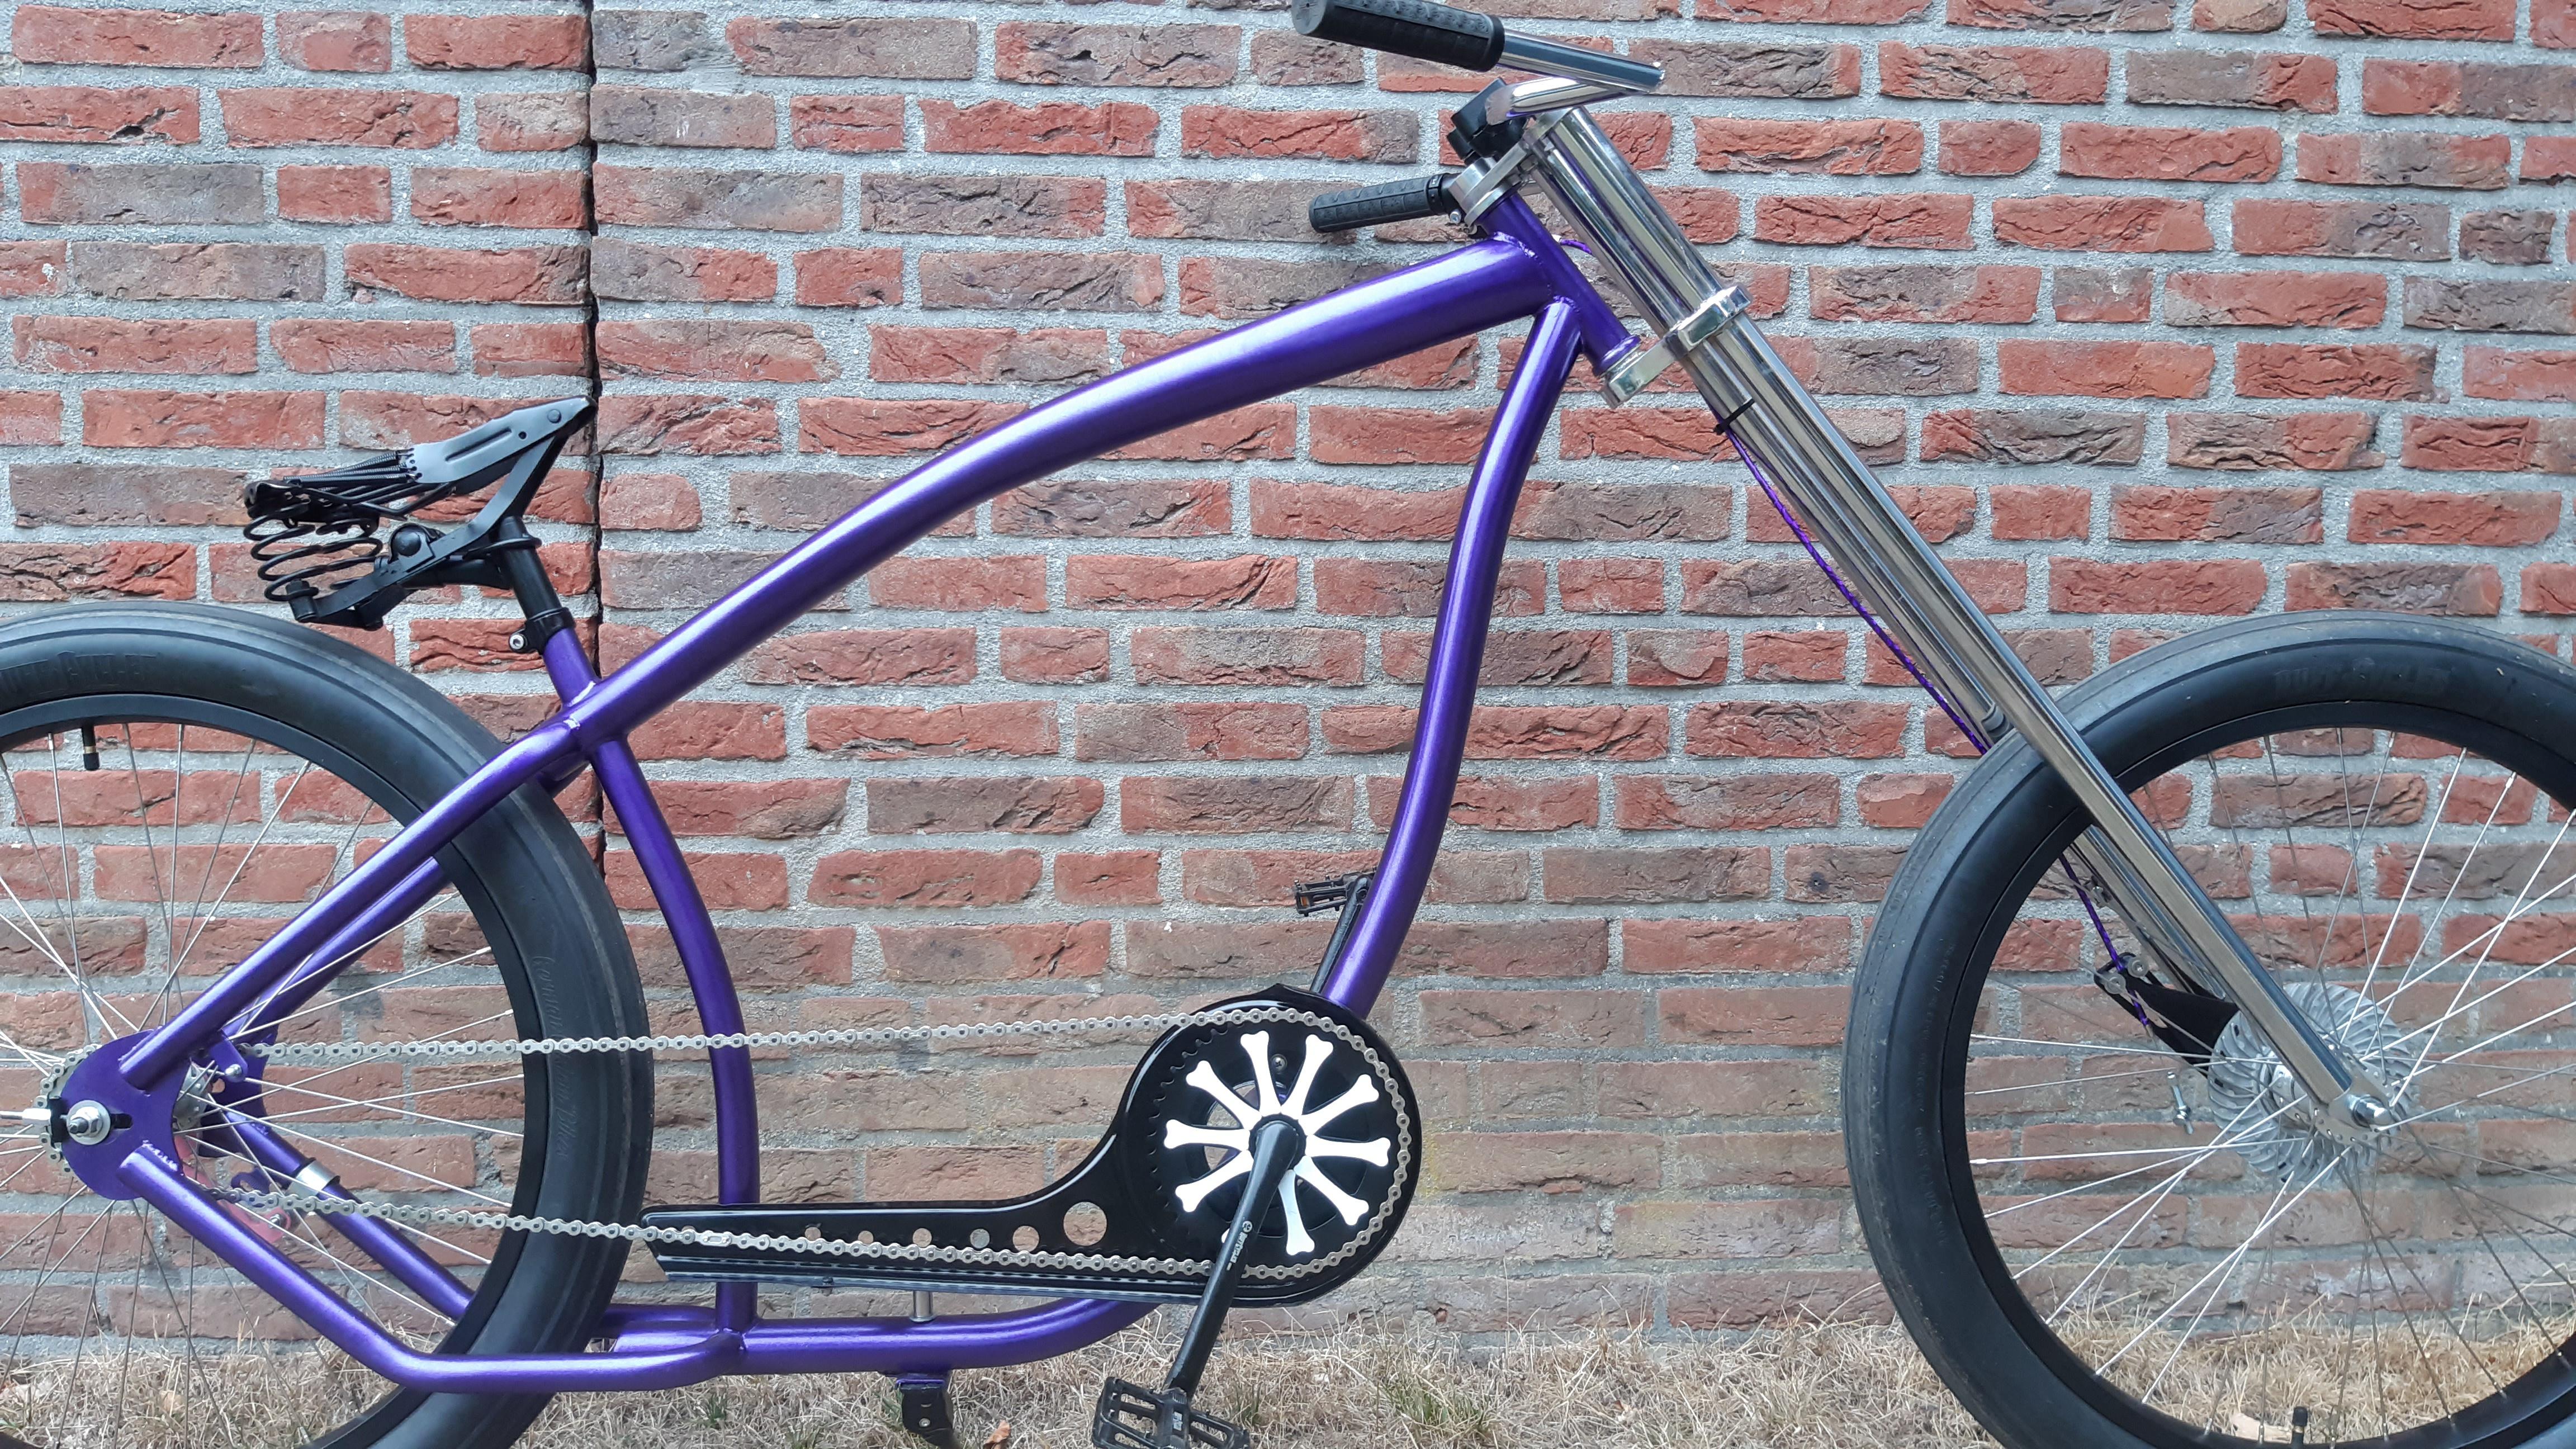
Otherwise I love it, the Nirve choppers frames have such beautiful lines. The brake lever is perfect for these handlebars!
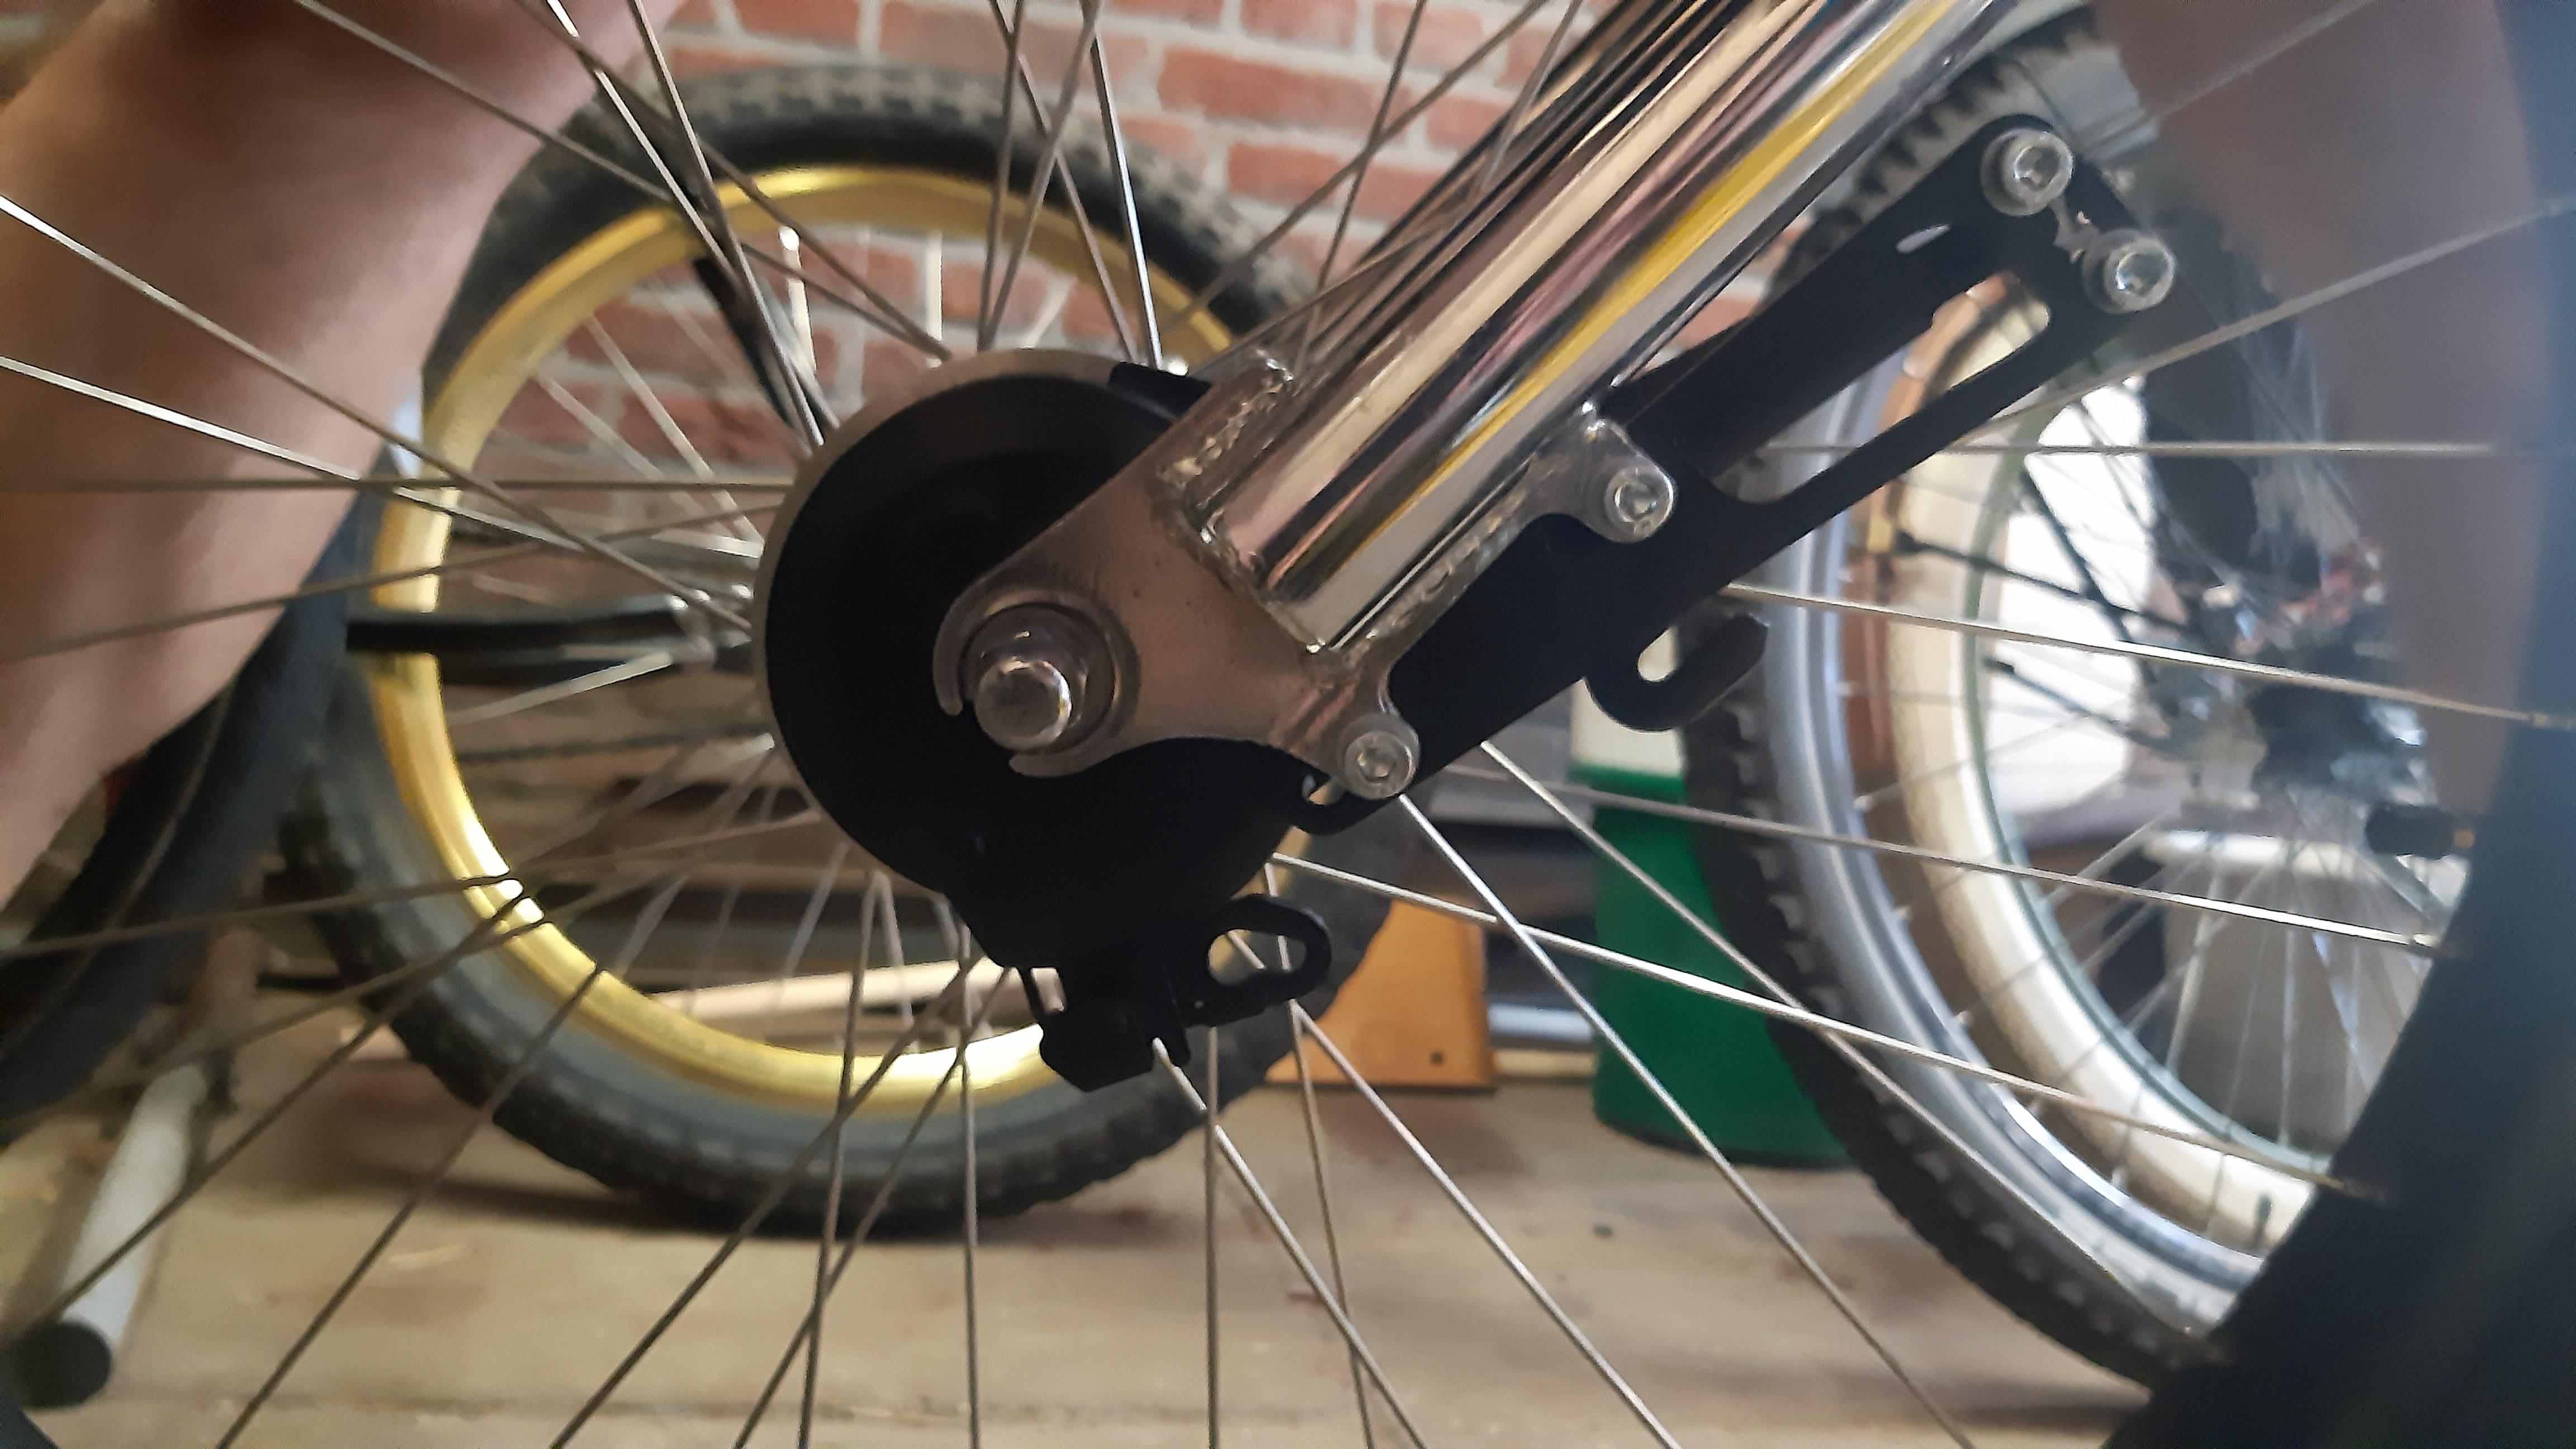
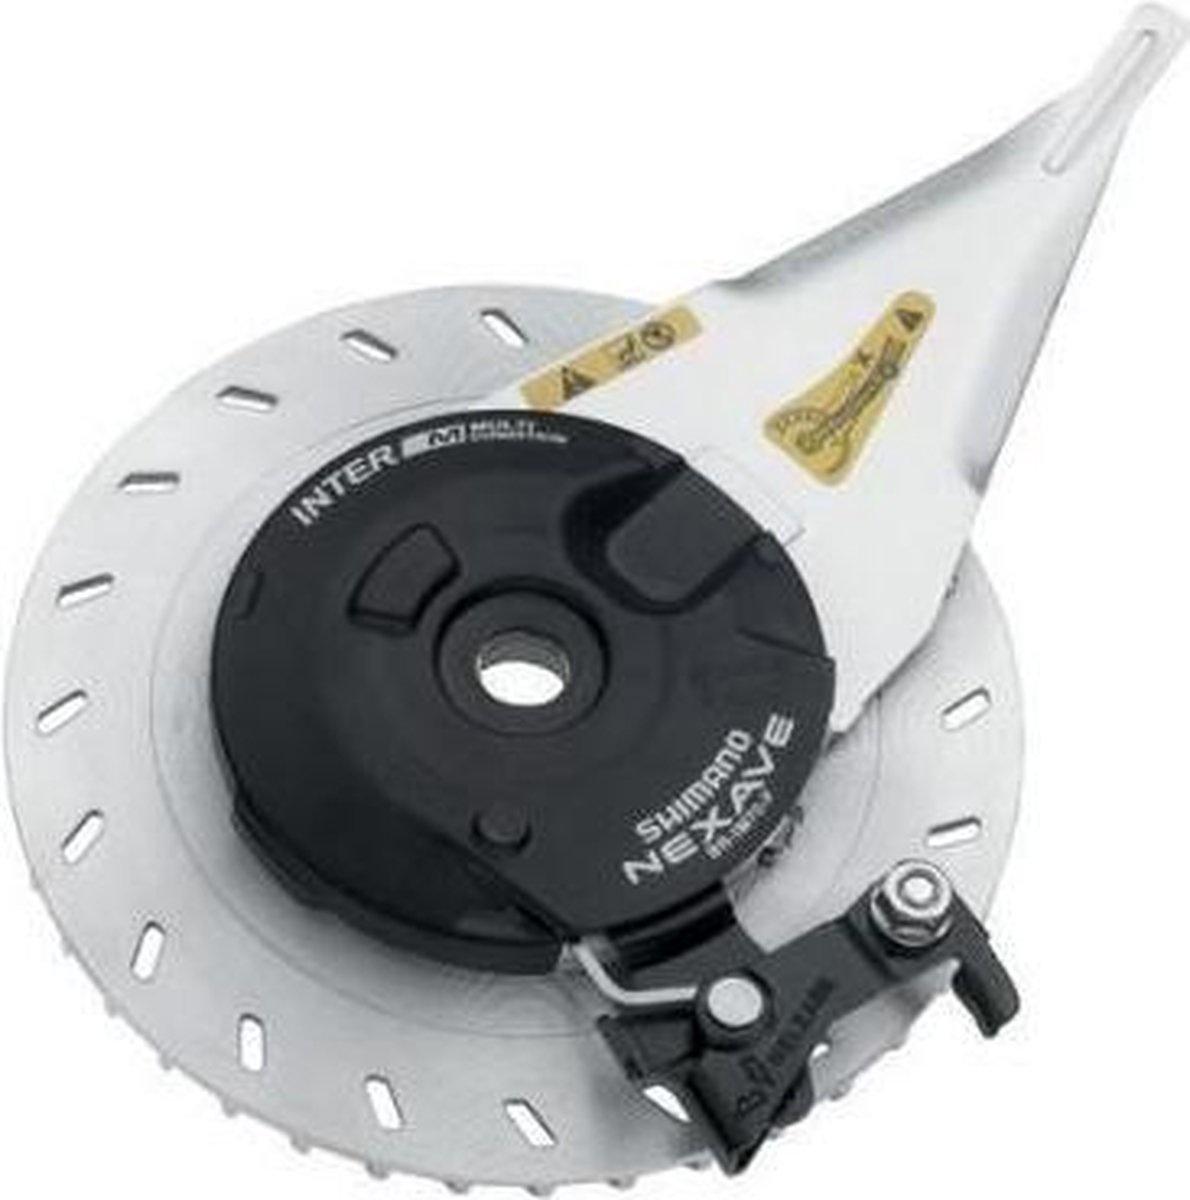
The roller brake might need more adjustment. I have set up my rear roller brake with only 5-6 mm pull on the cable for it to grab. On the pic there is no pull on the cable:

Otherwise I love it, the Nirve choppers frames have such beautiful lines. The brake lever is perfect for these handlebars!
The roller brake might need more adjustment. I have set up my rear roller brake with only 5-6 mm pull on the cable for it to grab. On the pic there is no pull on the cable:
I know OJ, I'll try this position soon. Thank you!My opinion hasn't changed.
But it's not MY bike.
Always appreciate your input Toro!I think your chain is too tight and it might be the reason why you have problems with the rear cog.
Otherwise I love it, the Nirve choppers frames have such beautiful lines. The brake lever is perfect for these handlebars!
The roller brake might need more adjustment. I have set up my rear roller brake with only 5-6 mm pull on the cable for it to grab. On the pic there is no pull on the cable:
View attachment 204289
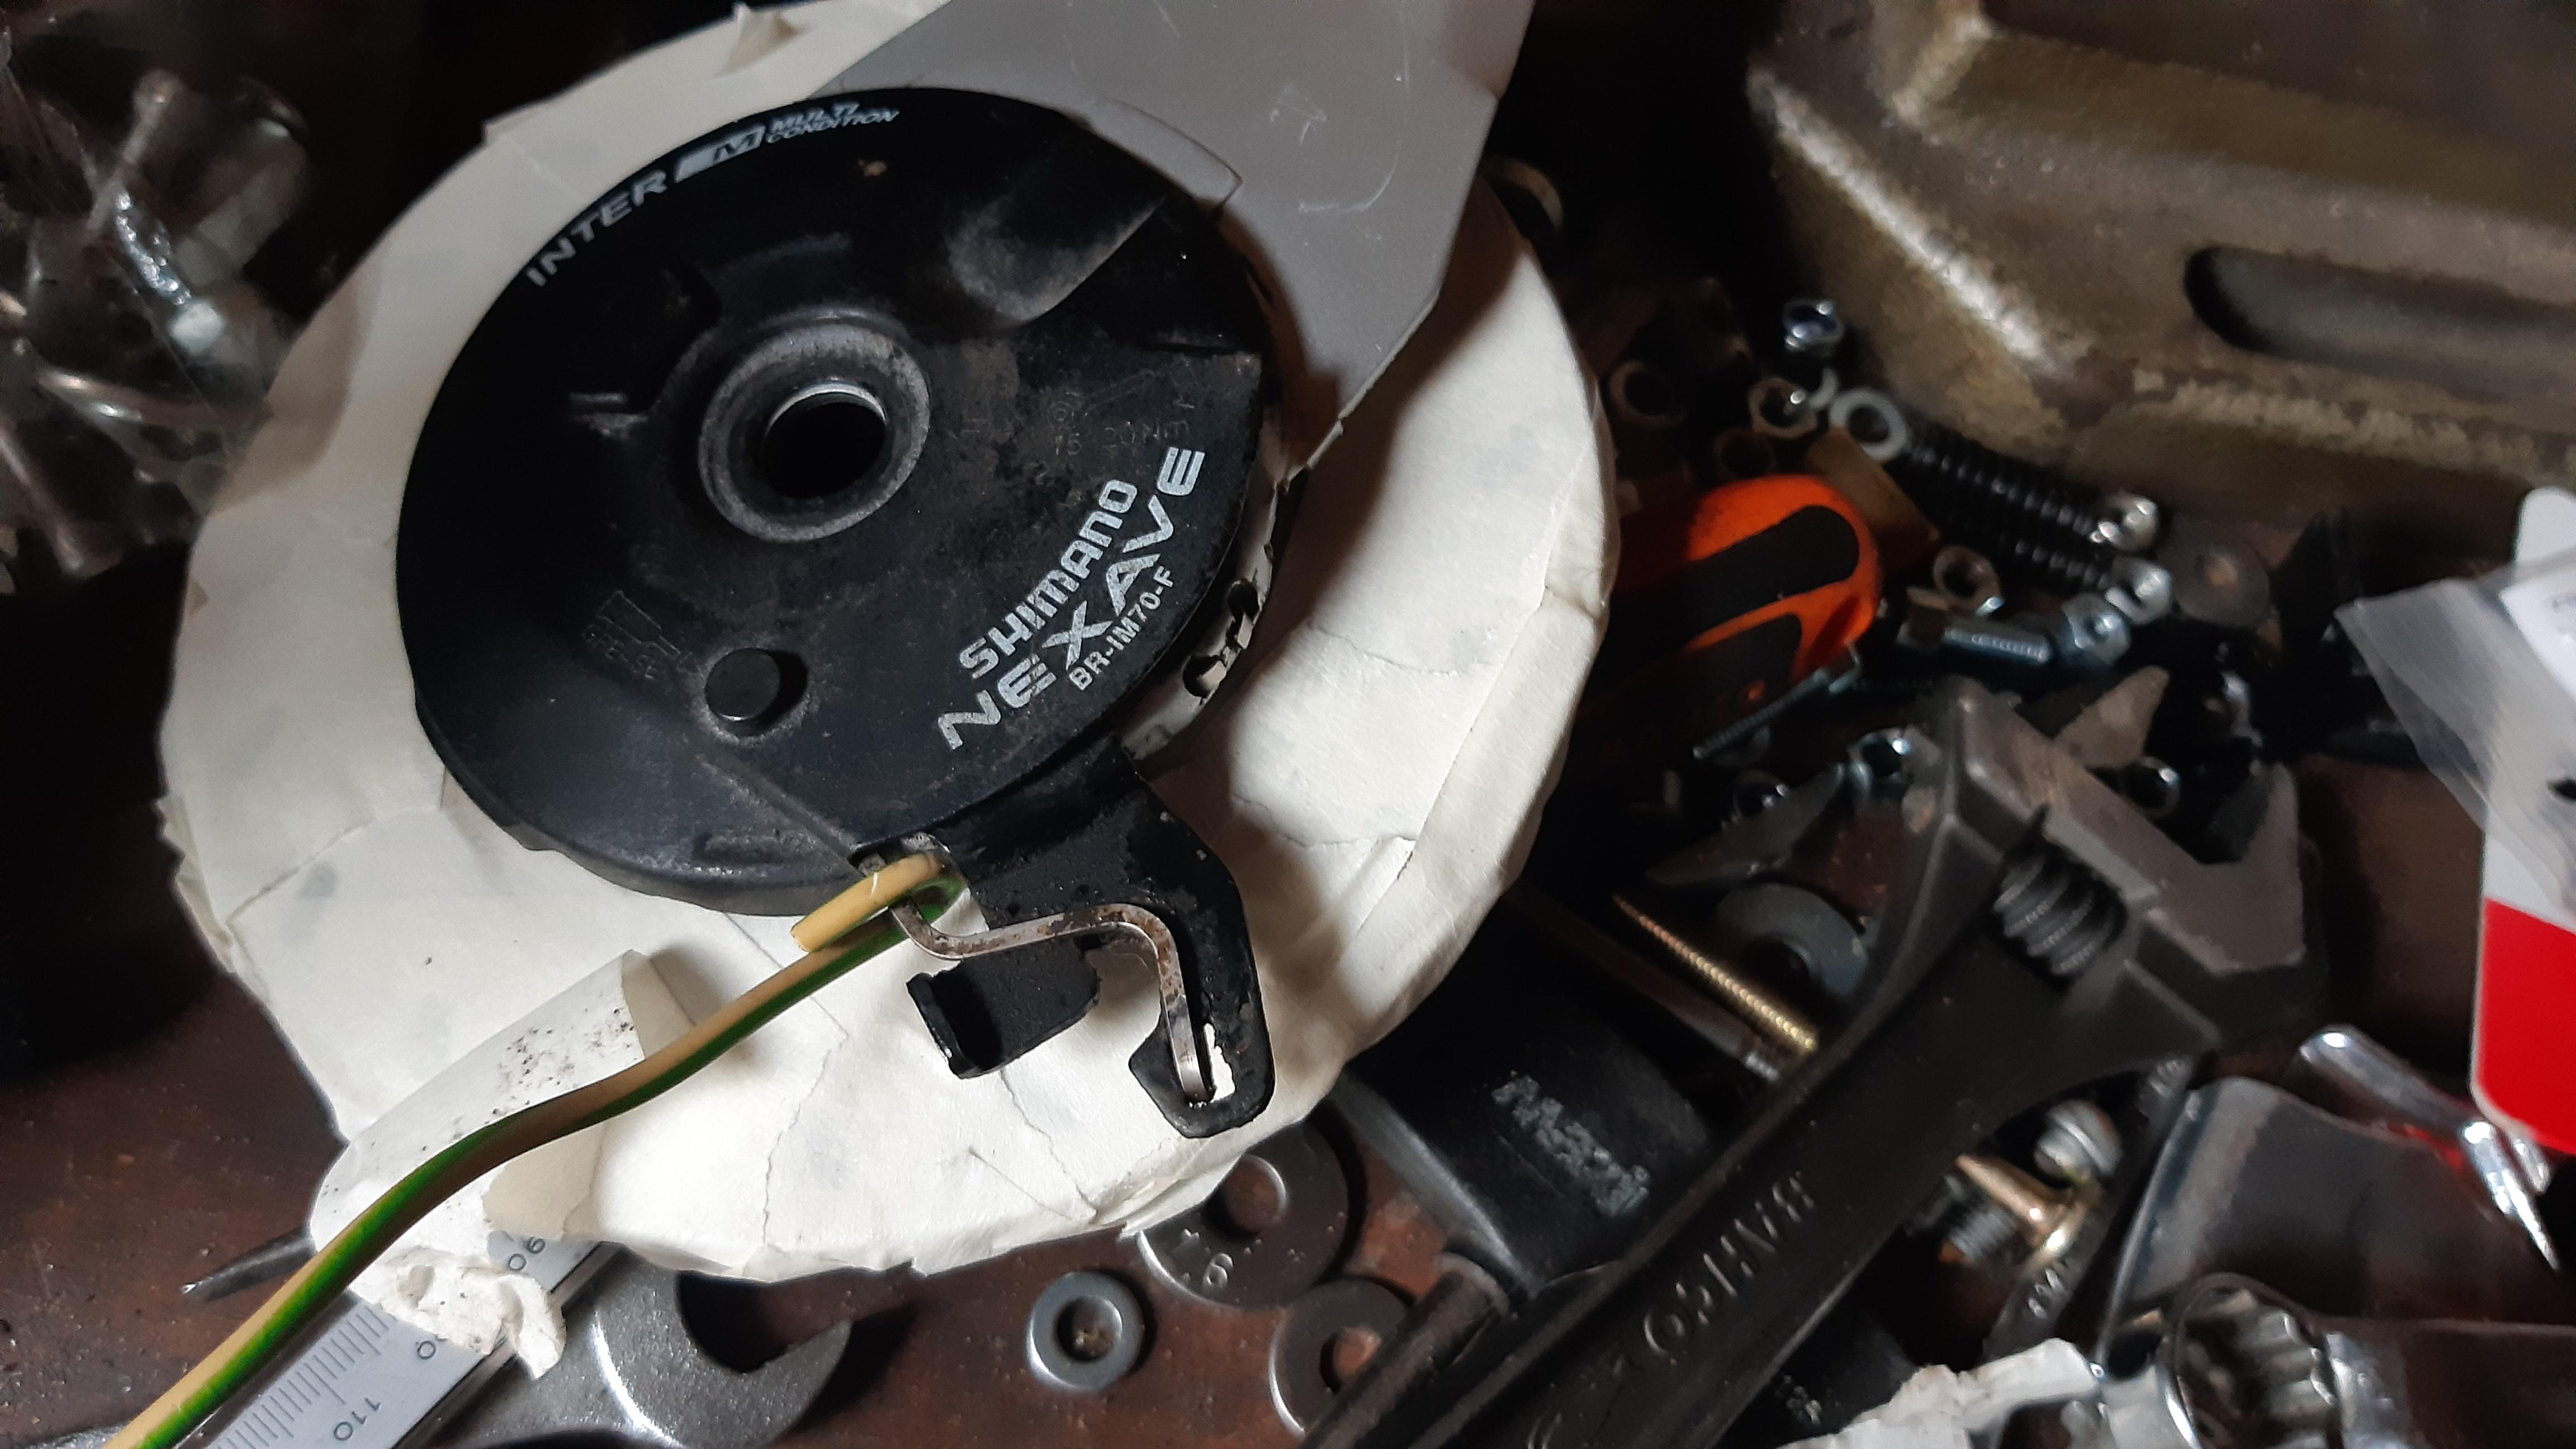
I have meddled with this brake a bit (Shimano Rollerbrake IM41) but it simply does not stop the bike.
The cable is lubricated and free. Adjusted as well.
The shoes simply do not engage, they create friction, but a (earlier mentioned) stamp brake works better.
I did read several articles about this type being absolute garbage.
Maybe I'll buy a different (newer) type with cooling fin/heat sink.
I still have many ideas for this bike, but time is haunting me right now. Its like that situation from Peter Pan, something with a crocodile and a ticking noise

First, I will check the rear sprocket and the front brake. I want it to be a rider first of all.
dig the coaster brake arm. Musselman approved.
Do you know the Mosselman? He comes from Scheveningen:dig the coaster brake arm. Musselman approved.
@Frankie plekhand
Sorry for that piece of Dutch culture, great memories from the 90's.
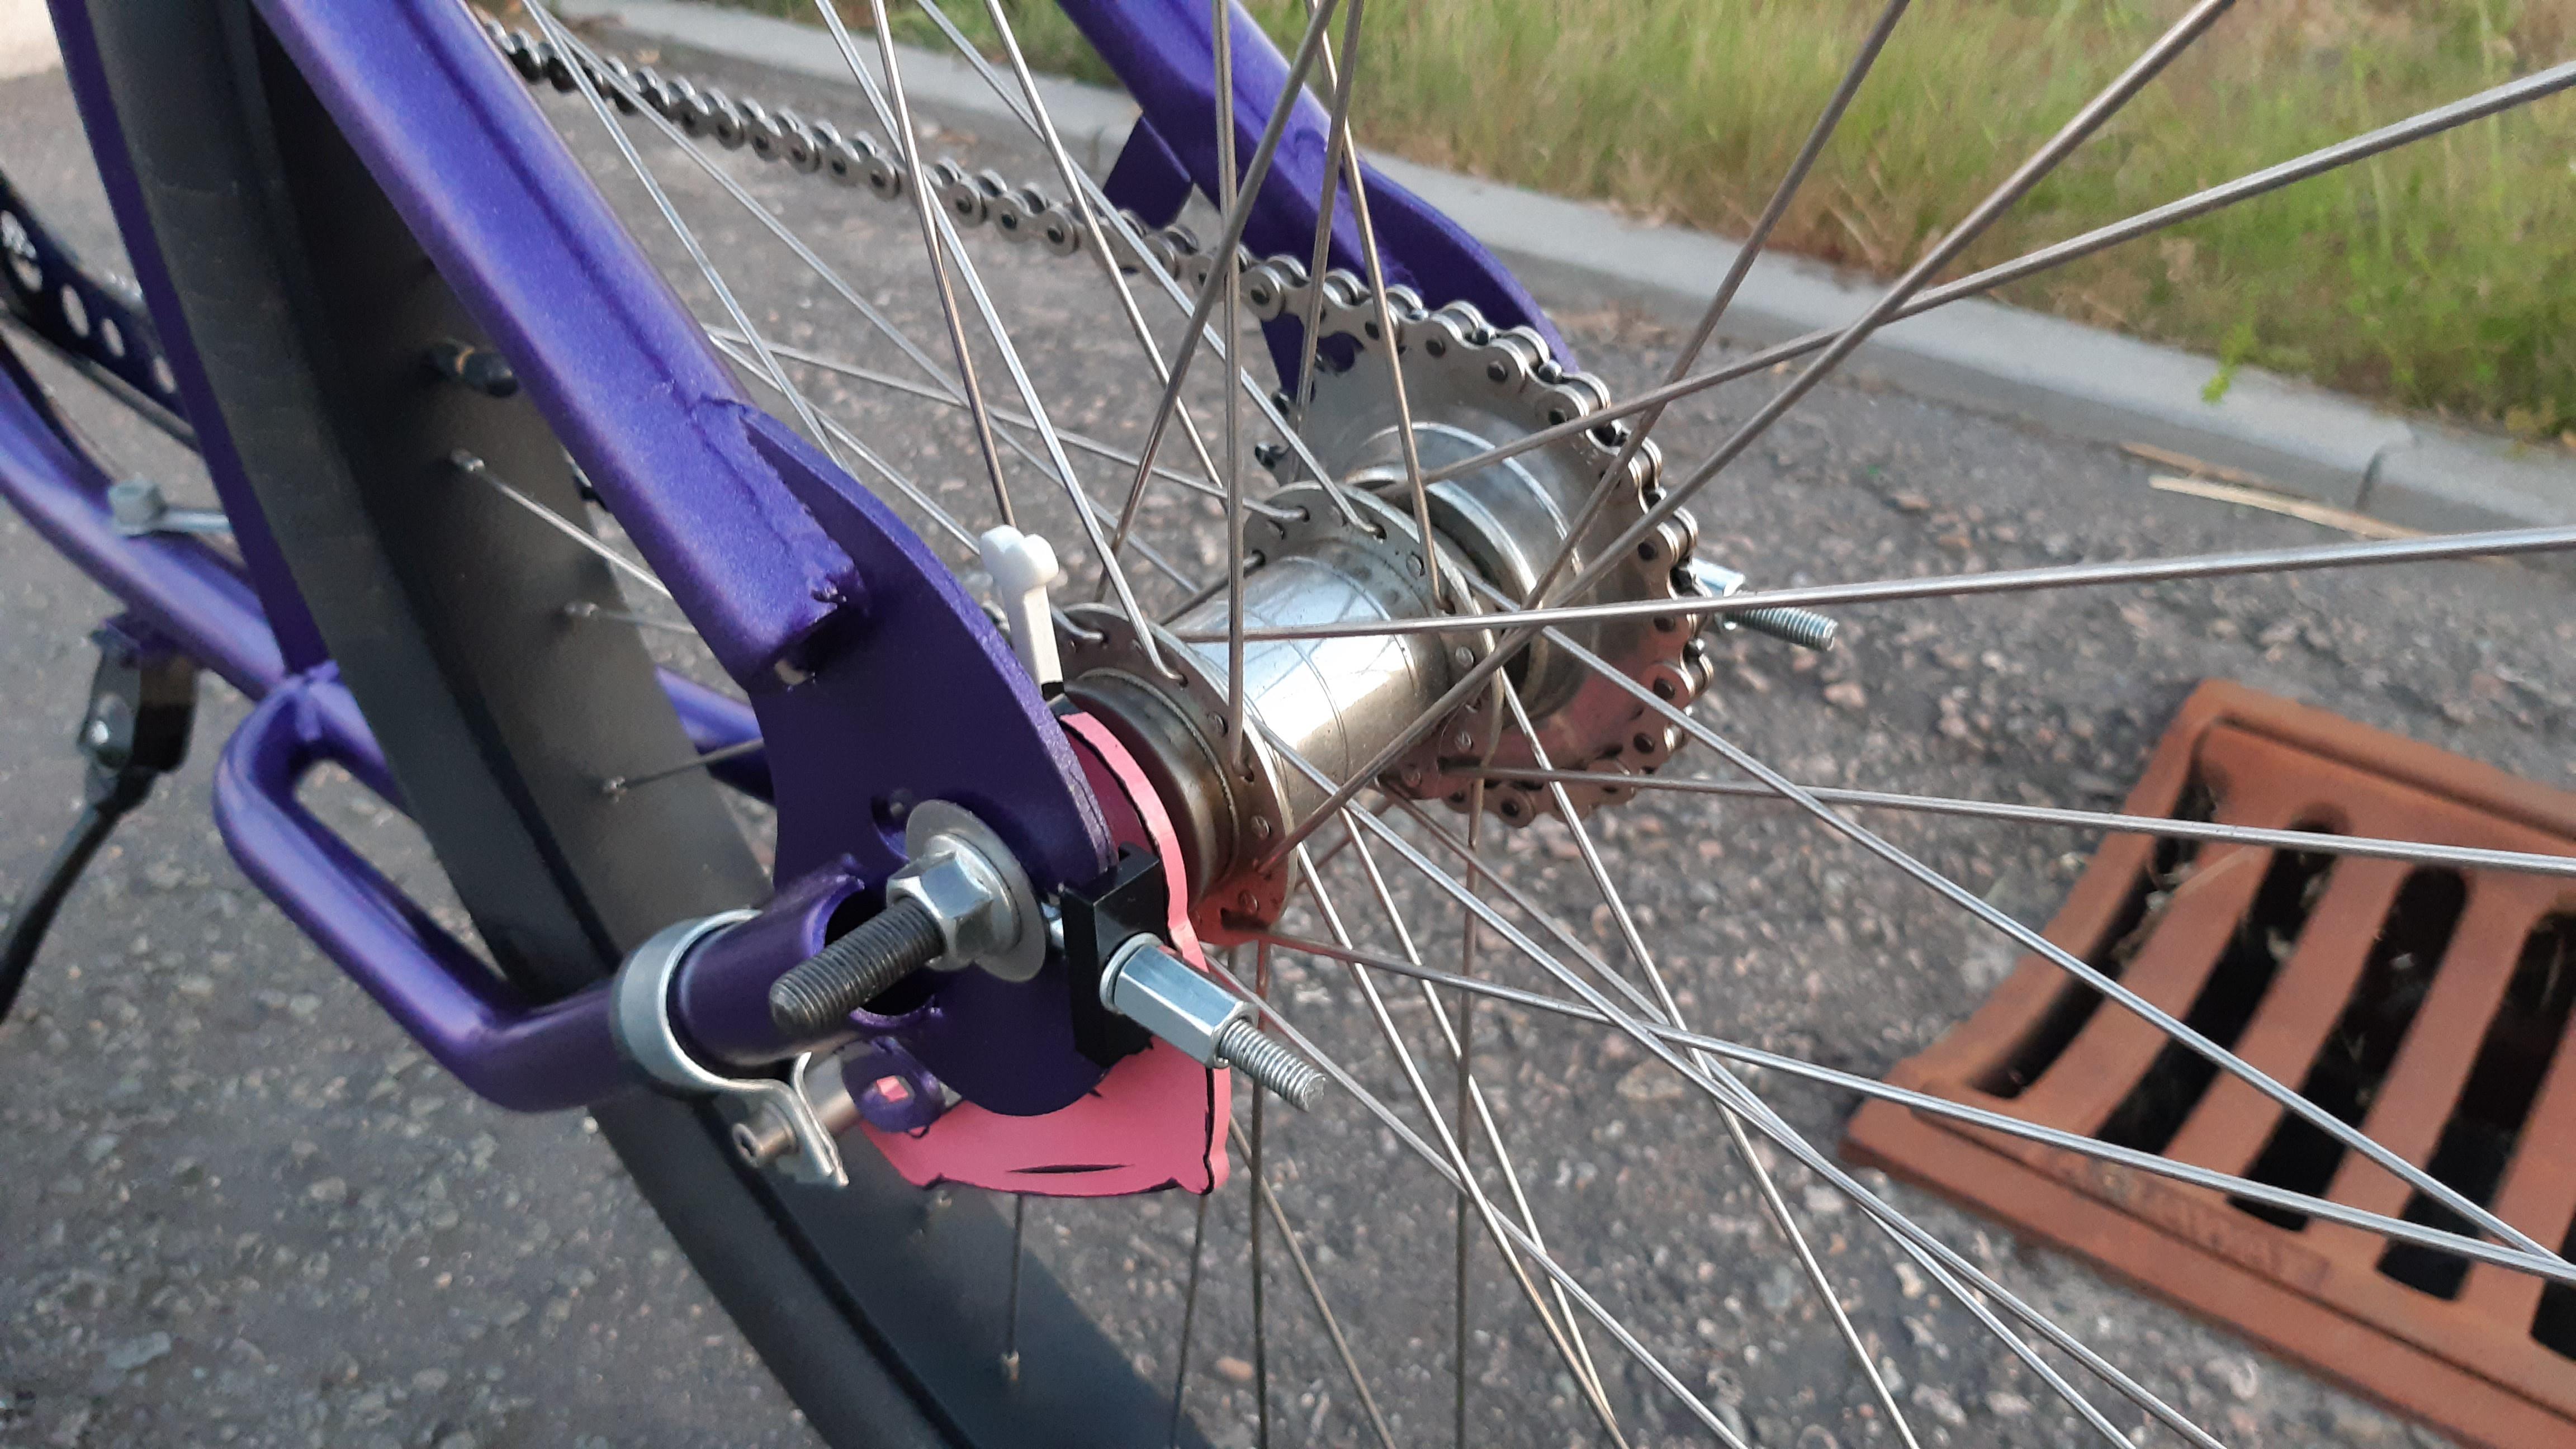
So the thread of the driver is toast. Took me some time to remove the nut:
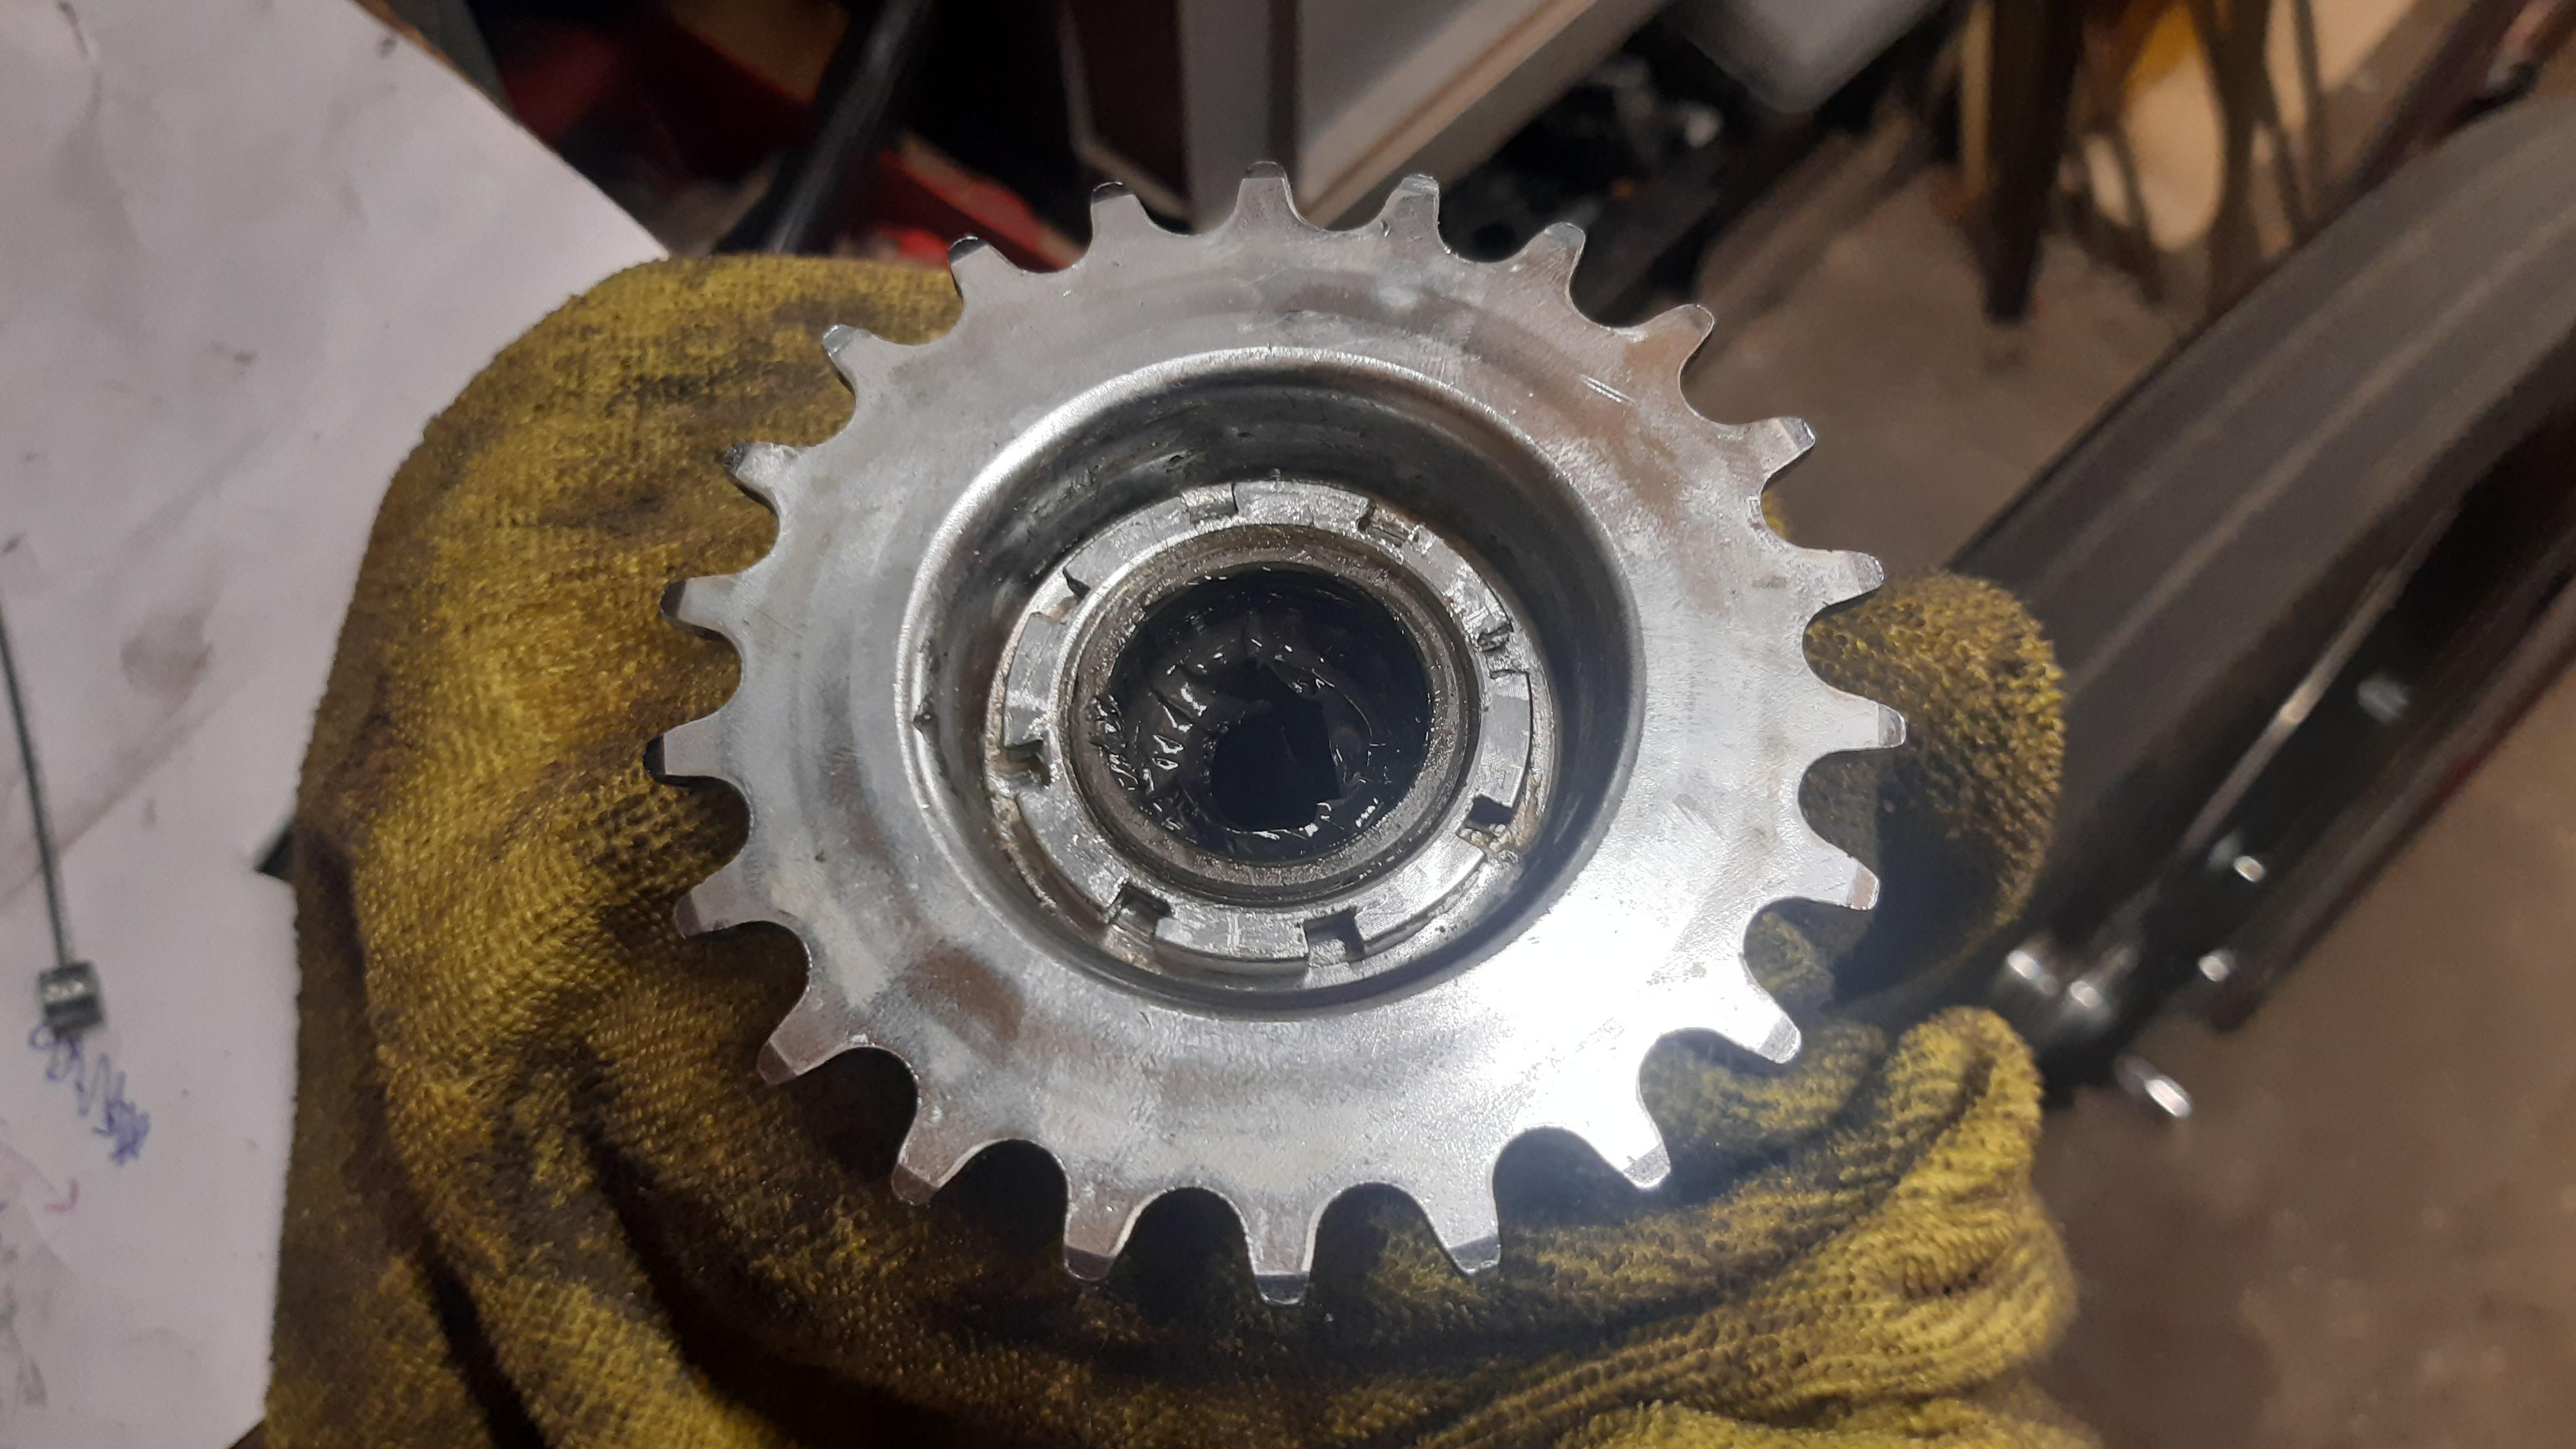
I replaced it with the Shimano CB-E110 driver which is very similar!
The only things that are different: It is a bit wider (+2mm chainline) and the small driver-side bearing of the Shimano is a bit bigger (bigger balls
)
Shimano.
The broken one with thread.
After this I reassembled the rear hub, and put the chain back on. I think it is quite foolproof now.
Only one anomaly I observed: The rear sprocket/cog spring that holds it in place on the driver, was square instead of round. It came off of a older version of the Shimano coaster brake series. Does anyone ever noticed this?
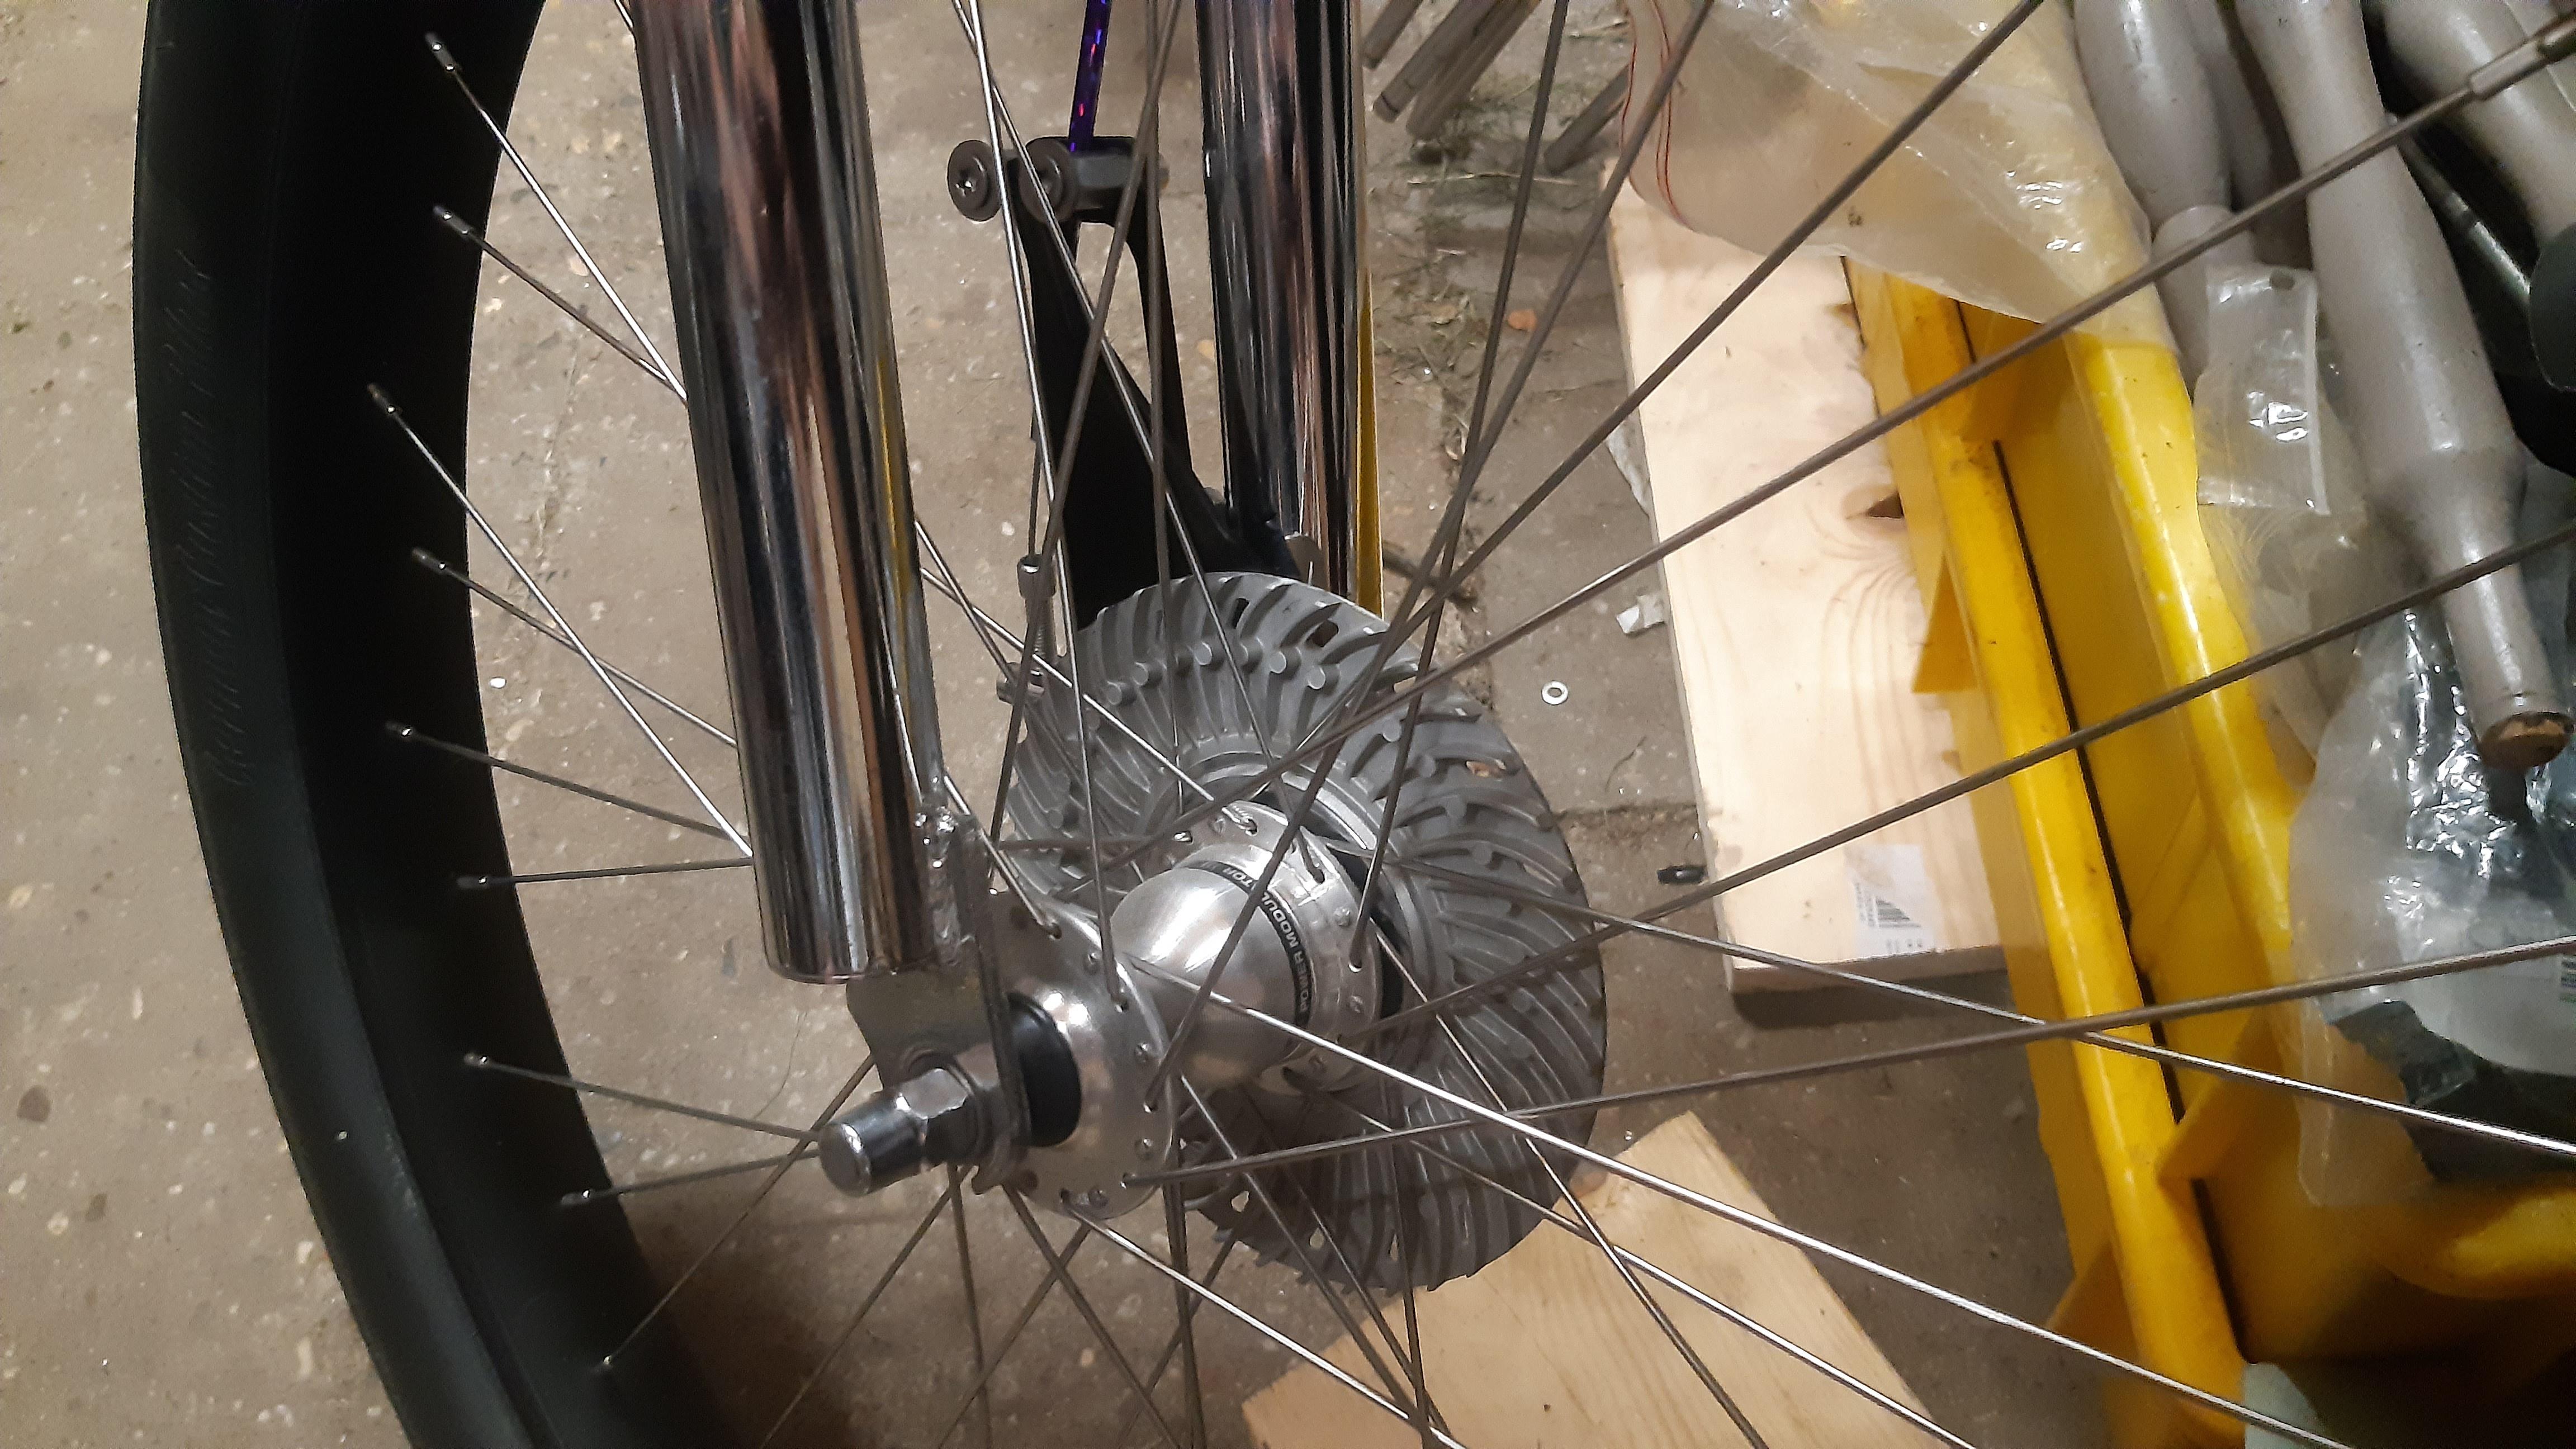
So I found a second hand rollerbrake with a huge heat sink/cooling fin.
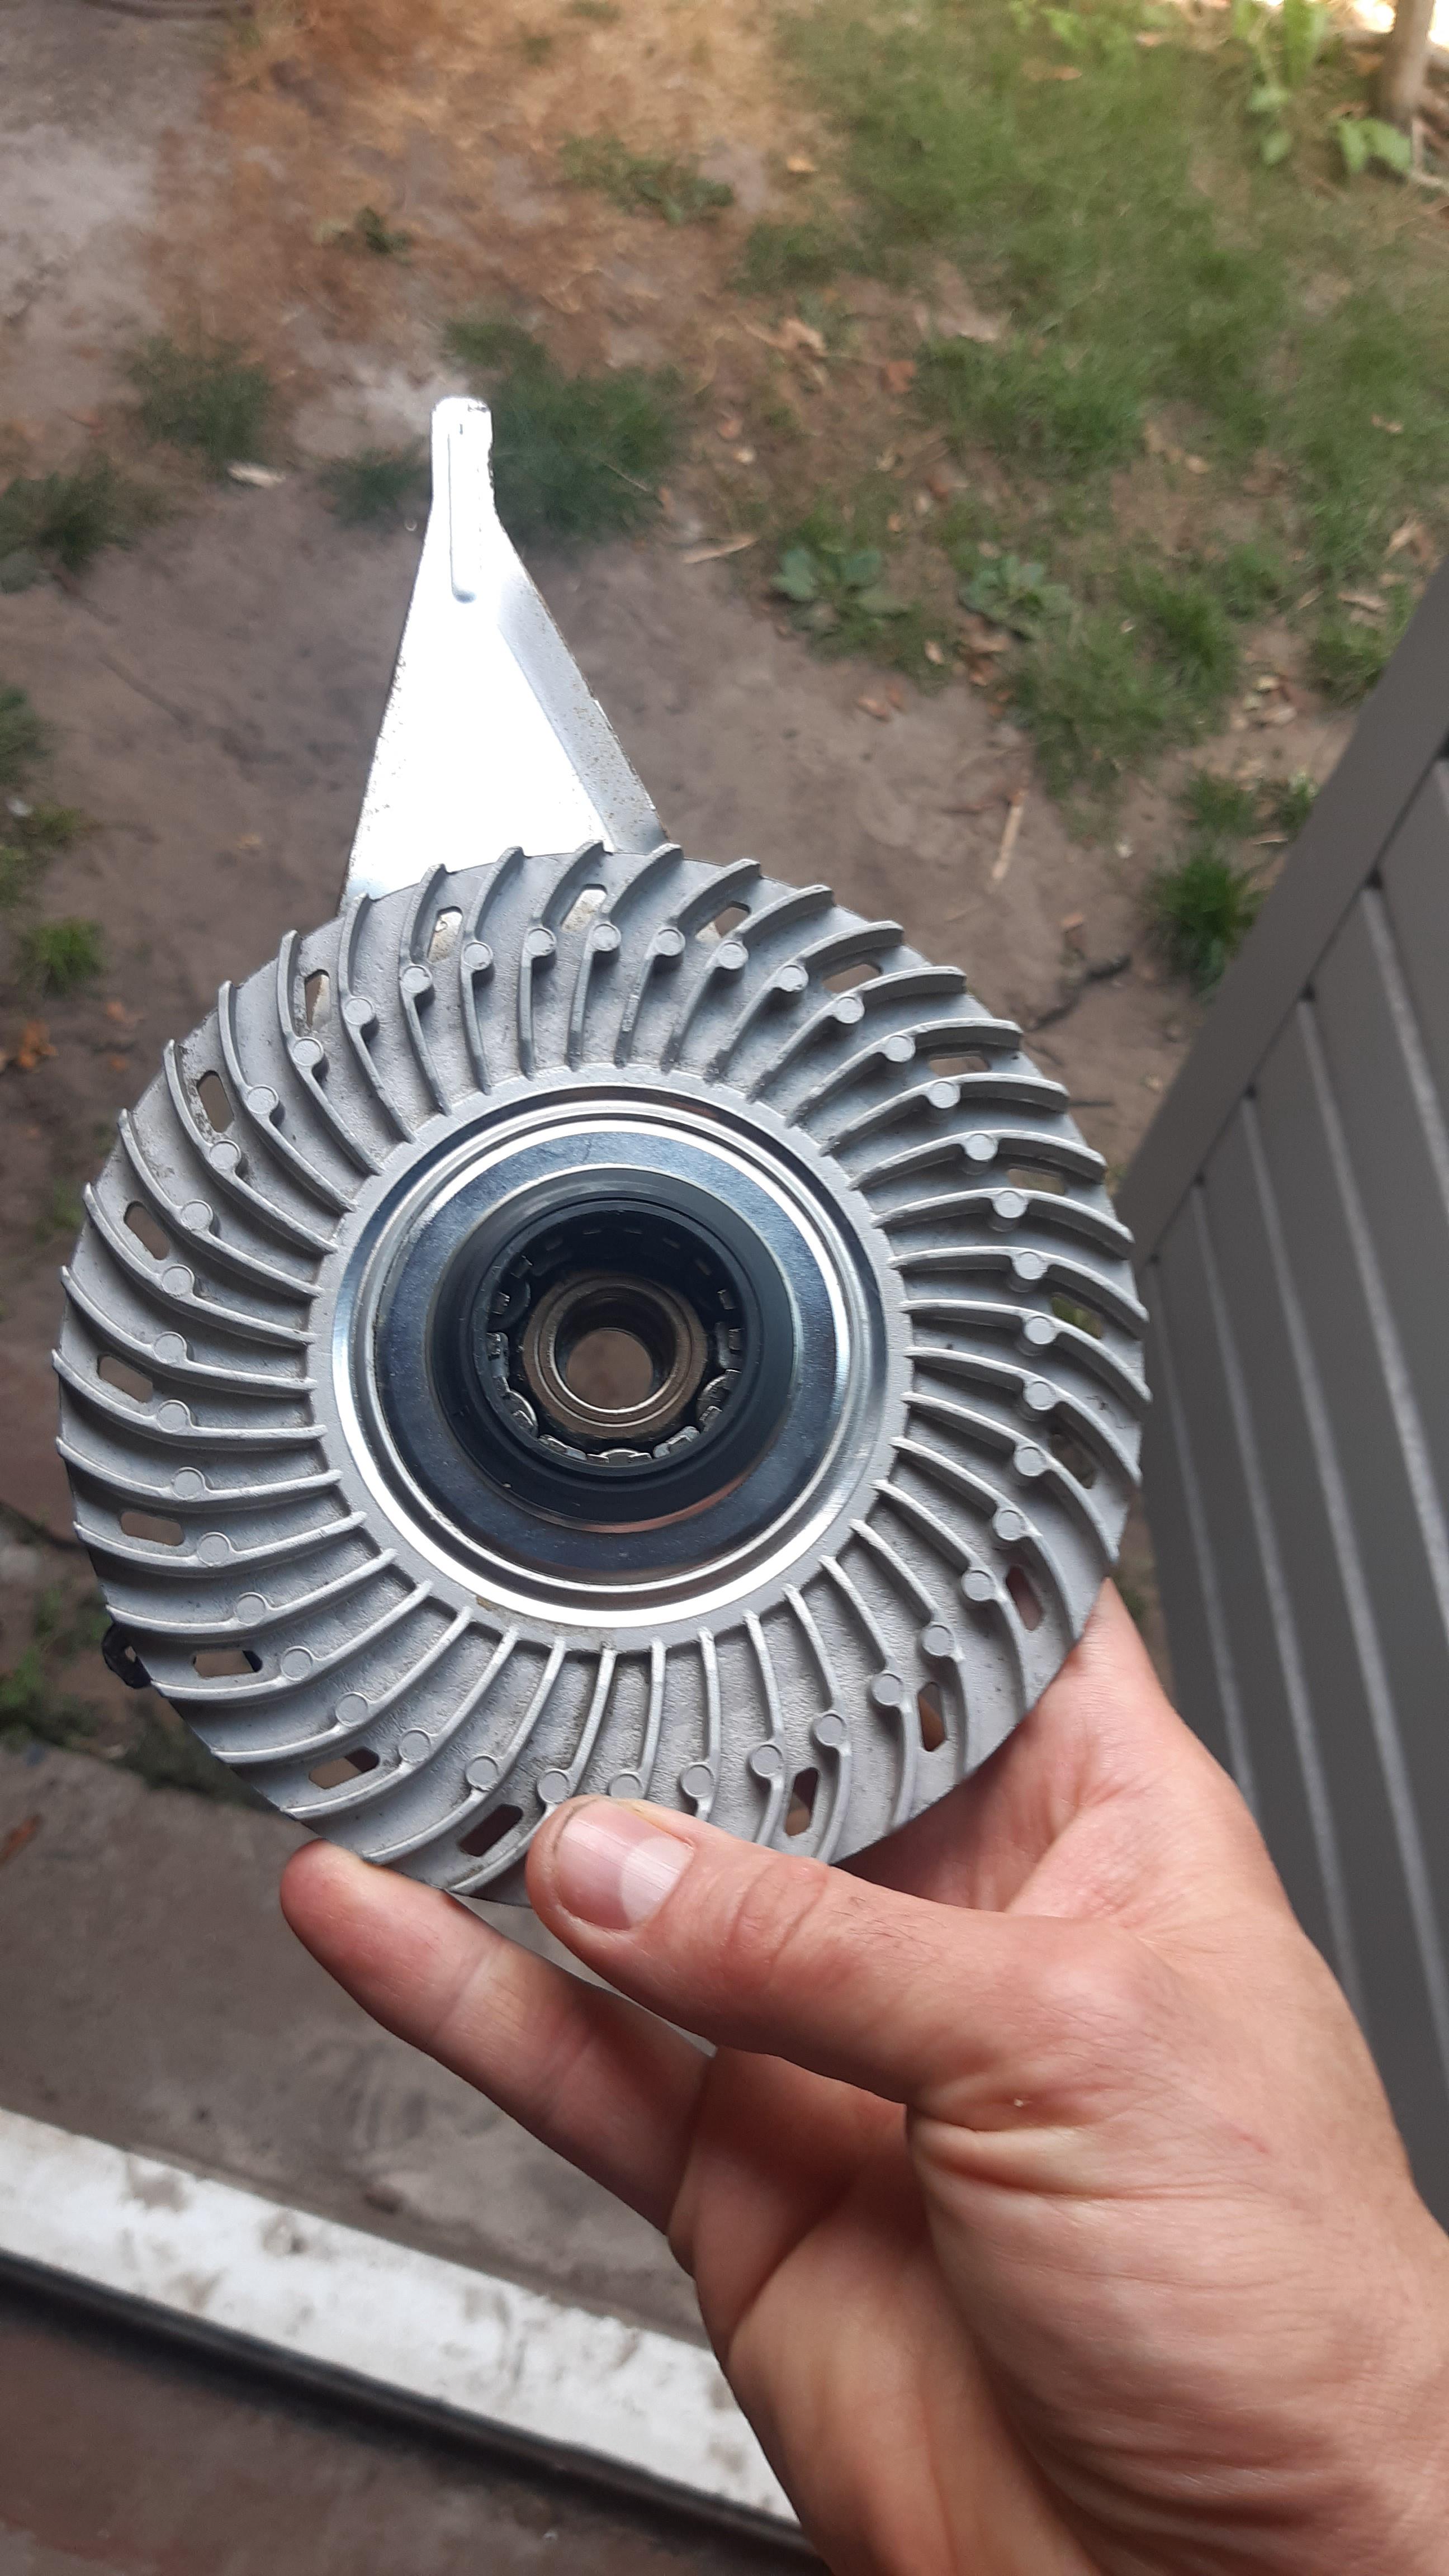
Let this sink in...
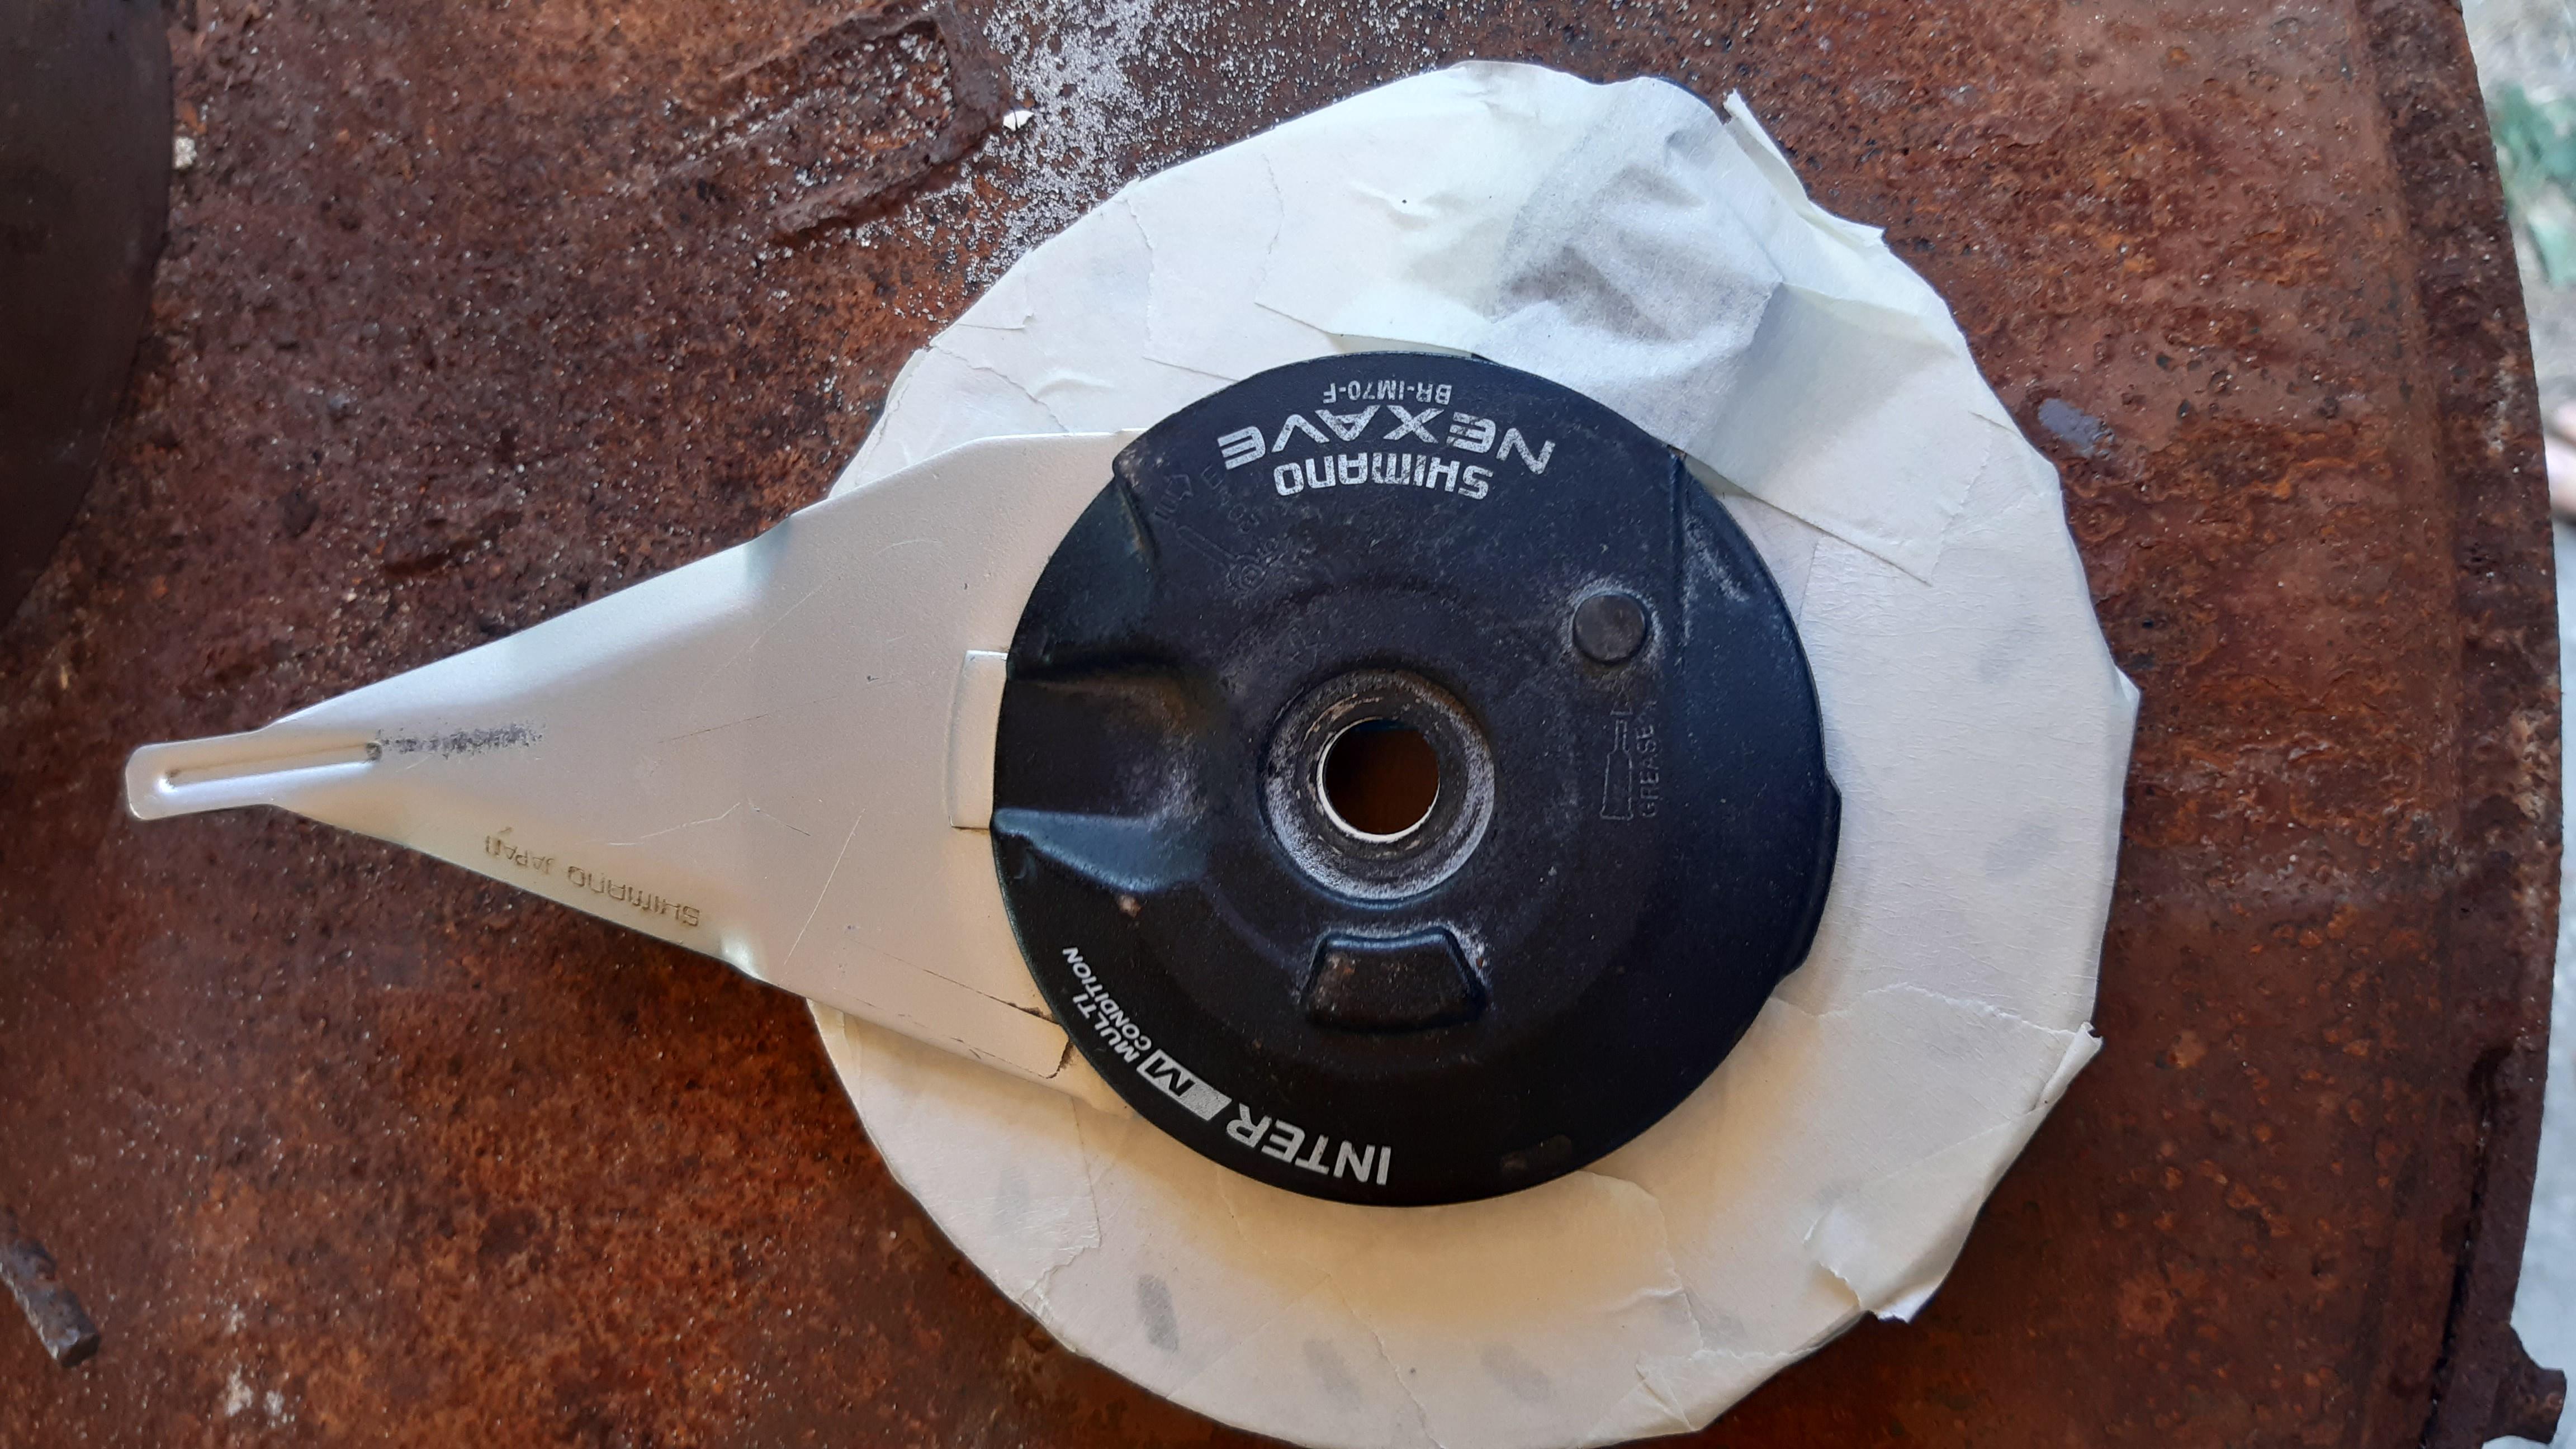
Tape added so I can paint the rest.
One problem...... I am missing something here...... where do I mount the brake cable? I think I need a 'link unit' or arm of some sorts.
Sigh... rollerbrakes...
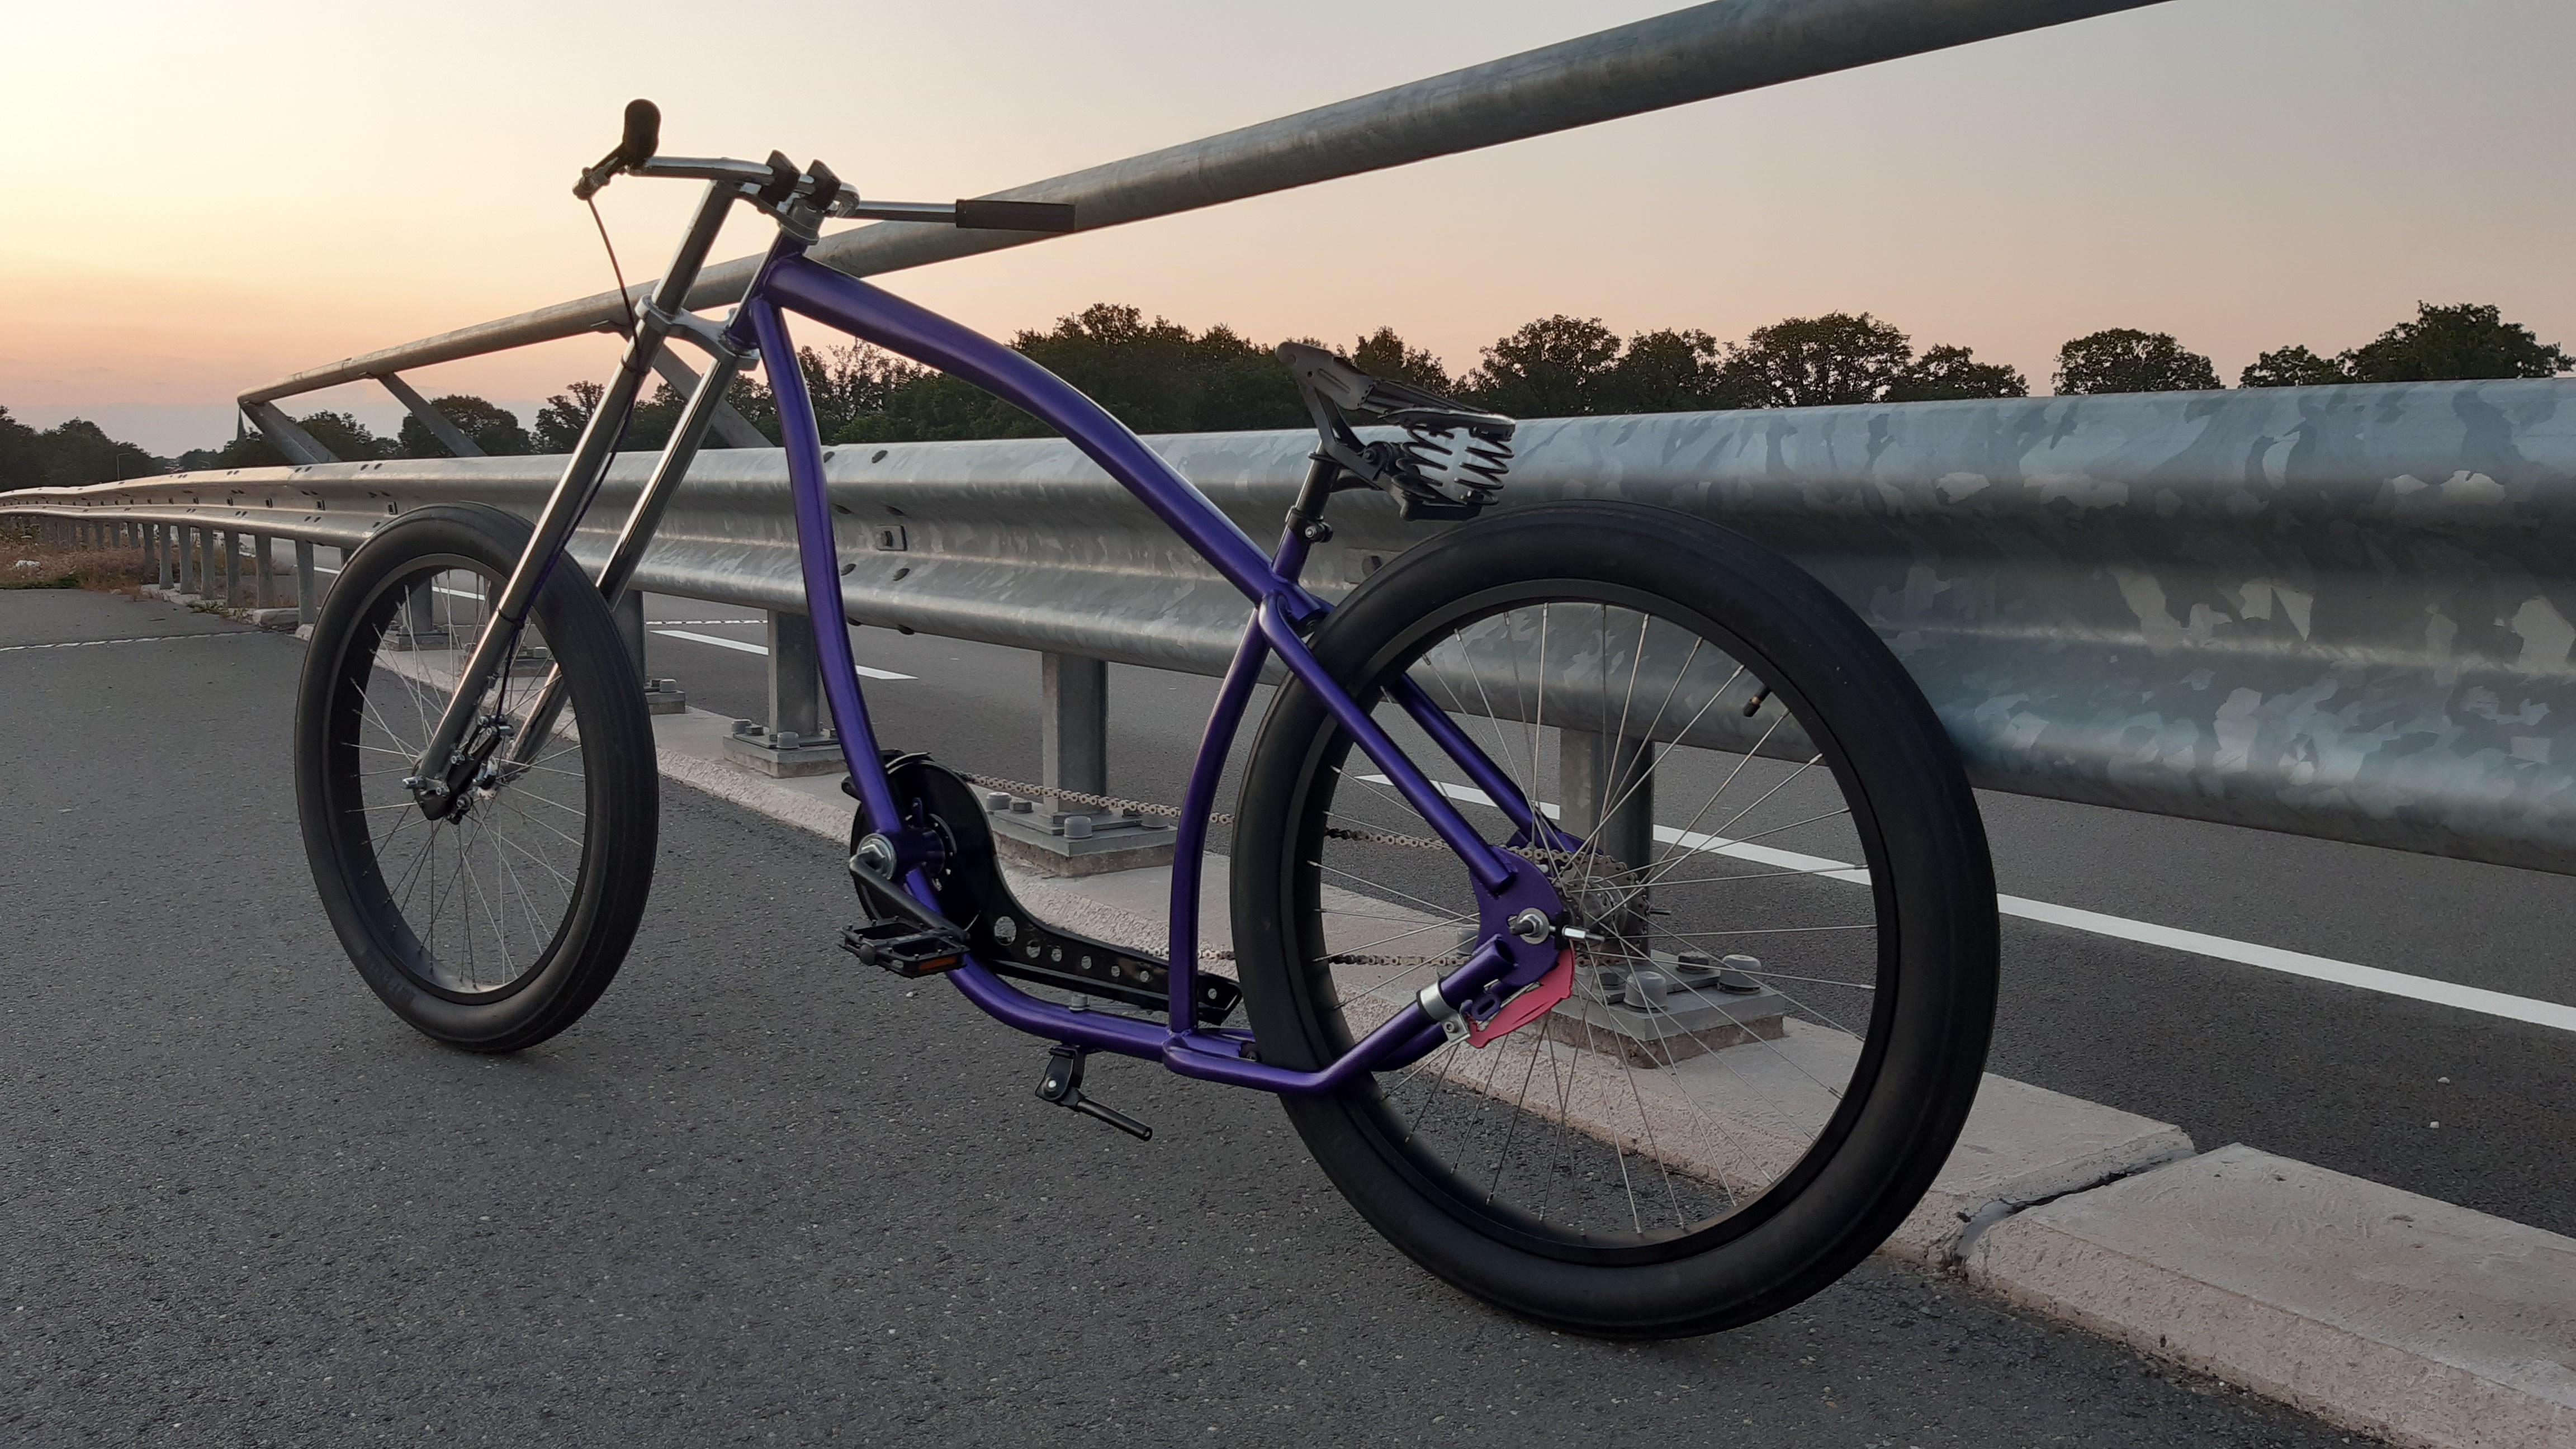
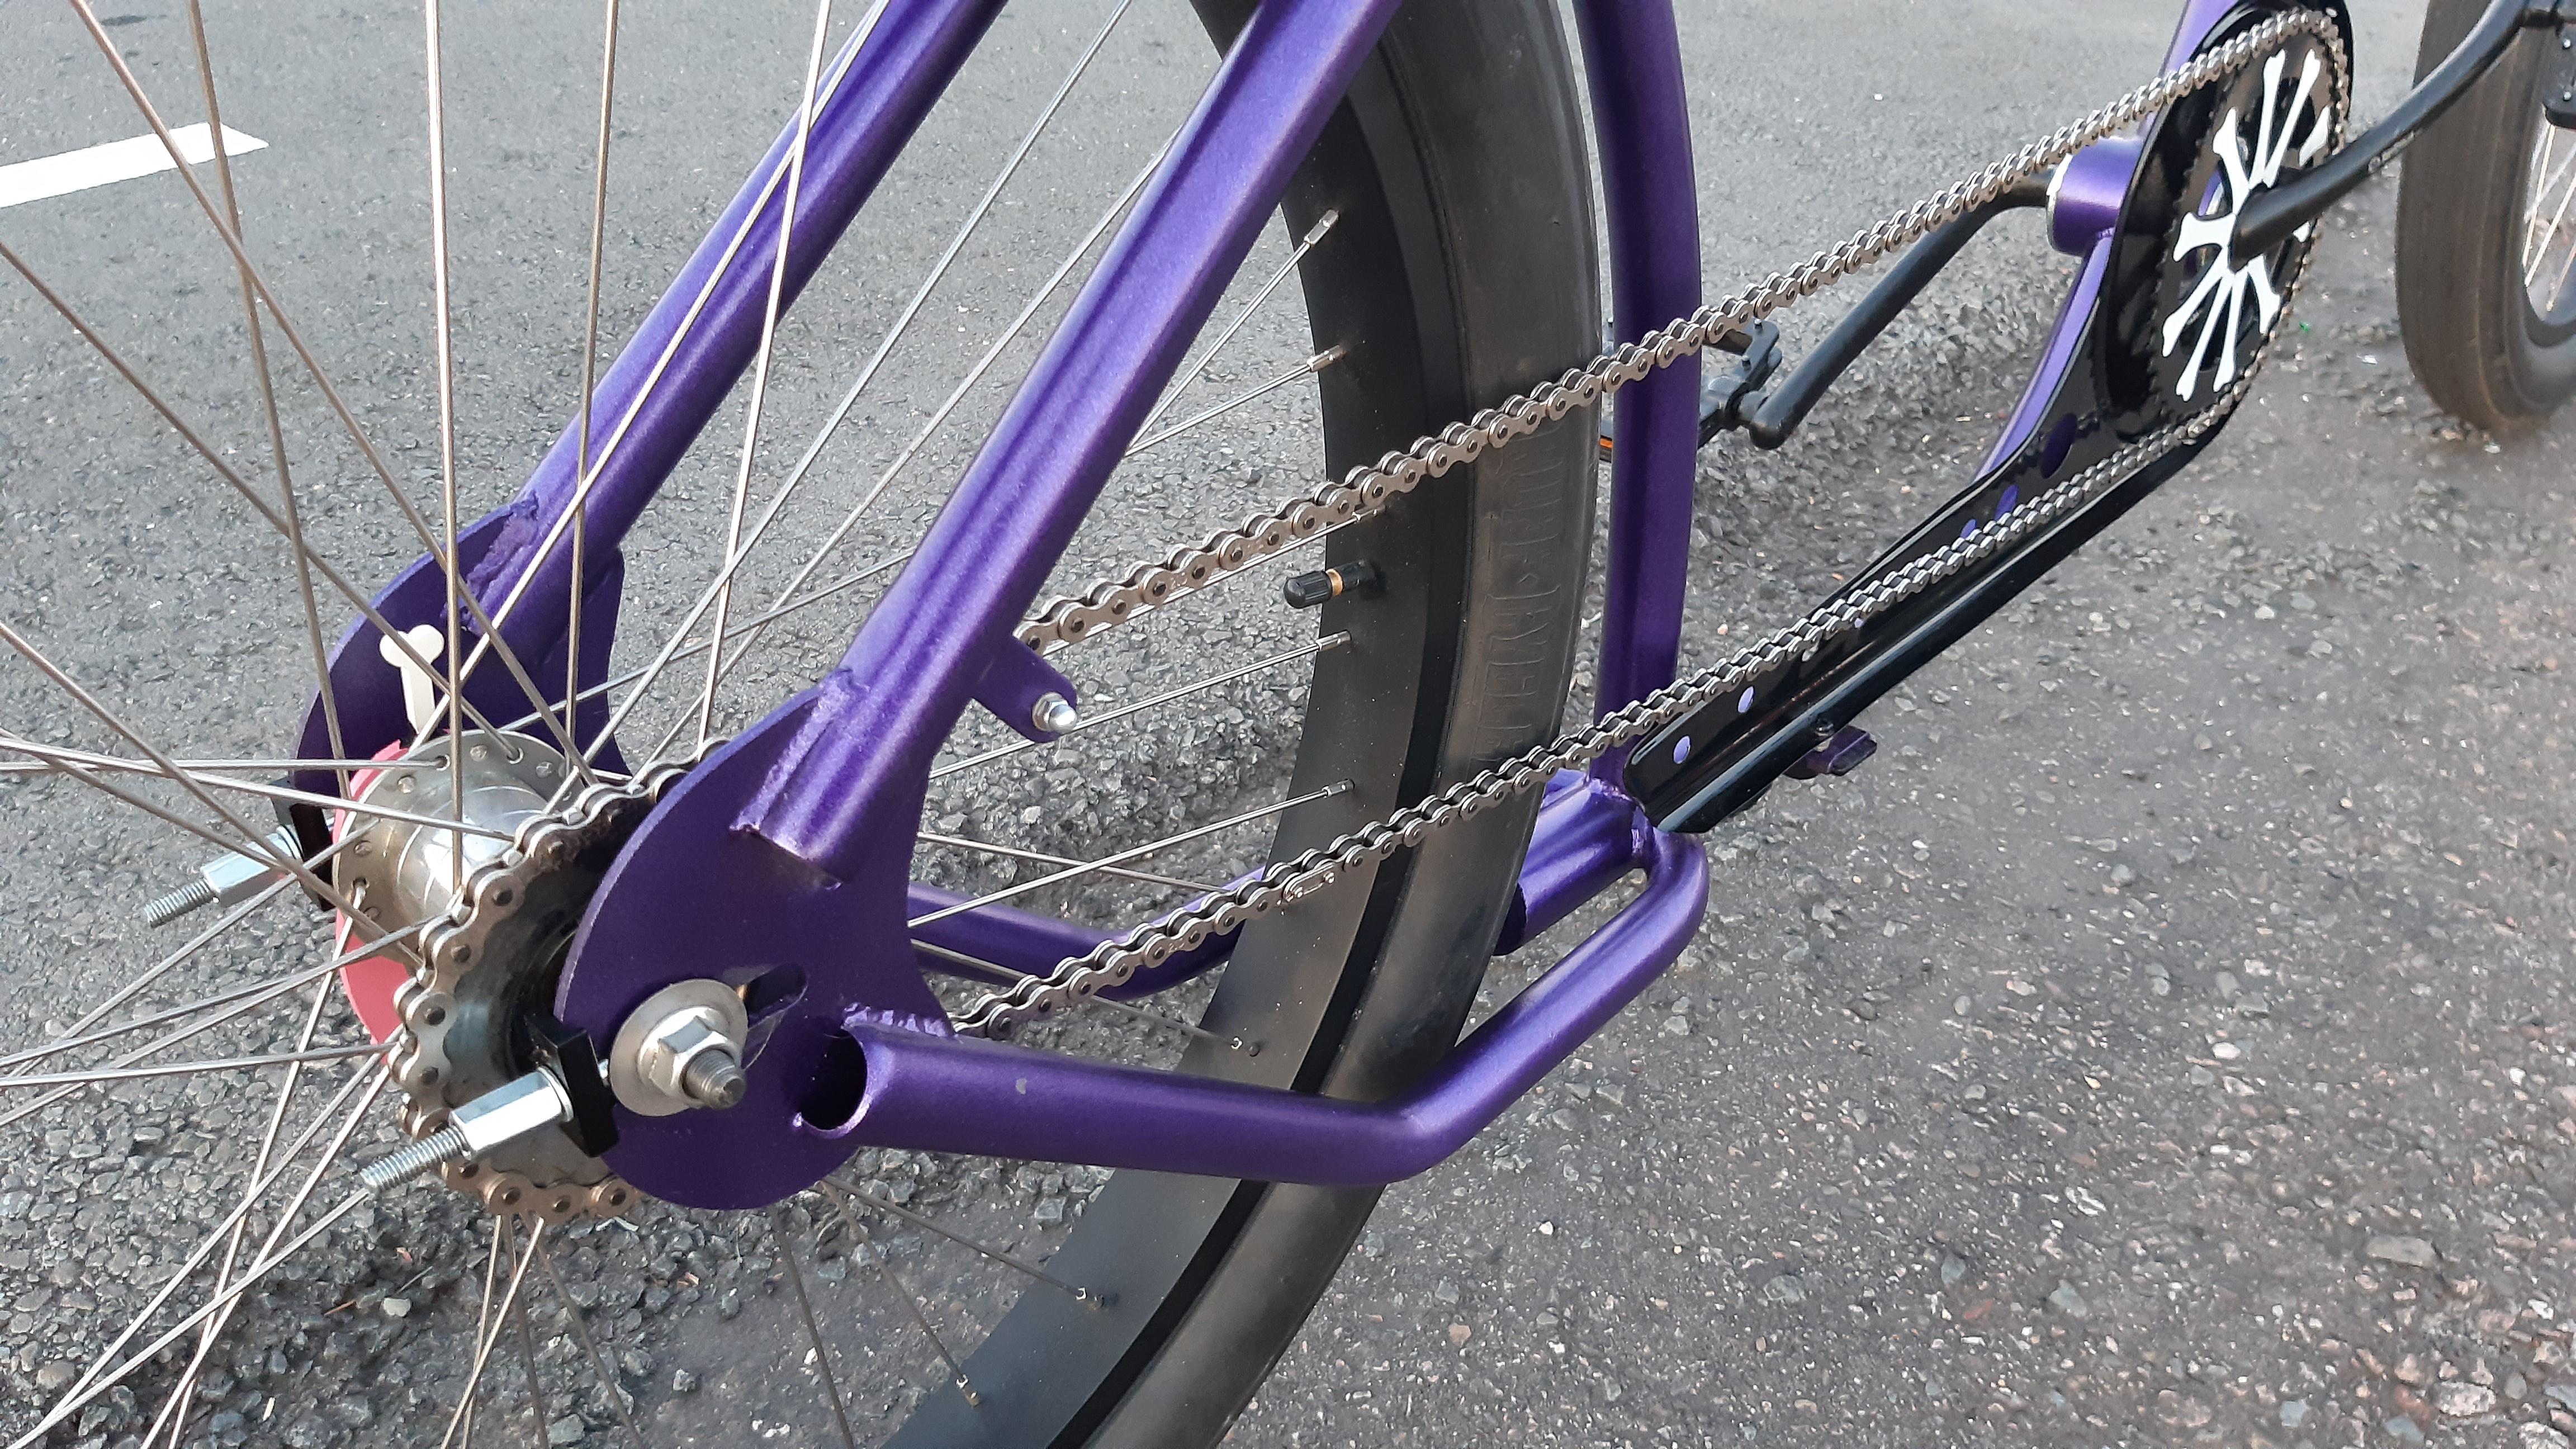
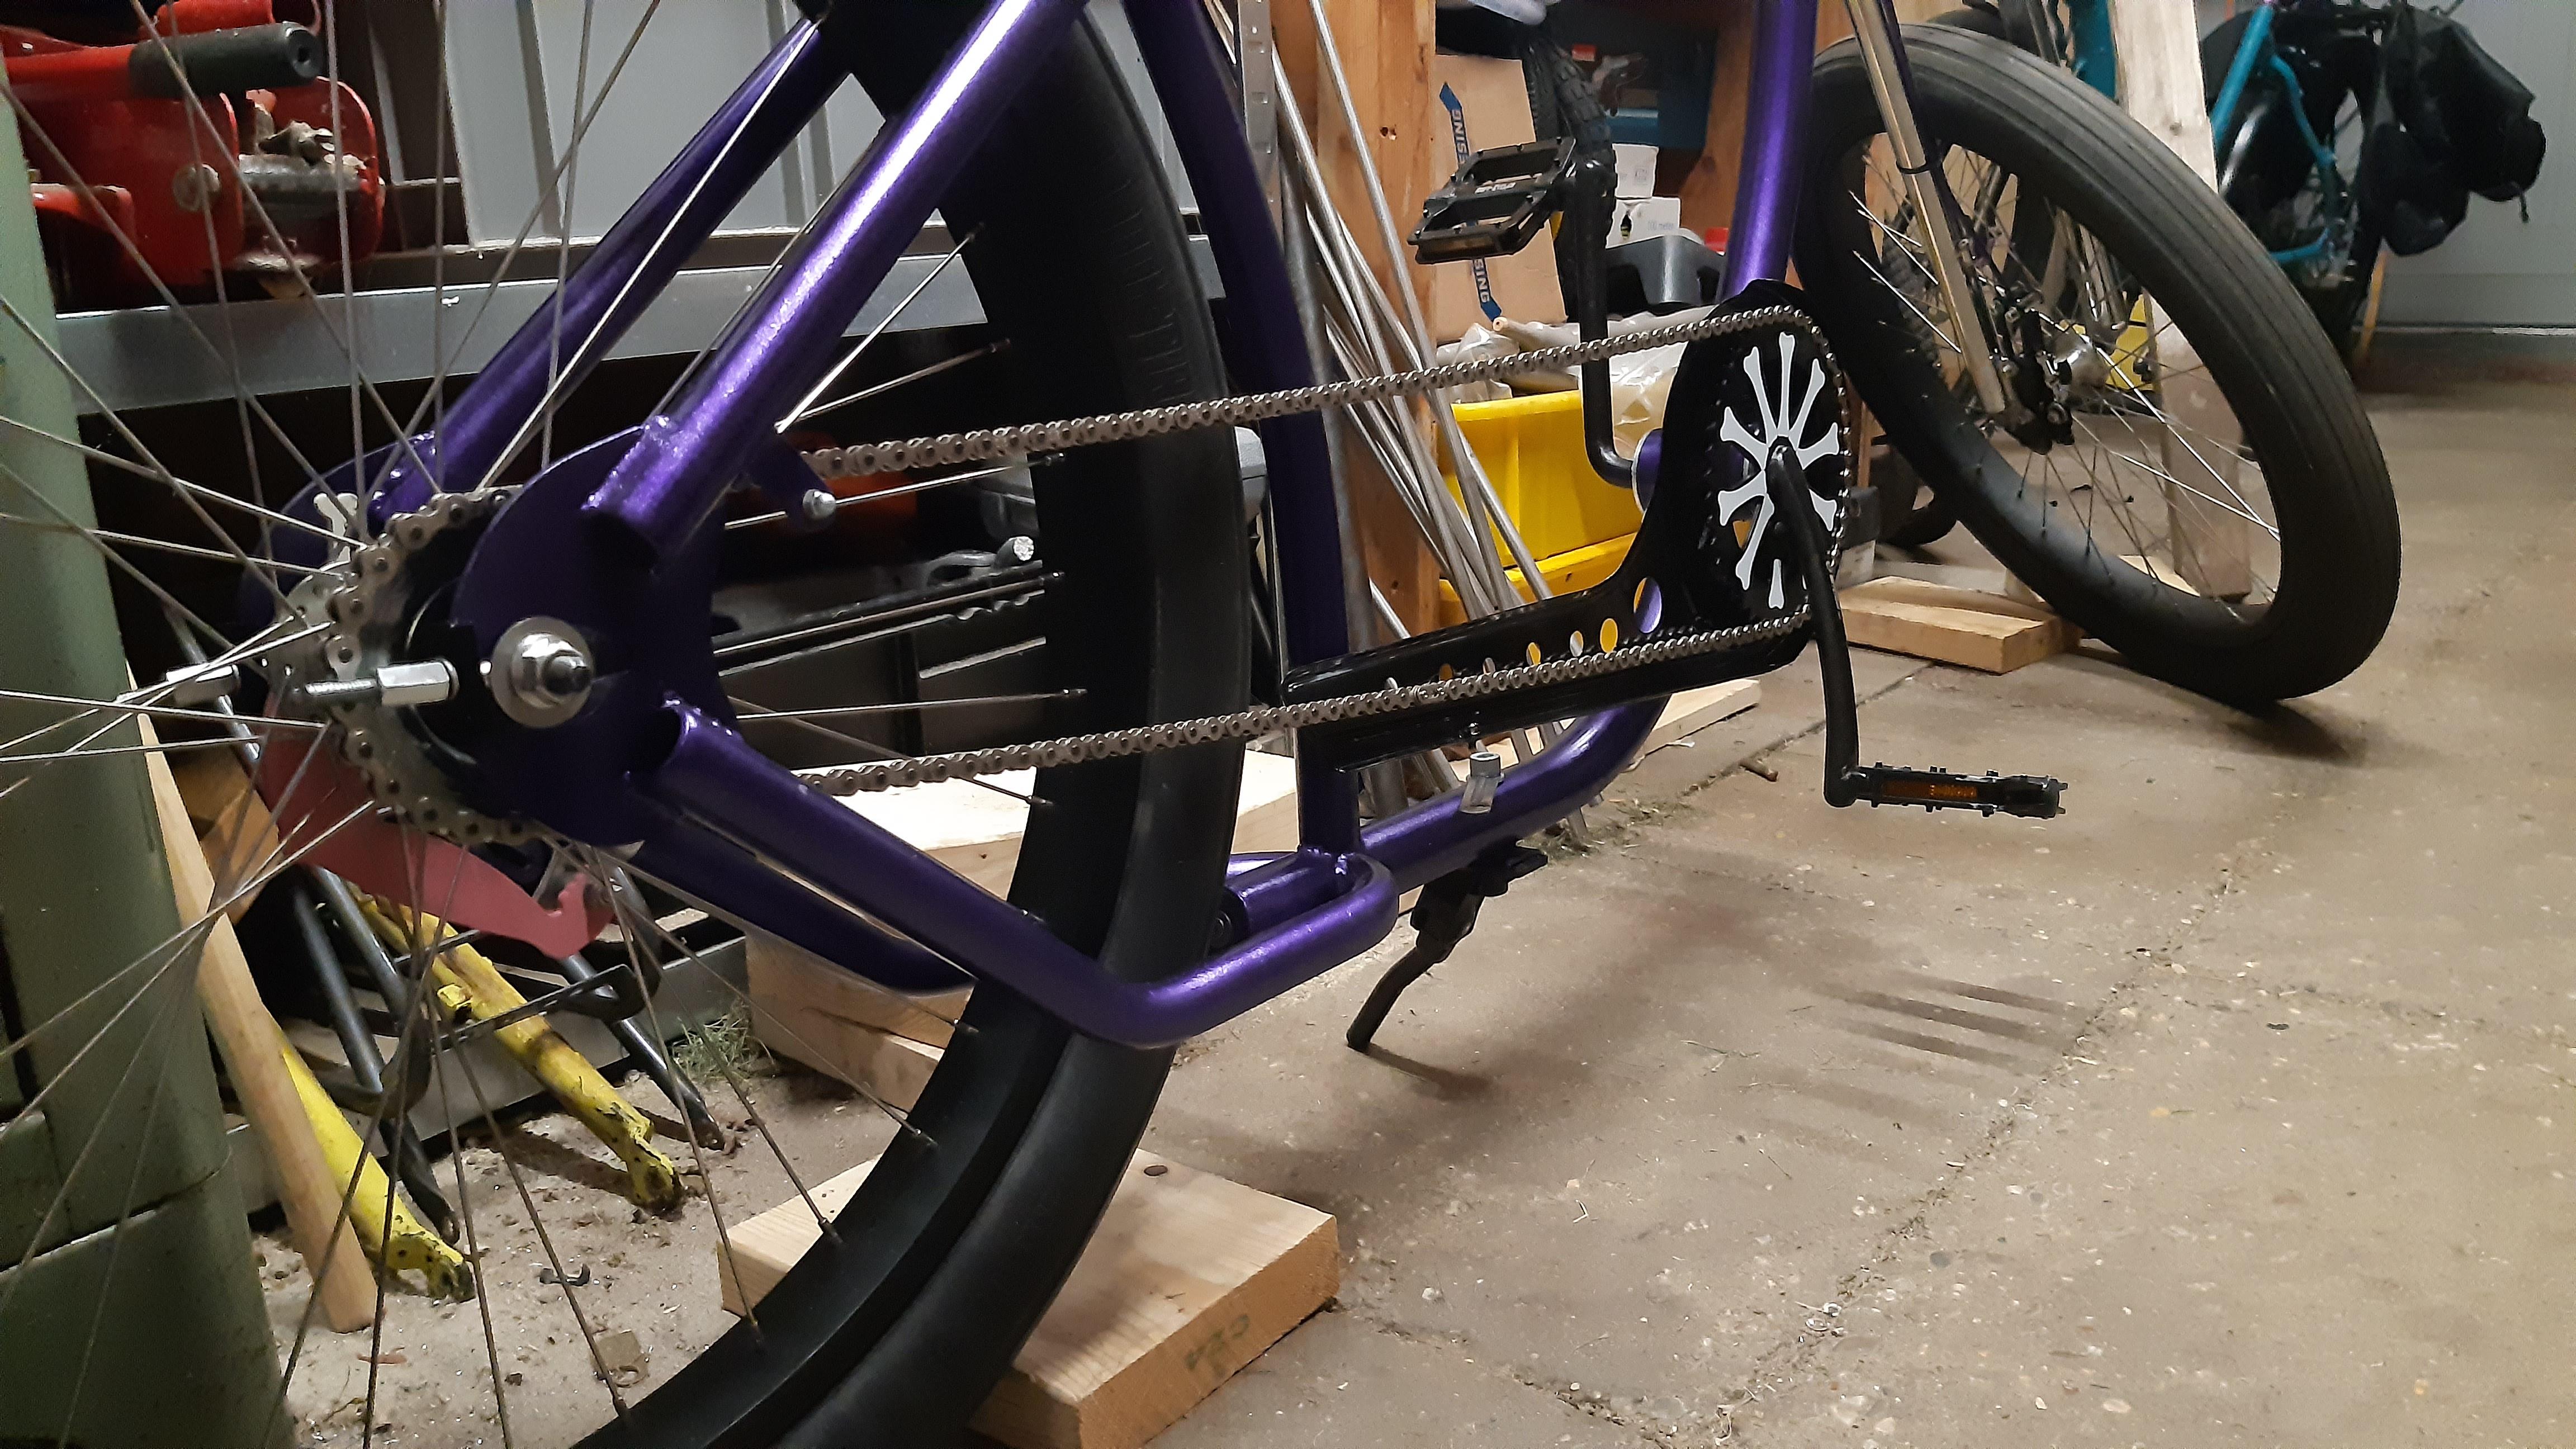
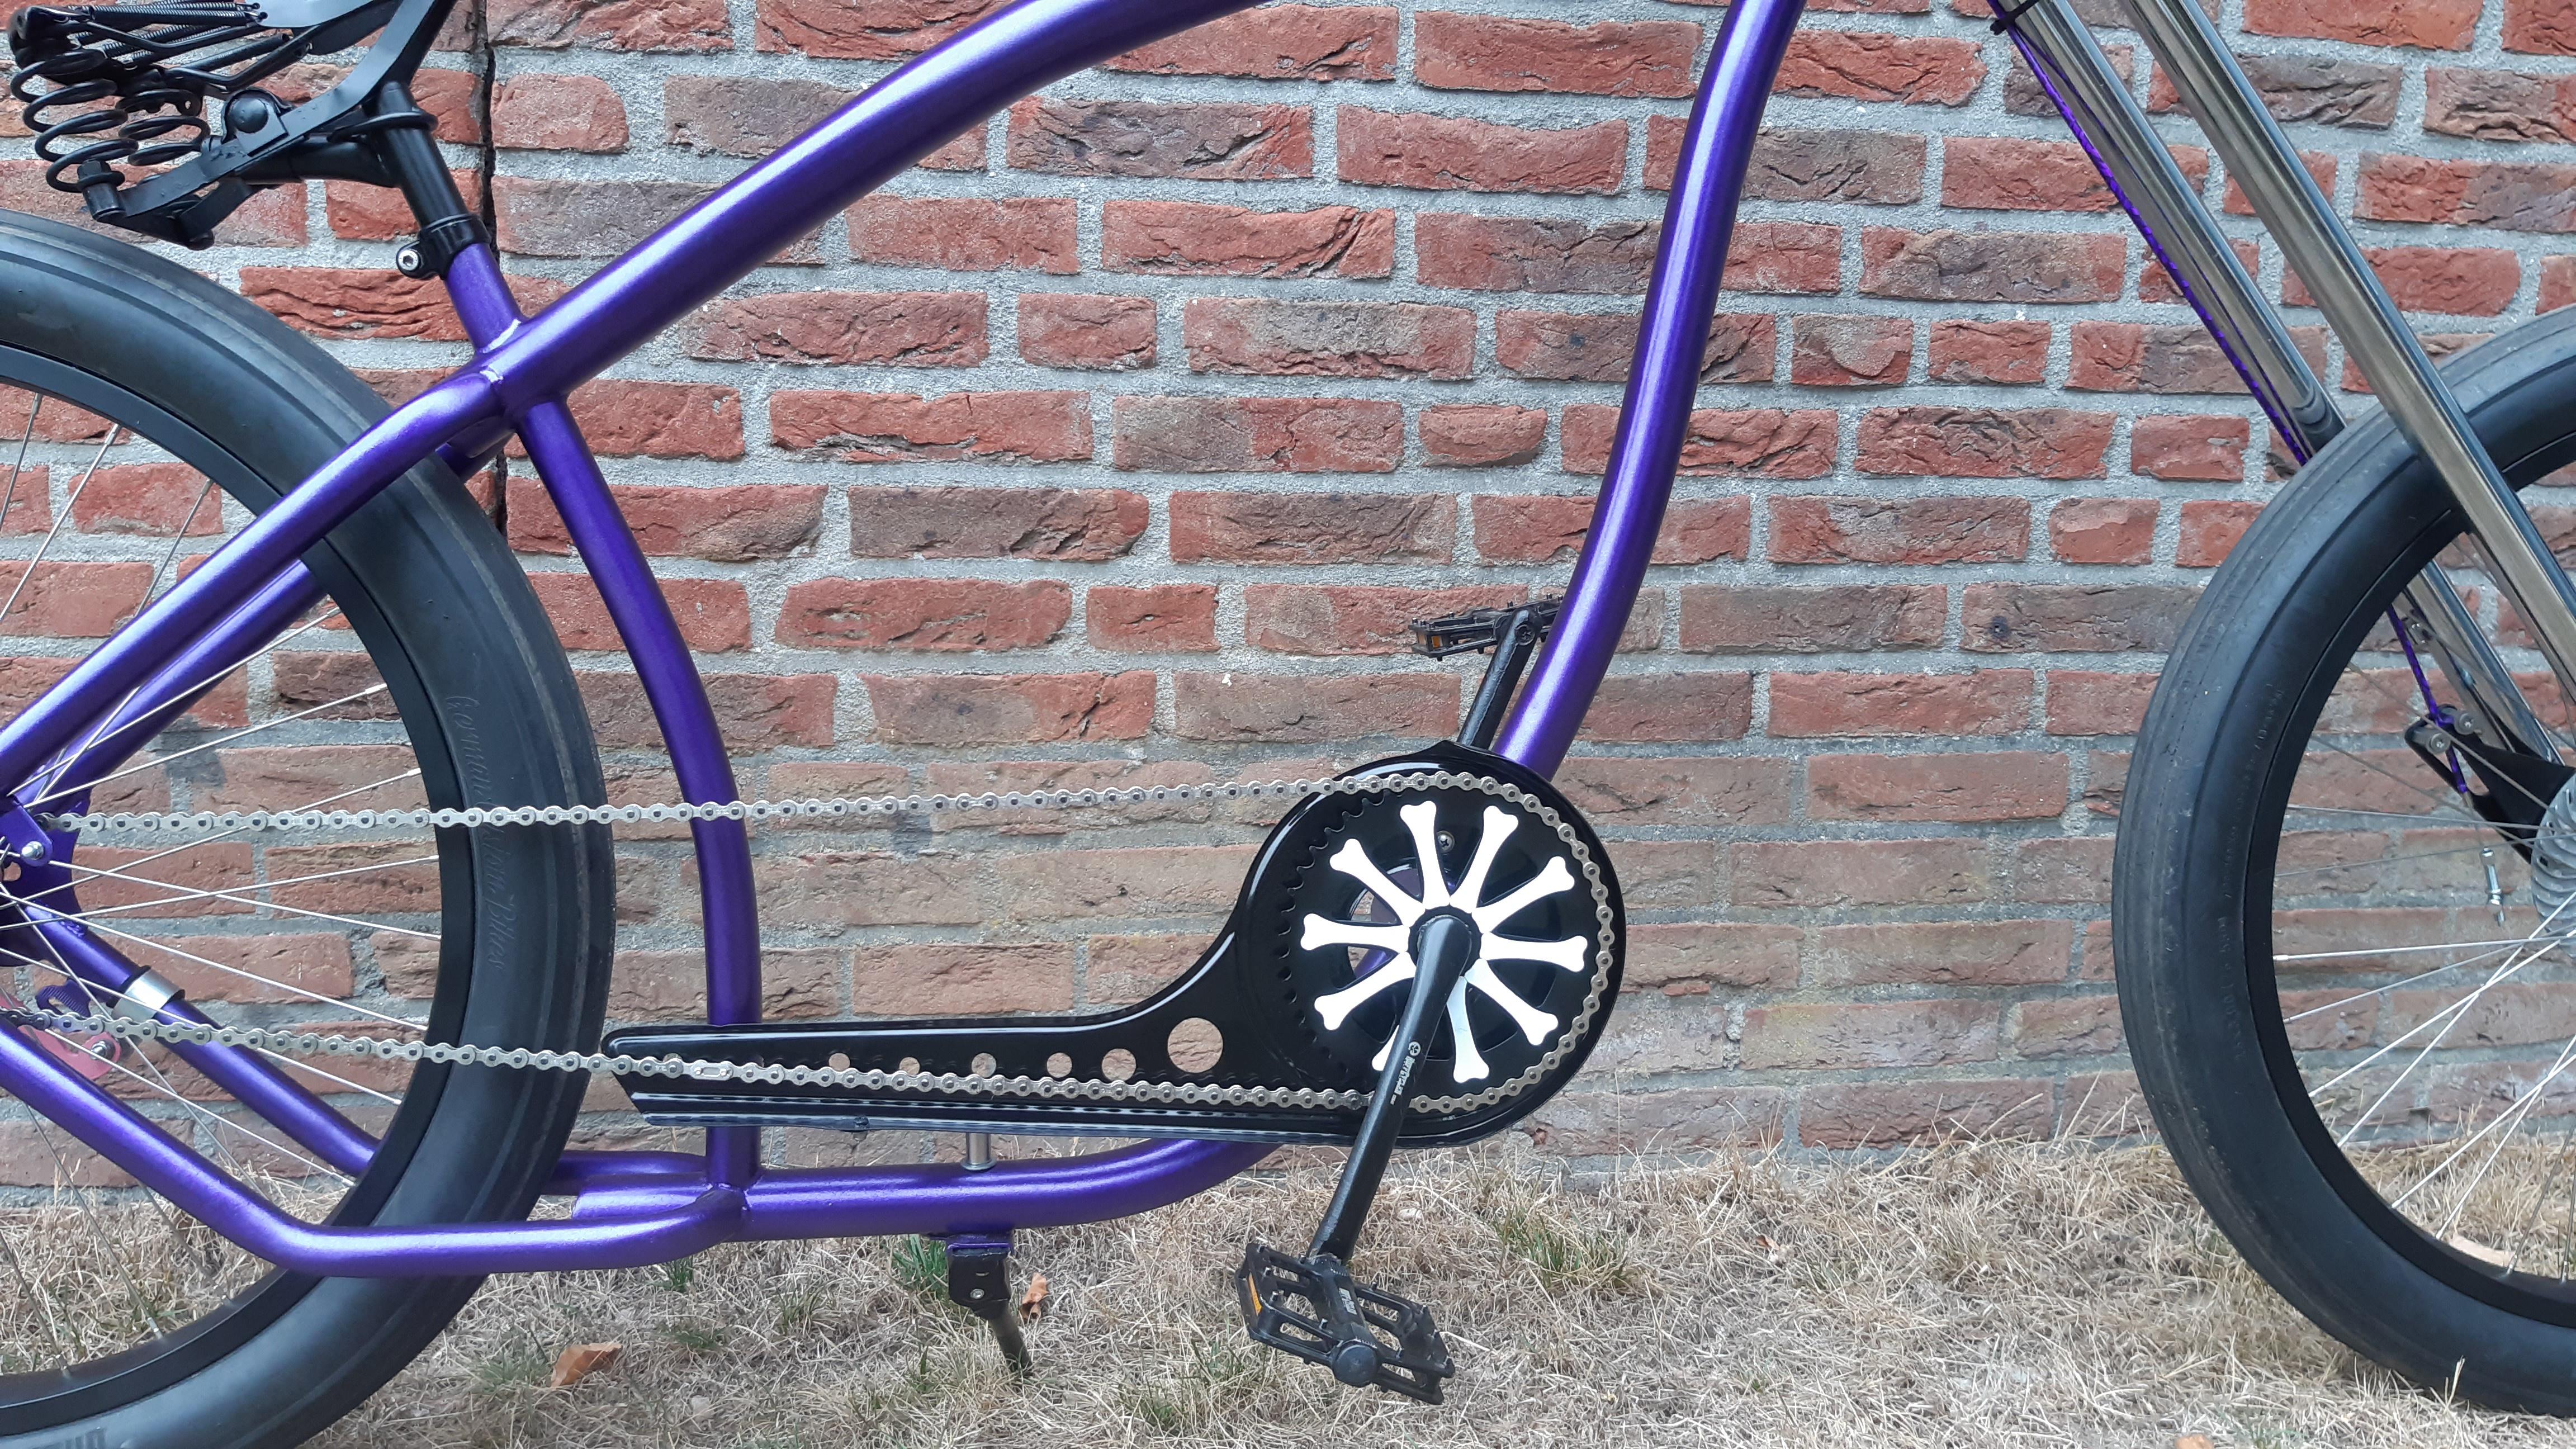
@OddJob you are right, I like the chainguard aligned with the chain better (it was quite dark already):
Last edited:
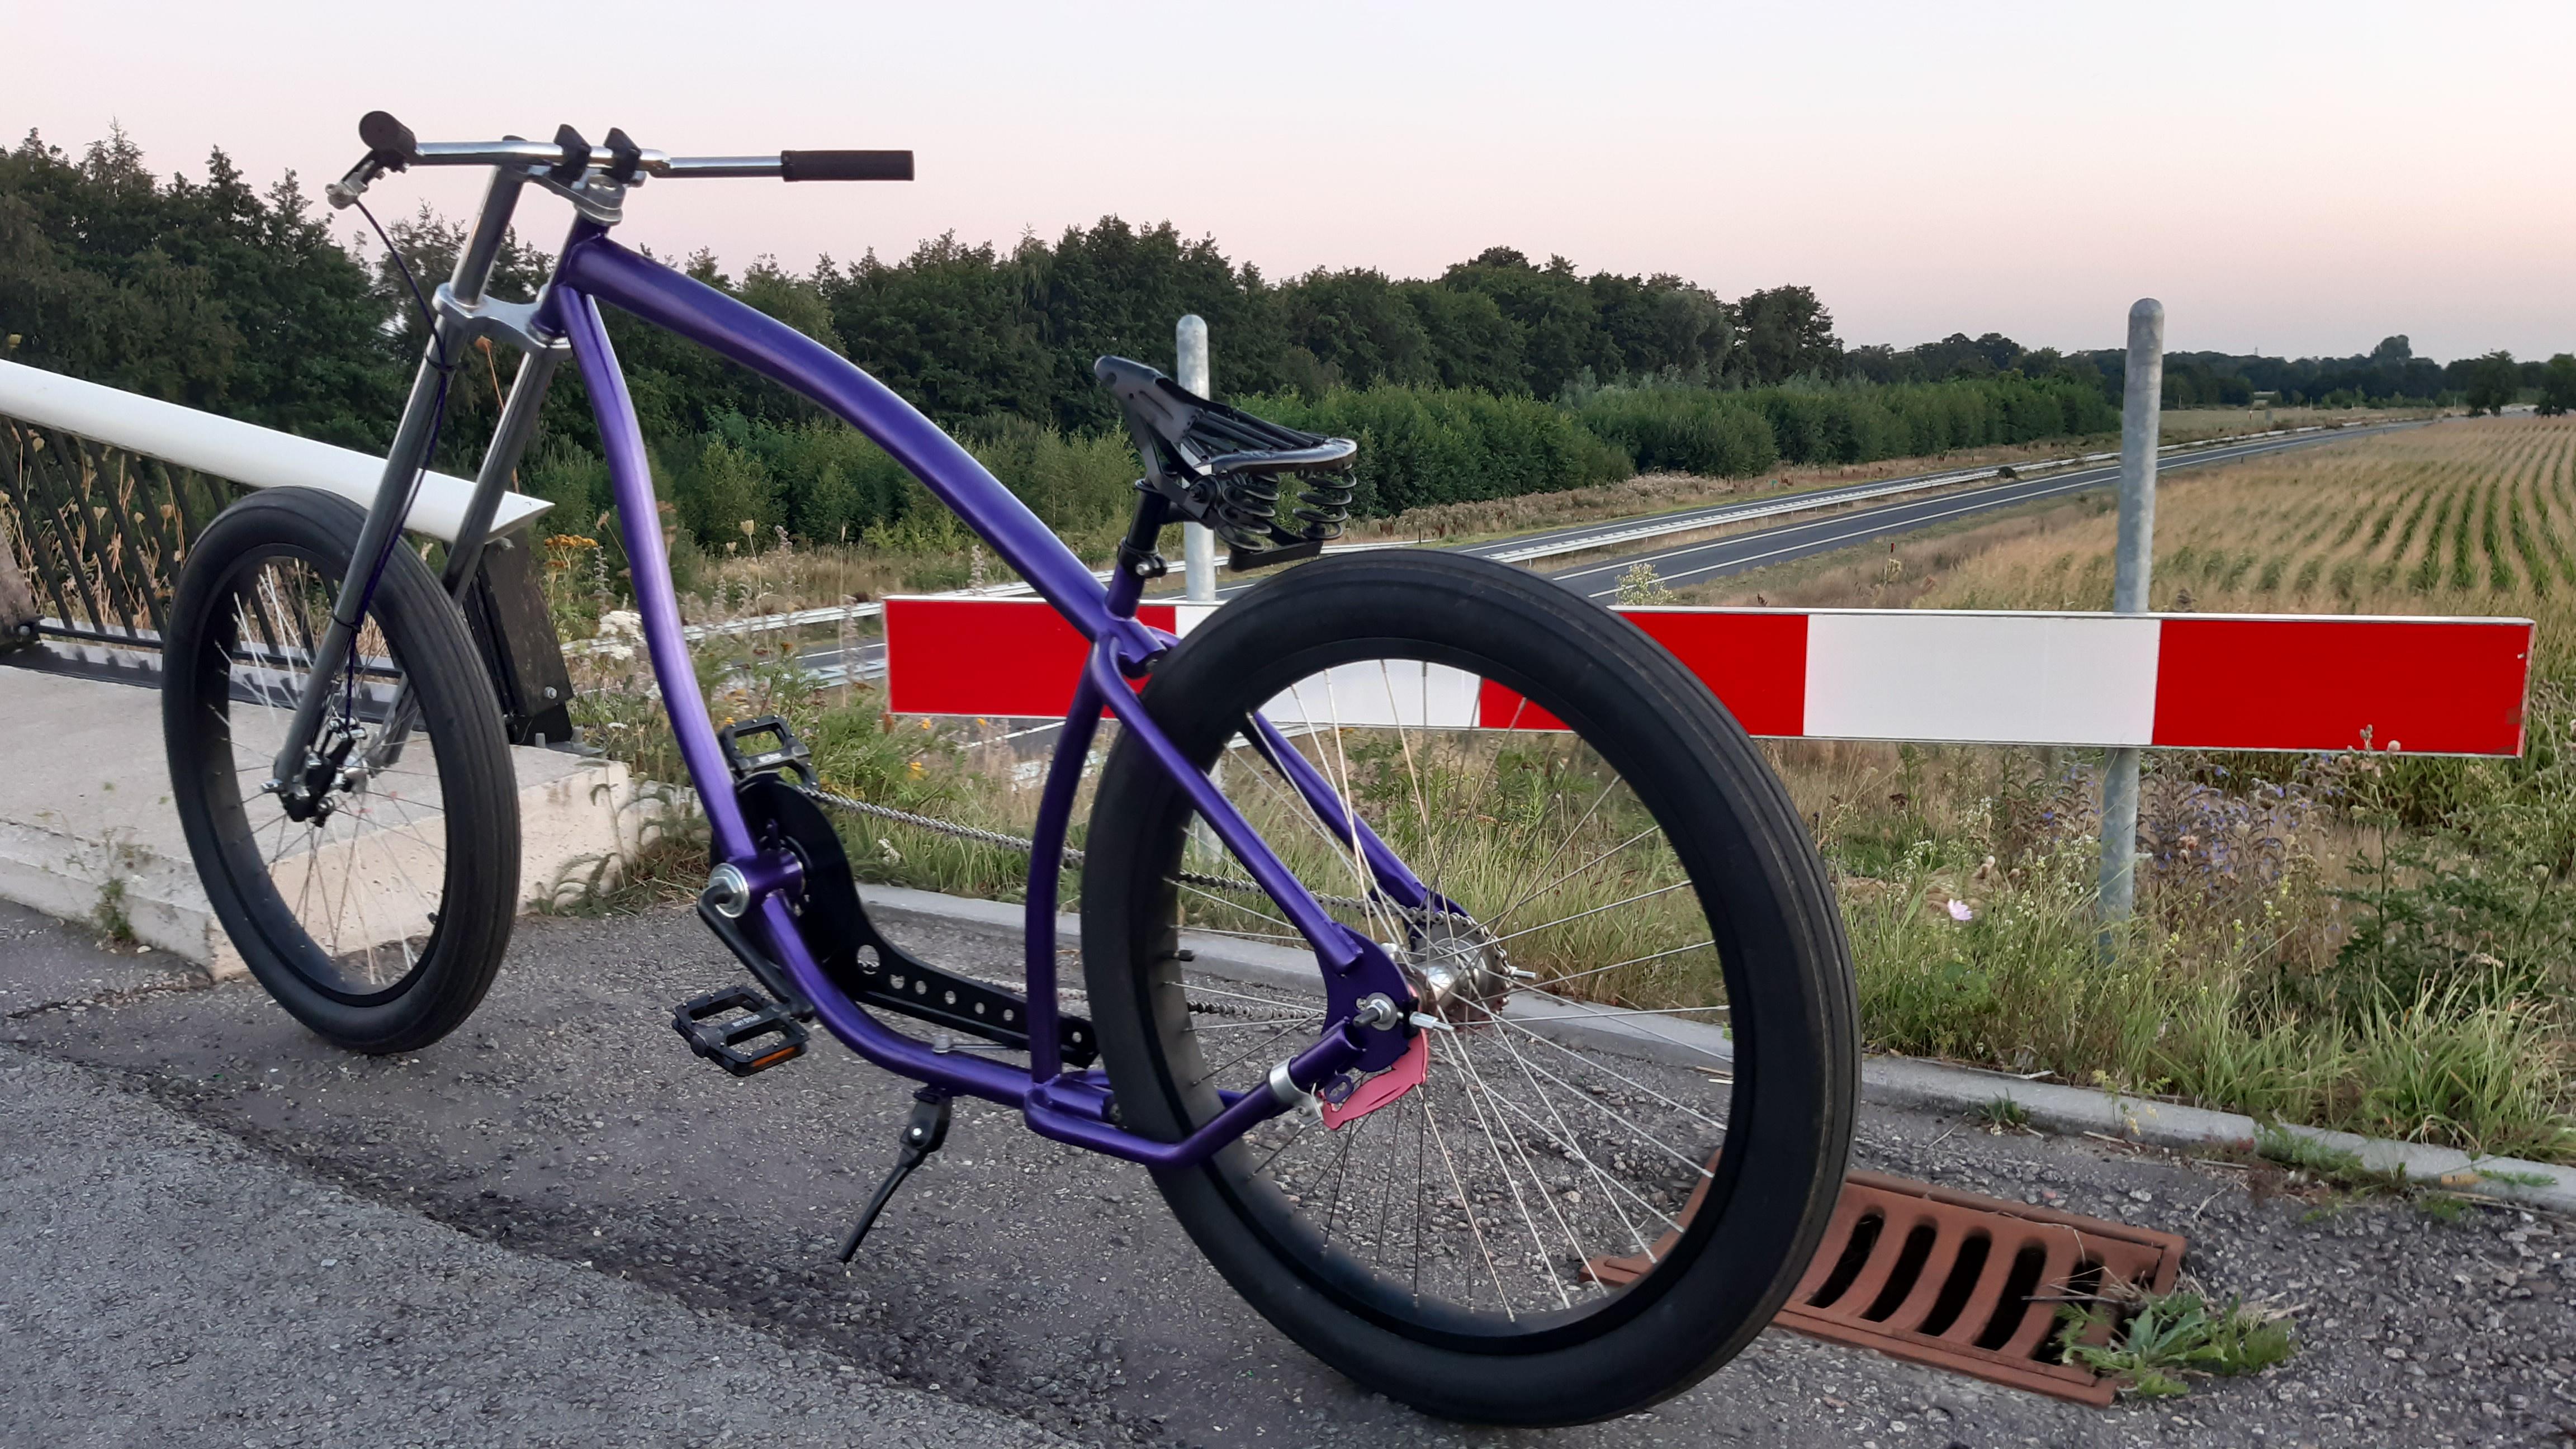
Dig the chainguard position! Give us a pulled back photo of the profile from the drive side, just to get the whole picture.
When I am able to take a picture before dark, I will certainly do that!Dig the chainguard position! Give us a pulled back photo of the profile from the drive side, just to get the whole picture.
I found the thing!
Ordered it in Germany since it seems not very common.
I assembled the brake without "the thing above" after paint and lubrication:
The fins look good though.
Almost done, link unit is ordered. It cost me 1.50 euros. Shipping ten times that number. Searched everywhere for an second hand or scrap hub which has that part...
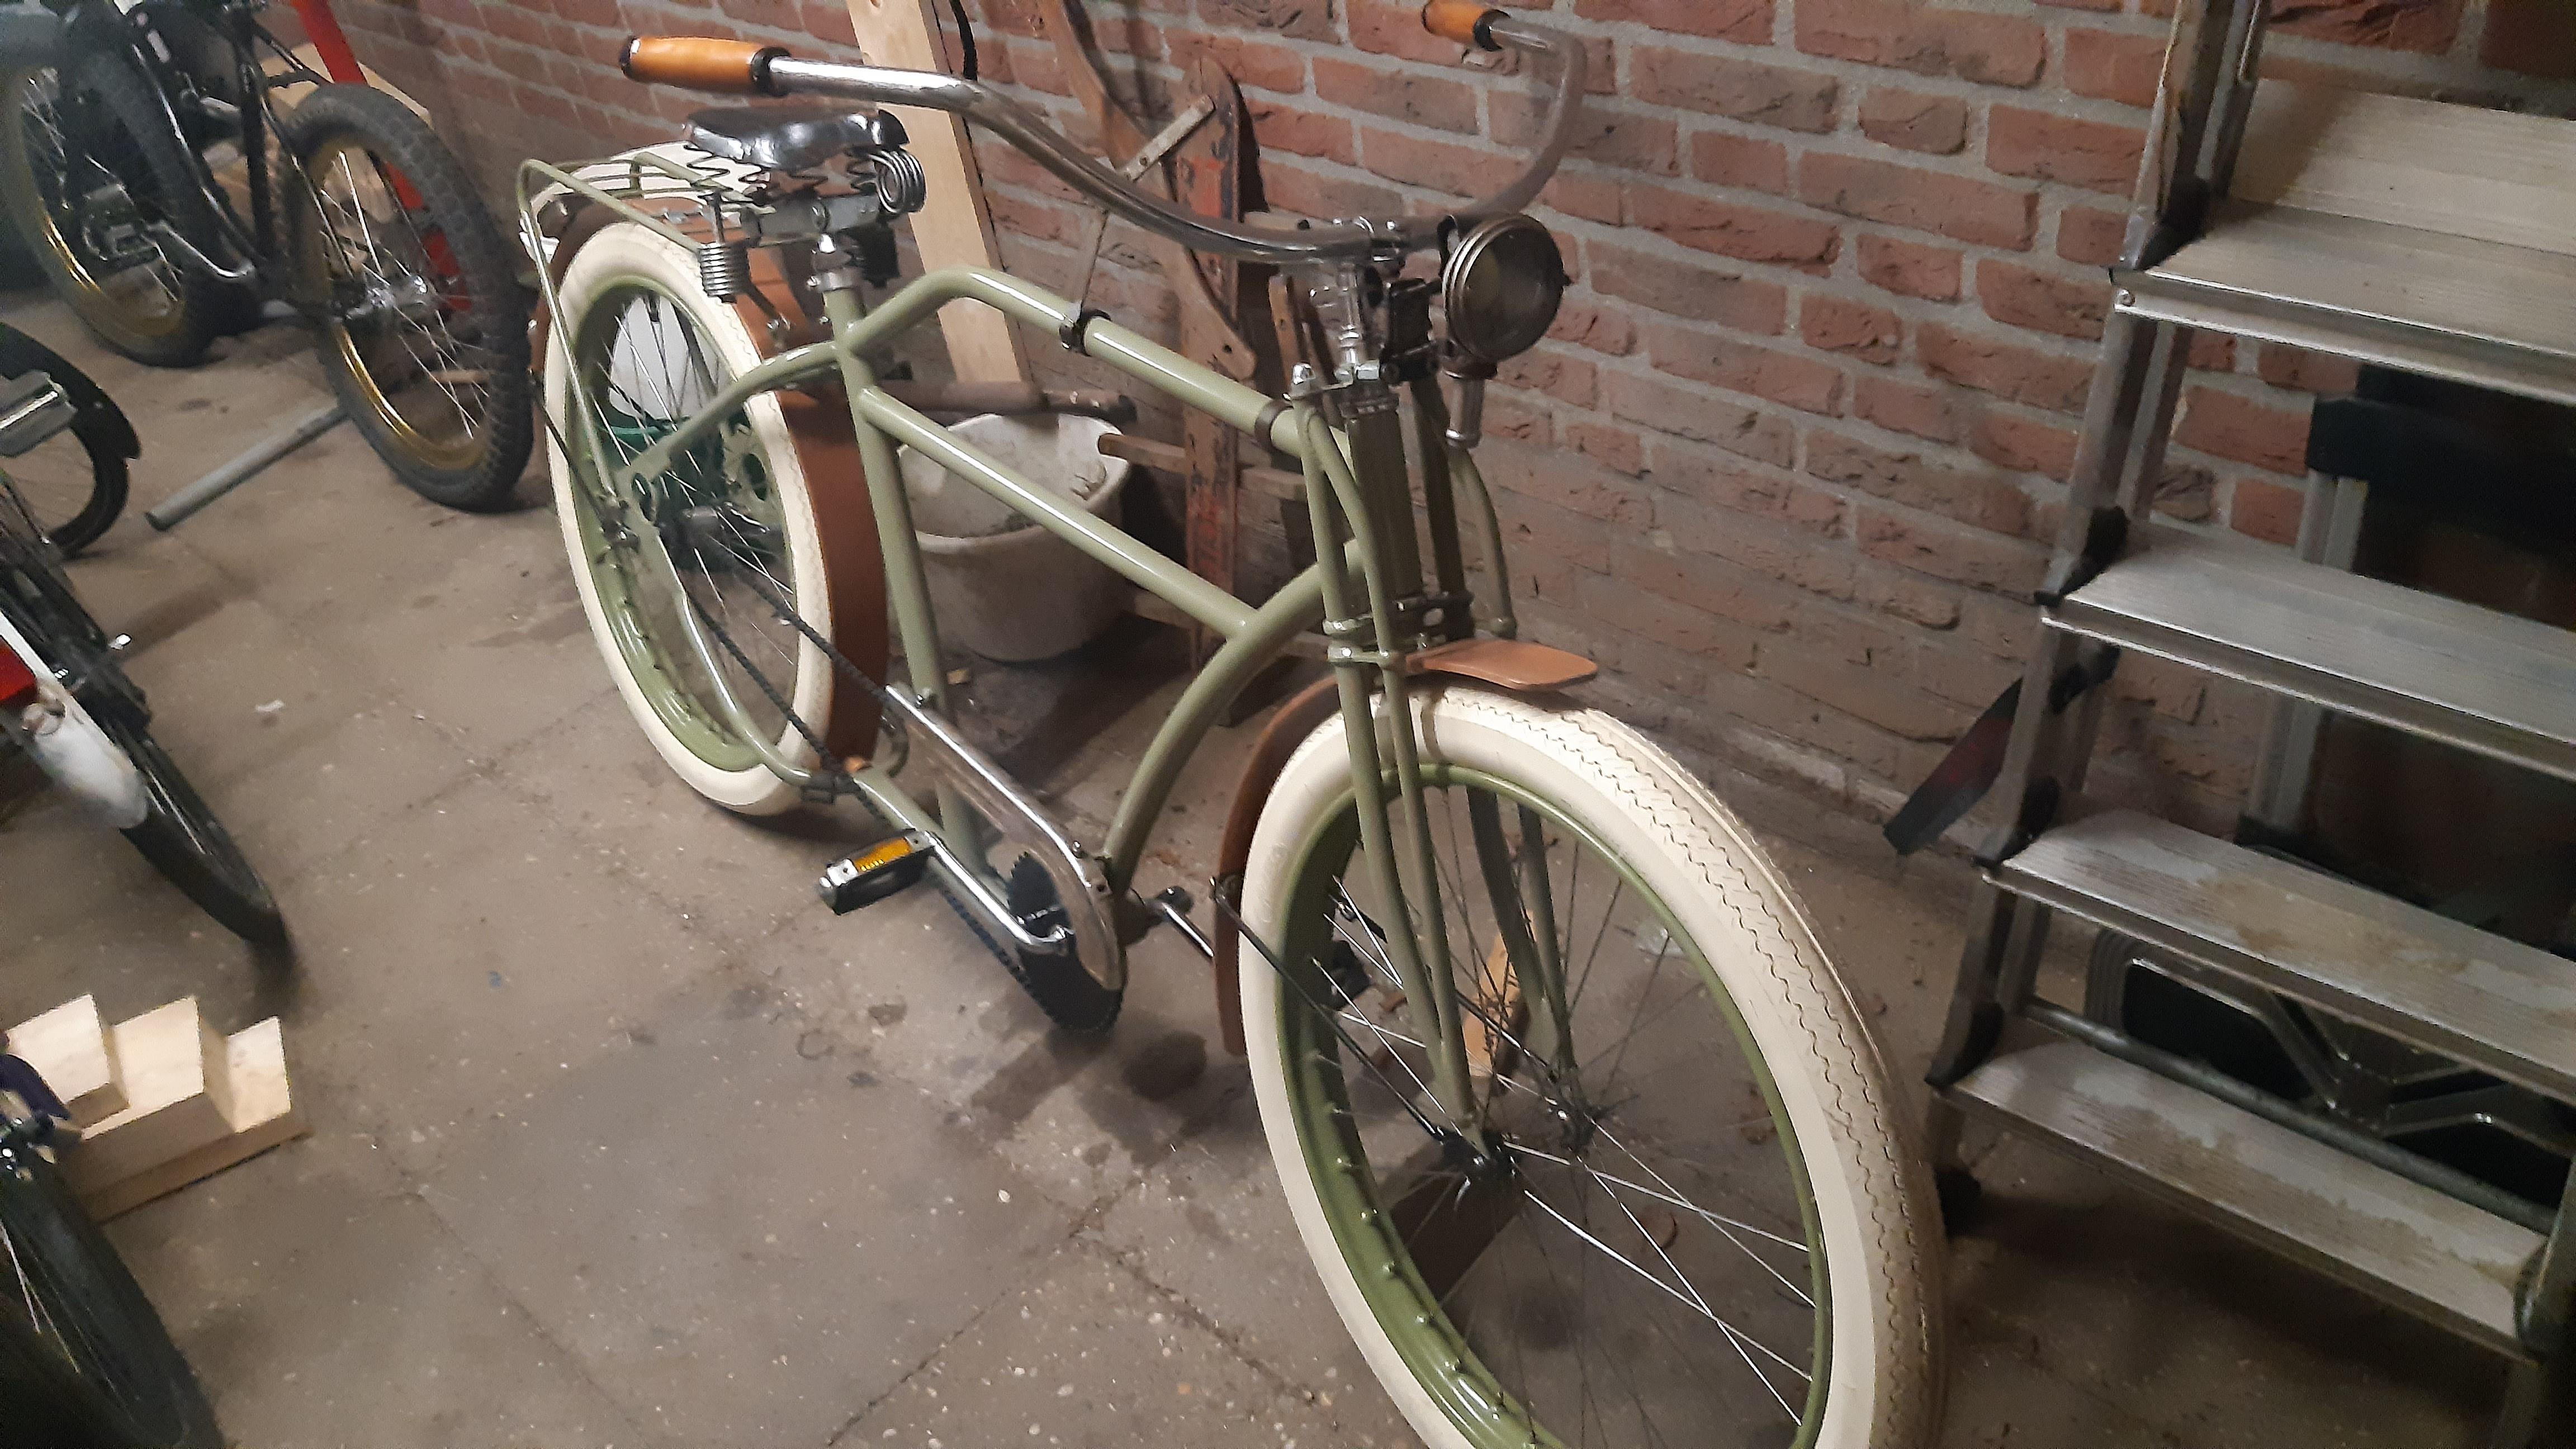
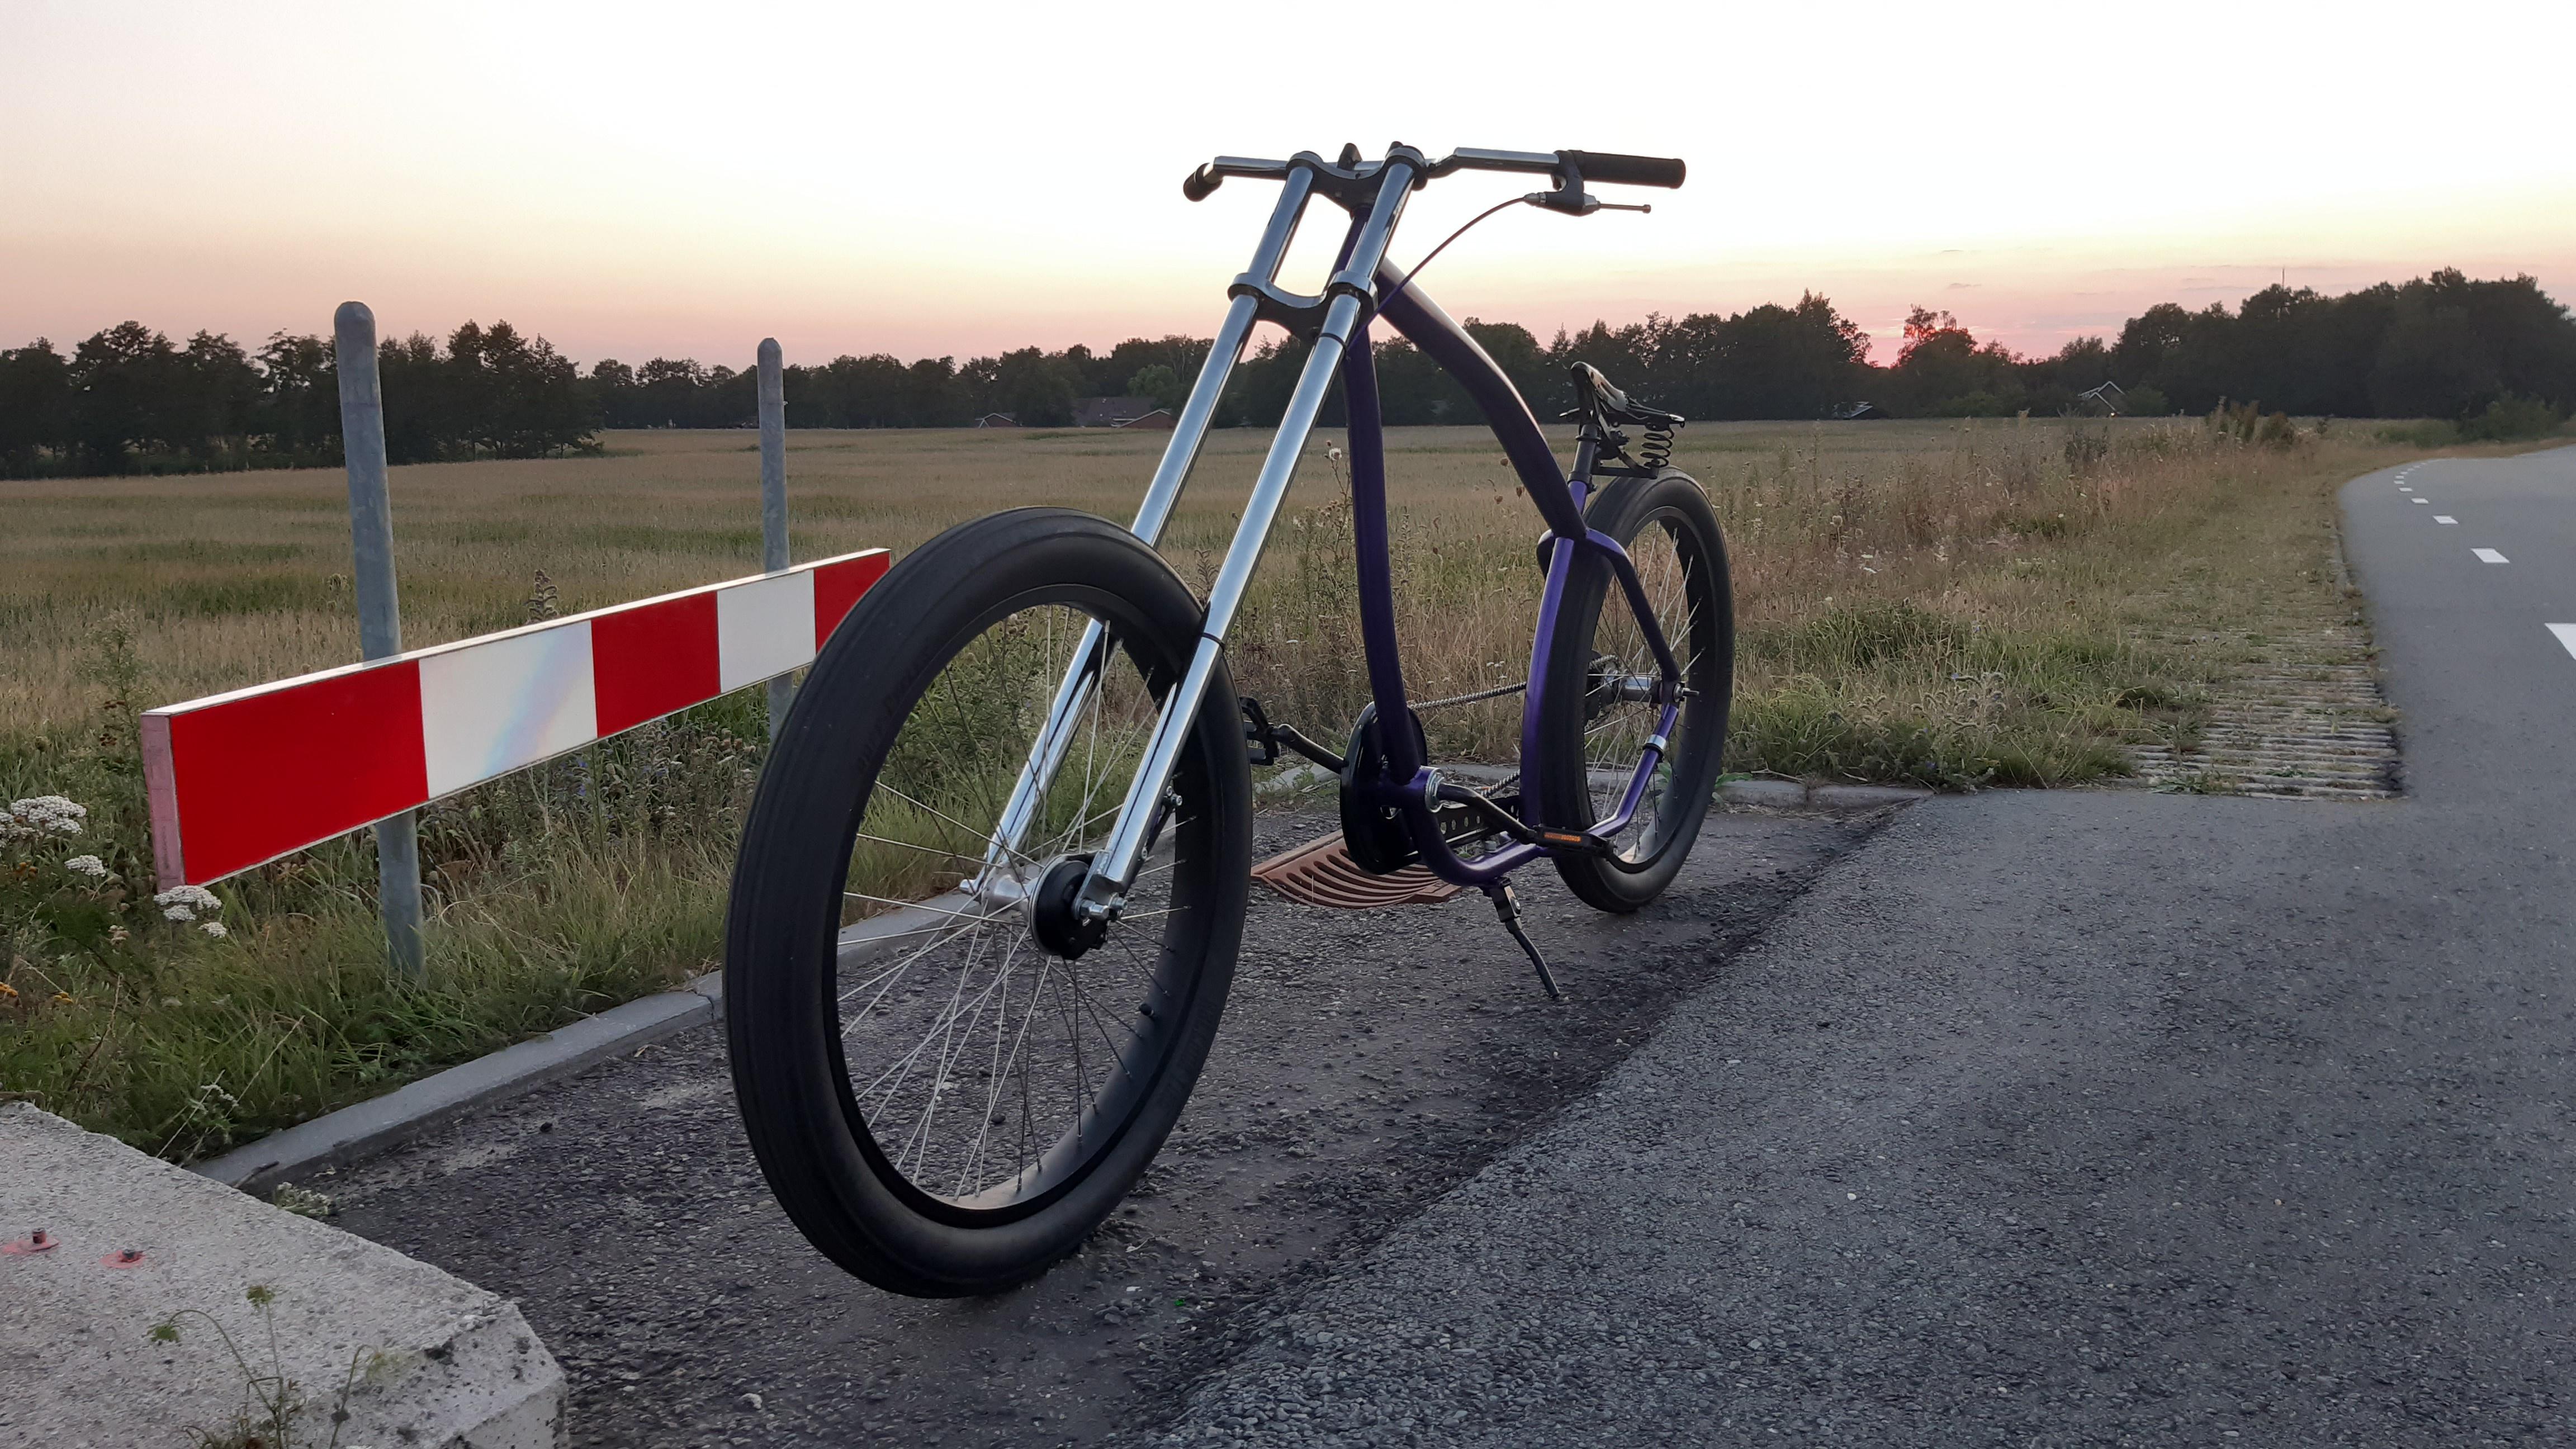
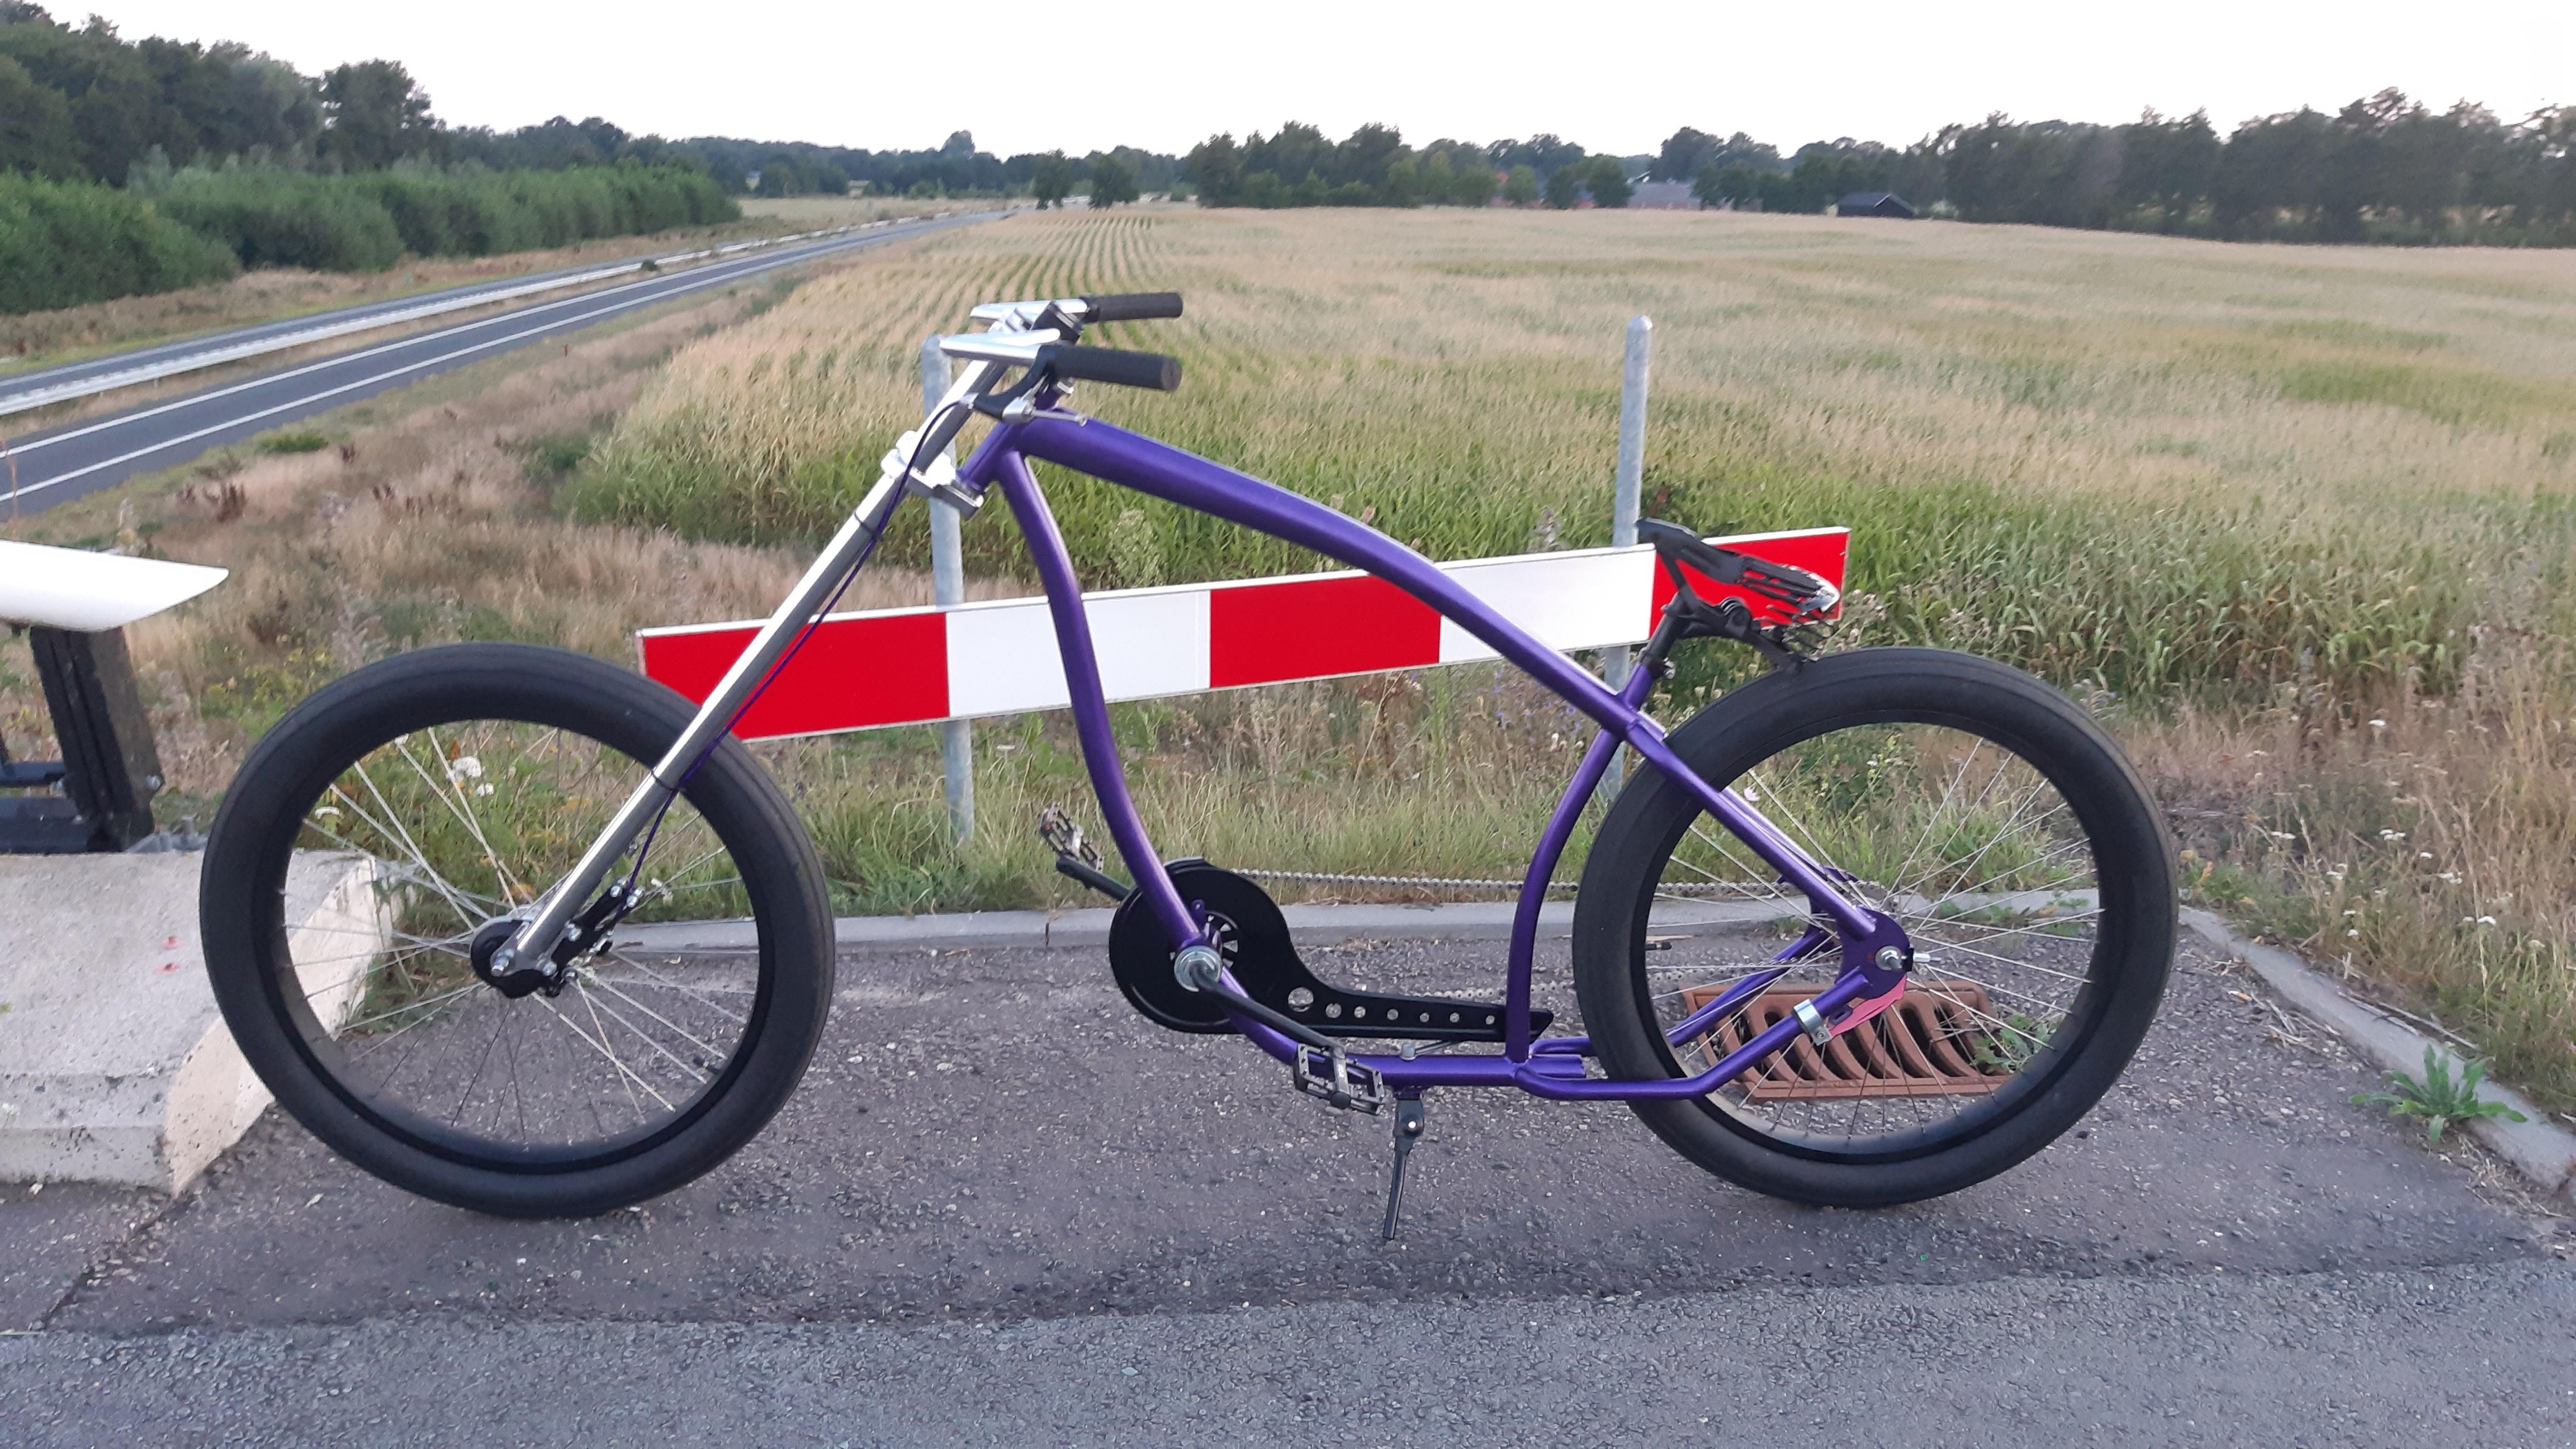
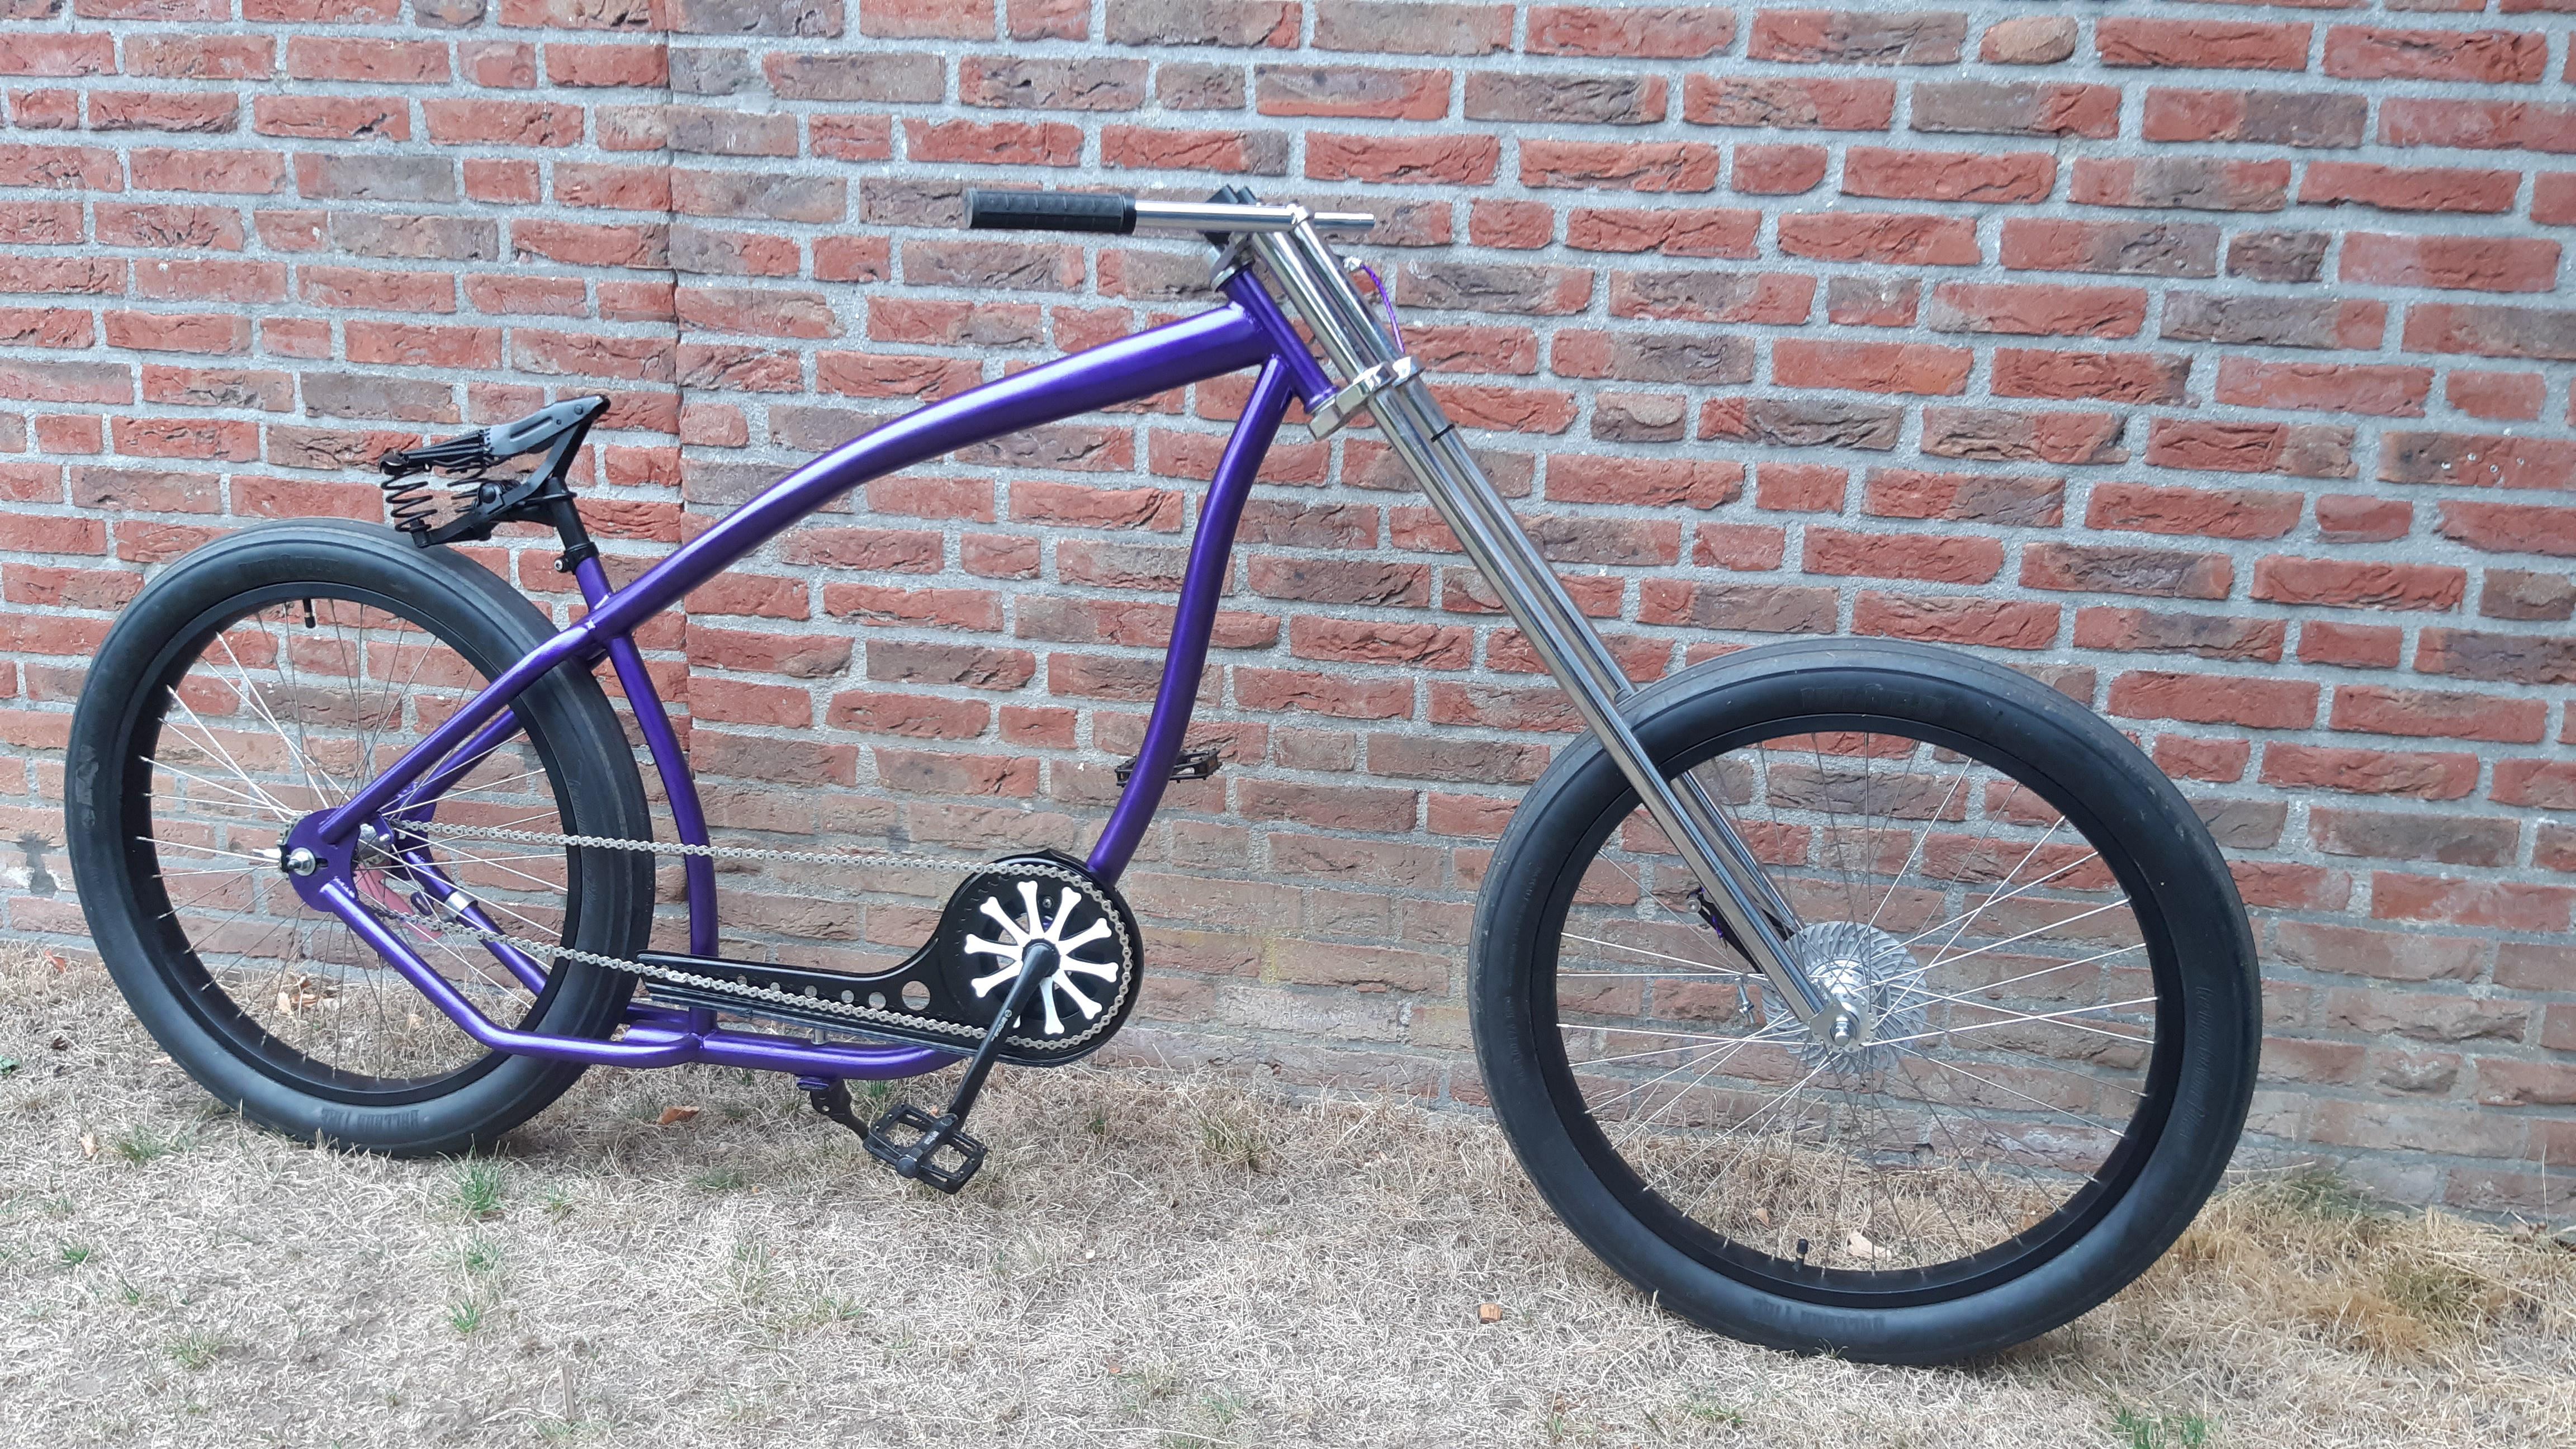
I took some pictures outside today! Had my daughter sleeping in the sling/carrier on me, had to be gentle moving this big bike haha.
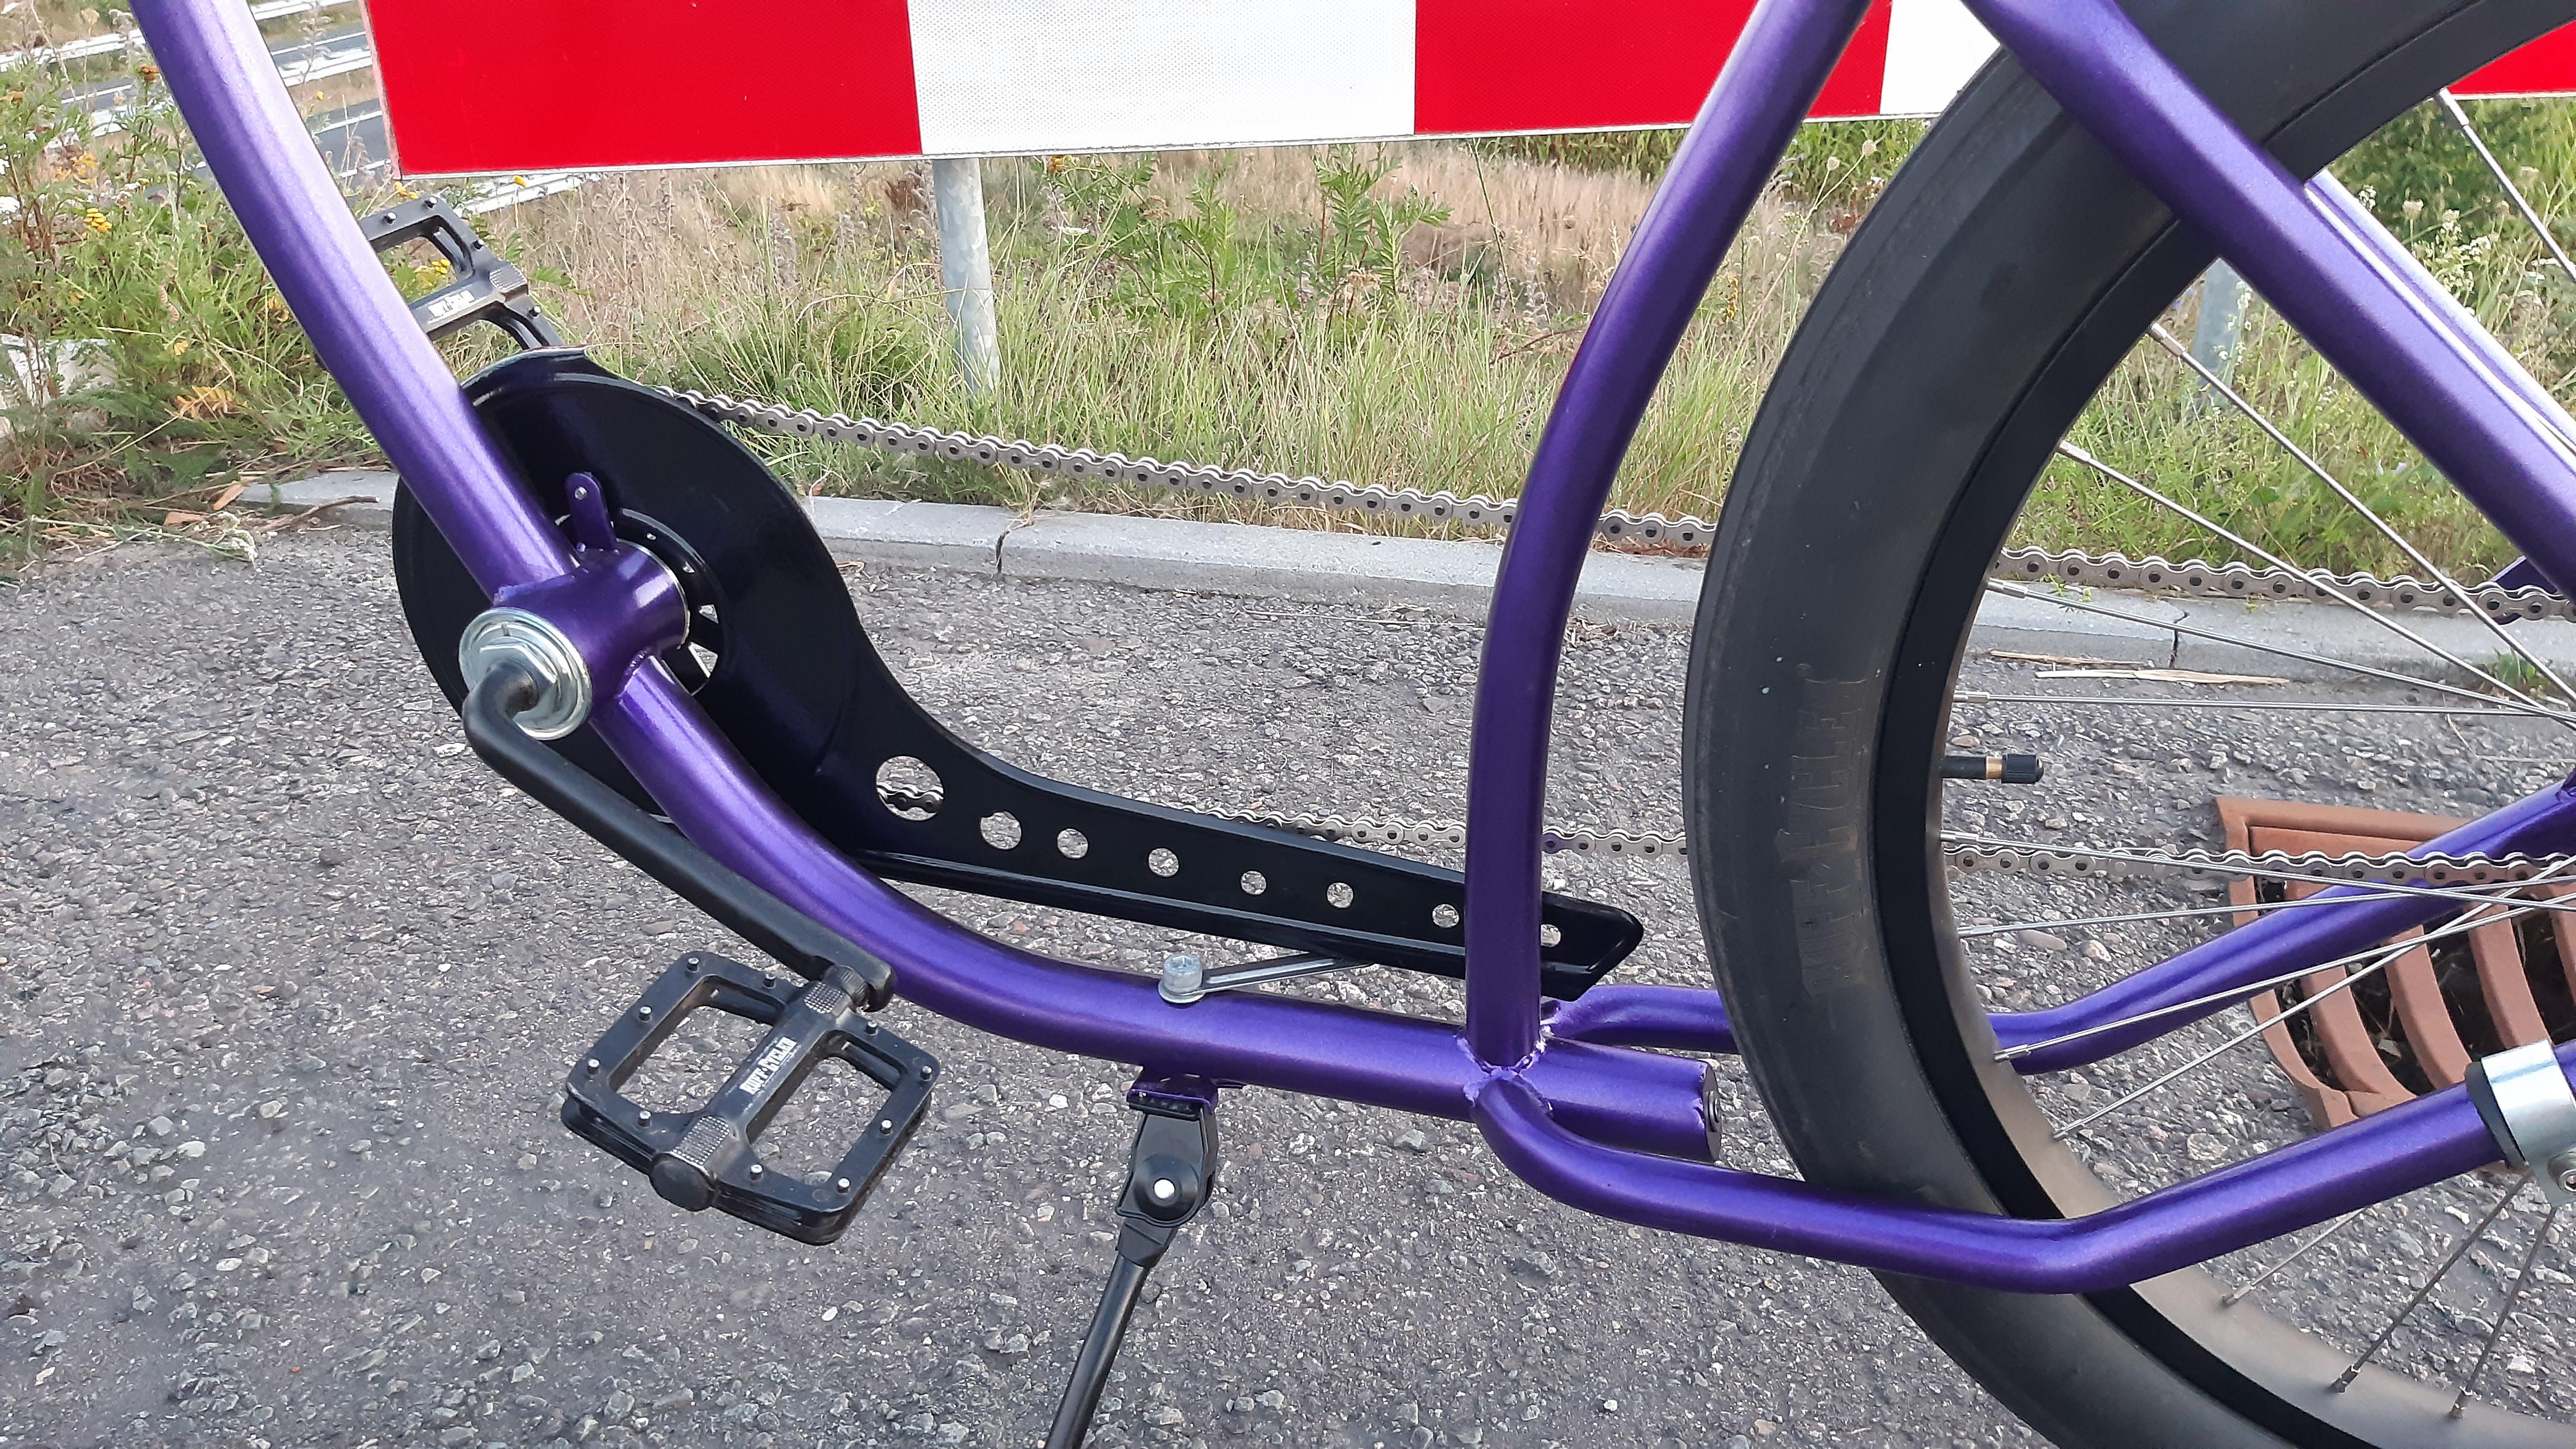
I liked the new chainguard position so much that I decided to permanently assemble it with an spacer and longer screw (M10, 100mm long ). Its also for the kickstand.
"Carbon, weight saving roadies ultimate nightmare"
My 'minimum' to do list before it is good enough for the finished bike thread:
-front brake connection.
-different kickstand, this one is not stable.
-Paracord seat idea tryout. (I don't know if I can do the grips in time).
-Headlamp assembly. Hopefully connection to a battery.
-Cleaning, adjustment pictures and ride video.
-Stickers with the build name or theme.
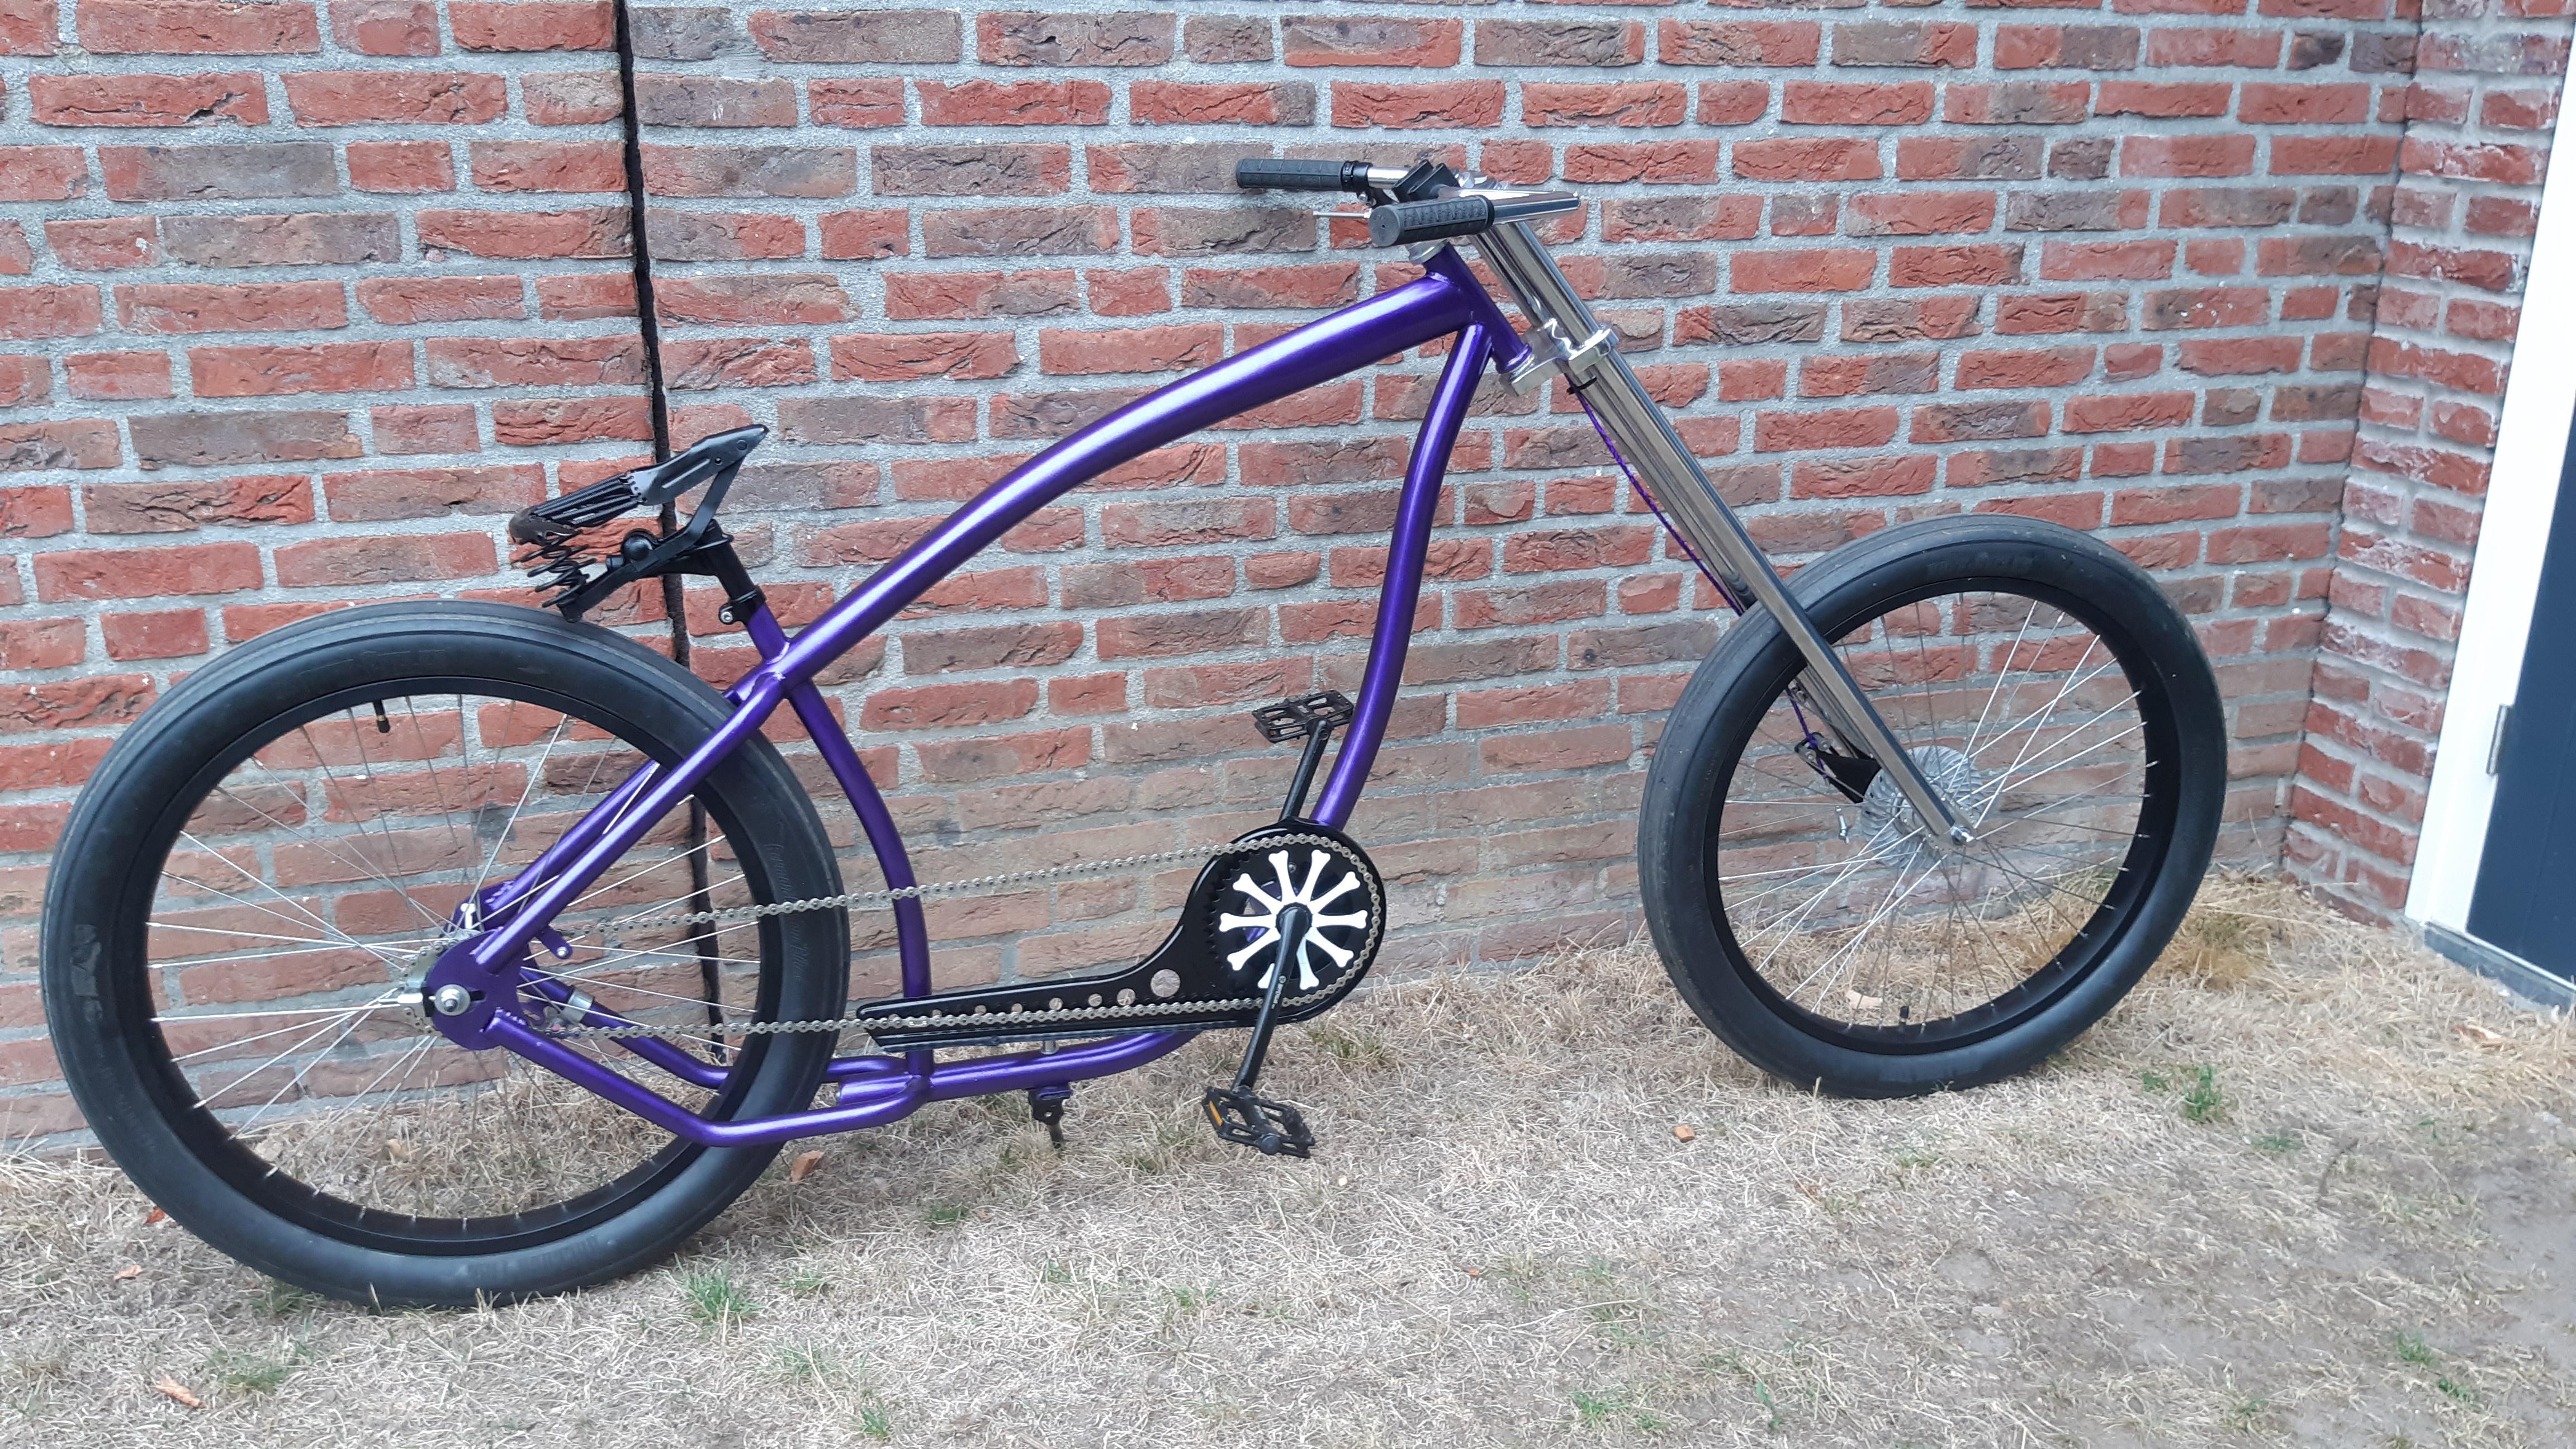
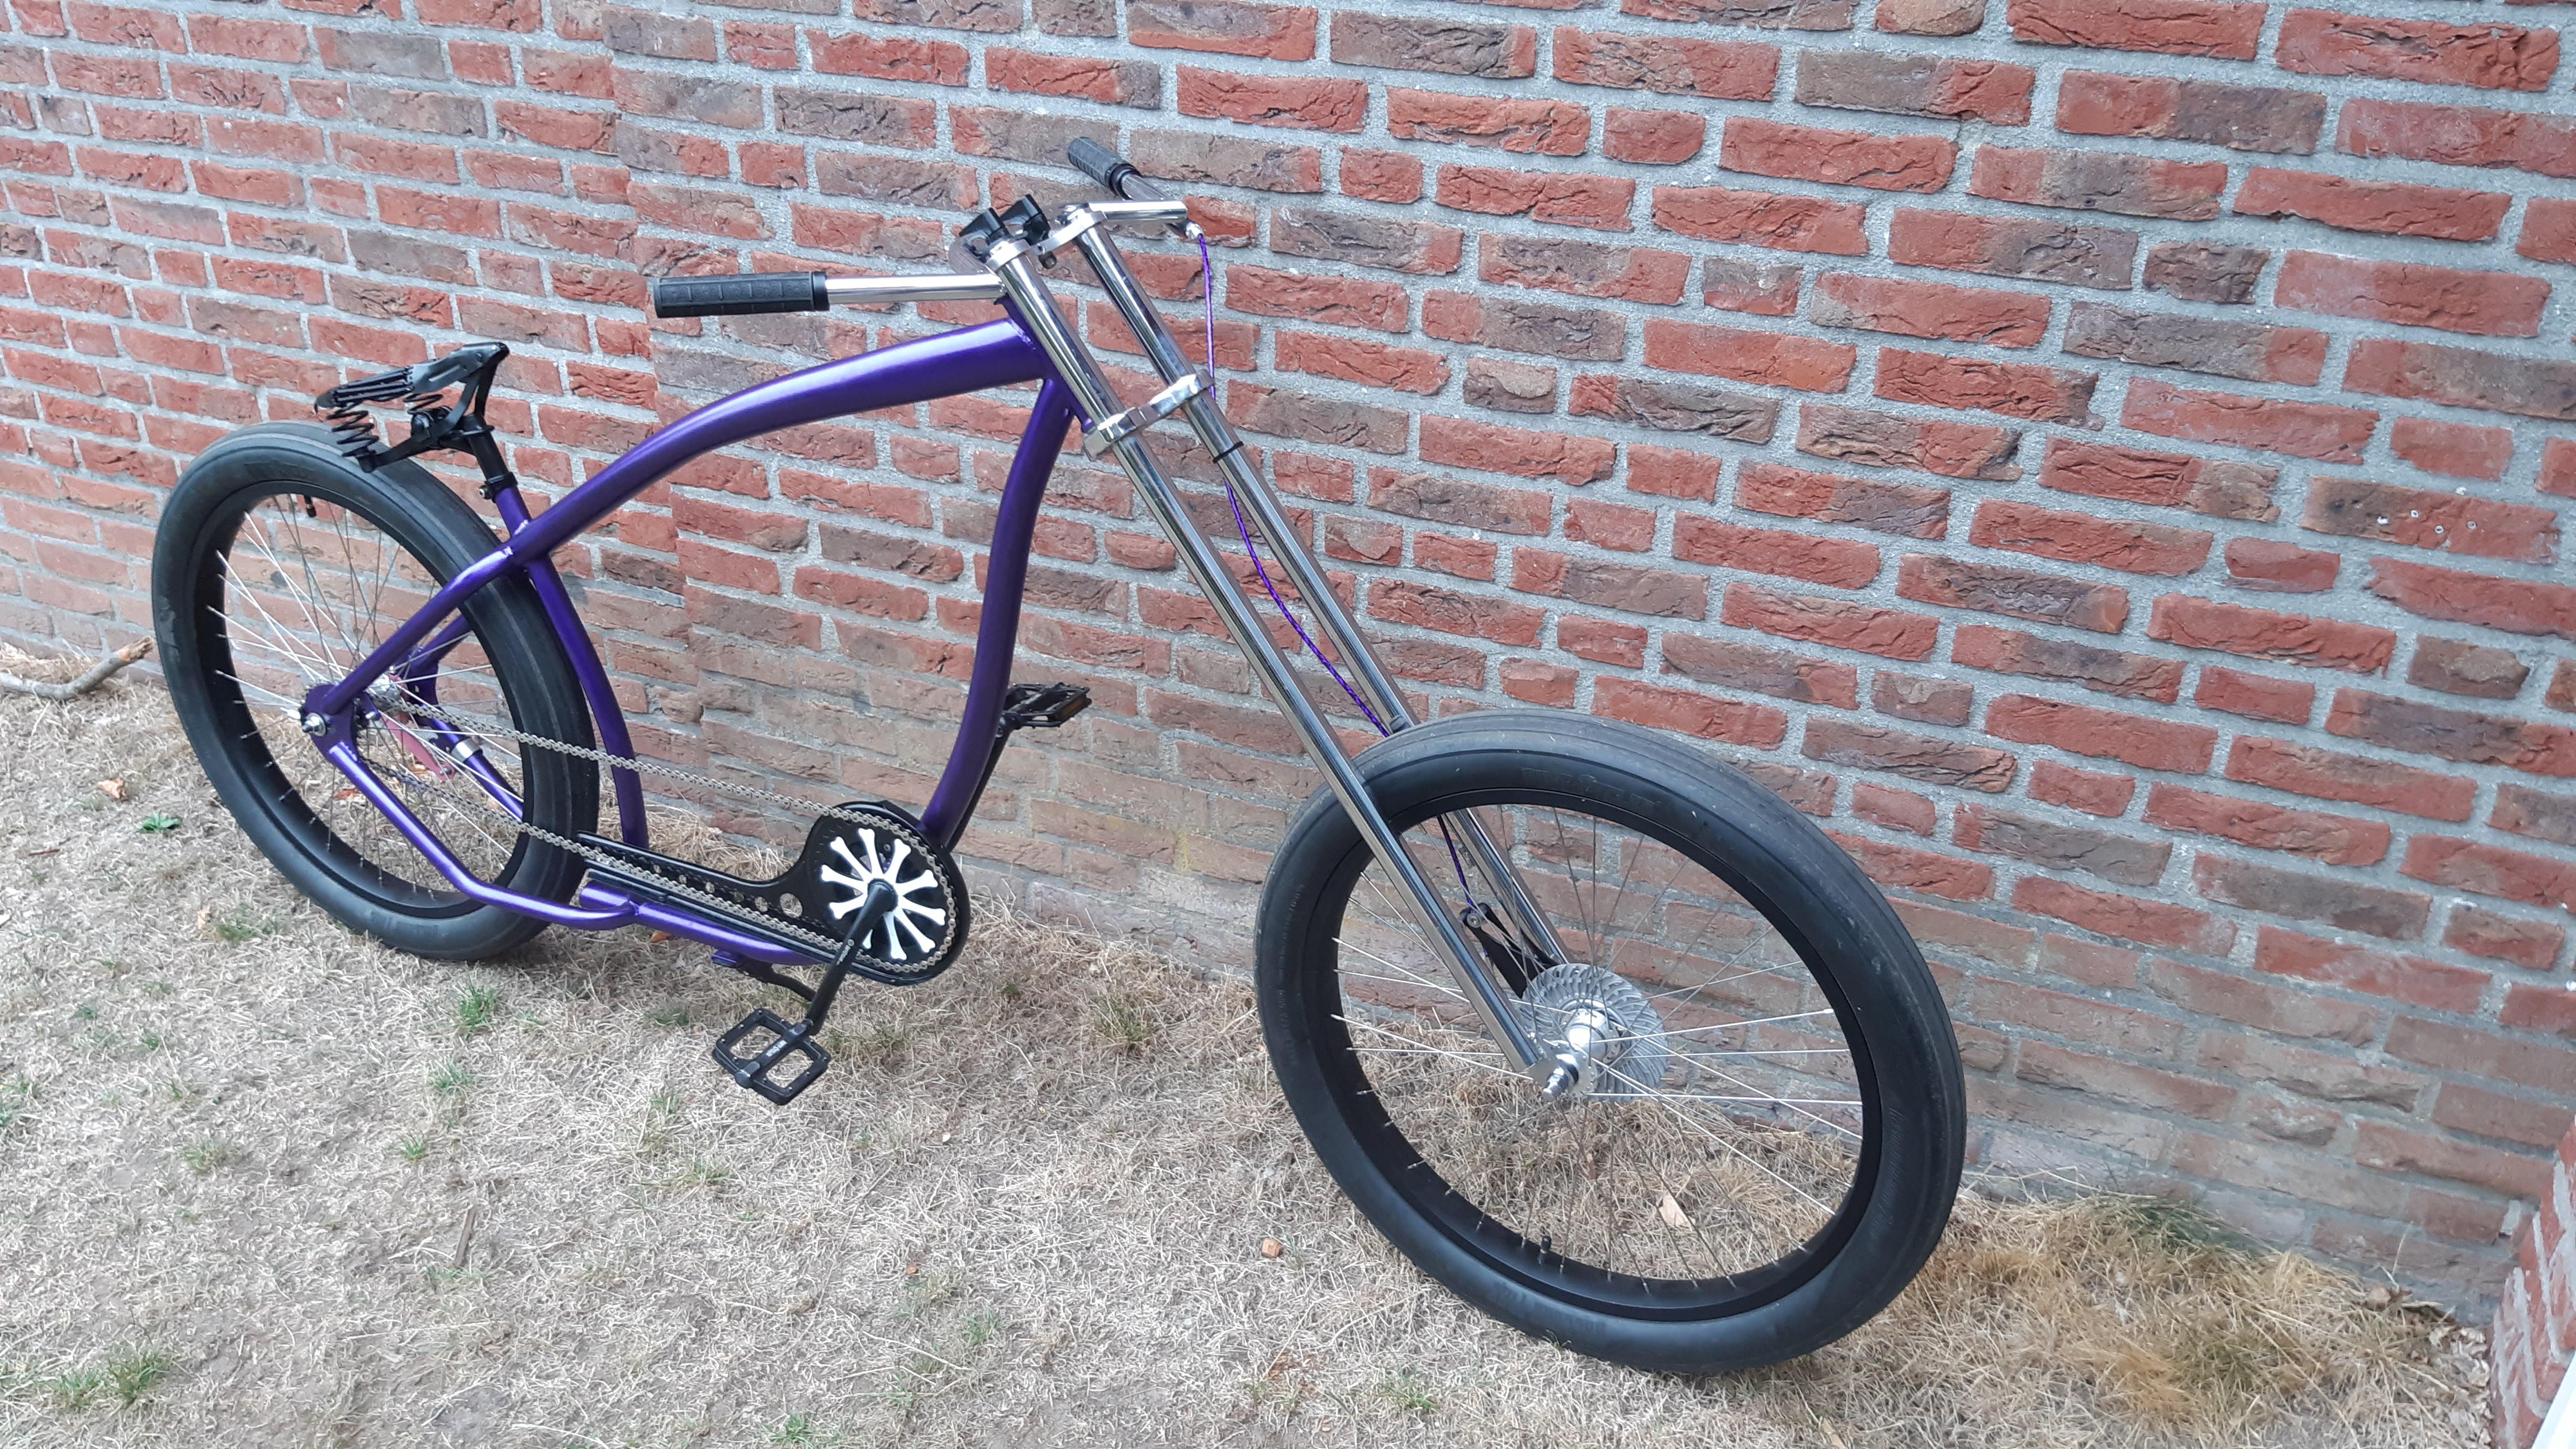

I like this solution. All scrap parts and a bit of drilling. Clean, strong, tough.
I took some pictures outside today! Had my daughter sleeping in the sling/carrier on me, had to be gentle moving this big bike haha.
I liked the new chainguard position so much that I decided to permanently assemble it with an spacer and longer screw (M10, 100mm long
). Its also for the kickstand."Carbon, weight saving roadies ultimate nightmare"
My 'minimum' to do list before it is good enough for the finished bike thread:
-front brake connection.
-different kickstand, this one is not stable.
-Paracord seat idea tryout. (I don't know if I can do the grips in time).
-Headlamp assembly. Hopefully connection to a battery.
-Cleaning, adjustment pictures and ride video.
-Stickers with the build name or theme.
I like this solution. All scrap parts and a bit of drilling. Clean, strong, tough.
MattiThundrrr
Rattus All Terrainus
Bart, this bike is sooooo cool. You've nailed it. The guard is just right, doesn't do anything to protect your leg, but the paint is covered. That seems like a perfect chopper metaphor; "who cares about rider safety, LOOK AT THE BIKE!!!"